(Last Updated 8/27/24)
PromoTix's secured, built-in live streaming tools allow you to broadcast your event to viewers at home. Only individuals who have purchased a live stream ticket will be able to view your live stream, and live stream tickets can only be used by one device at a time.
This guide will show you how to live stream your event on PromoTix using Open Broadcaster Software (OBS).
OBS is free and open source software for video recording and live streaming, and allows you to create multiple scenes and sources to put together a unique live streaming experience for your viewers.
While not recommended, if you would like to live stream on PromoTix using only your web browser, click here.
For resources on how to use OBS in detail, click here.
NOTE: While OBS is the most popular streaming service used with PromoTix, any hardware or software that supports RTMP for live streaming purposes can also be used instead of OBS.
To watch our detailed demo video on live streaming, click here.
1. Click on your "Live stream" tab
NOTE: This tutorial assumes that you already know how to create a PromoTix secured streaming event. For instructions on how to create a PromoTix secured streaming event, click here.
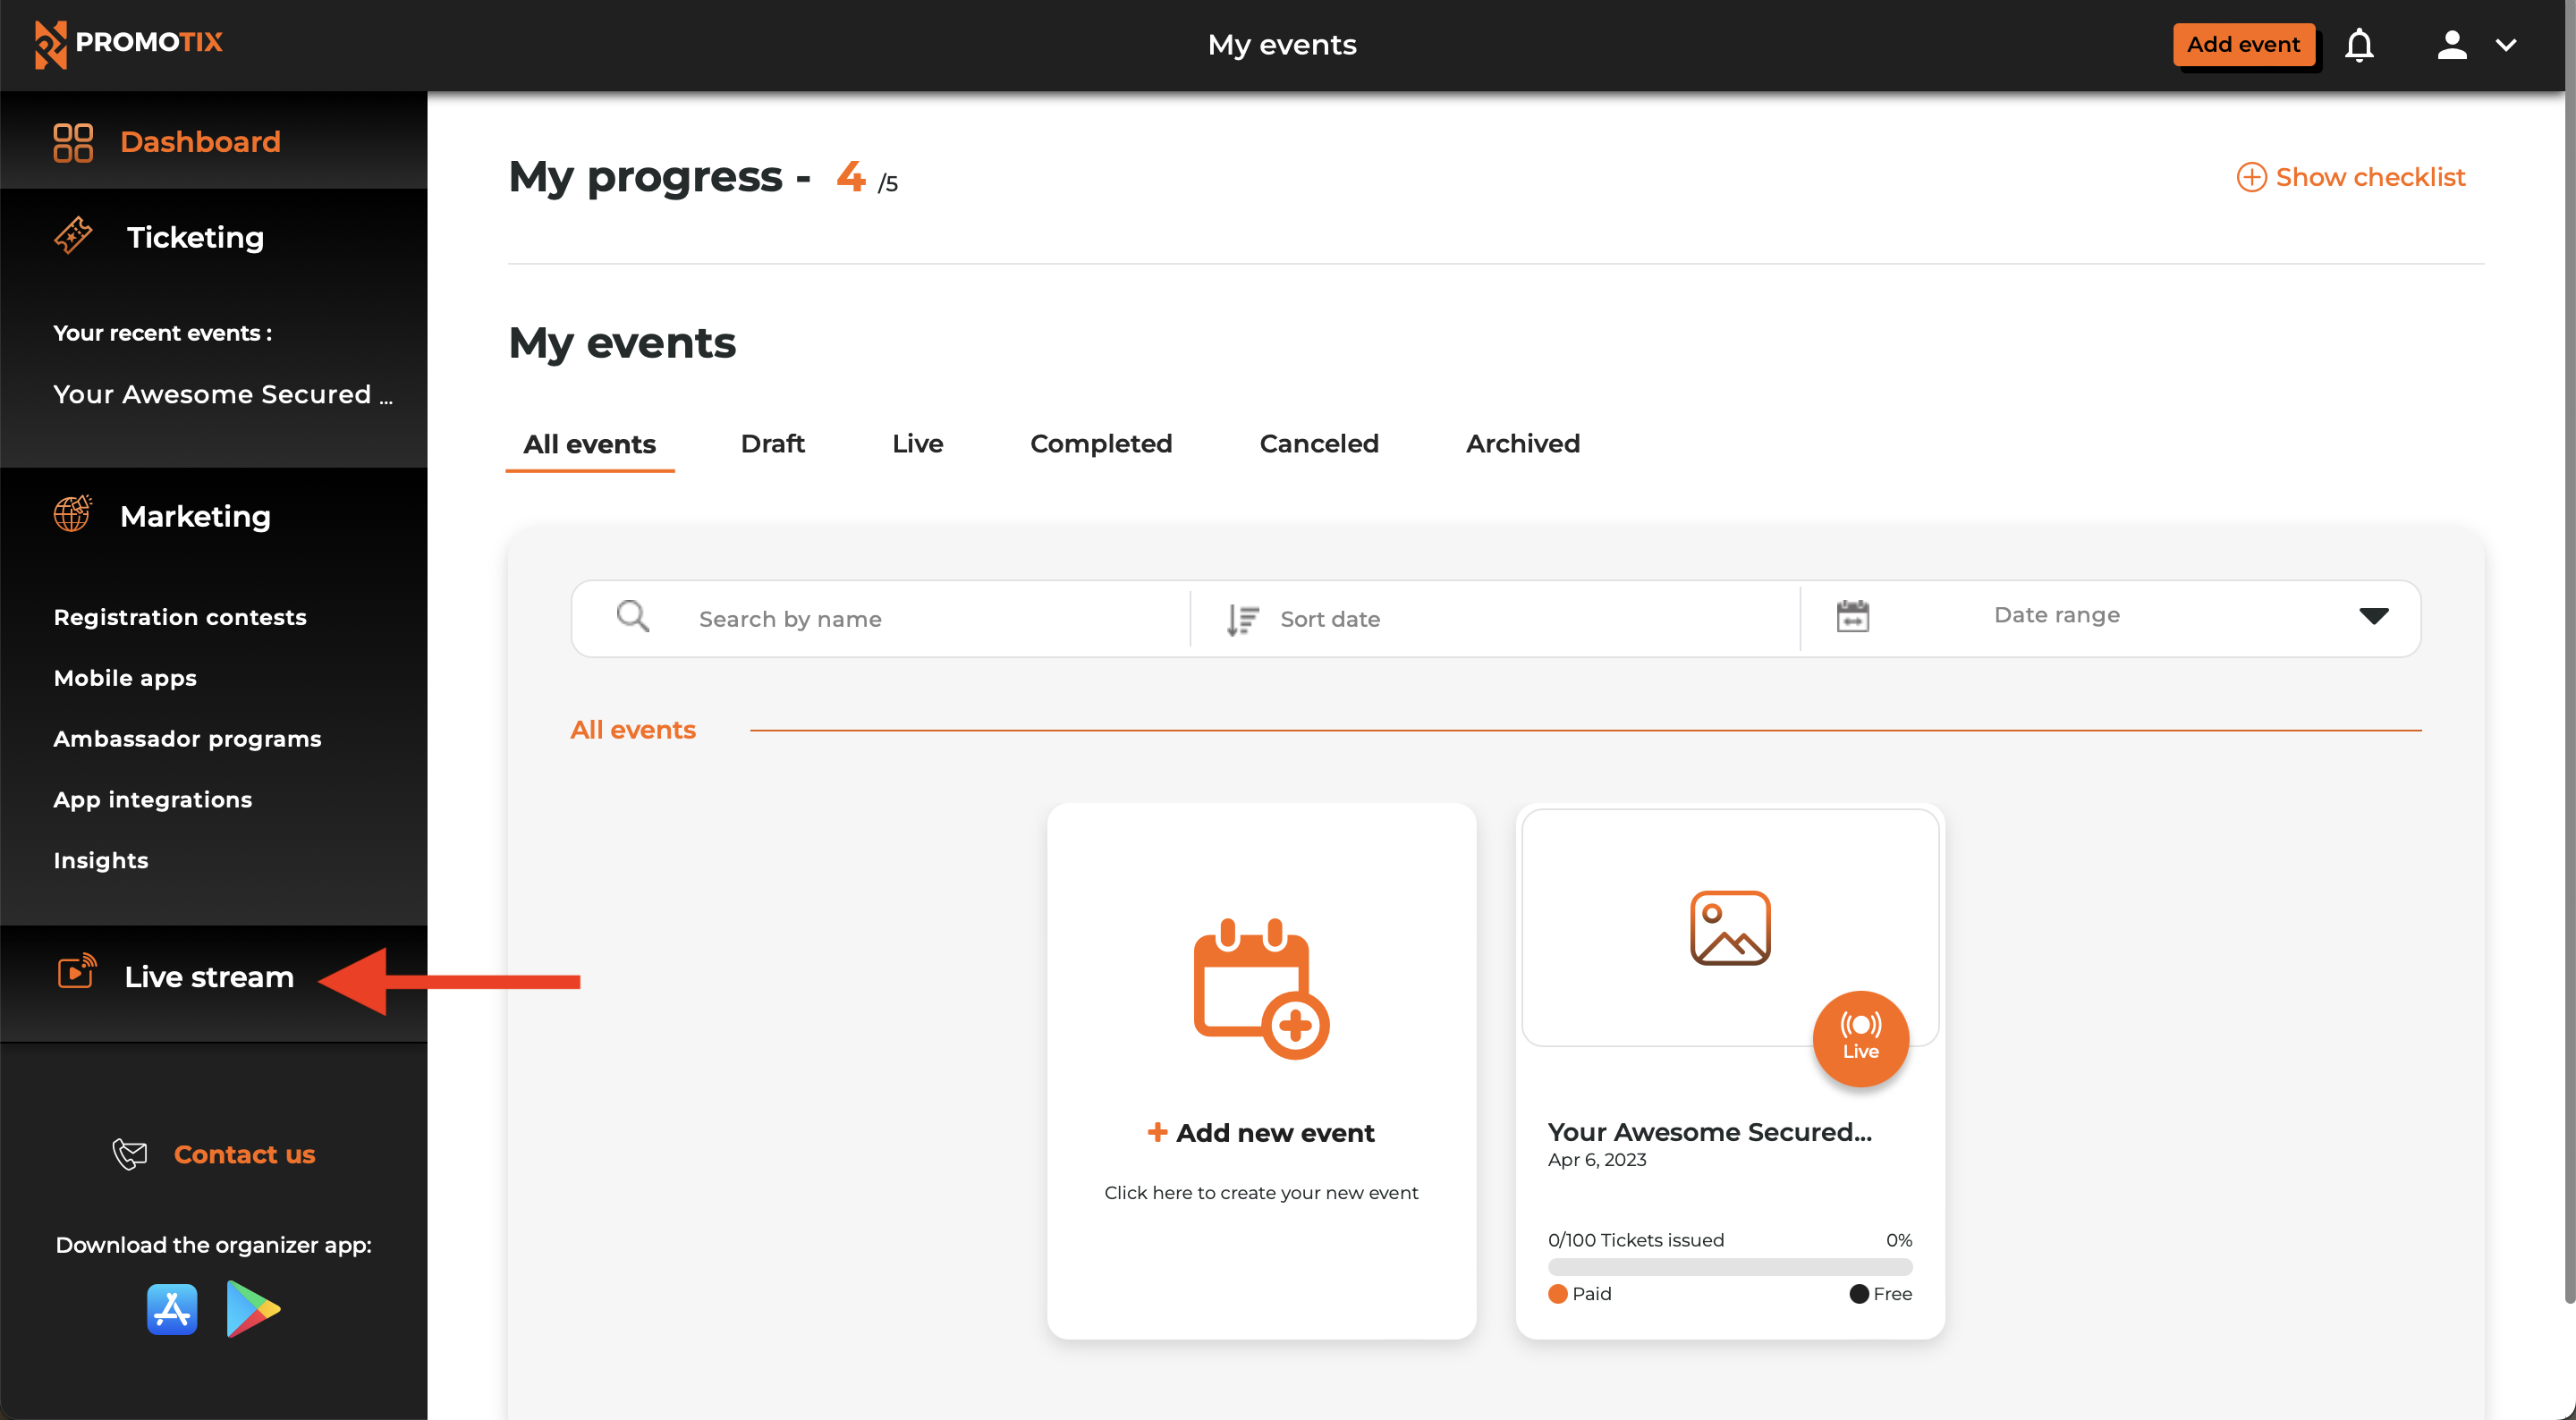
Once logged in to your PromoTix account, click on your Live stream tab from the side navigation menu.
2. Select a PromoTix secured streaming event
.png?width=727&height=332&name=Design%2044%20(1).png)
On this screen, you will see all of the PromoTix secured streaming events that you have created. Click on the event that you would like to live stream.
3. Get familiar with the interface
 This is your control center for live streaming with PromoTix. See below for descriptions on each feature:
- A 👉 The total duration that you've live streamed for this event
- B 👉 How many secured streaming tickets you've sold for this event
- C 👉 How many live viewers are tuned in
- D 👉 Your total number of views for this event
- E 👉 How many live viewers are currently using the chat feature
- F 👉 Start previewing an audio and video source connected to your device
- G 👉 Generate an RTMP address and a stream key for use with OBS / RTMP (do not click this option if planning to use OBS / RTMP)
- H 👉 Click to share your event page
- I 👉 Click to invite a guest to your live stream.
- J 👉 How much time you have remaining to live stream today. NOTE: this timer will only start counting down once your event is scheduled to begin.
- K 👉 Preview your video after clicking on the Start cam button (not applicable when using OBS / RTMP)
- L 👉 Send chat messages to your viewers
4. Click on the "Use RTMP" button

Click on the Use RTMP button to show the RTMP Server URL and generate a unique stream key for your event.

NOTE: once a stream key has been generated for your event, it will not change even if the "Use RTMP" button is clicked multiple times.
5. Open the OBS application
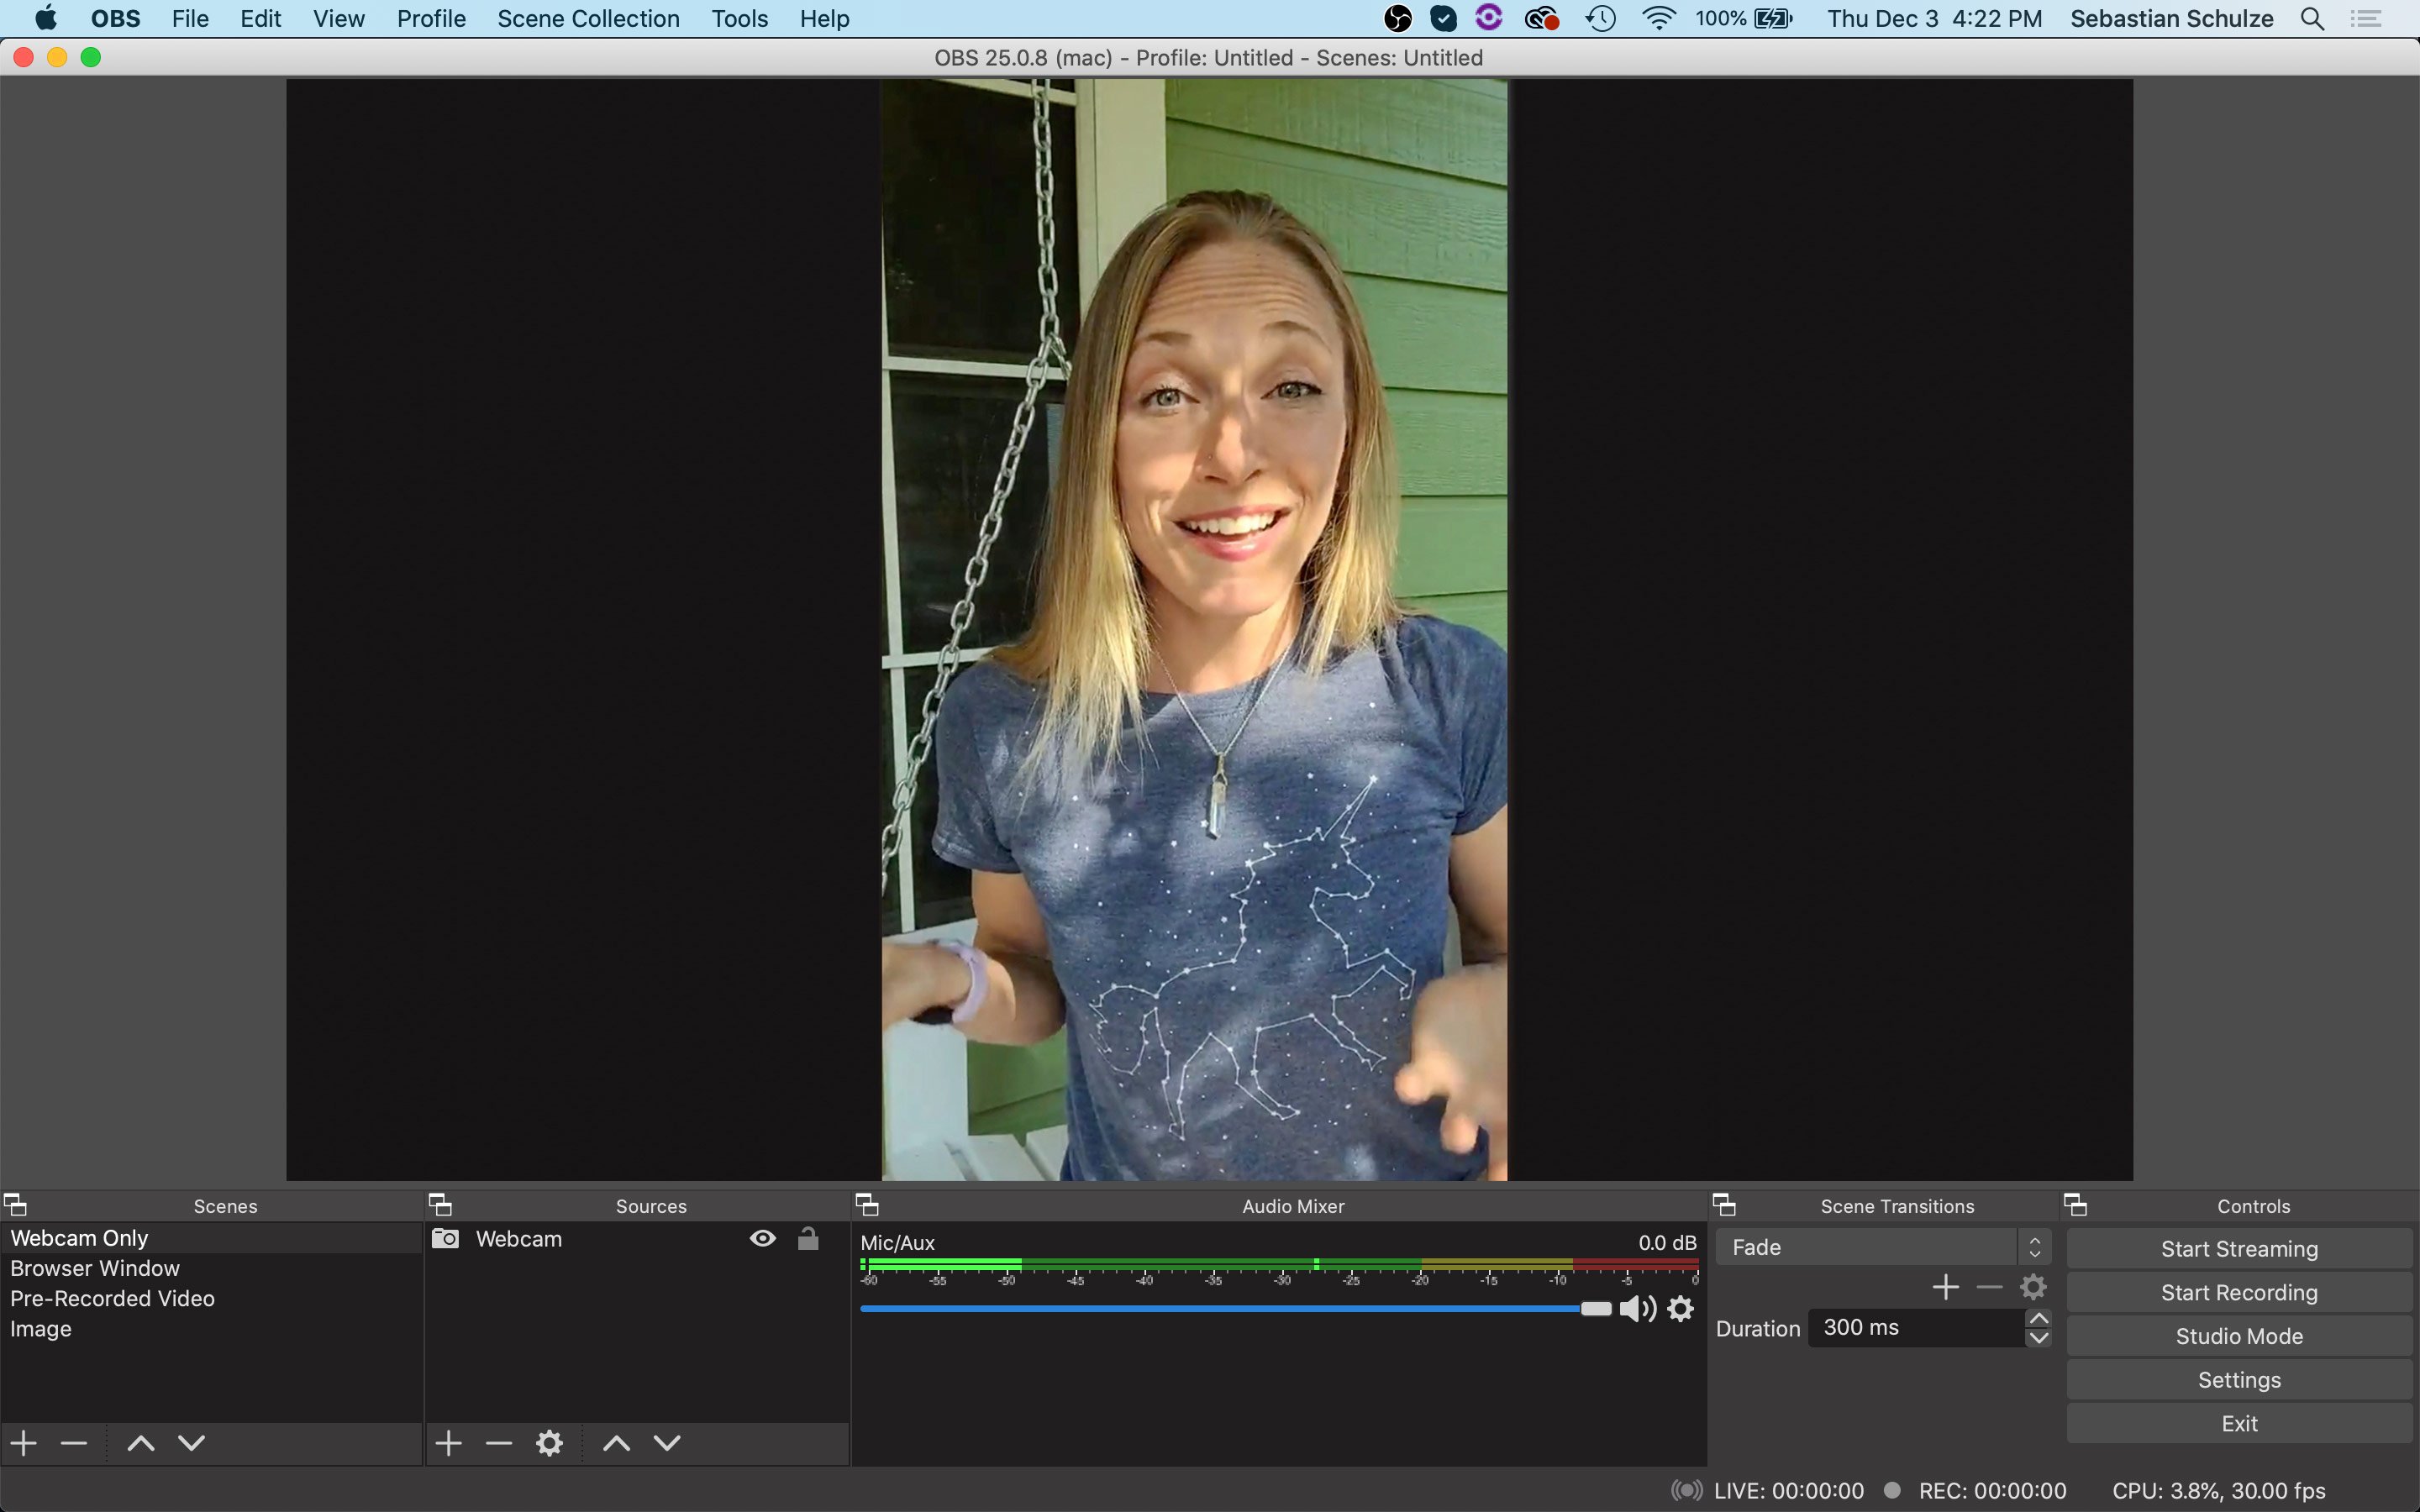
Open up the OBS application on your computer. If you have not downloaded OBS yet, click here.
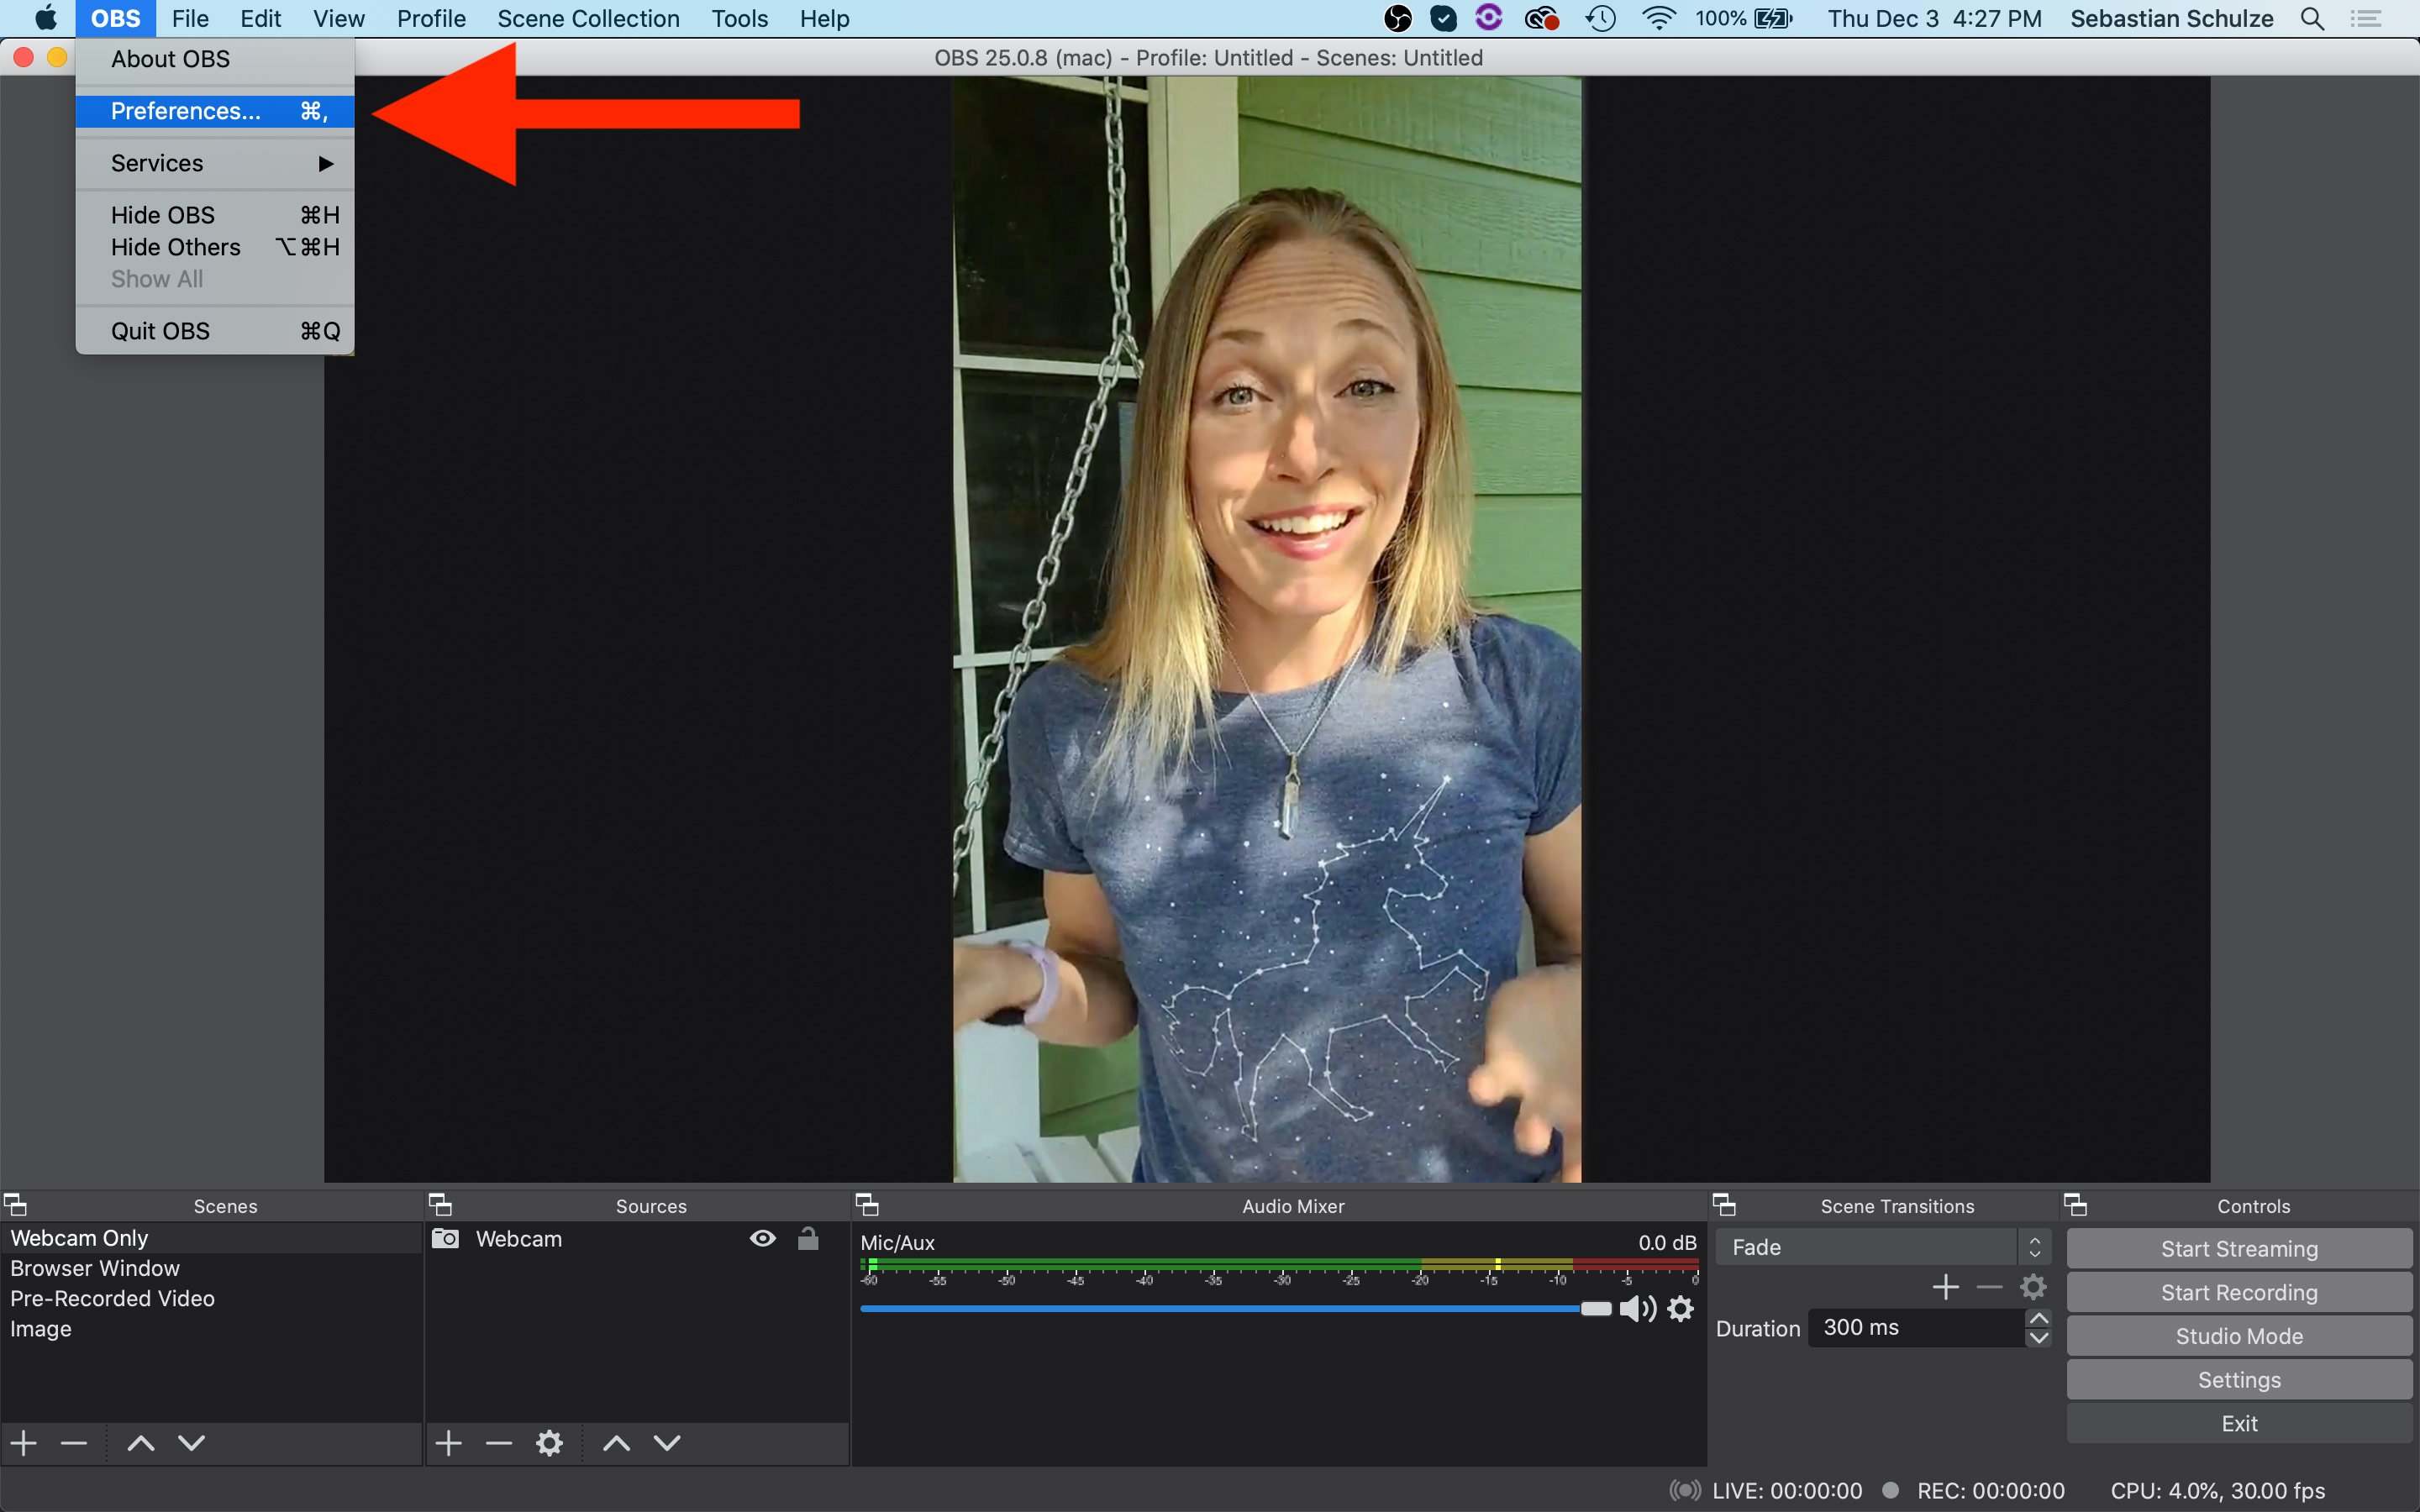
6. Click on "OBS" and then select "Preferences"
7. Paste your RTMP address & stream key into OBS
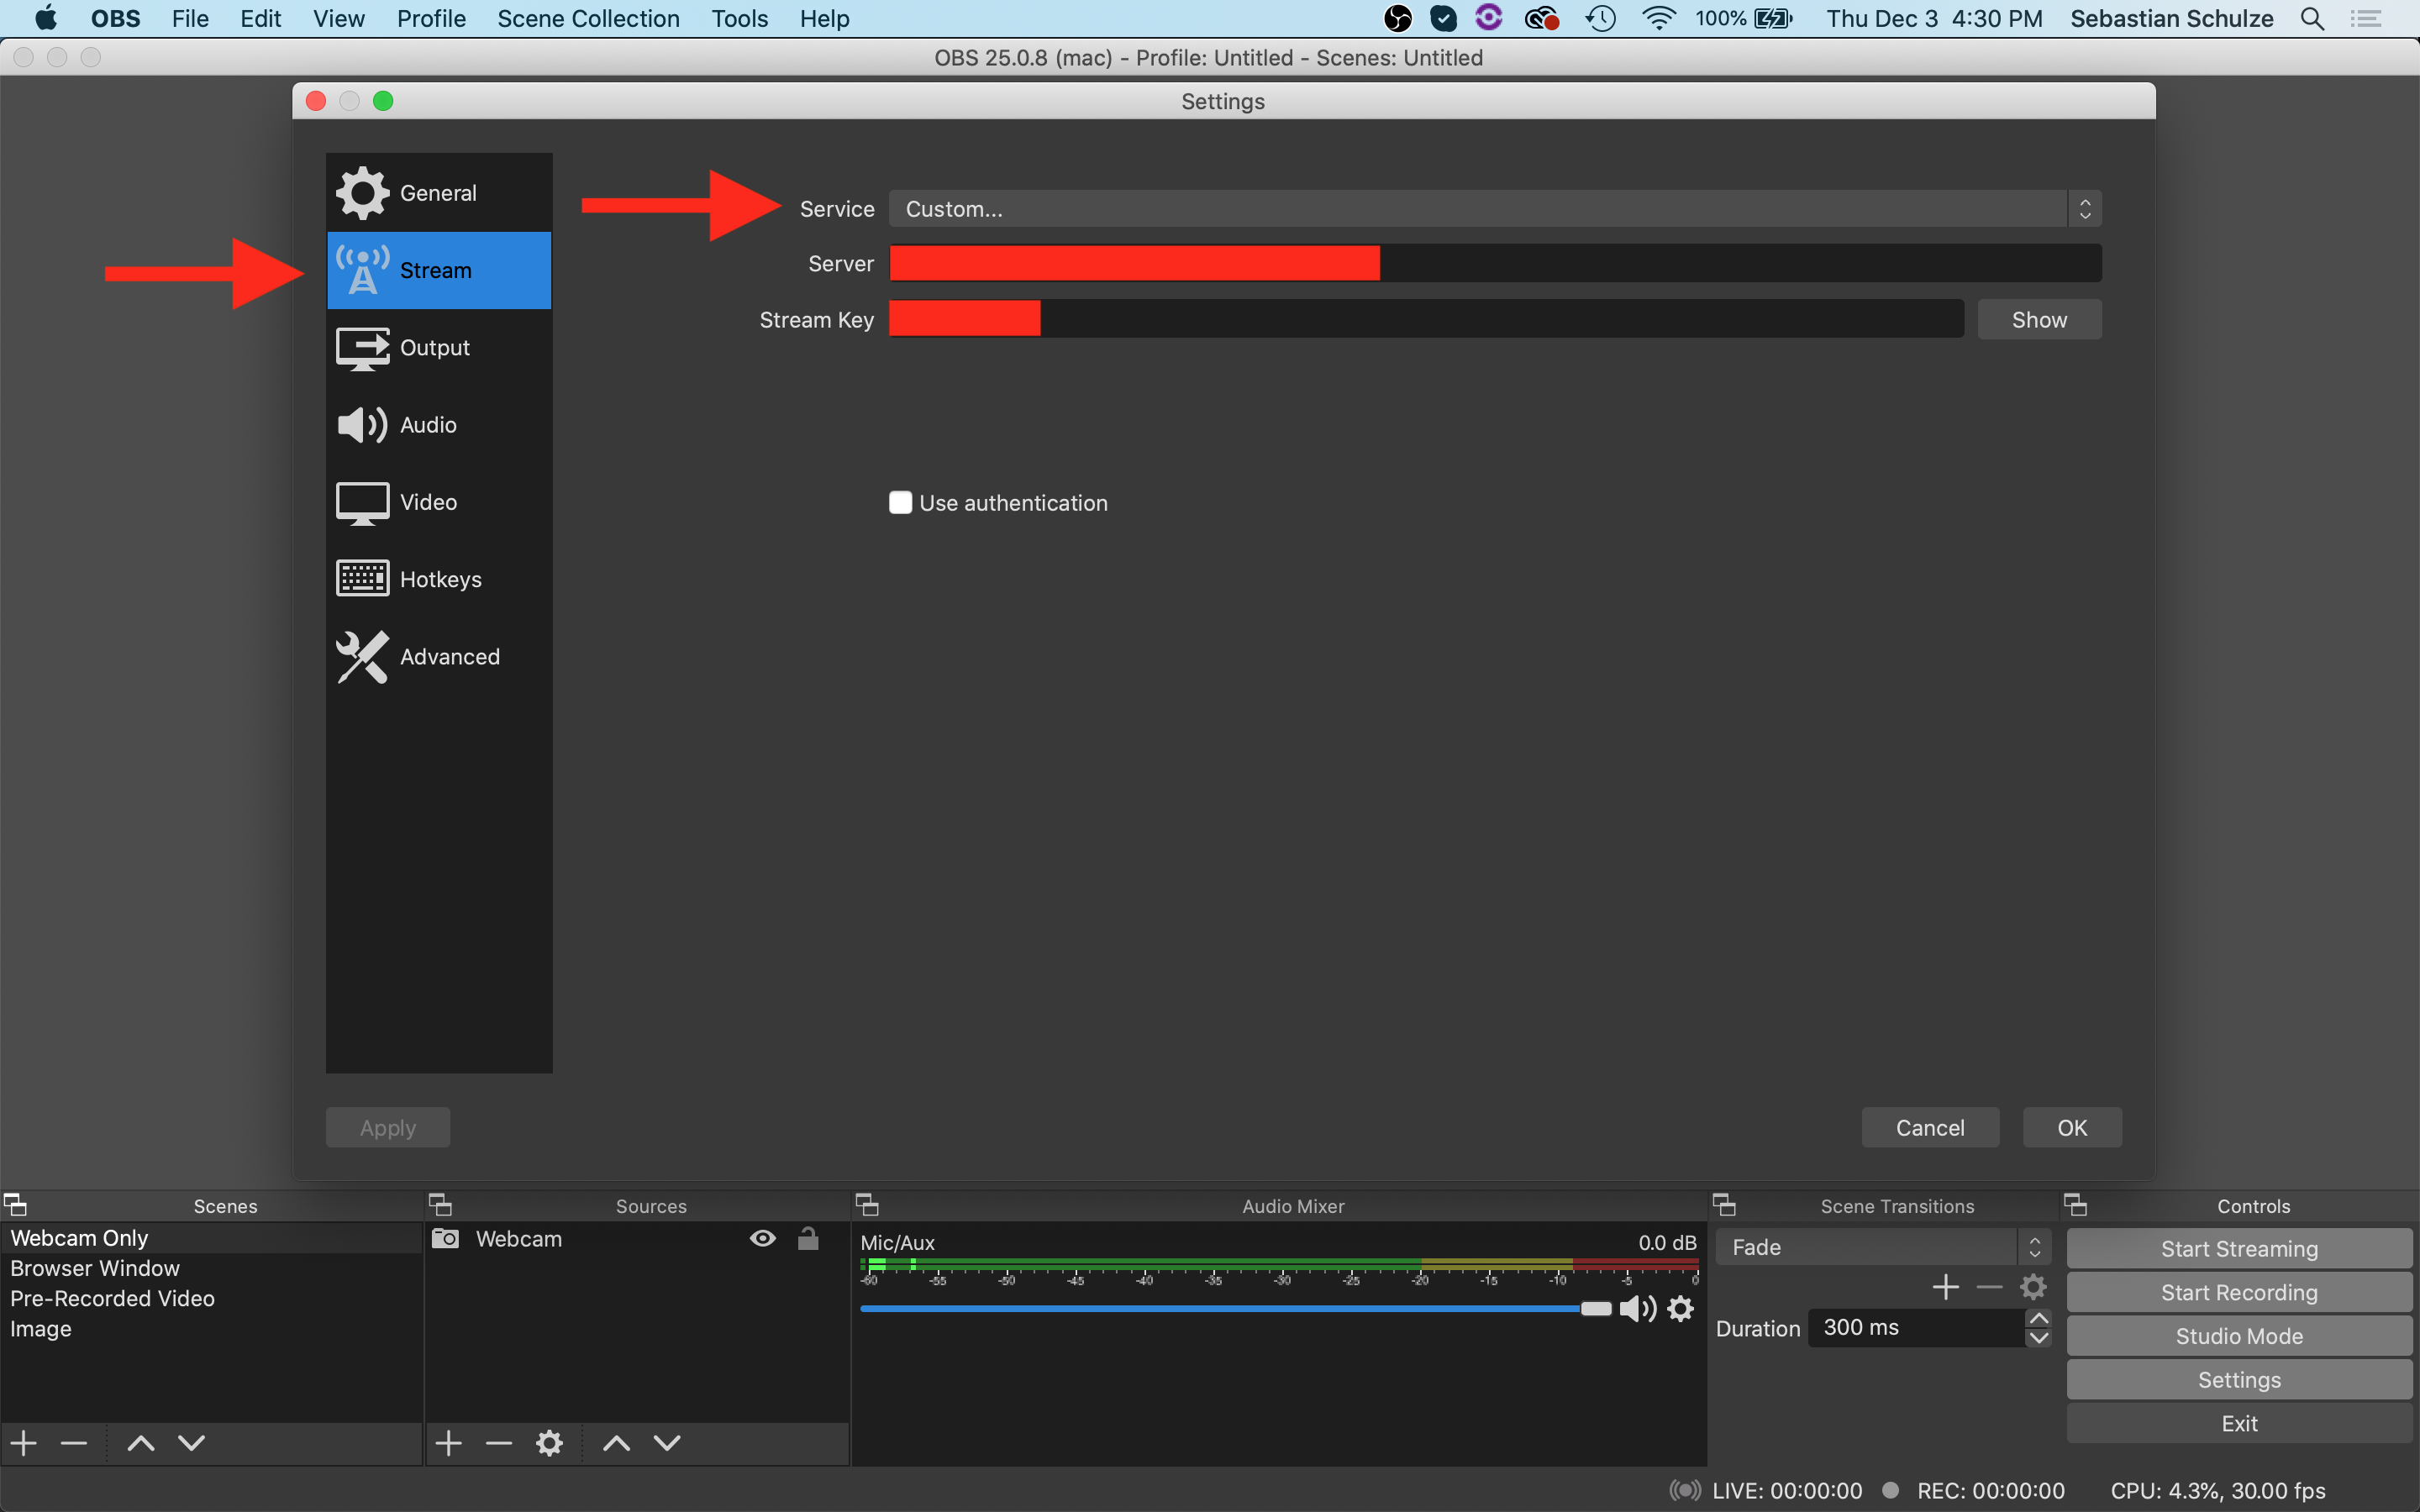
- Select "Stream"
- In the "Service" dropdown menu, select "Custom..."
- In the "Server" text field, copy & paste the "Server" from PromoTix here.
- In the "Stream Key" text field, copy & paste the "Stream Key" from PromoTix here.
- Click on "OK"
8. Recommended OBS settings for live streaming on PromoTix
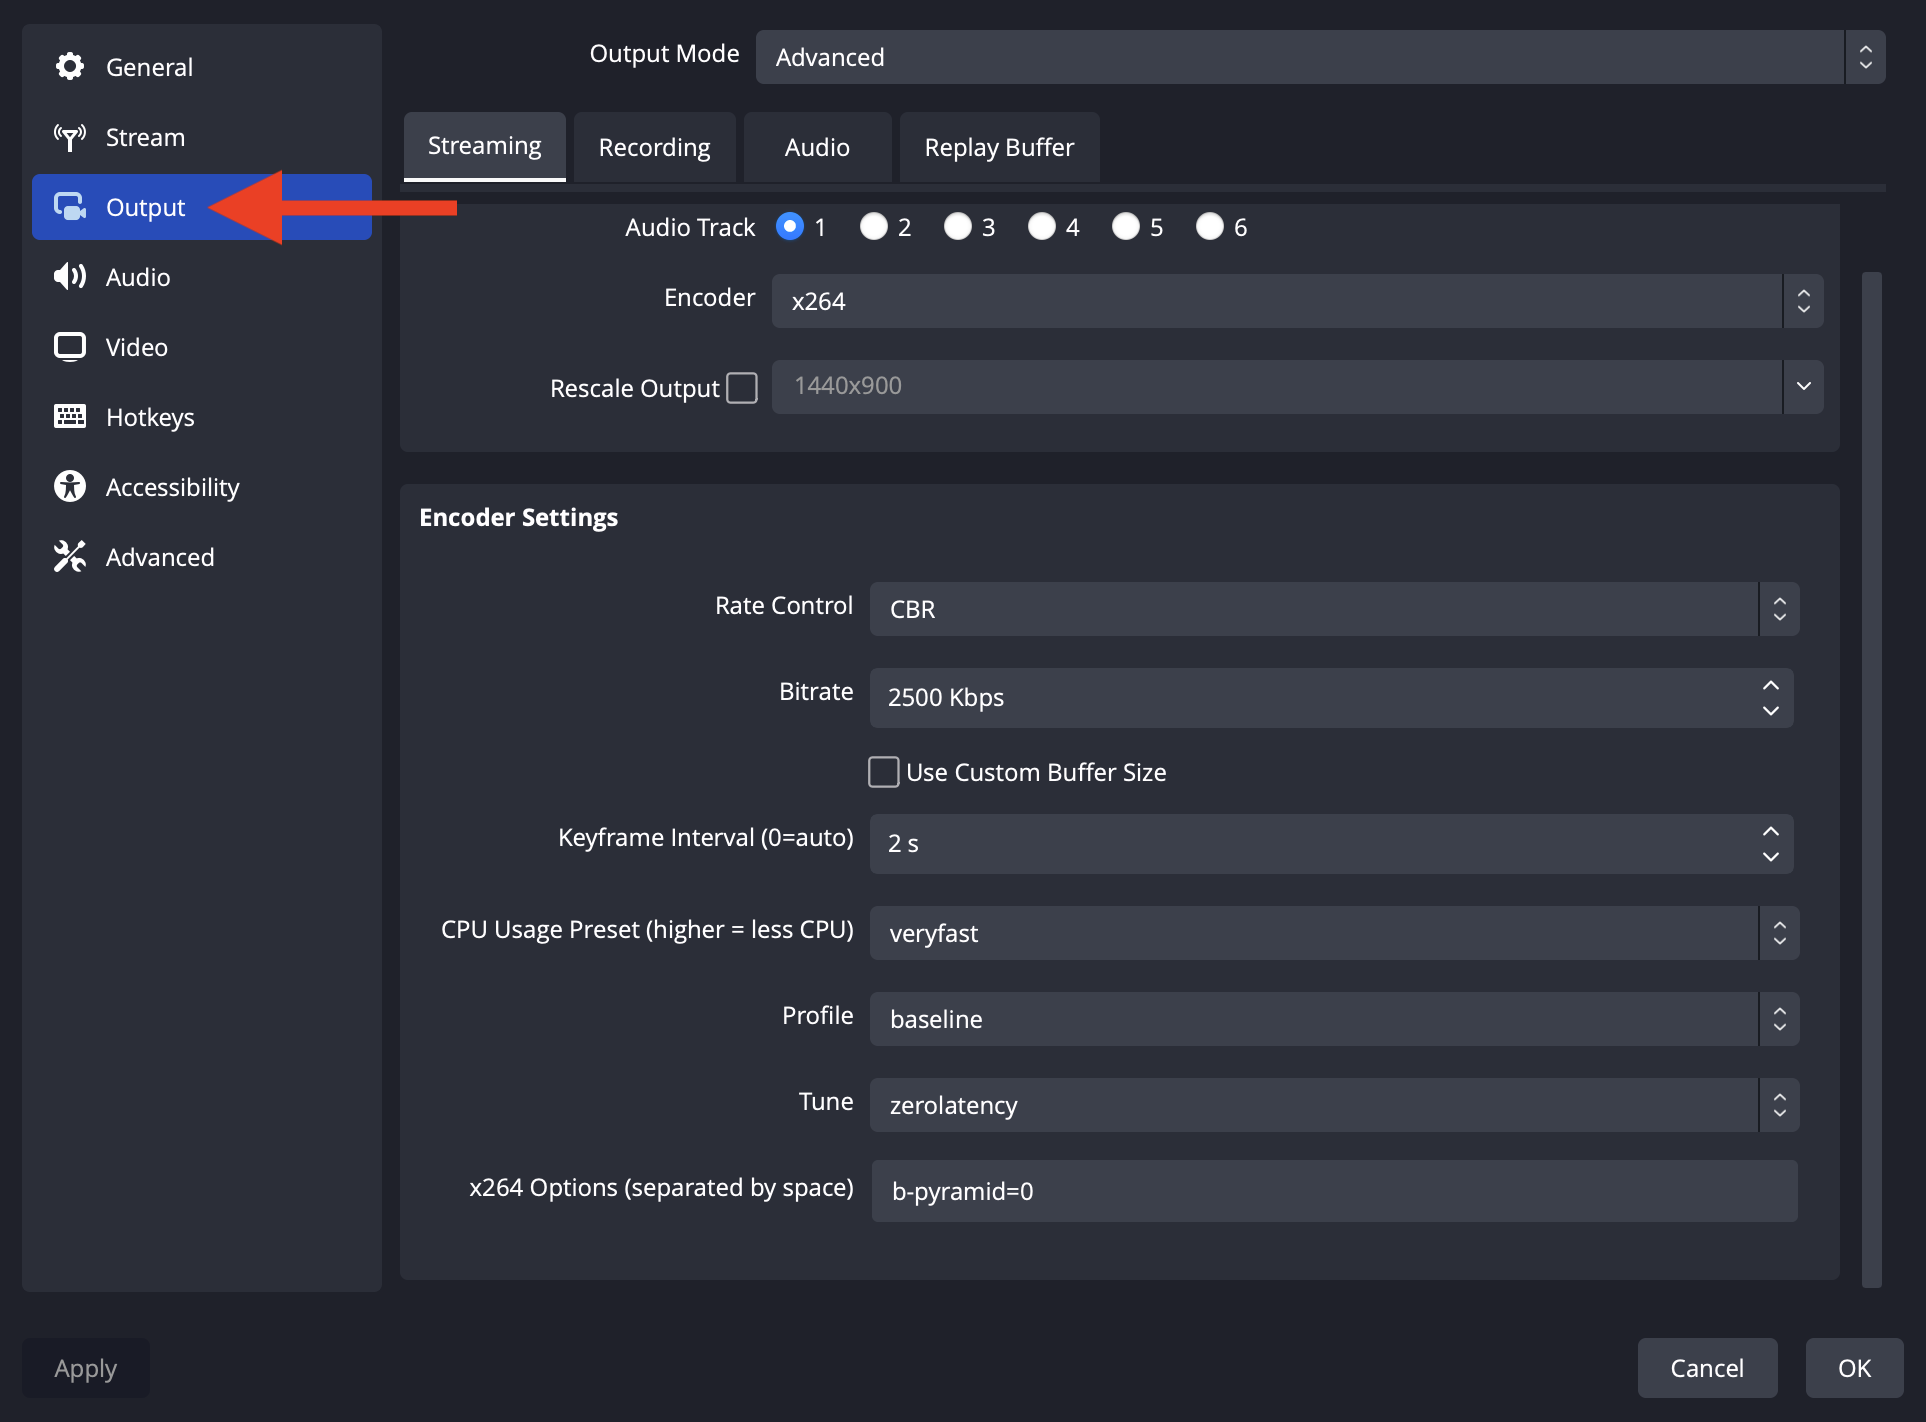
- Select “Output."
- Select Output Mode: Advanced.
- Select Encoder: x264.
- Select Rate Control: CBR (Background: “Constant Bitrate” is better for low latency live streaming).
- Select Bitrate: between 500 kBits/s – 800 kBits/s – 2000 kBits/s – 4000 kBits/s or more (see live stream quality recommendations below).
- Select Tune: ZeroLatency.
- (Optional) CPU Usage: veryfast (the faster, the fewer CPU resources but lower quality).
- (Optional) Profile: Baseline and b-pyramid=0 (see above).
- Background: Baseline is a H264-standard based profile optimized for lower complexity and latency. It may have a slight impact on quality compared to latency (latency impact max. 100 ms). Other profiles like “Main” and “High” work well with PromoTix (b-pyramid is optional now – it may improve compatibility with some playback options like older Chrome browsers).
- Live stream quality
- PromoTix supports highest video quality for delivery and distribution to all browsers, however, there are physical limits by your network connection and encoder performance. If your hardware and network supports it, you can go up to Full HD for live streaming.
- Video quality is primarily decided by
- Video resolution and bitrate of the encoder configuration
- CPU and system performance of your camera and PC / Laptop
- Network capacity
- All factors have an impact on quality. If you try to turn bitrate and resolution very high, but your system and the whole network does not support it, you will get bad results.
- Recommendations
- Start with the lowest acceptable quality, such as medium resolution and bitrate (640×480 1000 kBits/s or 1280×720 2000 kBits/s).
- Test the whole setup end-to-end, including playback on several devices.
9. Test your live stream settings before your event
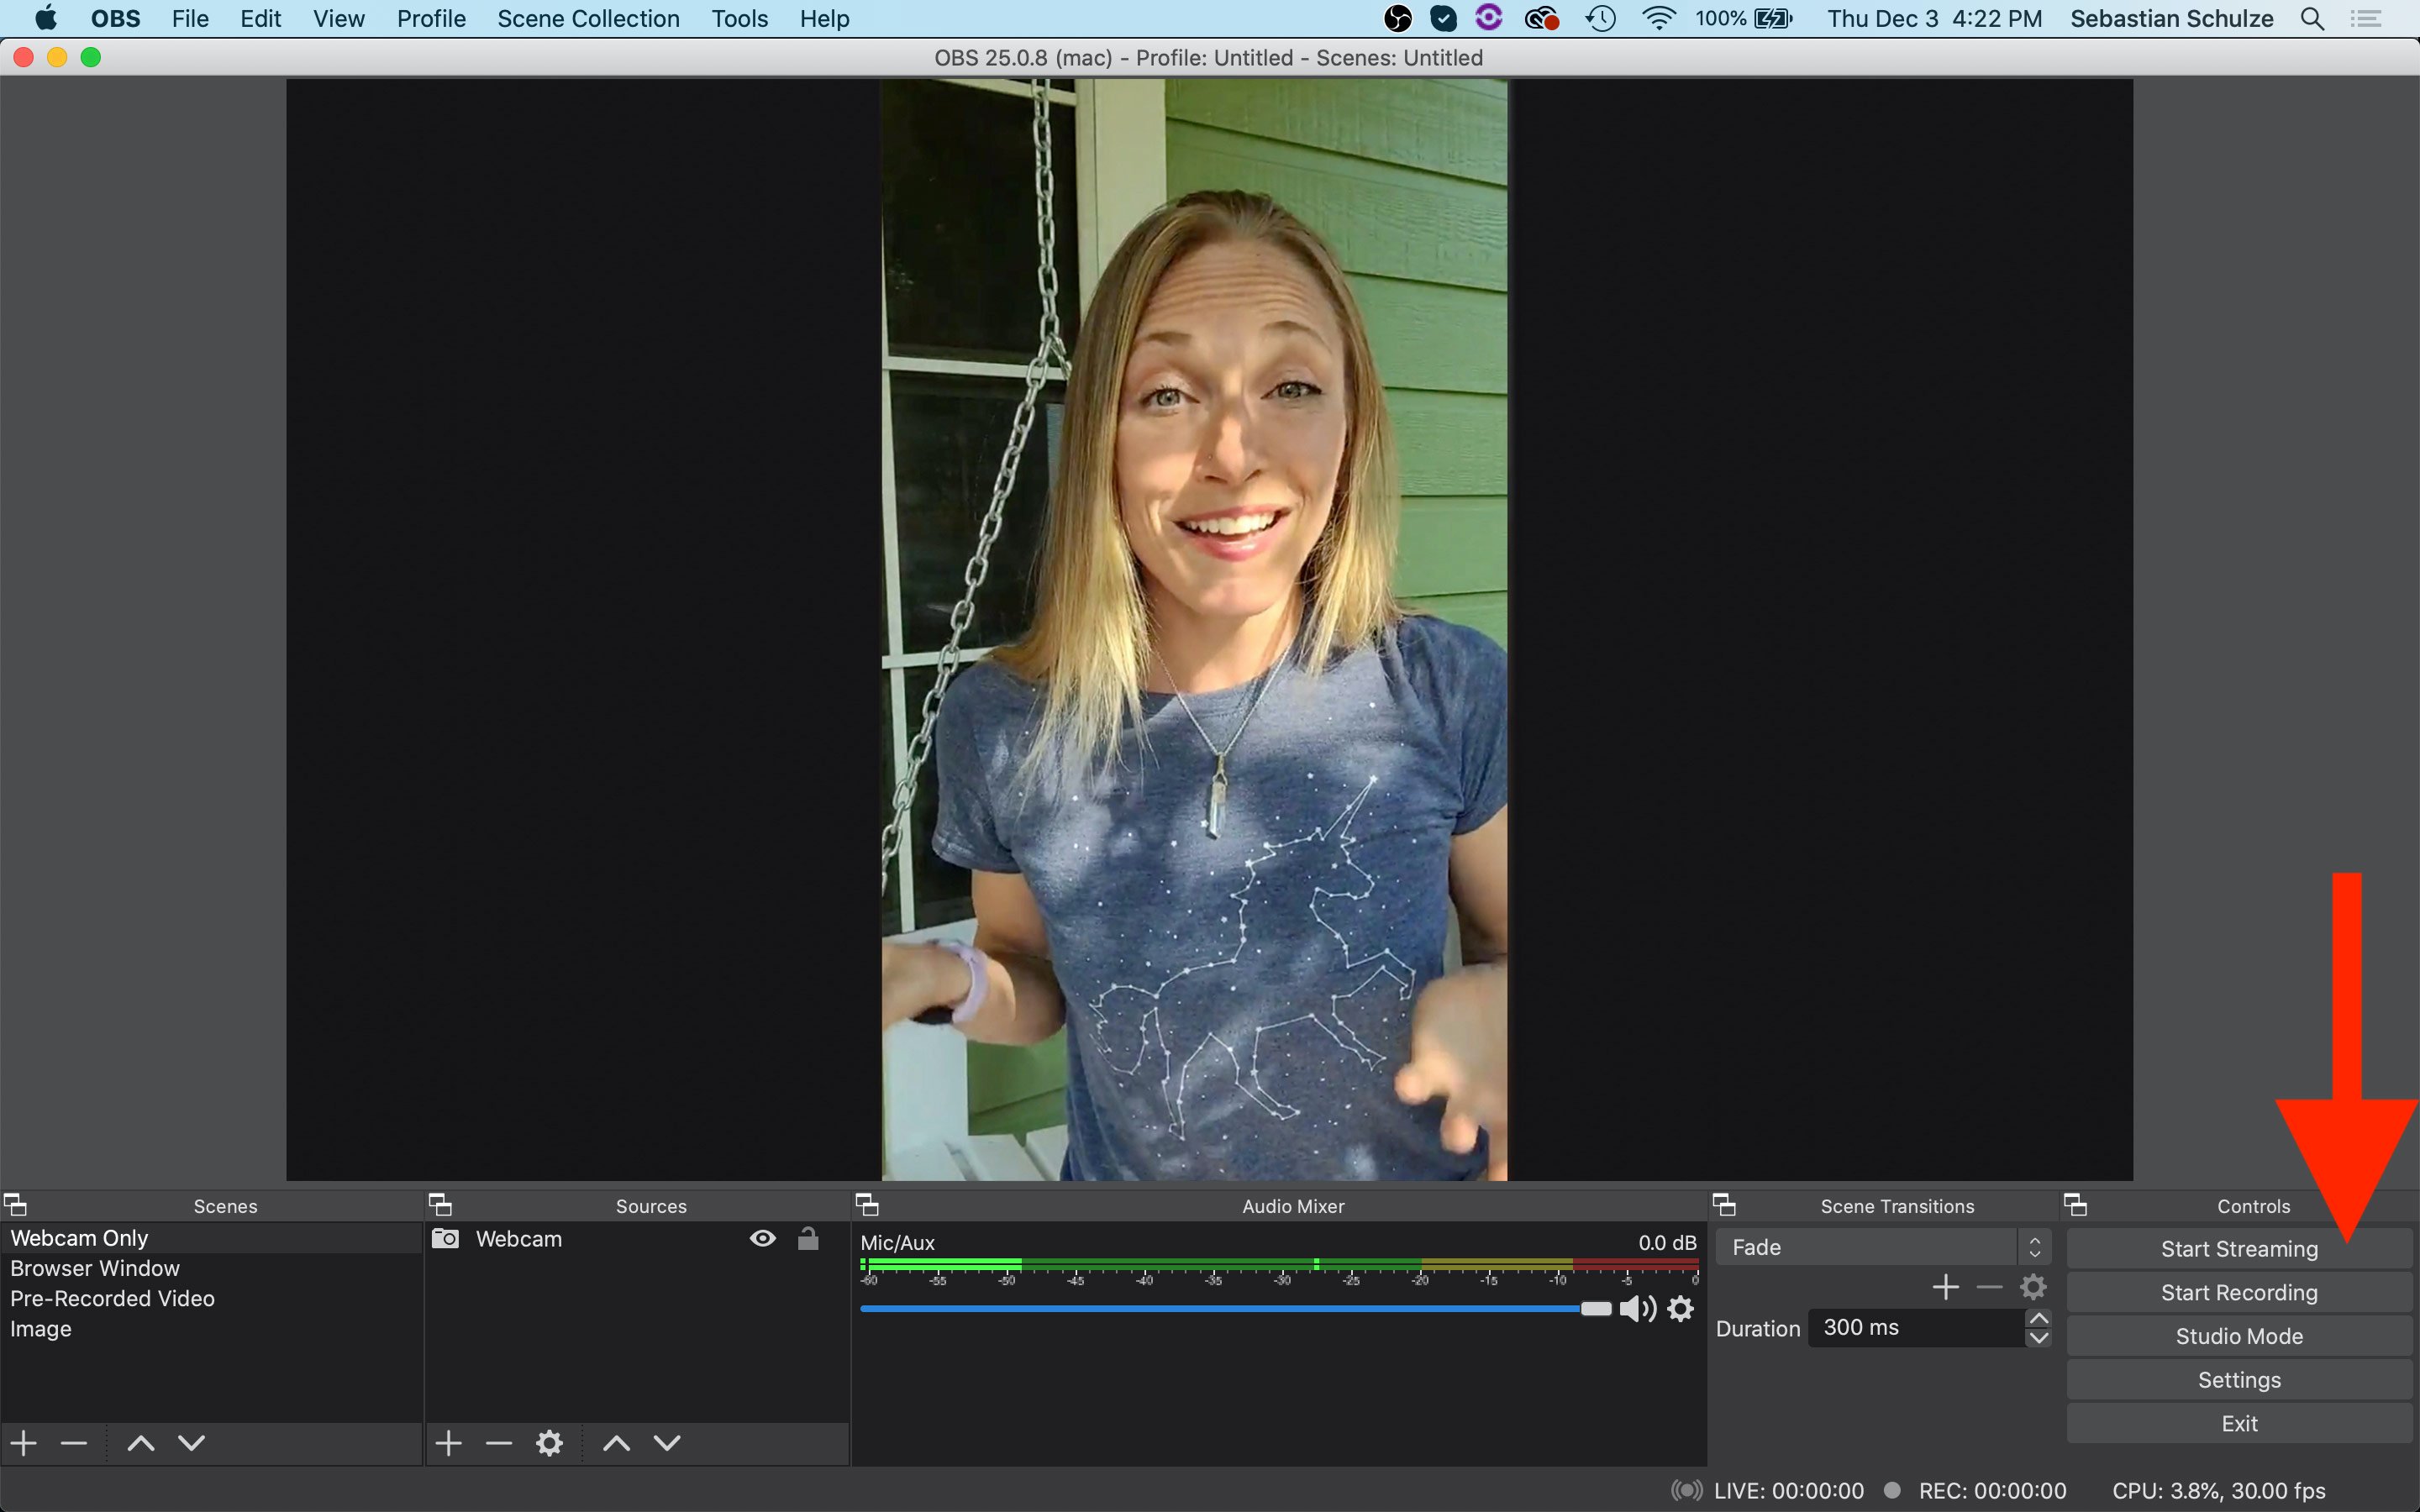
Once you're ready to test out your live stream settings, click on the Start Streaming button inside of OBS.
Key points for testing:
- When live streaming on PromoTix using the RTMP option, you can begin live streaming at any point before your event is scheduled to begin.
- When live streaming early, your ticket buyers will not be notified that your are live. They also won't be able to access your stream until your event is scheduled to begin.
- Your ticket buyers can start checking in to your live stream (10) minutes before your event is scheduled to begin, however they will be unable to actually view your stream until the event starts.
- Once your event starts, if you are currently live streaming to your event, then your stream will be automatically broadcasted to your viewers. There is nothing that you or your viewers have to do in order to make the live stream appear.
10. Test your RTMP connection

To ensure that the RTMP connection between OBS and PromoTix is working properly, return to PromoTix and ensure that the text Event already streaming is displaying at the top of the screen. You may need to refresh your screen in order for it to appear.
If this text is appearing, that means the RTMP connection between OBS and PromoTix is working properly.
11. Click on the "Preview" button to check your audio and video playback
 Click on the Preview button to preview your live stream and check your audio and video playback. For example, if you can't see anything, go back to OBS and double check your video settings.
12. Go live for real!
To live stream for real, simply start live streaming to your event (using the instructions above) before your event is scheduled to start, and then wait for your viewers to join.
Once your event has begun, you can monitor your viewer's chat messages and send chat messages to your viewers.
Once you're ready to end your stream, click on the Stop Streaming button inside of OBS.
TIP: If you need to permanently boot someone from the chat, click on their name inside of the chat window.
NOTE: While it is possible to stop and restart your stream halfway through your event, this is not recommended.