

(Last updated 7/27/23)
Having to deal with disputes (also known as chargebacks, inquiries, or retrievals) is an unfortunate but inevitable aspect of being a merchant online.
PromoTix is integrated with PromoTix Processing Pro for credit card processing, so if any of your customers from PromoTix file a dispute they will appear in your PromoTix Processing Pro account.
This guide will help you:
- Understand the differences between a dispute, inquiry, retrieval, and chargeback
- Learn best practices for responding to disputes
- Prevent disputes from happening
IMPORTANT: there is nothing that PromoTix Processing Pro, PromoTix, or any other ticketing platform can do to "guarantee" the outcome of a dispute. Credit card issuers (banks) make the final decisions based on the evidence provided by both the customer and the merchant. This guide will offer you tips to help you improve your chances of winning disputes on PromoTix Processing Pro.
1. Understanding disputes
From Stripe's documentation here:
"A dispute (also known as a chargeback, inquiry, or retrieval) occurs when a cardholder questions your payment with their card issuer. An inquiry or retrieval is nothing more than a request for more information about the charge, which may escalate to a chargeback. To process a chargeback, the issuer creates a formal dispute, which immediately reverses the payment."
Key takeaway points:
- The lowest level of a dispute is called an "inquiry" or a "retrieval," which is simply a customer requesting for more information about a charge.
- A customer may escalate an inquiry or retrieval into what's known as a chargeback by filing a formal dispute.
- When a chargeback occurs, your payment received from the customer will be immediately reversed.
2. General process for dealing with disputes
If you do find yourself with a dispute, all is not lost. You, the event organizer, have the ability to respond to disputes by providing evidence that you are entitled to keep the funds. Depending on the evidence you provide, you may be able to win the chargeback and re-obtain the lost funds.
According to the 2021 Chargeback Field Report, "of the chargeback win rates reported by survey respondents, 32 percent emerged as the average. This means that, of those transactions represented to an issuing bank, the bank will accept roughly one in three cases."
3. Locating the order on PromoTix
The first basic step that you should take once receiving a dispute is to locate the order in question in your PromoTix account. To locate the order:
- Click on your PromoTix event from your PromoTix dashboard.
- Click on the "Orders" tab in the drawer on the left of the screen.
- Search the customer's name, email address, order number, etc. in the search bar at the top of the screen.
Once you've located the order, it will look something like this:
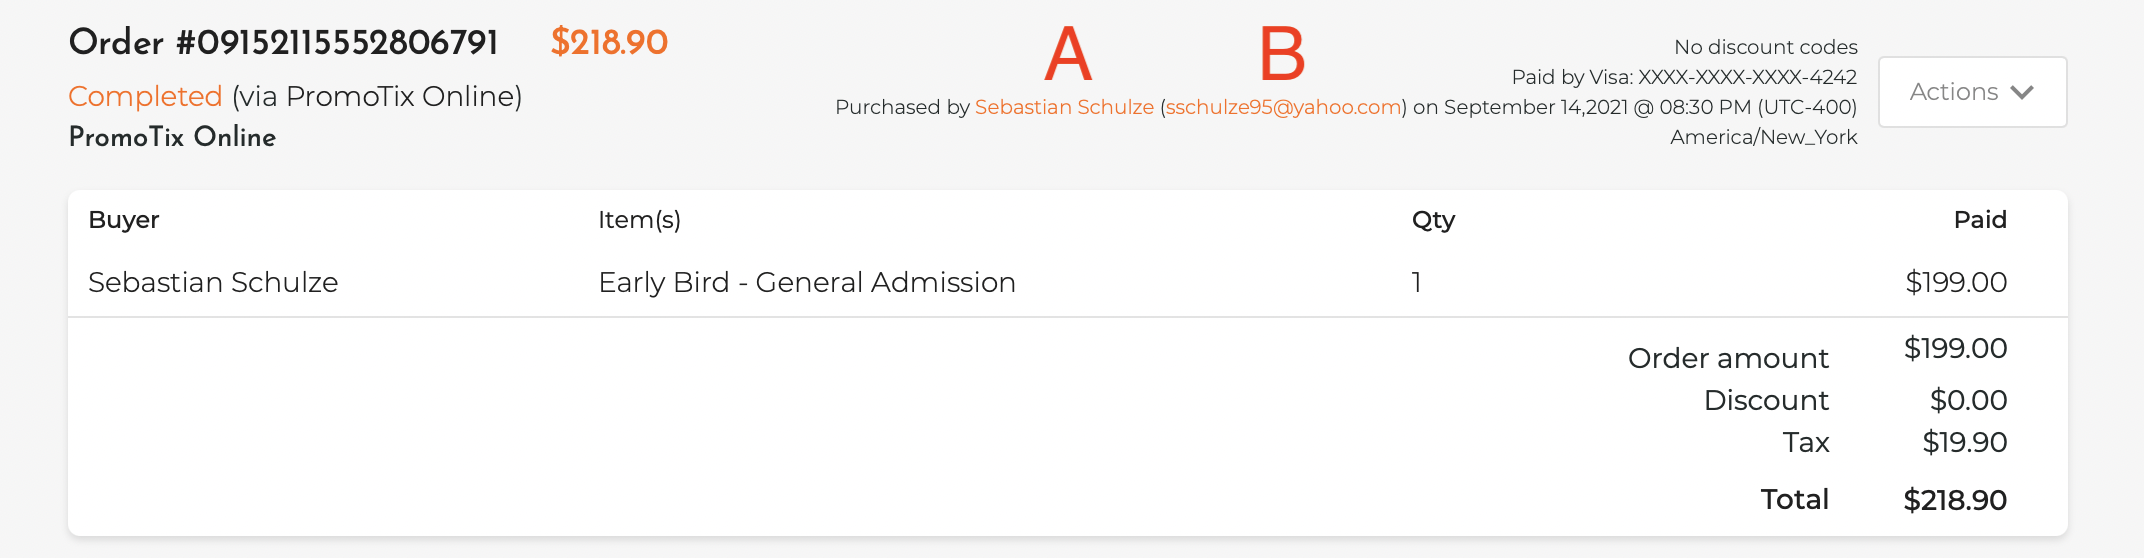
- A 👉 The customer's full name
- B 👉 The customer's email address
We recommend retrieving a copy of your customer's receipt to include in your evidence later on in the process. Here are the steps to email yourself a copy of the customer's receipt:
- Click on the "Actions" dropdown menu in the top right of the order.
- Click on "Send receipt."
- A copy of the customer's receipt will be sent to your PromoTix account email address.
- Take a screenshot of the receipt.
4. Locating your new order confirmation email
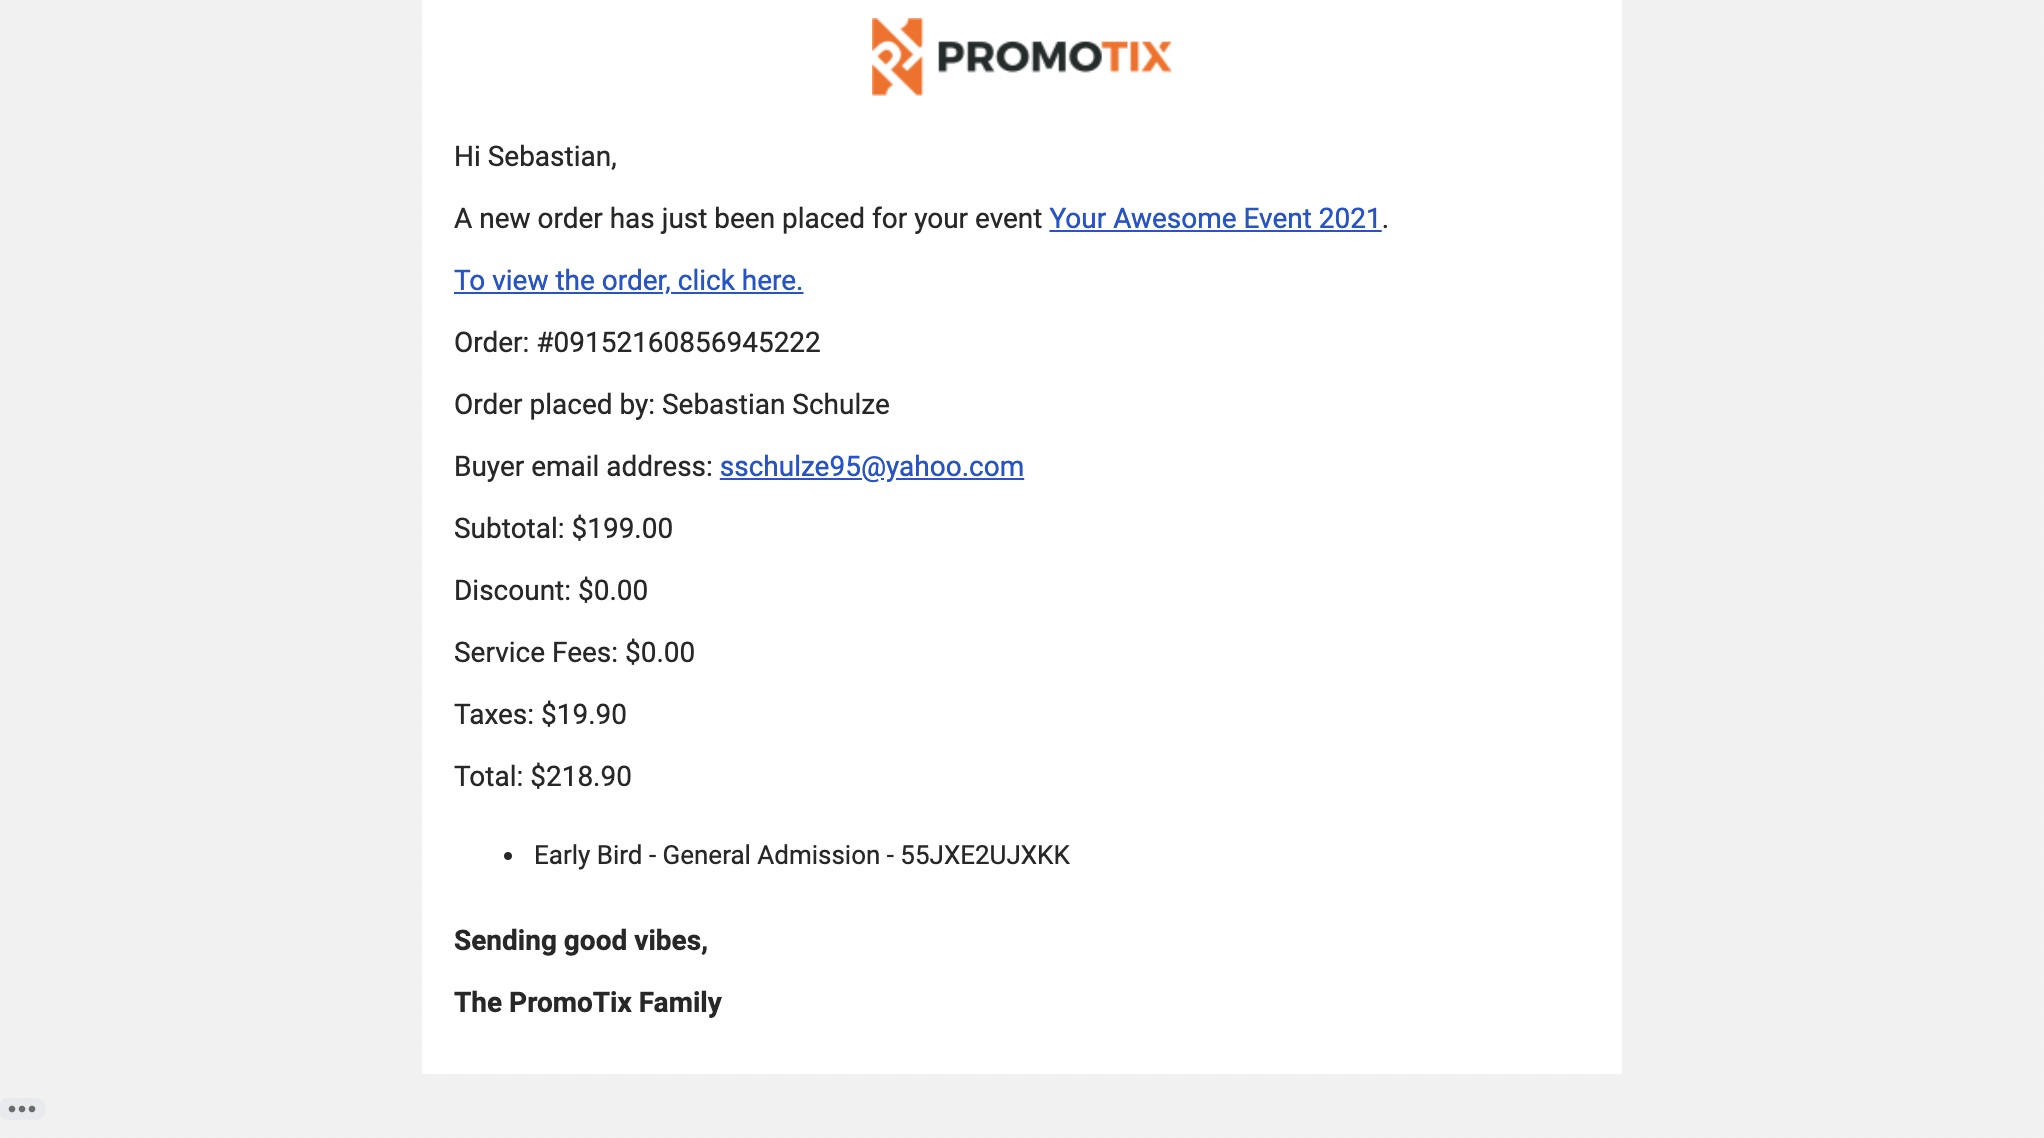 If you have new order notifications turned on in your PromoTix account settings, you will have also received an email immediately at the time the order was placed.
To search for this email in your inbox, the subject line will be in the format: "New Order for (EVENT NAME)"
If you are able to locate a copy of this email, we recommend taking a screenshot of it to include in your evidence later on in the process.
5. Checking to see if the ticket(s) purchased were checked in to your event
Now that you've located the order, if your event is completed you can check to see if the ticket(s) the customer purchased were actually checked in to your event. If the ticket(s) were checked in, this is evidence that the customer demonstrated their use of the product(s) purchased.
To check if the ticket(s) purchased were checked in for your event:
- Click on your PromoTix event from your PromoTix dashboard.
- Click on the "Reports" tab in the drawer on the left side of the screen.
- In the "Report type" dropdown menu, select "Attendee report."
- Click on the "Print report" button in the top right hand corner of the screen.
- Locate the order by searching the order number (on Mac, this can be done by holding Command + F)
Your report should look something like this:
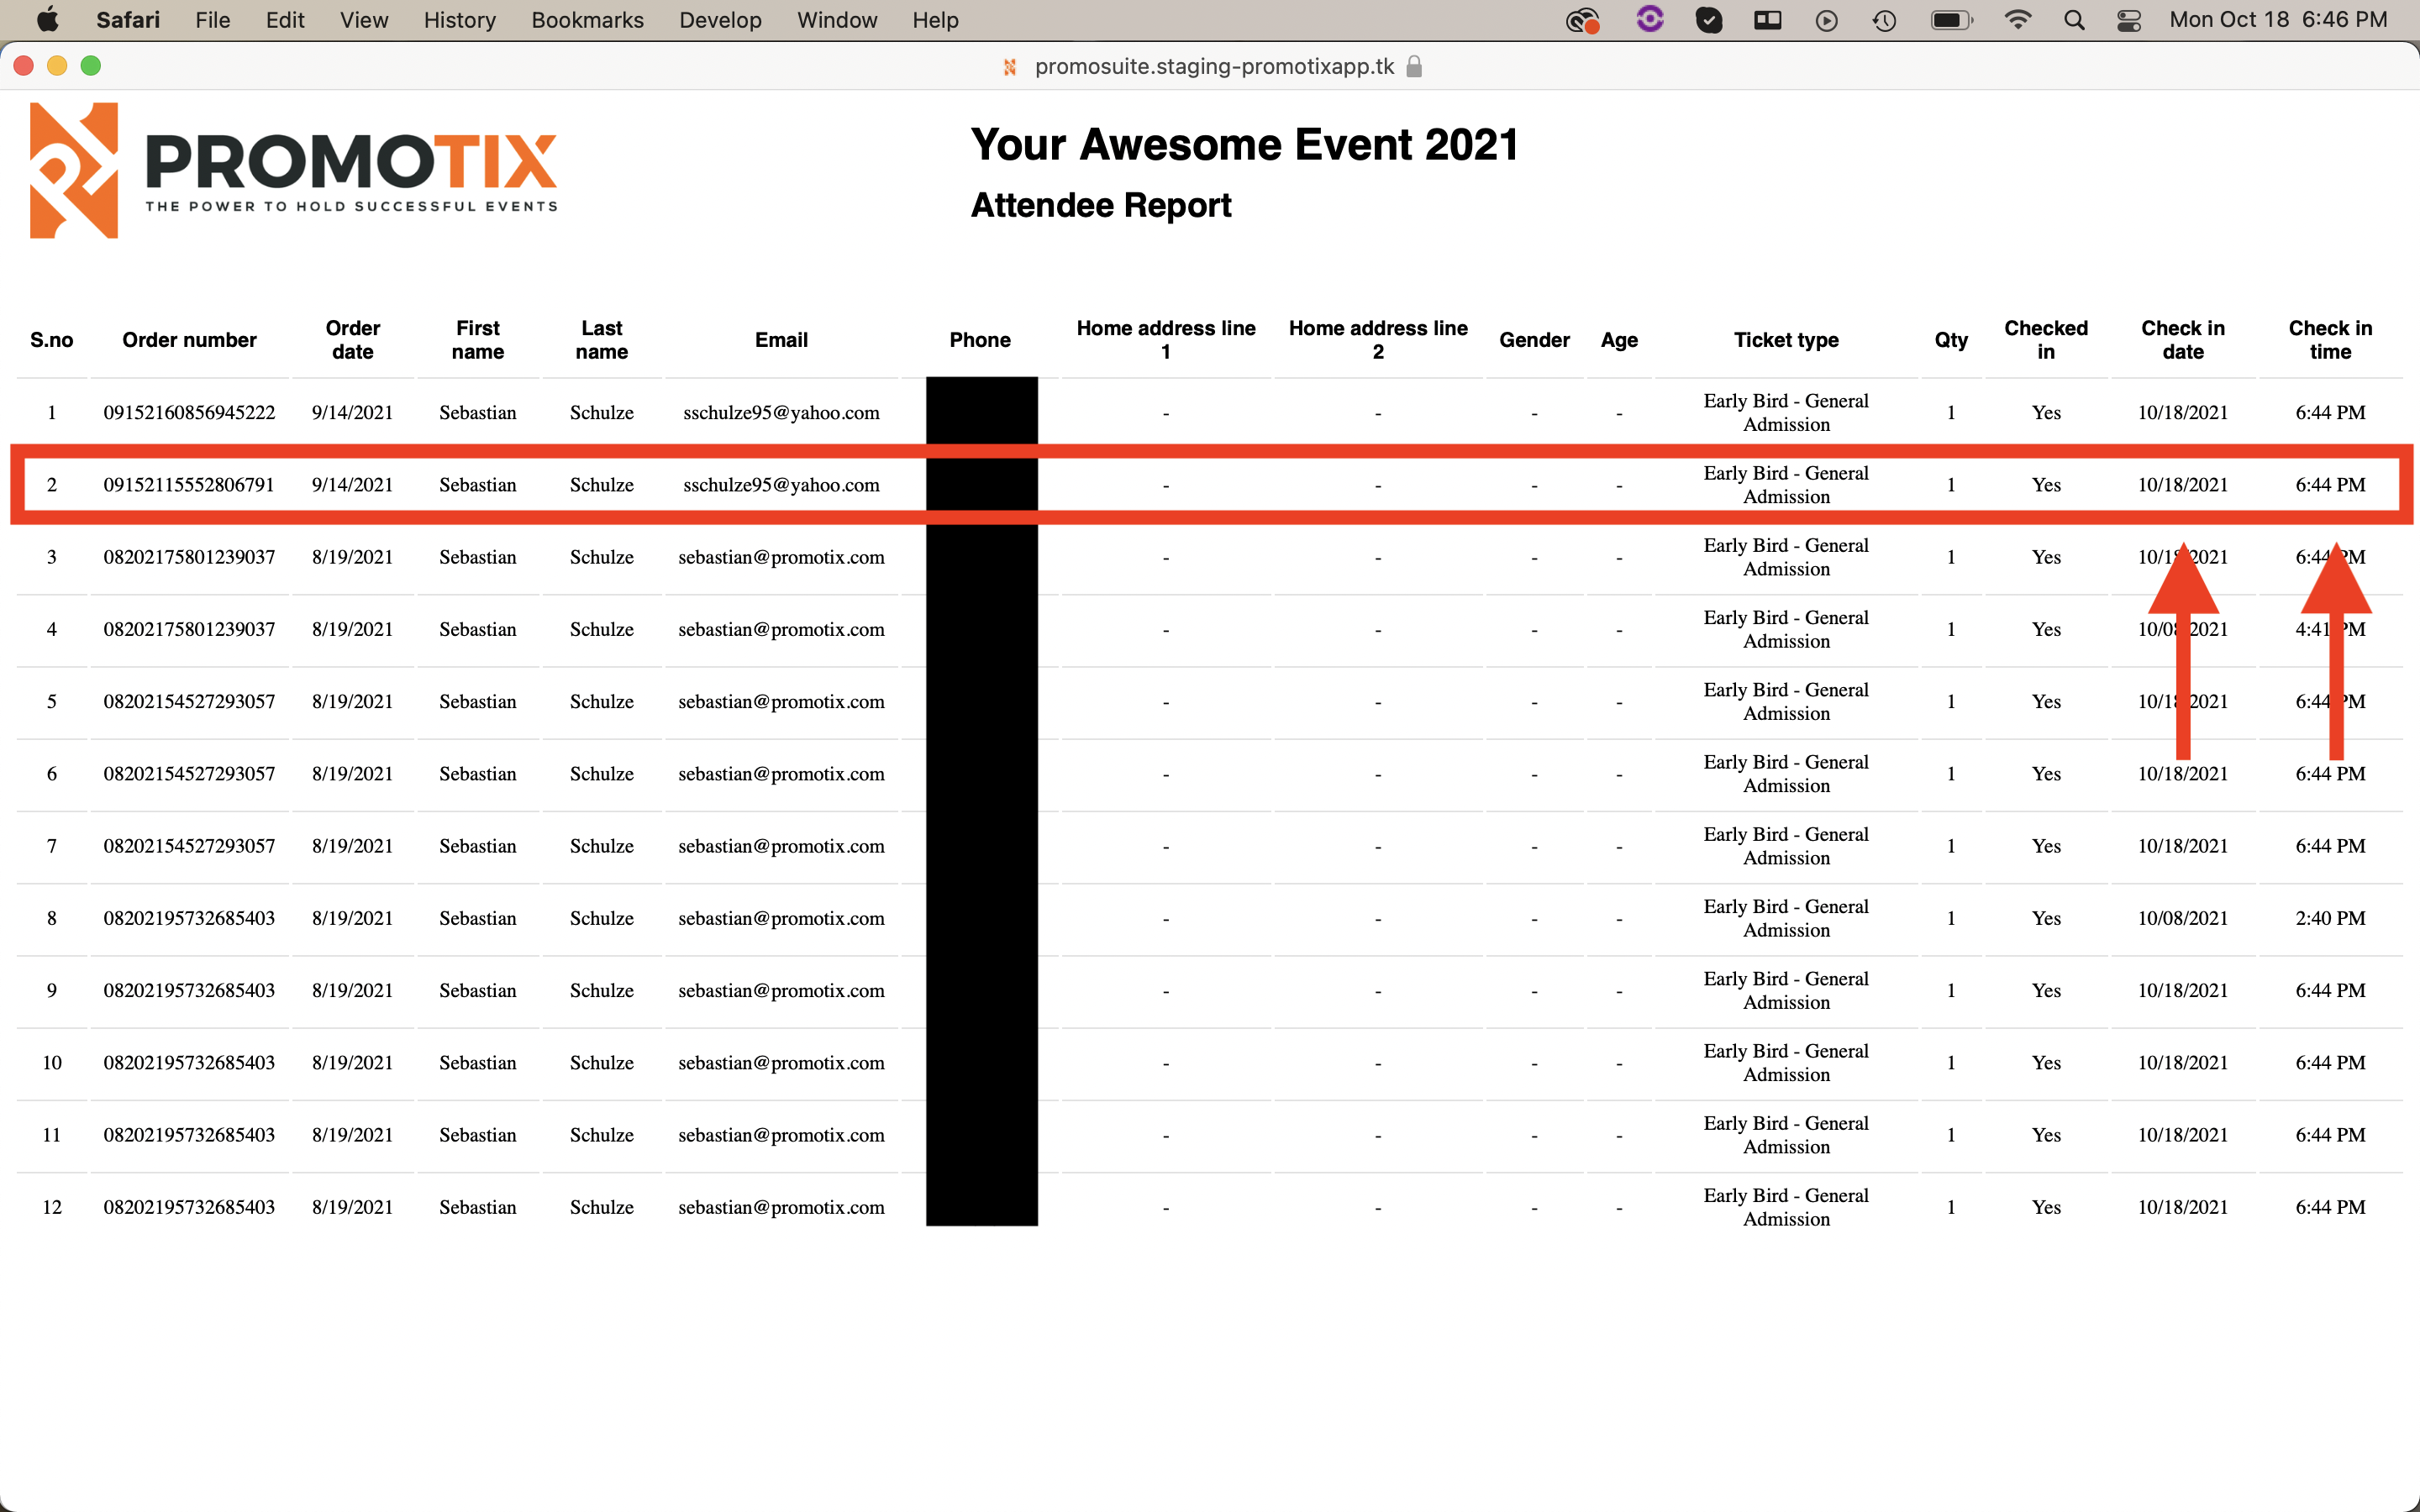 If any of the ticket(s) the customer purchased were checked in, we recommend taking a screenshot of this report to use as evidence later on in the process.
6. Locating your refund policy and/or terms & conditions
When creating a PromoTix event, you have the option to add your refund policy and/or terms & conditions. If you've added either of these to your event, all of your customers who placed an order online would have had to check a box and agree to your policies before placing their orders.
To view your event page:
- Click on your PromoTix event from your PromoTix dashboard.
- Click on the "View event" button in the top right hand corner of the screen.
Your event page should look something like this:
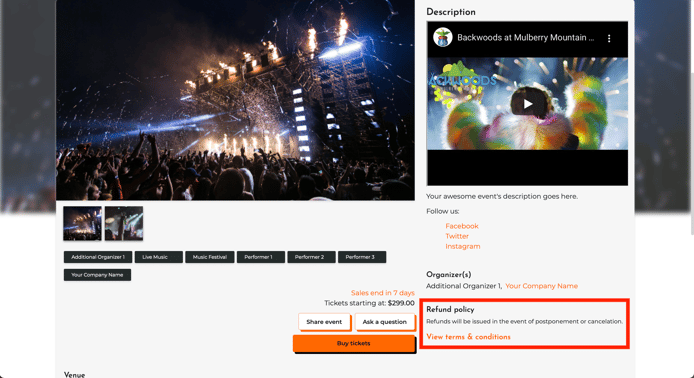
You can also click on the "View terms & conditions" link to open up your terms & conditions in a popup window:
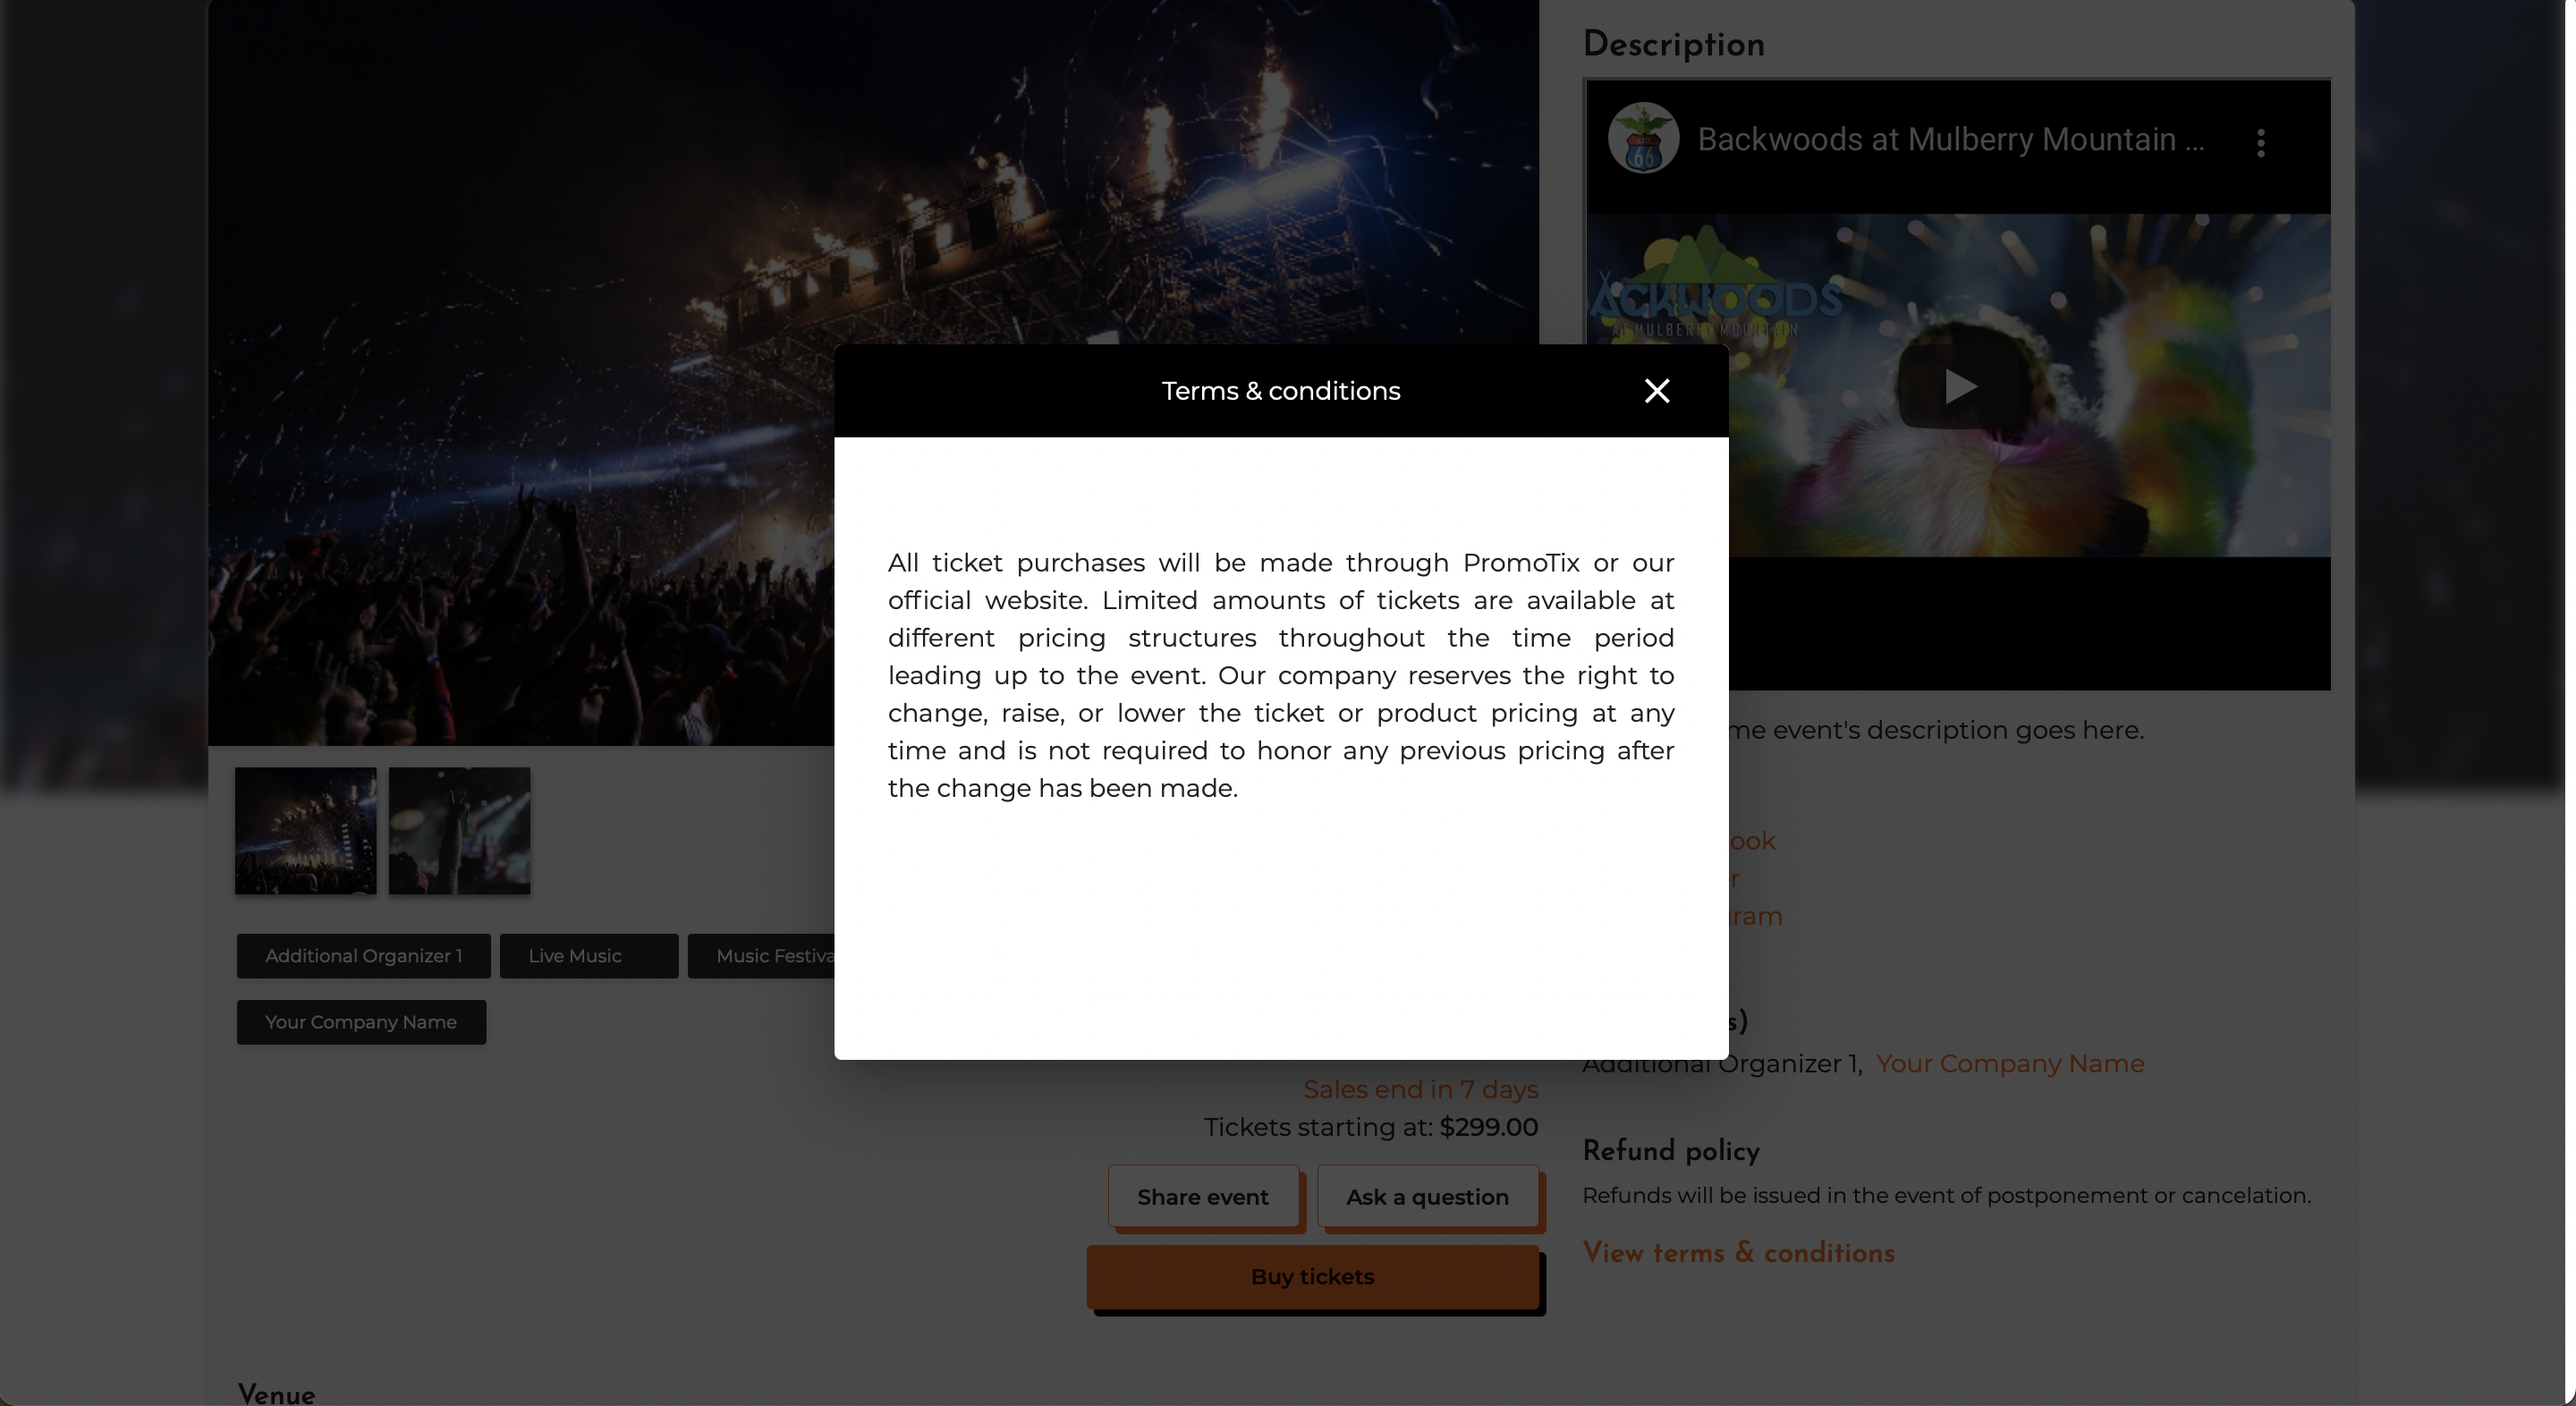
We recommend taking screenshot(s) of your publicly displayed refund policy and/or terms & conditions on your event page to include in your evidence later on in the process.
If your event is still live, you can also click on the "Buy tickets" button and then proceed to the final step in your checkout process. On this screen, your refund policy and/or terms & conditions will be displayed:
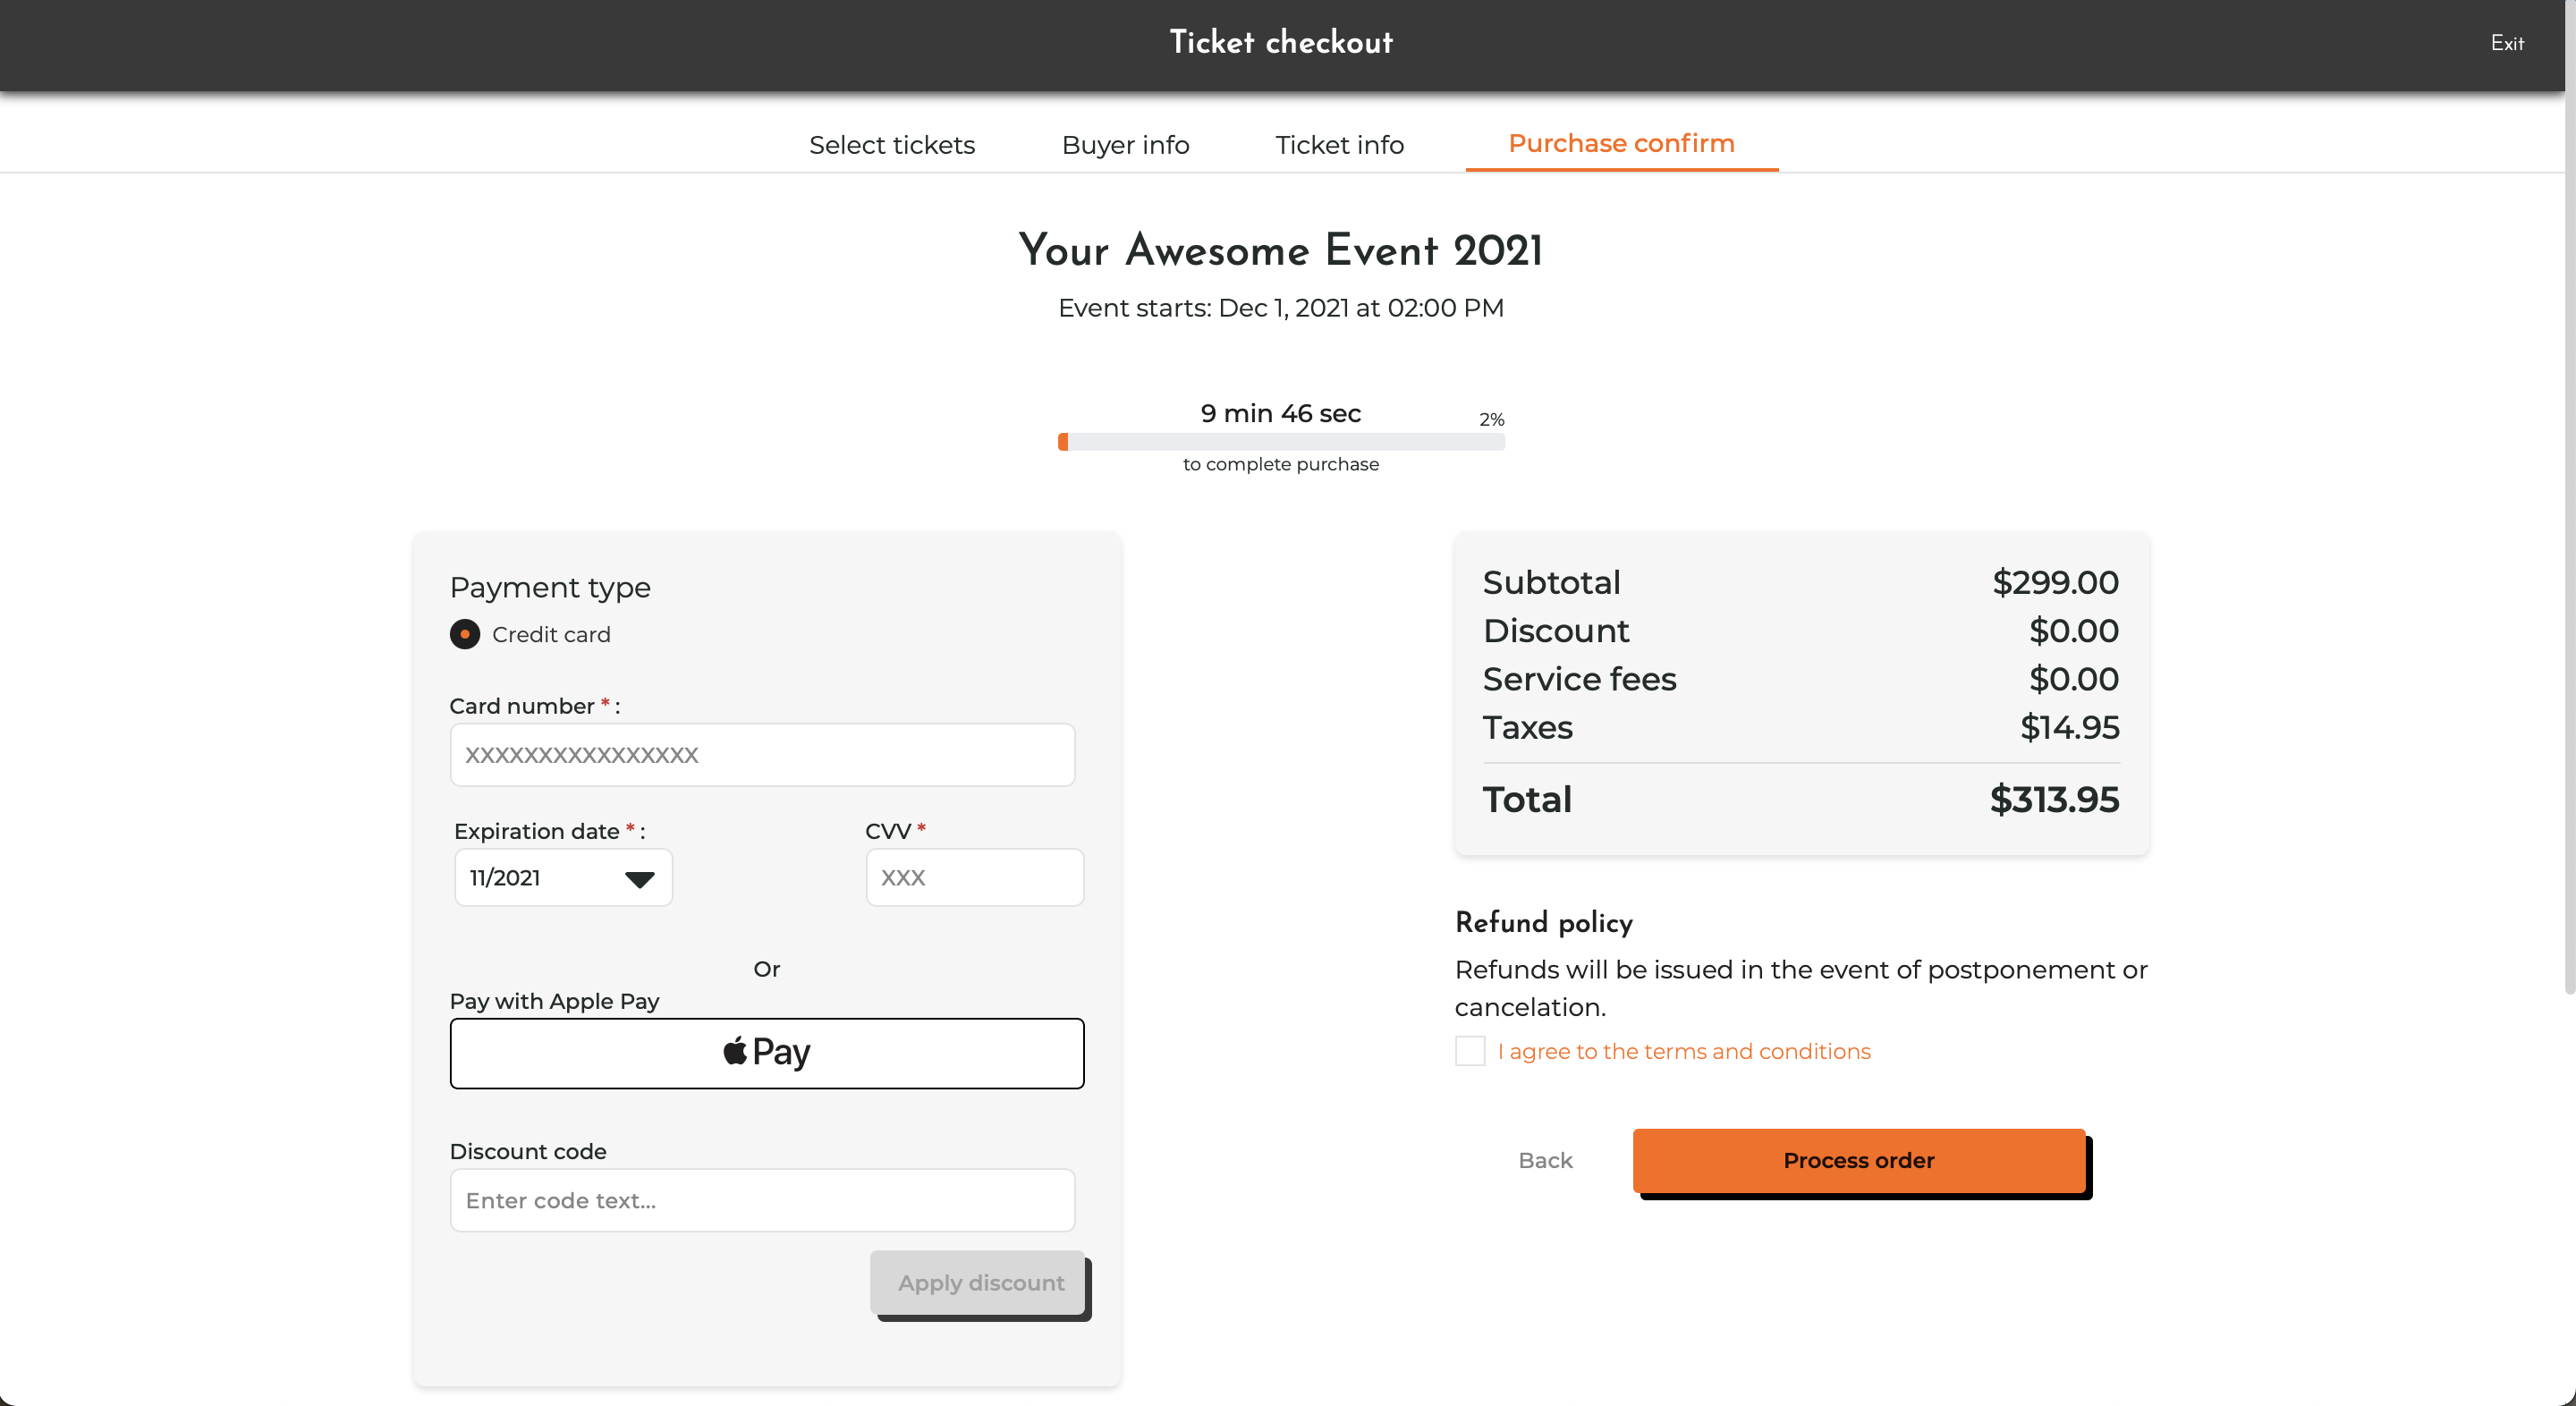
We recommend taking screenshot(s) of your publicly displayed refund policy and/or terms & conditions on this screen to include in your evidence later on in the process.
7. Locate the chargeback(s) in your PromoTix Processing Pro account
- Login to your PromoTix Processing Pro account here: https://promotixprocessing.com
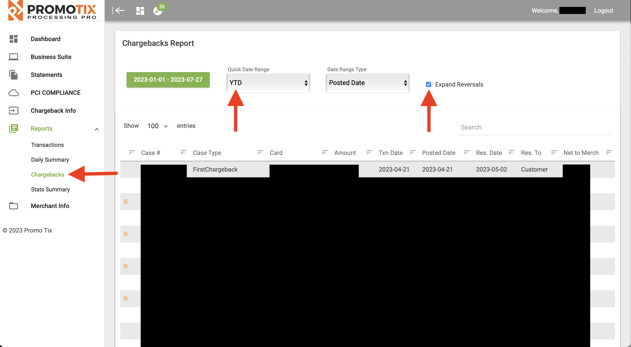
- Once logged in, click on the Chargebacks tab on the left side of the screen
- Use the Quick Date Range filter if necessary to view your chargebacks
- Click the Expand Reversals checkbox to see a complete history for each chargeback
- Make a note of the Case # and Amount of the chargeback you would like to fight
NOTE: the Case Type FirstChargeback reflects funds that have been debited to the customer, and the Case type FirstReversal reflects funds that have been debited back into your account (successful reversals).
8. Start the evidence submission process
To start the evidence submission process:
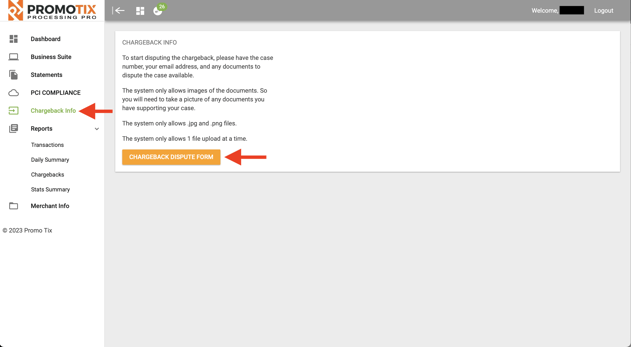
- Click on the Chargeback Info tab in the drawer on the left side of the screen
- Click on the CHARGEBACK DISPUTE FORM button
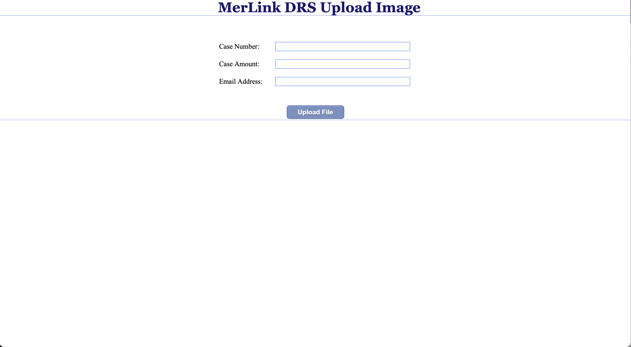
On the following screen, you will be asked to provide the following information:
- Case Number (see previous step)
- Case Amount (see previous step)
- Email address (see step #3)
- Upload your evidence
Here is an example of evidence you can upload which has a very high success rate (please remember that success cannot be guaranteed). This PDF includes:
- Cover page
- Refund policy displayed publicly on website
- Terms & conditions displayed publicly on website
- Refund policy and terms & conditions agreement in PromoTix checkout process
- Payment processor payment details
- Order details in PromoTix
- Ticket checkin details
- Email receipt
- Ticket files

9. Preventing disputes from happening
Here are some steps you can take to prevent chargebacks from occurring in the future:
- Provide a clear and accurate statement descriptor (this is what will appear on your customers' bank statements).
- Display your full refund policy and/or terms and conditions publicly on your website and in your event page.
- Display disclaimers on the footer of your website that speak to a shortened version of your "no refunds" policy.
- Be sure to collect as much evidence as possible by customizing the registration form on your events.
- Have a game plan / template as to what you will submit to fight each chargeback for your company. Improve it as you learn more (see sample PDF above).
- If you can email the customer, ask them why they are charging back the order before responding with evidence. They may tell you something different than they told their bank, and that evidence would show they are untruthful to help you win. One thing you can do is directly ask them if they read that tickets were non-refundable at checkout. If they answer that they did... you may win given they admitted they knew that tickets were non-refundable. The other advantage of talking with them, is that you may be able to work it out directly with the attendee if there was a misunderstanding, and avoid the chargeback on your account. Note: Customer communication that shows they understand the tickets were non-refundable is a big win for your evidence.
- Search their name on Facebook, Twitter, Instagram, etc. - sometimes you can find that they have posted photos of themselves attending your event. Submitting this as evidence shows they attended and used their ticket.
- You will most likely never when a "Fraudulent" case, as the bank will cancel the person's card since the original ticket buyer was not authorized to use the card and the card information may be compromised. To prevent fraud, one thing you can do is require attendees to show ID at the door that matches the name on the ticket. Although this will slow down your door / entry, it will cut down on fraud and prevent people from reselling tickets to your event since the name on the ticket must match the name on the ID.

