

(Last Updated 9/24/23)
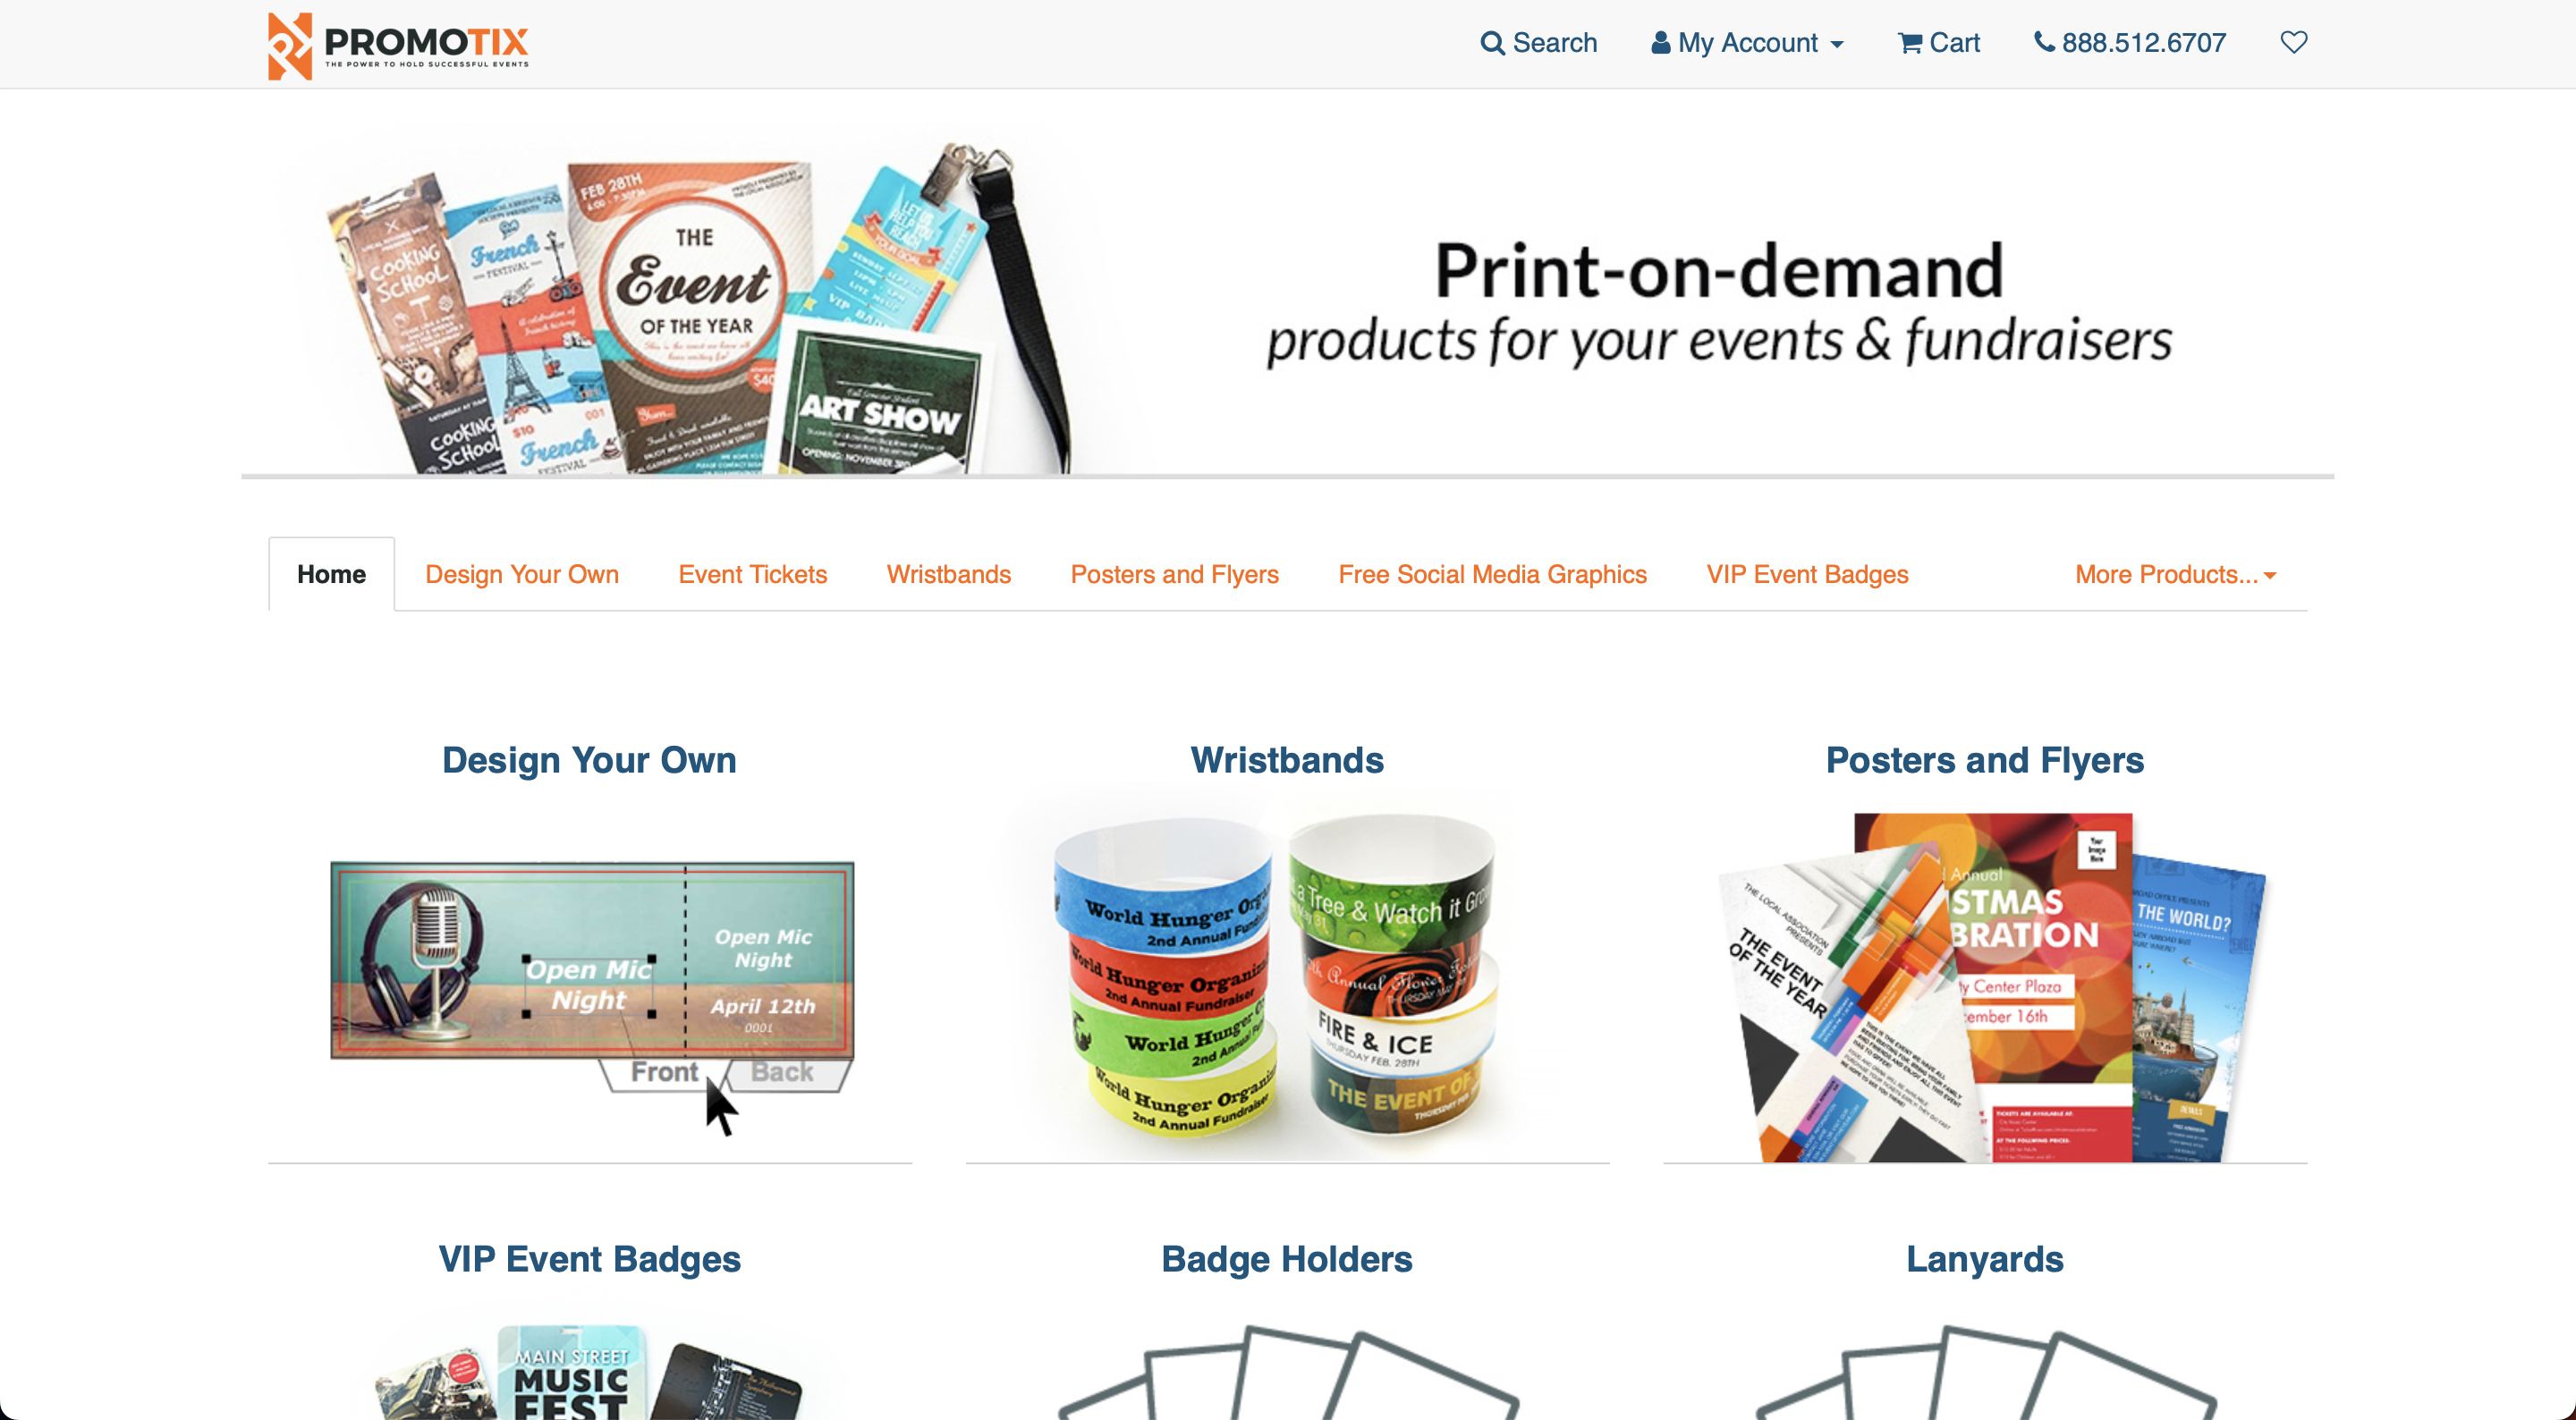
In the majority of cases, we suggest selling all of your tickets on PromoTix digitally since it's easy and free. In some cases however, you may want to order physical printed tickets: complete with your branding and scannable QR codes.
With PromoTix Printing, you can design, order, and have your tickets shipped directly to your door.
You can also use PromoTix Printing for more than just printing tickets. Here are some examples:
- Wristbands
- Posters and Flyers
- VIP Event Badges
- And more...
1. Visit Printing.PromoTix.com
Visit this URL: https://printing.promotix.com
2. Click on "Design Your Own" or "Event Tickets"
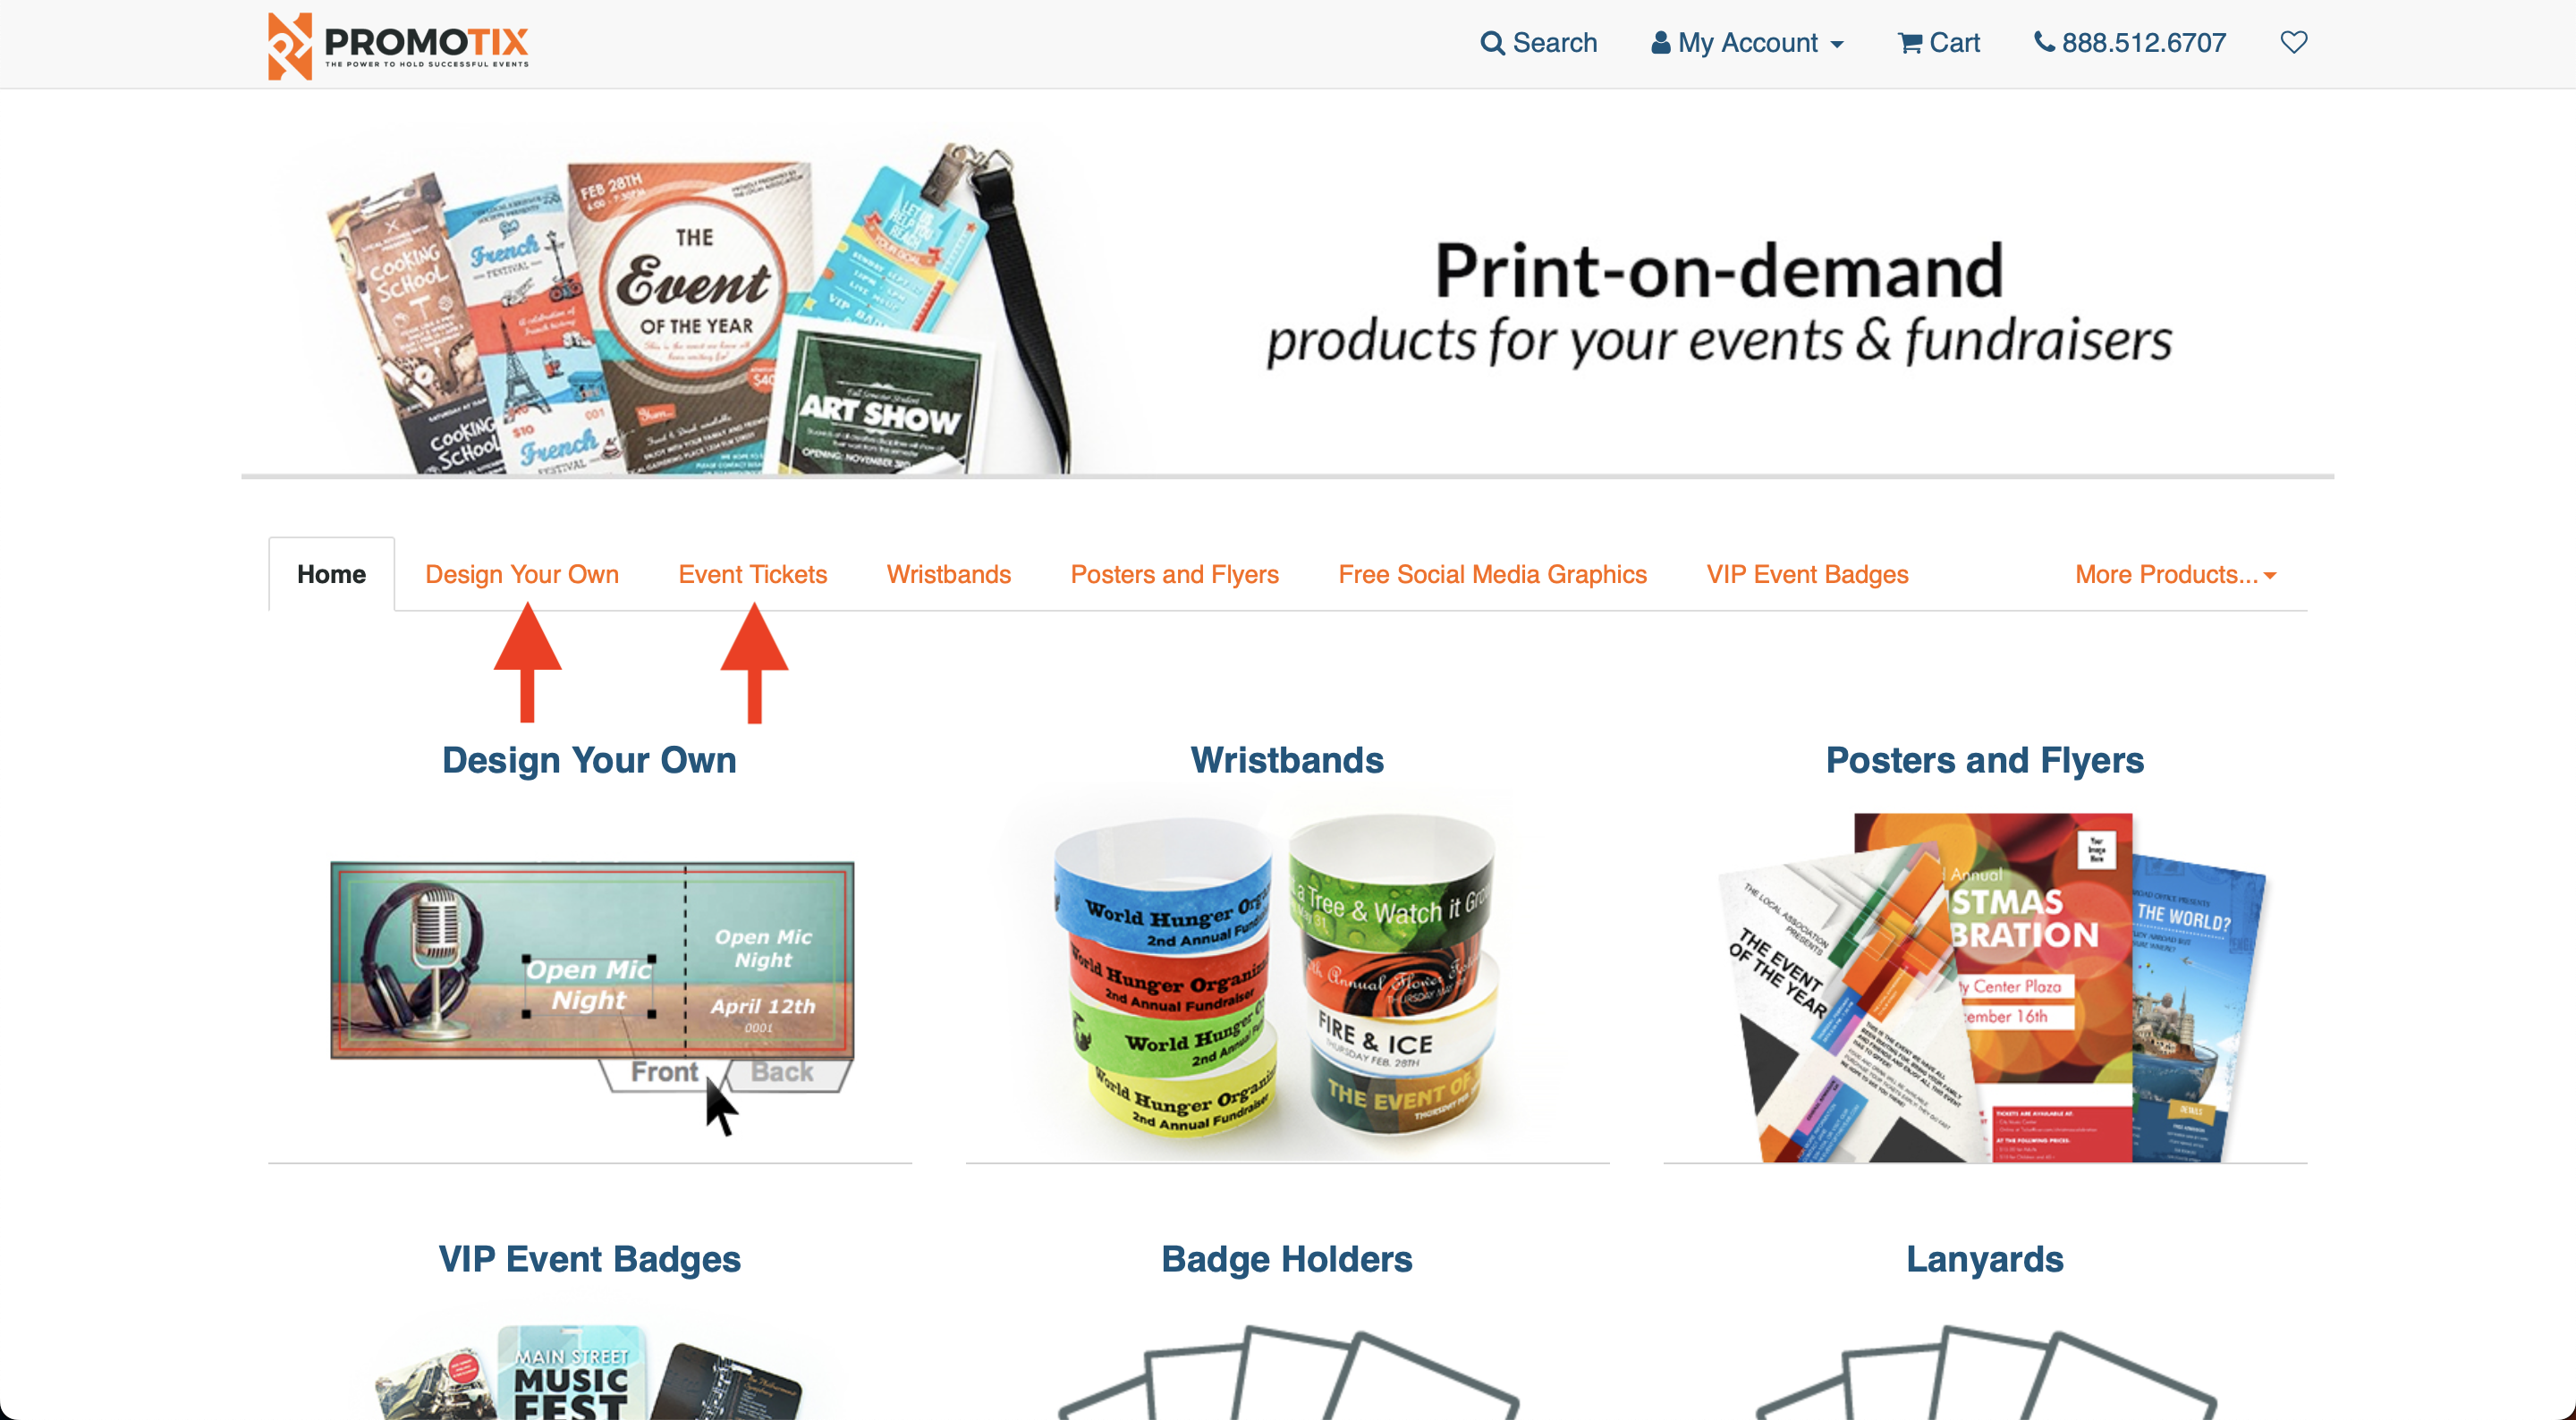 Click on Design Your Own if you would like to select a size and design your own tickets from scratch. Click on Event Tickets to browse from pre-made designs already available.
3. Select a size
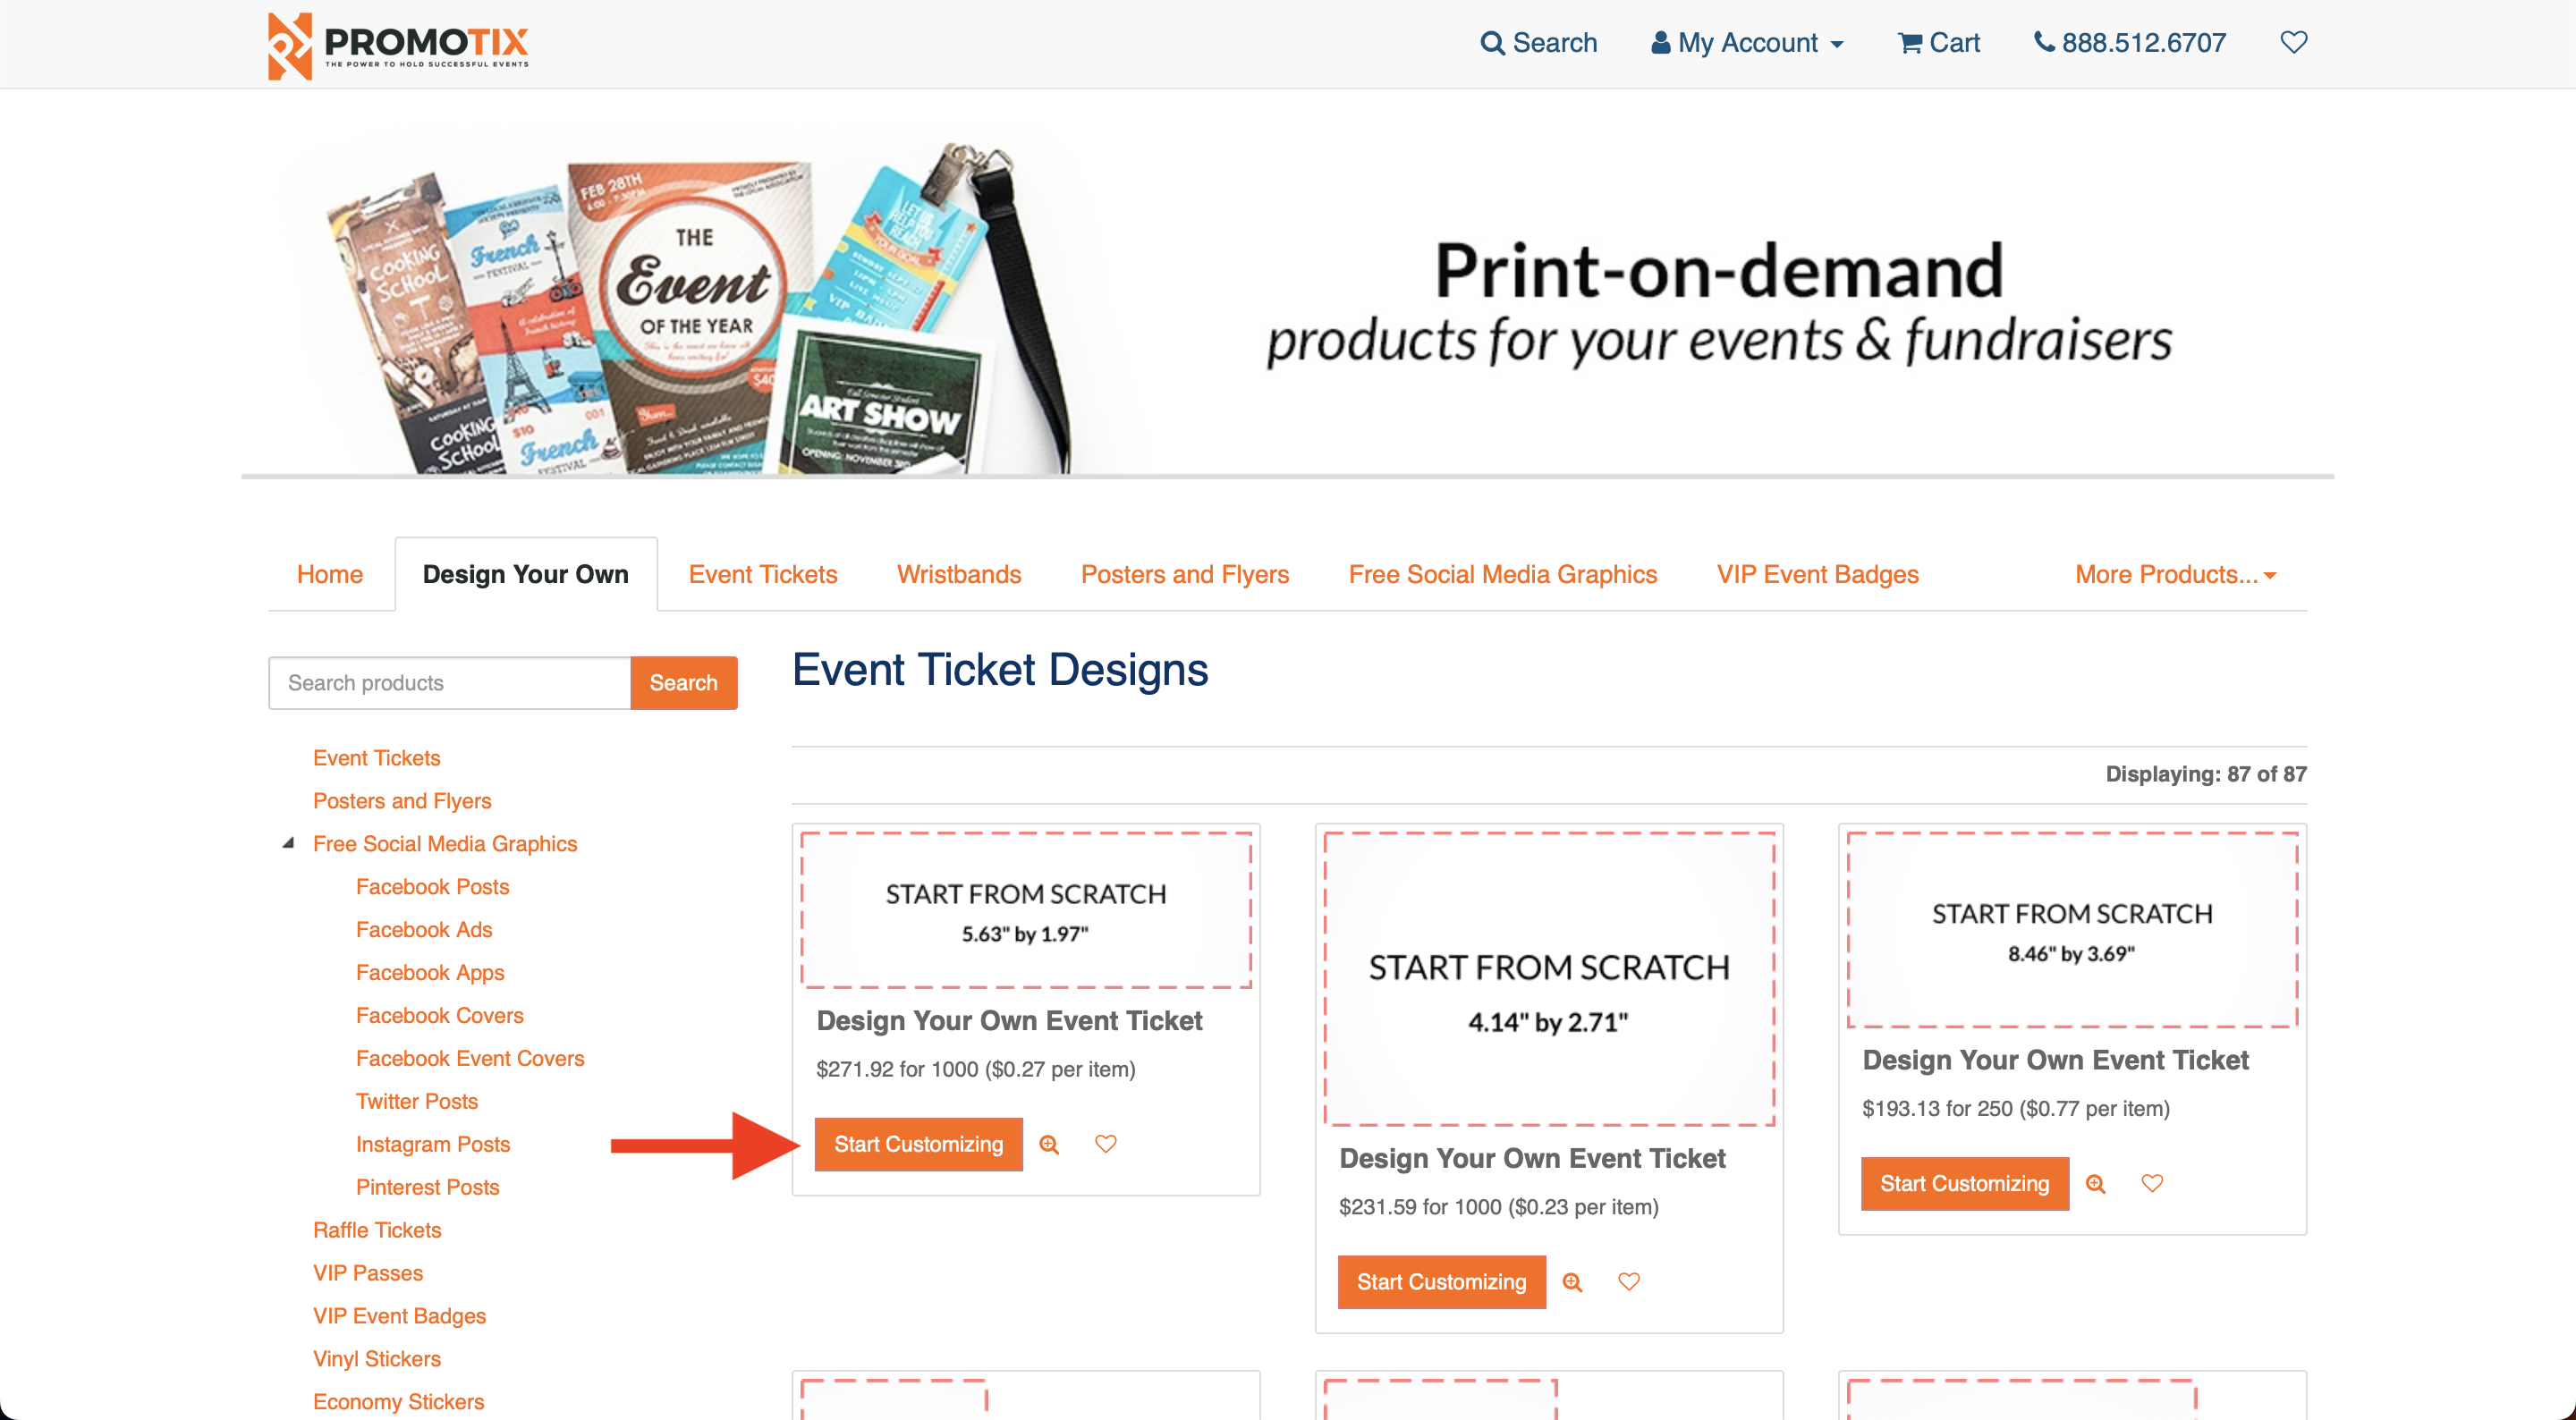 Select a size and click on the Start Customizing button.
NOTE: your pricing will vary based on how many tickets you order. As a general rule, the cost per-ticket will be lower for larger orders.
For the next step, you will need to generate QR codes in your event(s) on PromoTix so that each printed ticket will have a unique, scannable QR code on it:
4. Navigate to your event's Guest list tab

- Open a new tab in your web browser
- Login to your PromoTix account
- Click on your event
- Click on the Guest list tab in the drawer on the left side of the screen
5. Create a new guest list
 Click on the New guest list button.
6. Enter in a title for your new guest list
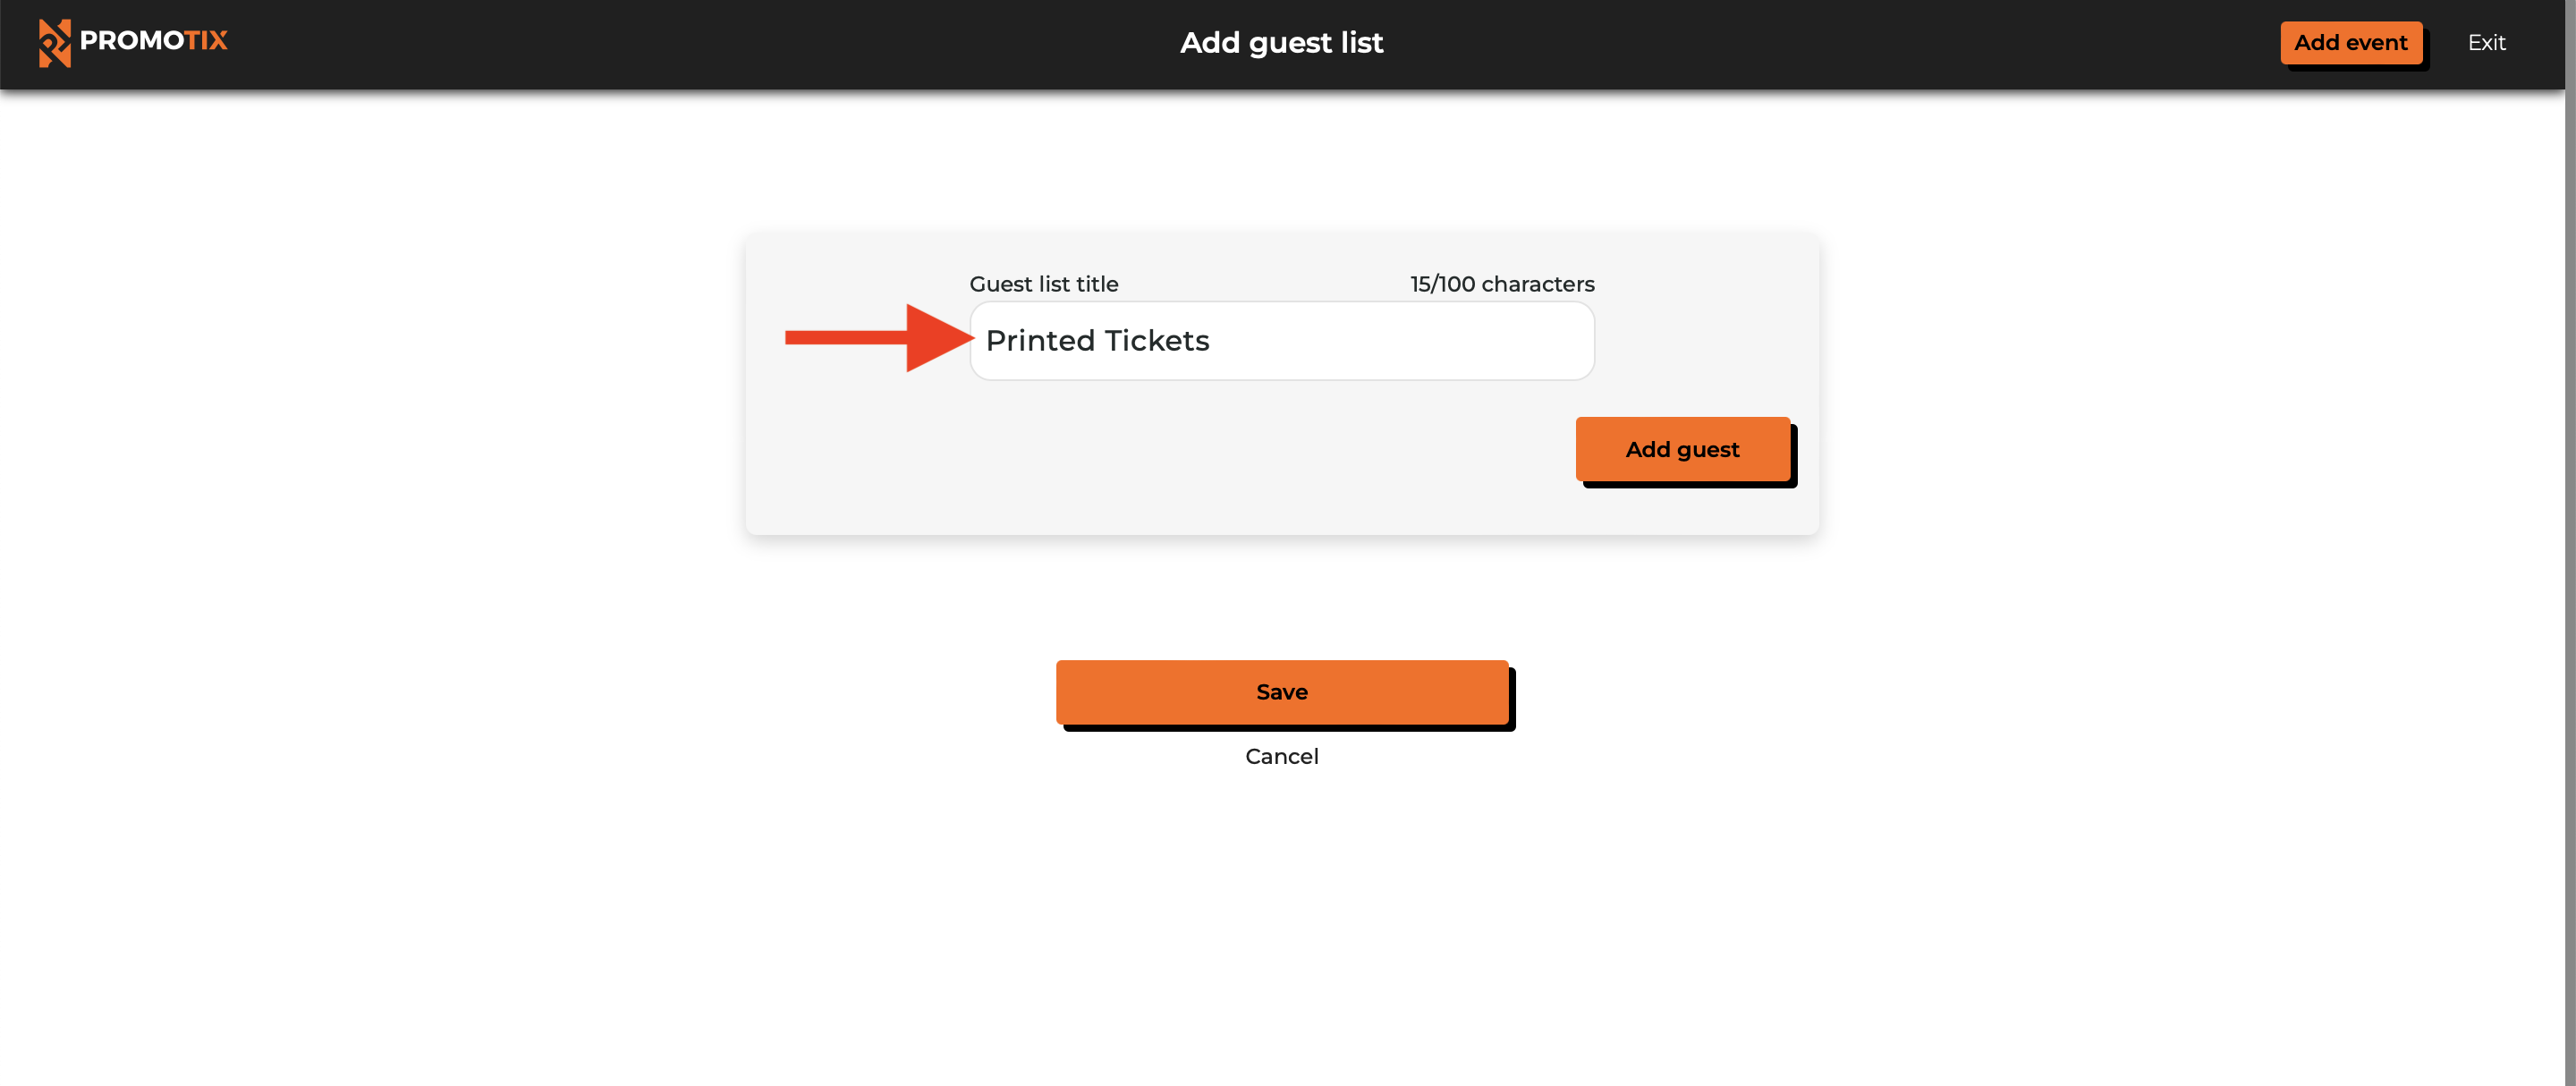 Enter in a title for your new guest list (ex. Printed Tickets).
Afterwards, click on the Save button.
7. Click on "Actions," and then "Add guest"
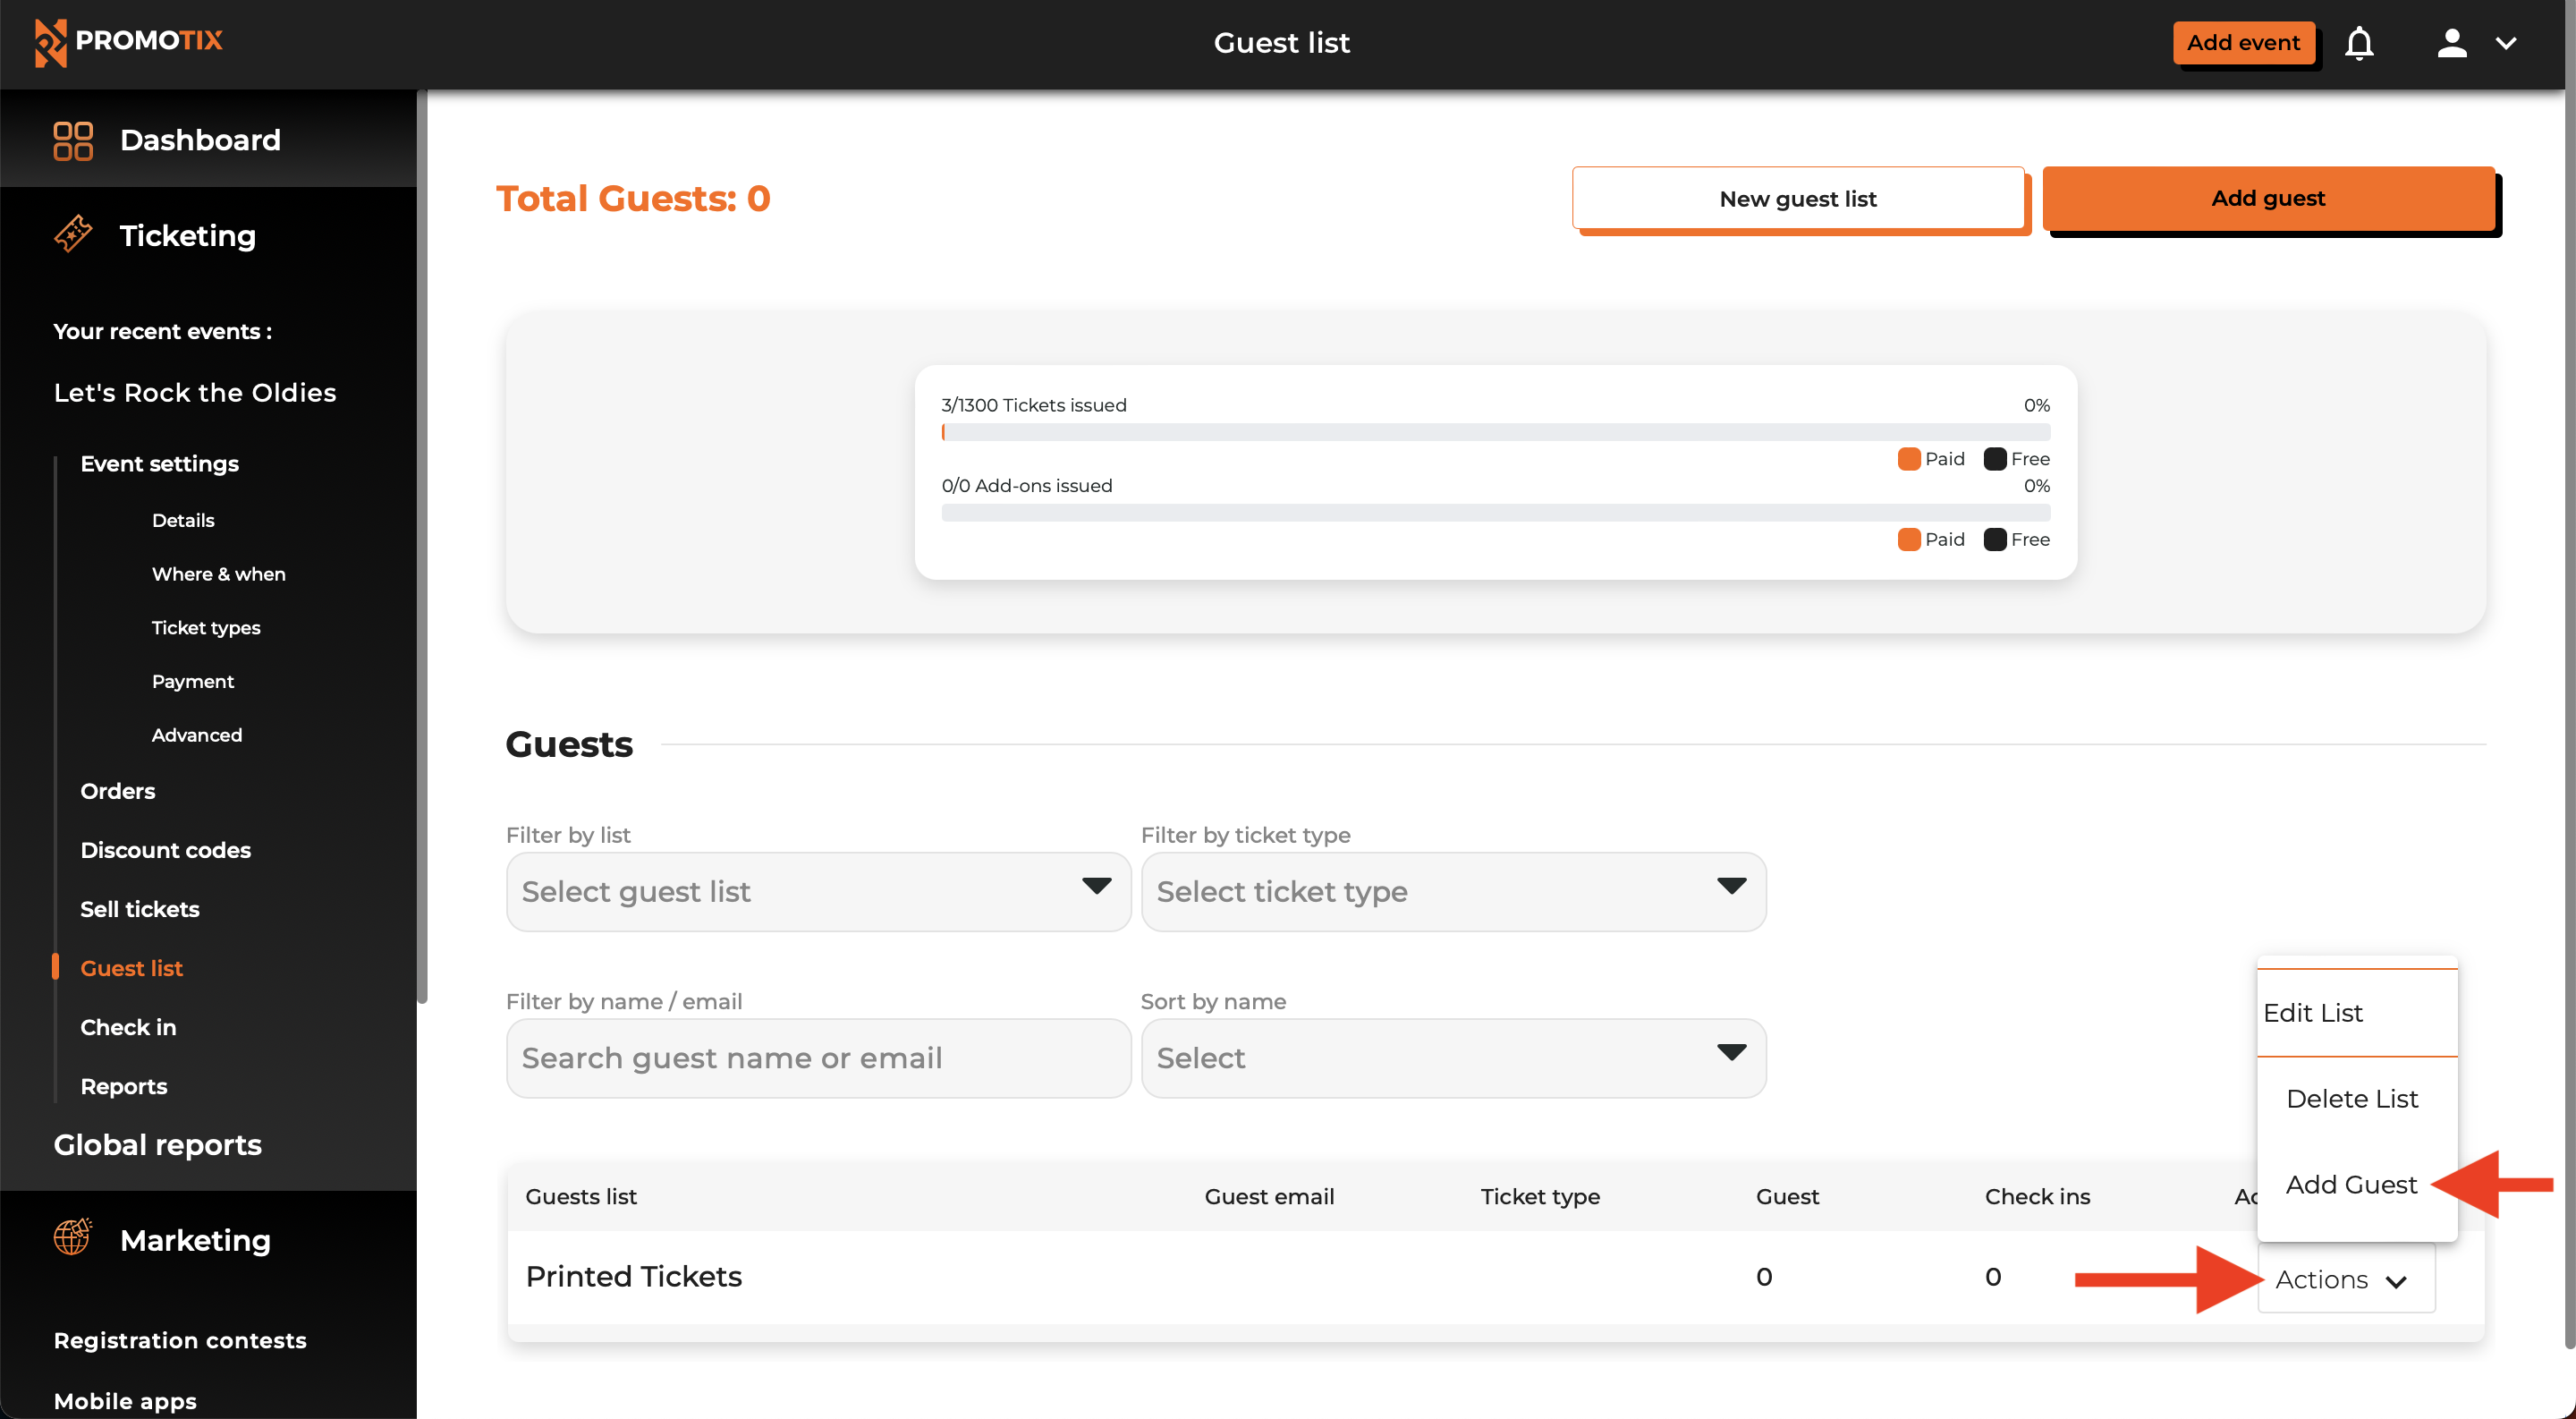
To the right of the guest list you just created, click on Actions and then click on Add Guest.
8. Fill out the required fields
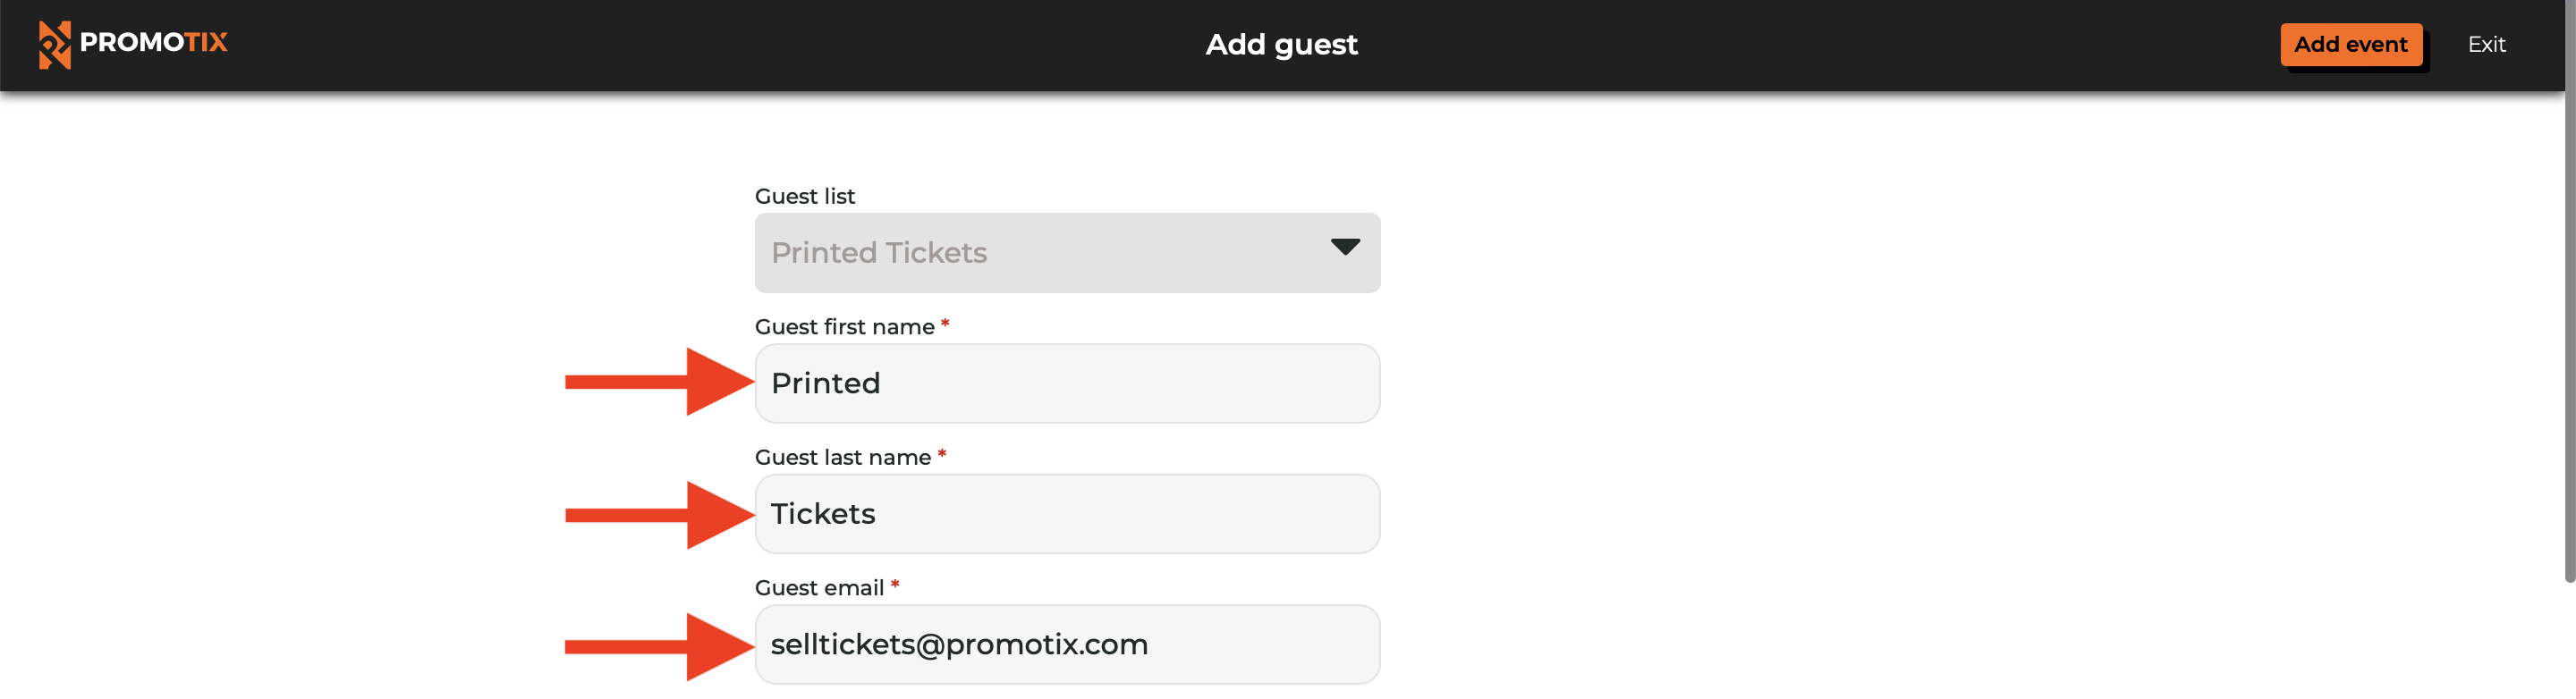 Fill out the (3) required fields at the top of the screen. While the information you enter in here is inconsequential, here is what we suggest:
- Guest first name: Printed
- Guest last name: Tickets
- Guest email: selltickets@promotix.com
Afterwards, scroll down towards the bottom of the screen.
9. Select how many QR codes you would like to generate
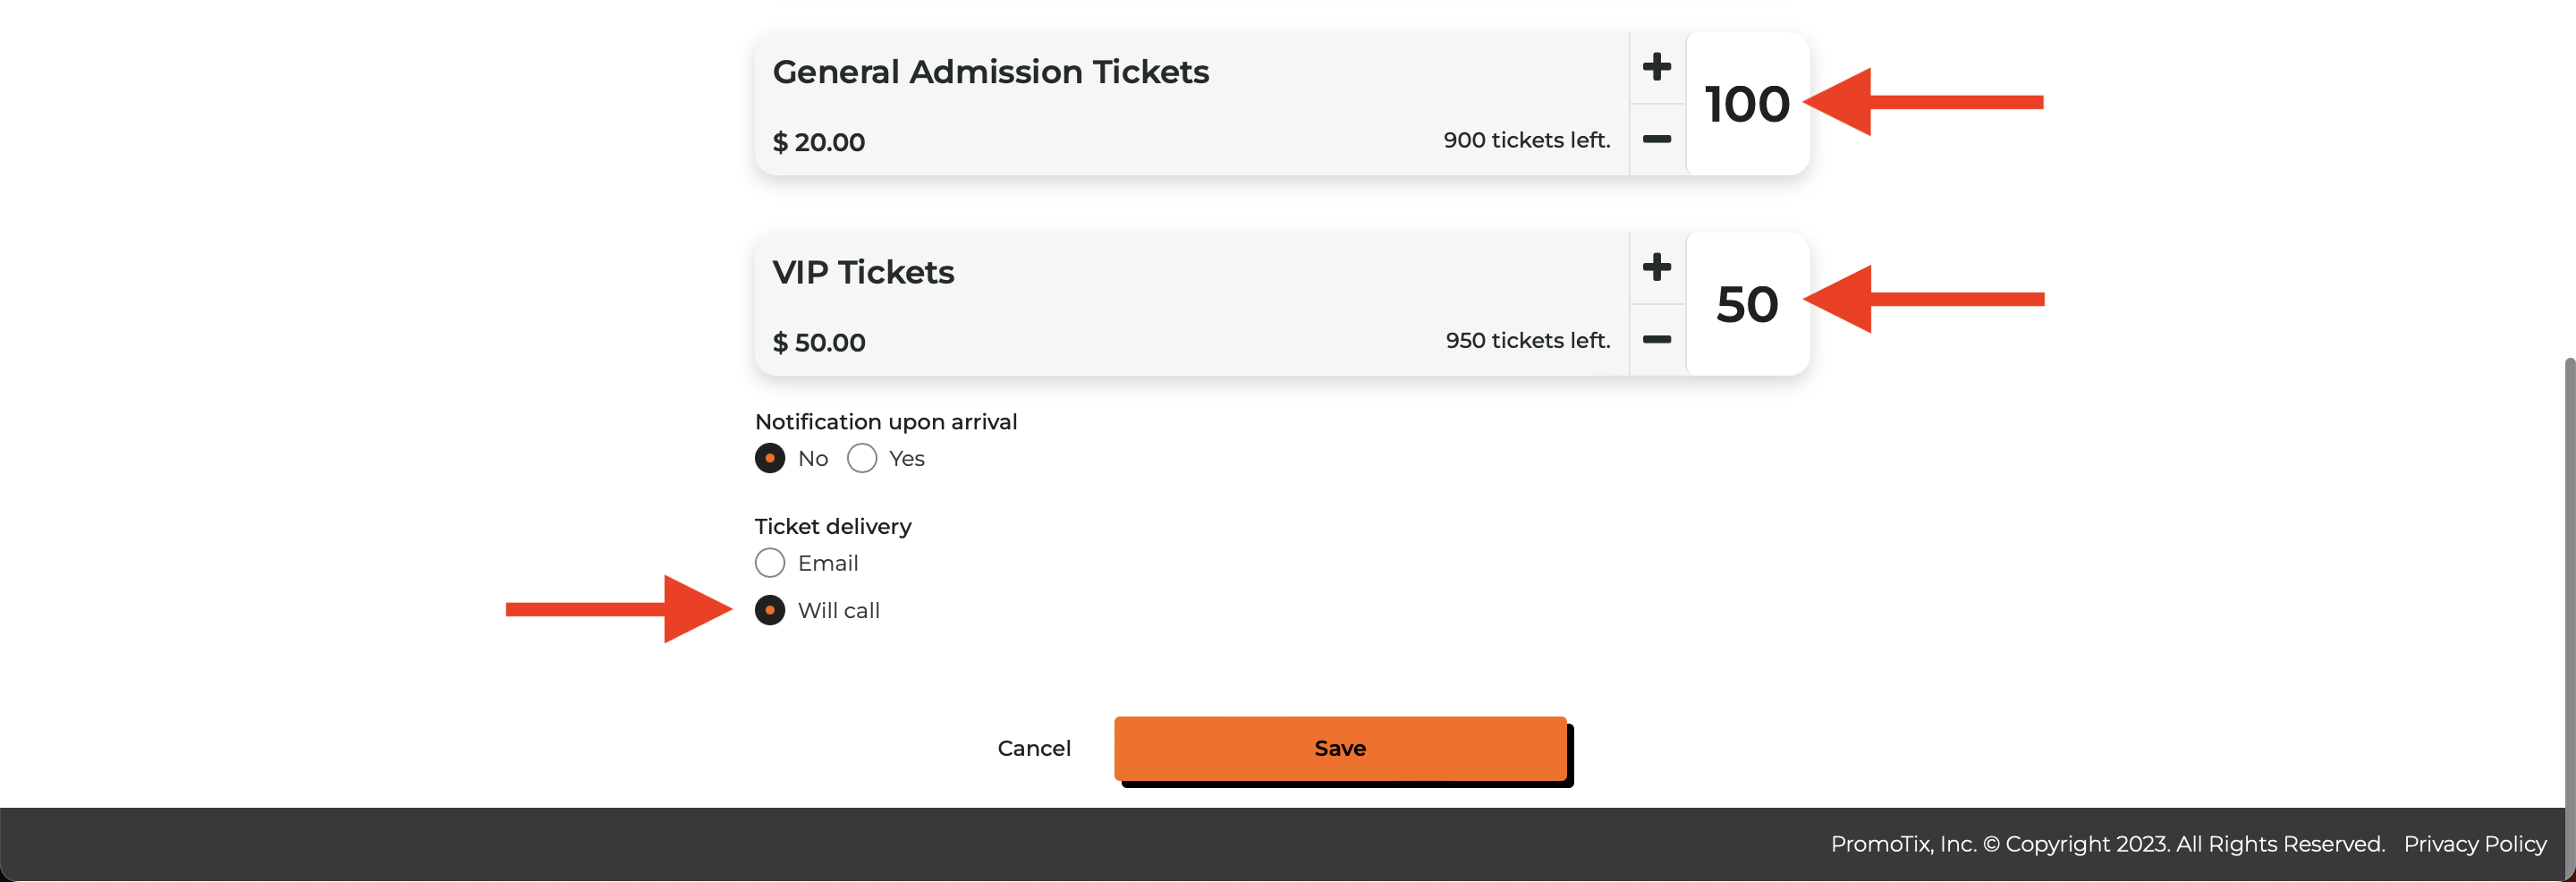 Use the + and - buttons to select how many QR codes you would like to generate (this should align with how many tickets you plan to order). You can also generate QR codes for multiple ticket types at once.
TIP: if you would like to keep your printed ticket inventory separate from your standard ticket inventory, create new ticket type(s) specifically for your printed ticket inventory. Make sure to mark them as "Private" so they won't show up on your public event page.
Afterwards, click on the Will call option.
Once you're done, click on the Save button.
10. Navigate to your event's Reports tab
 Click on the Reports tab in the drawer on the left side of the screen.
11. Download your event's Attendee report
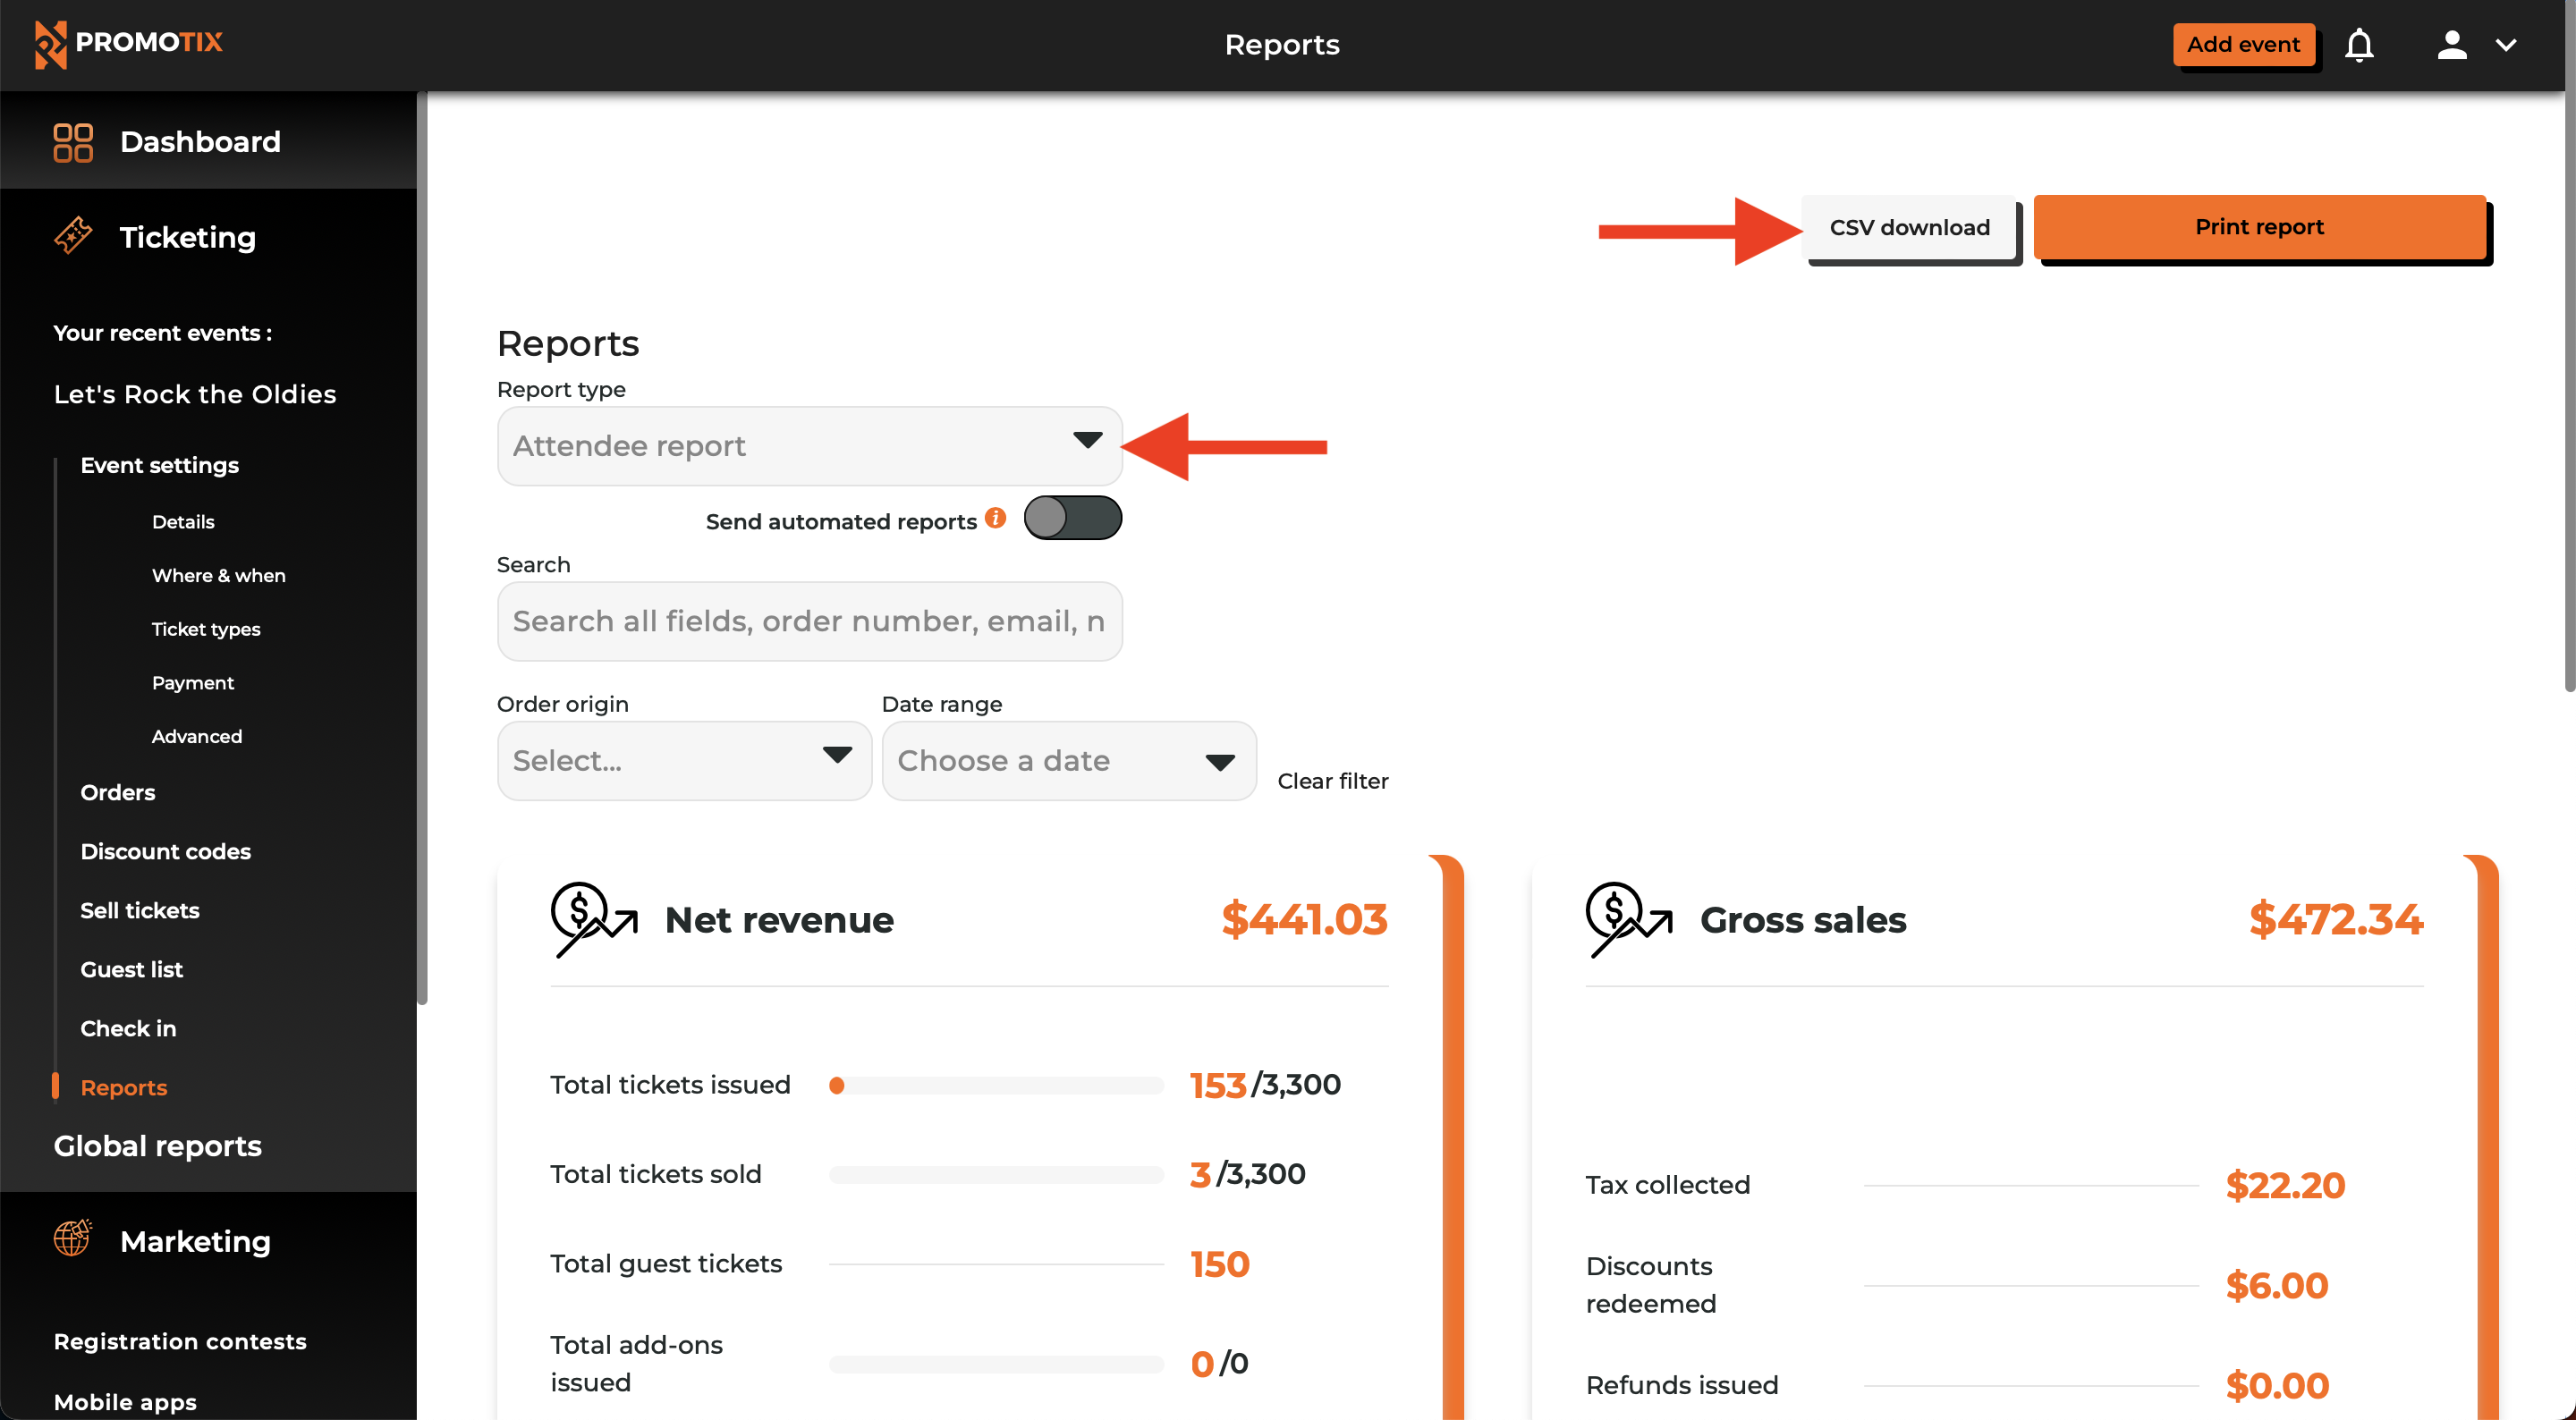
- In the Report type dropdown menu, select the Attendee report.
- Afterwards, click on the CSV download button.
- Afterwards, open up the download .csv file on your device.
12. Format the .csv file
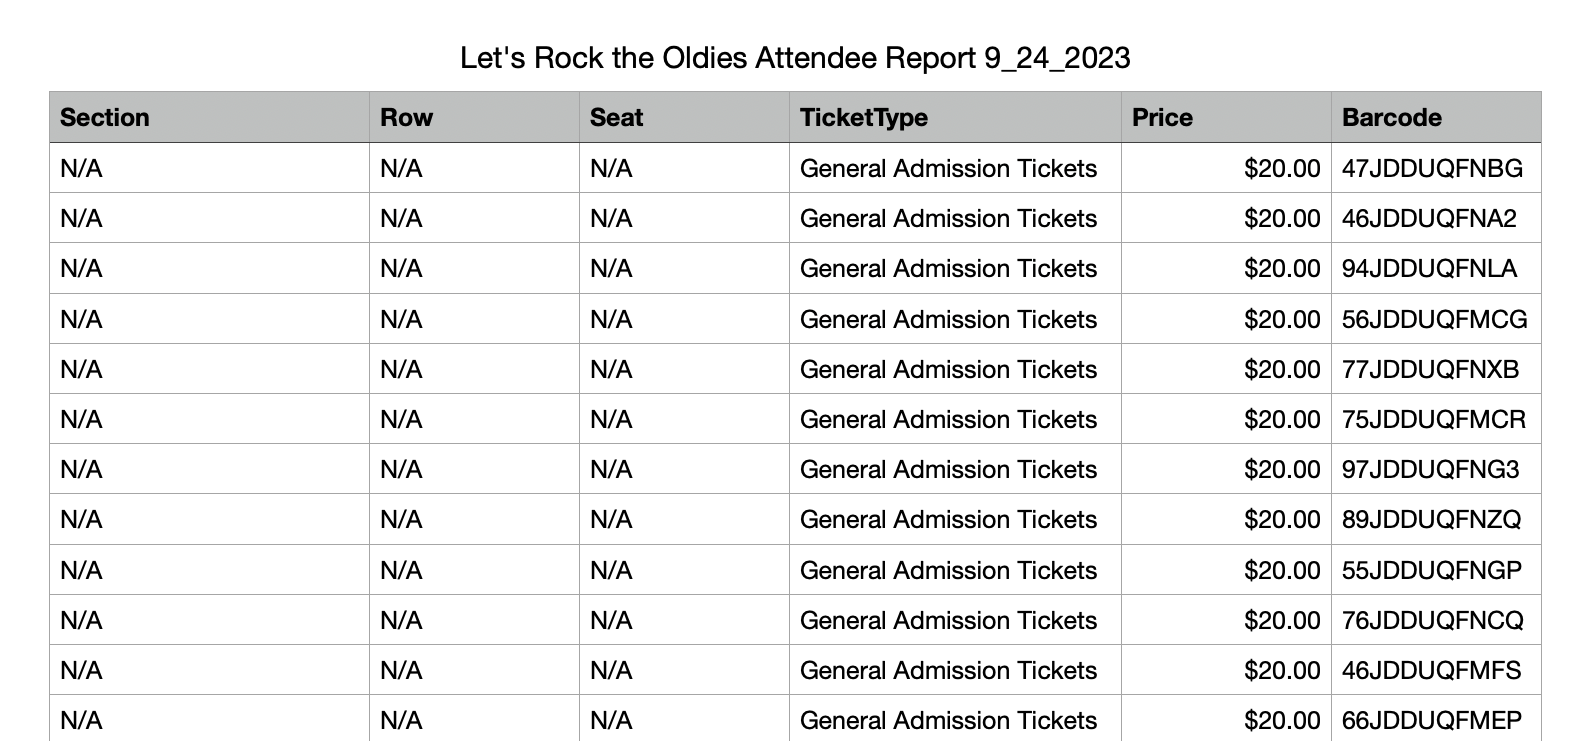
- Delete all of the columns except for (2) columns: ITEM and QR CODE
- Rename the ITEM column to TicketType
- Rename the QR CODE column to Barcode
- Delete all of the rows except for the "Printed Tickets" rows which were created in the previous steps
- Add (3) new columns to the left of the TicketType column:
- Section
- Row
- Seat
- Add (1) new column to the left of the Barcode column:
- Price
- Fill in details for the (4) new columns that you created. Once you're done, the file should look like the example in the image above.
- Once you're done, save the .csv file.
TIP: if you do not plan to use one of the columns (ex. the "Seat" column for only standing room tickets), and if you would like to number your tickets, then you can use one of these unused columns to assign a number to each ticket.
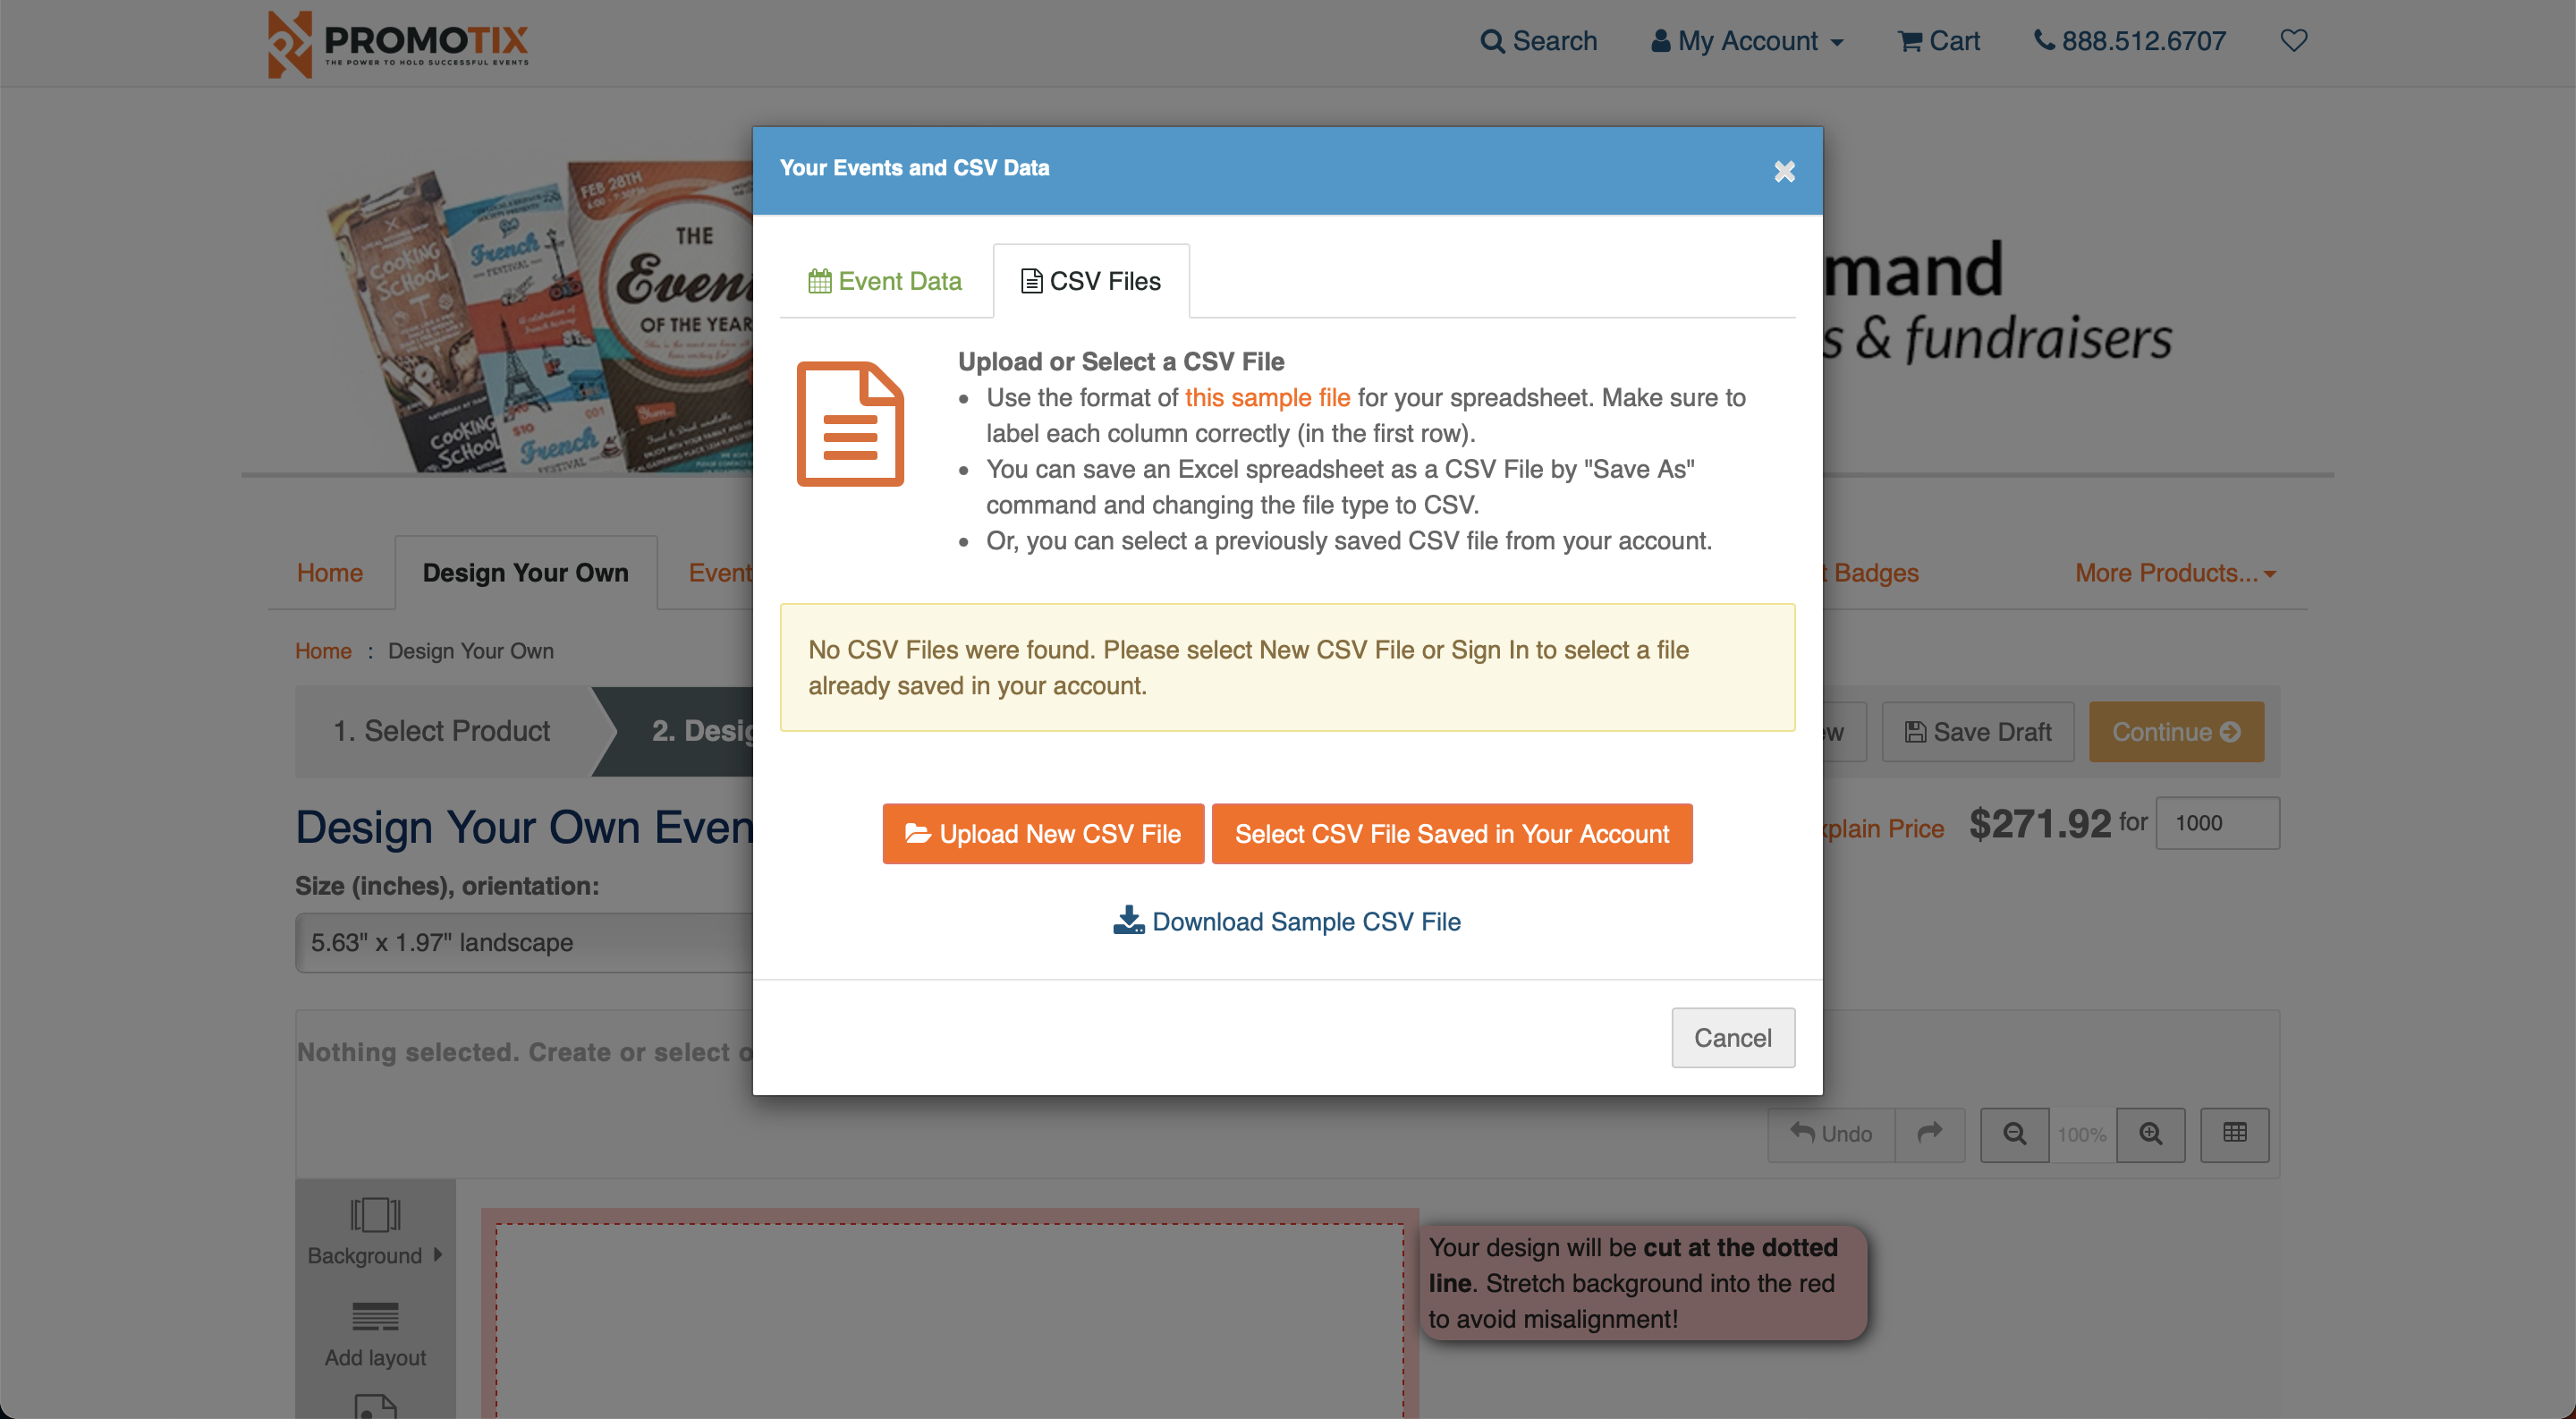
13. Upload your .csv file to Printing.PromoTix.com
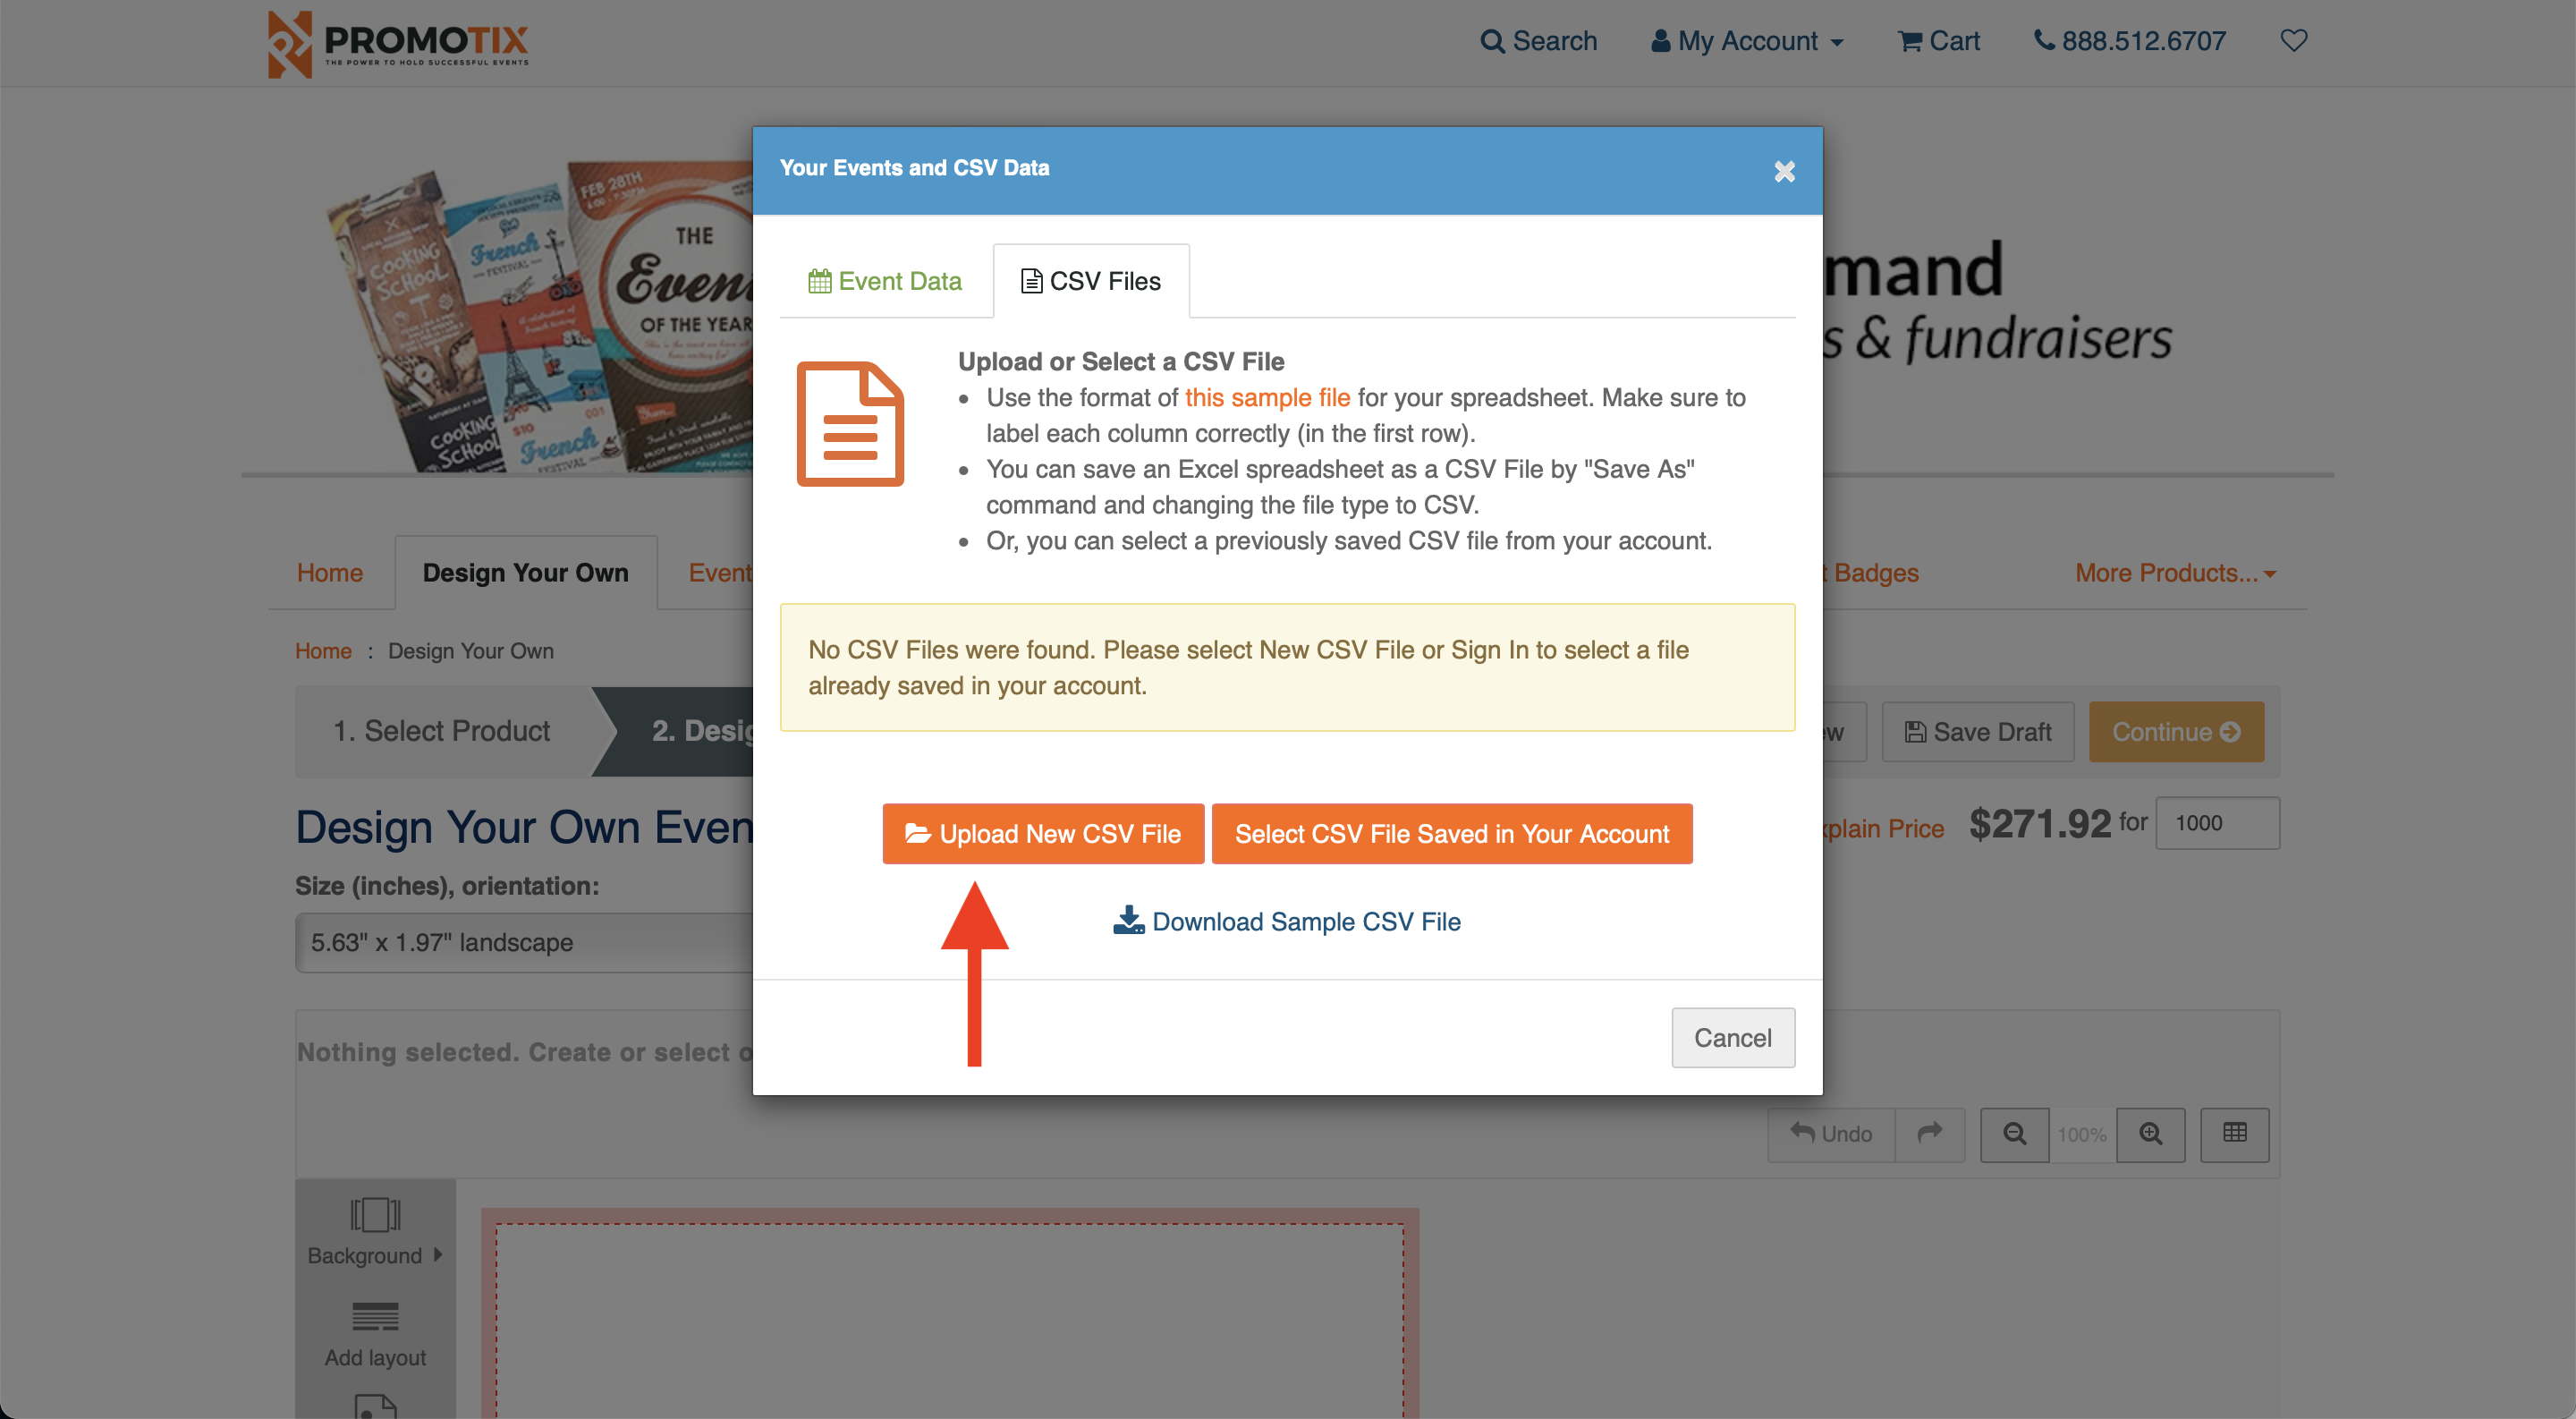
- Back on Printing.PromoTix.com, click on the Upload New CSV File button.
- Afterwards, select your .csv file in order to upload it.
14. Review your information and save
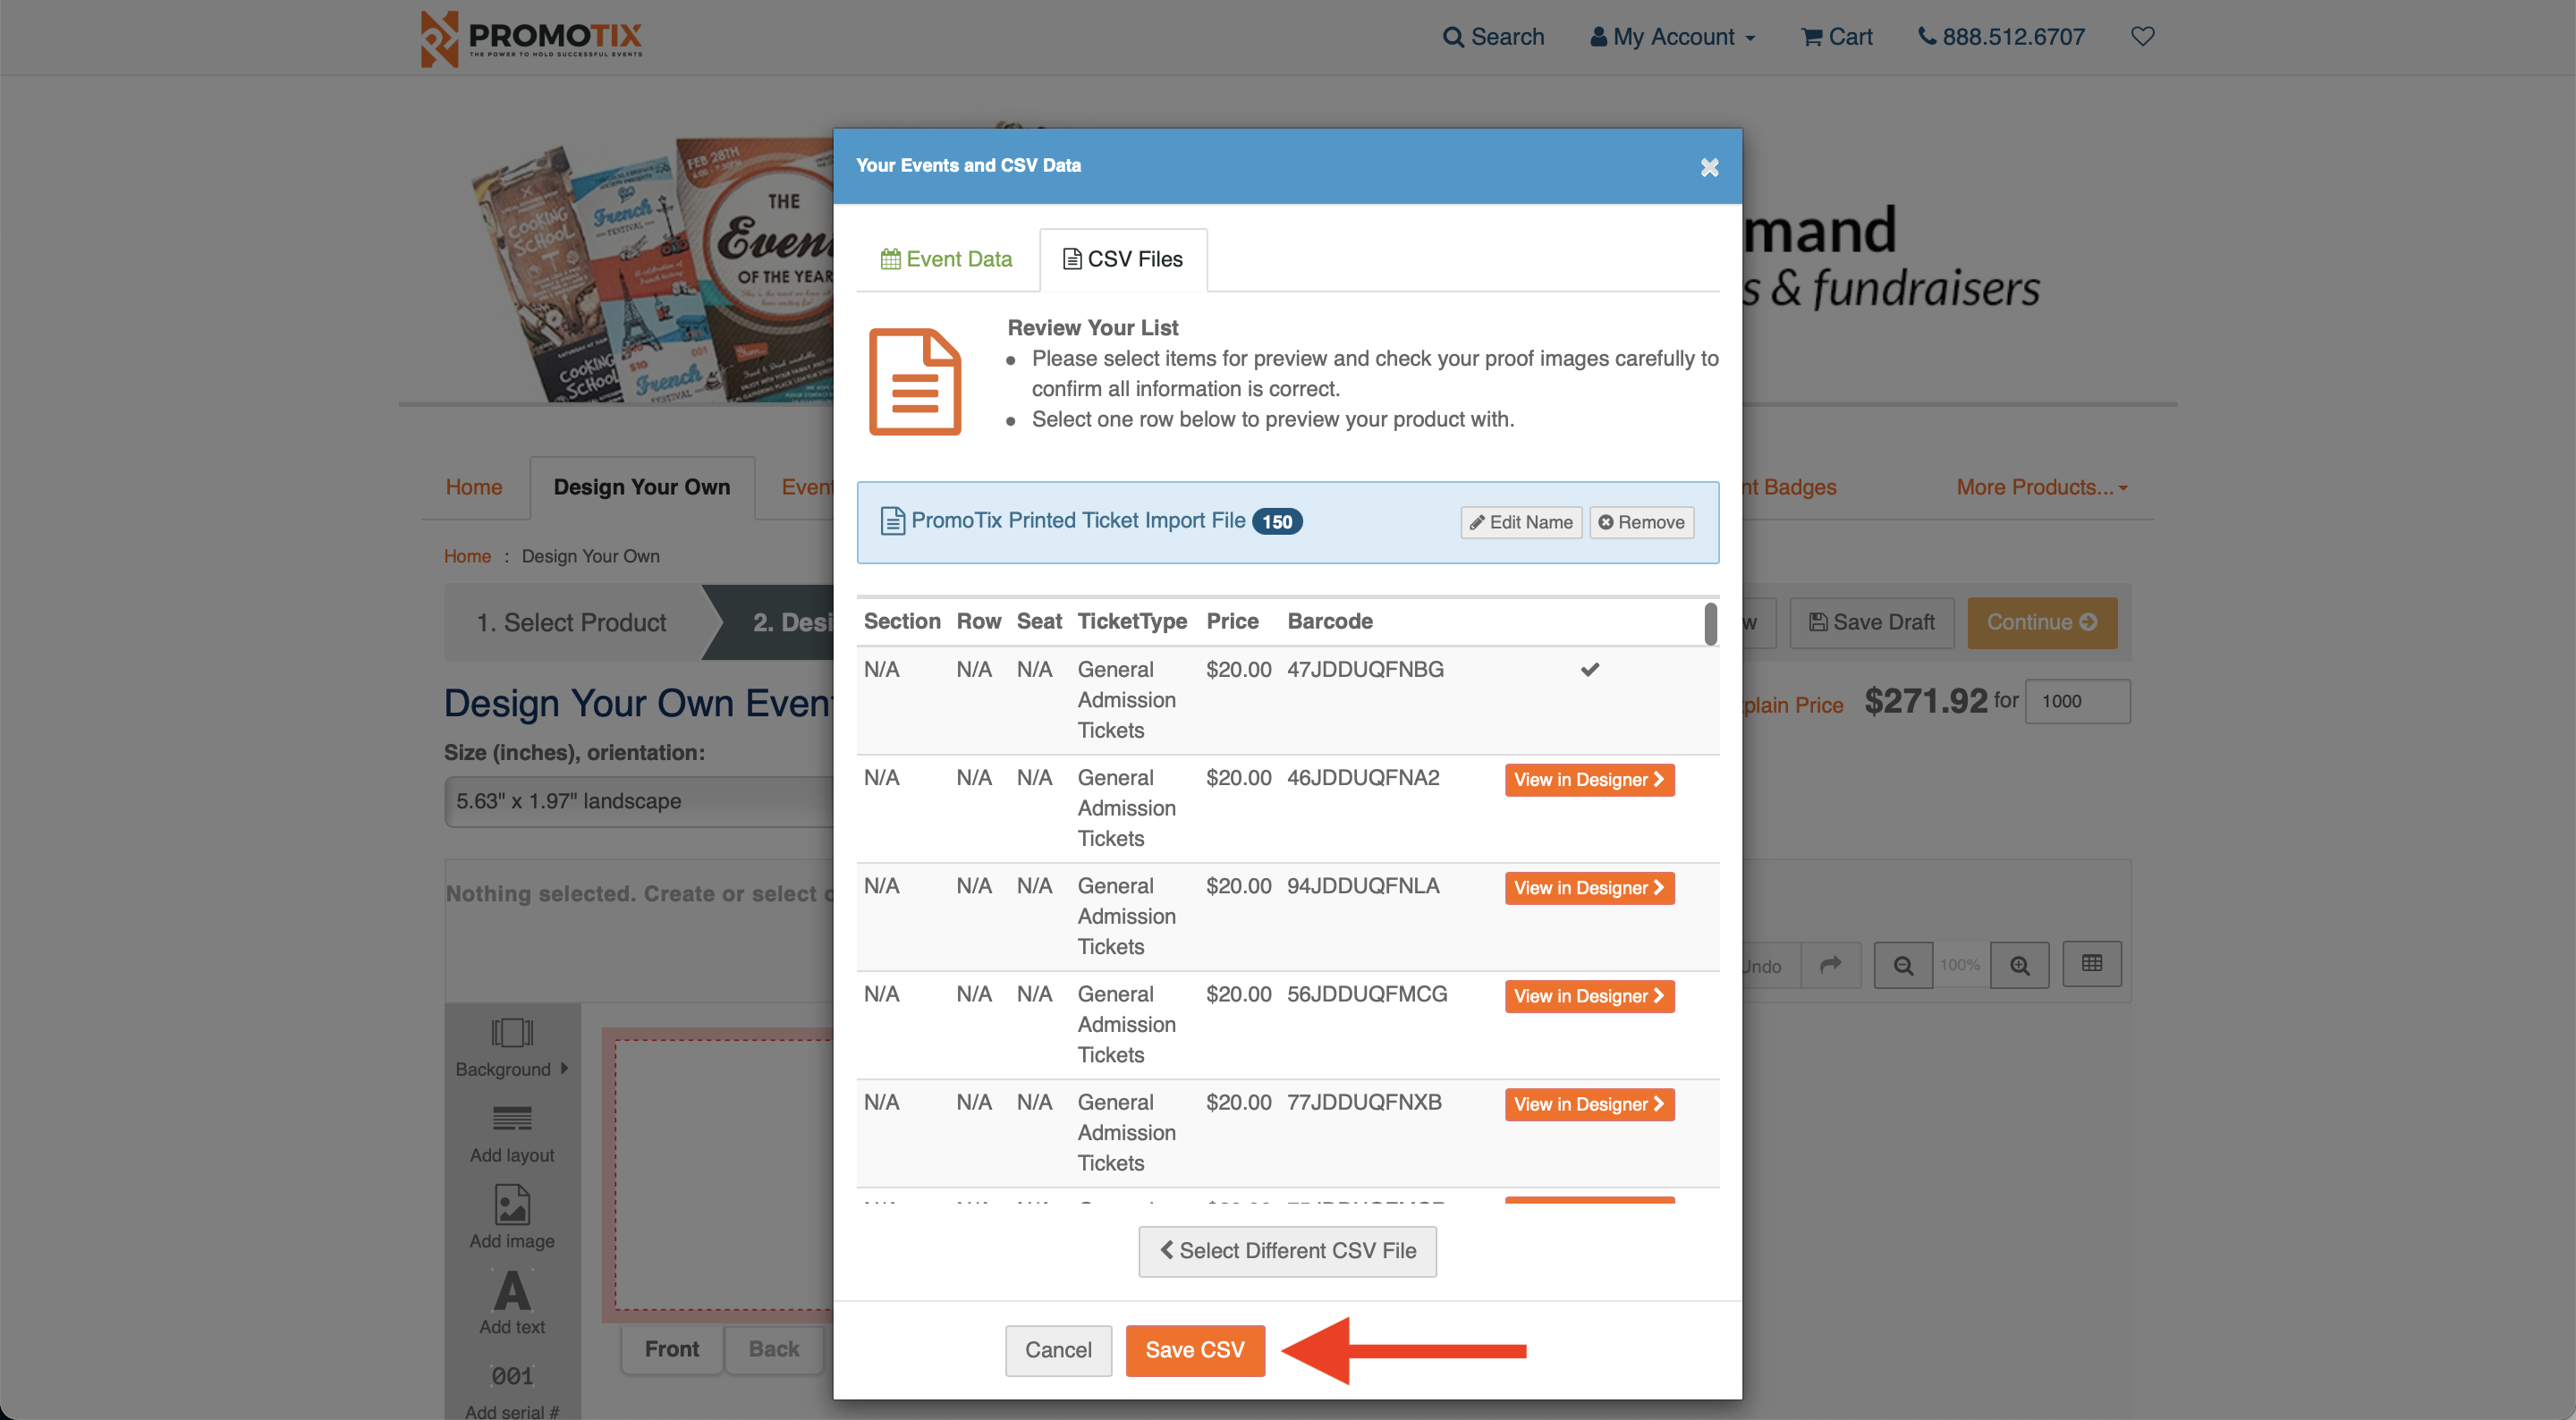
- Review your information (for example, to make sure that the columns and data appear correct).
- Once you're done, click on the Save CSV button.
- Once the popup window closes, you will notice that new text information has been added to your ticket design. We suggest clicking on each text field and deleting them (using the "delete" key) so that you again have a clean slate.
15. Upload background images to your ticket design
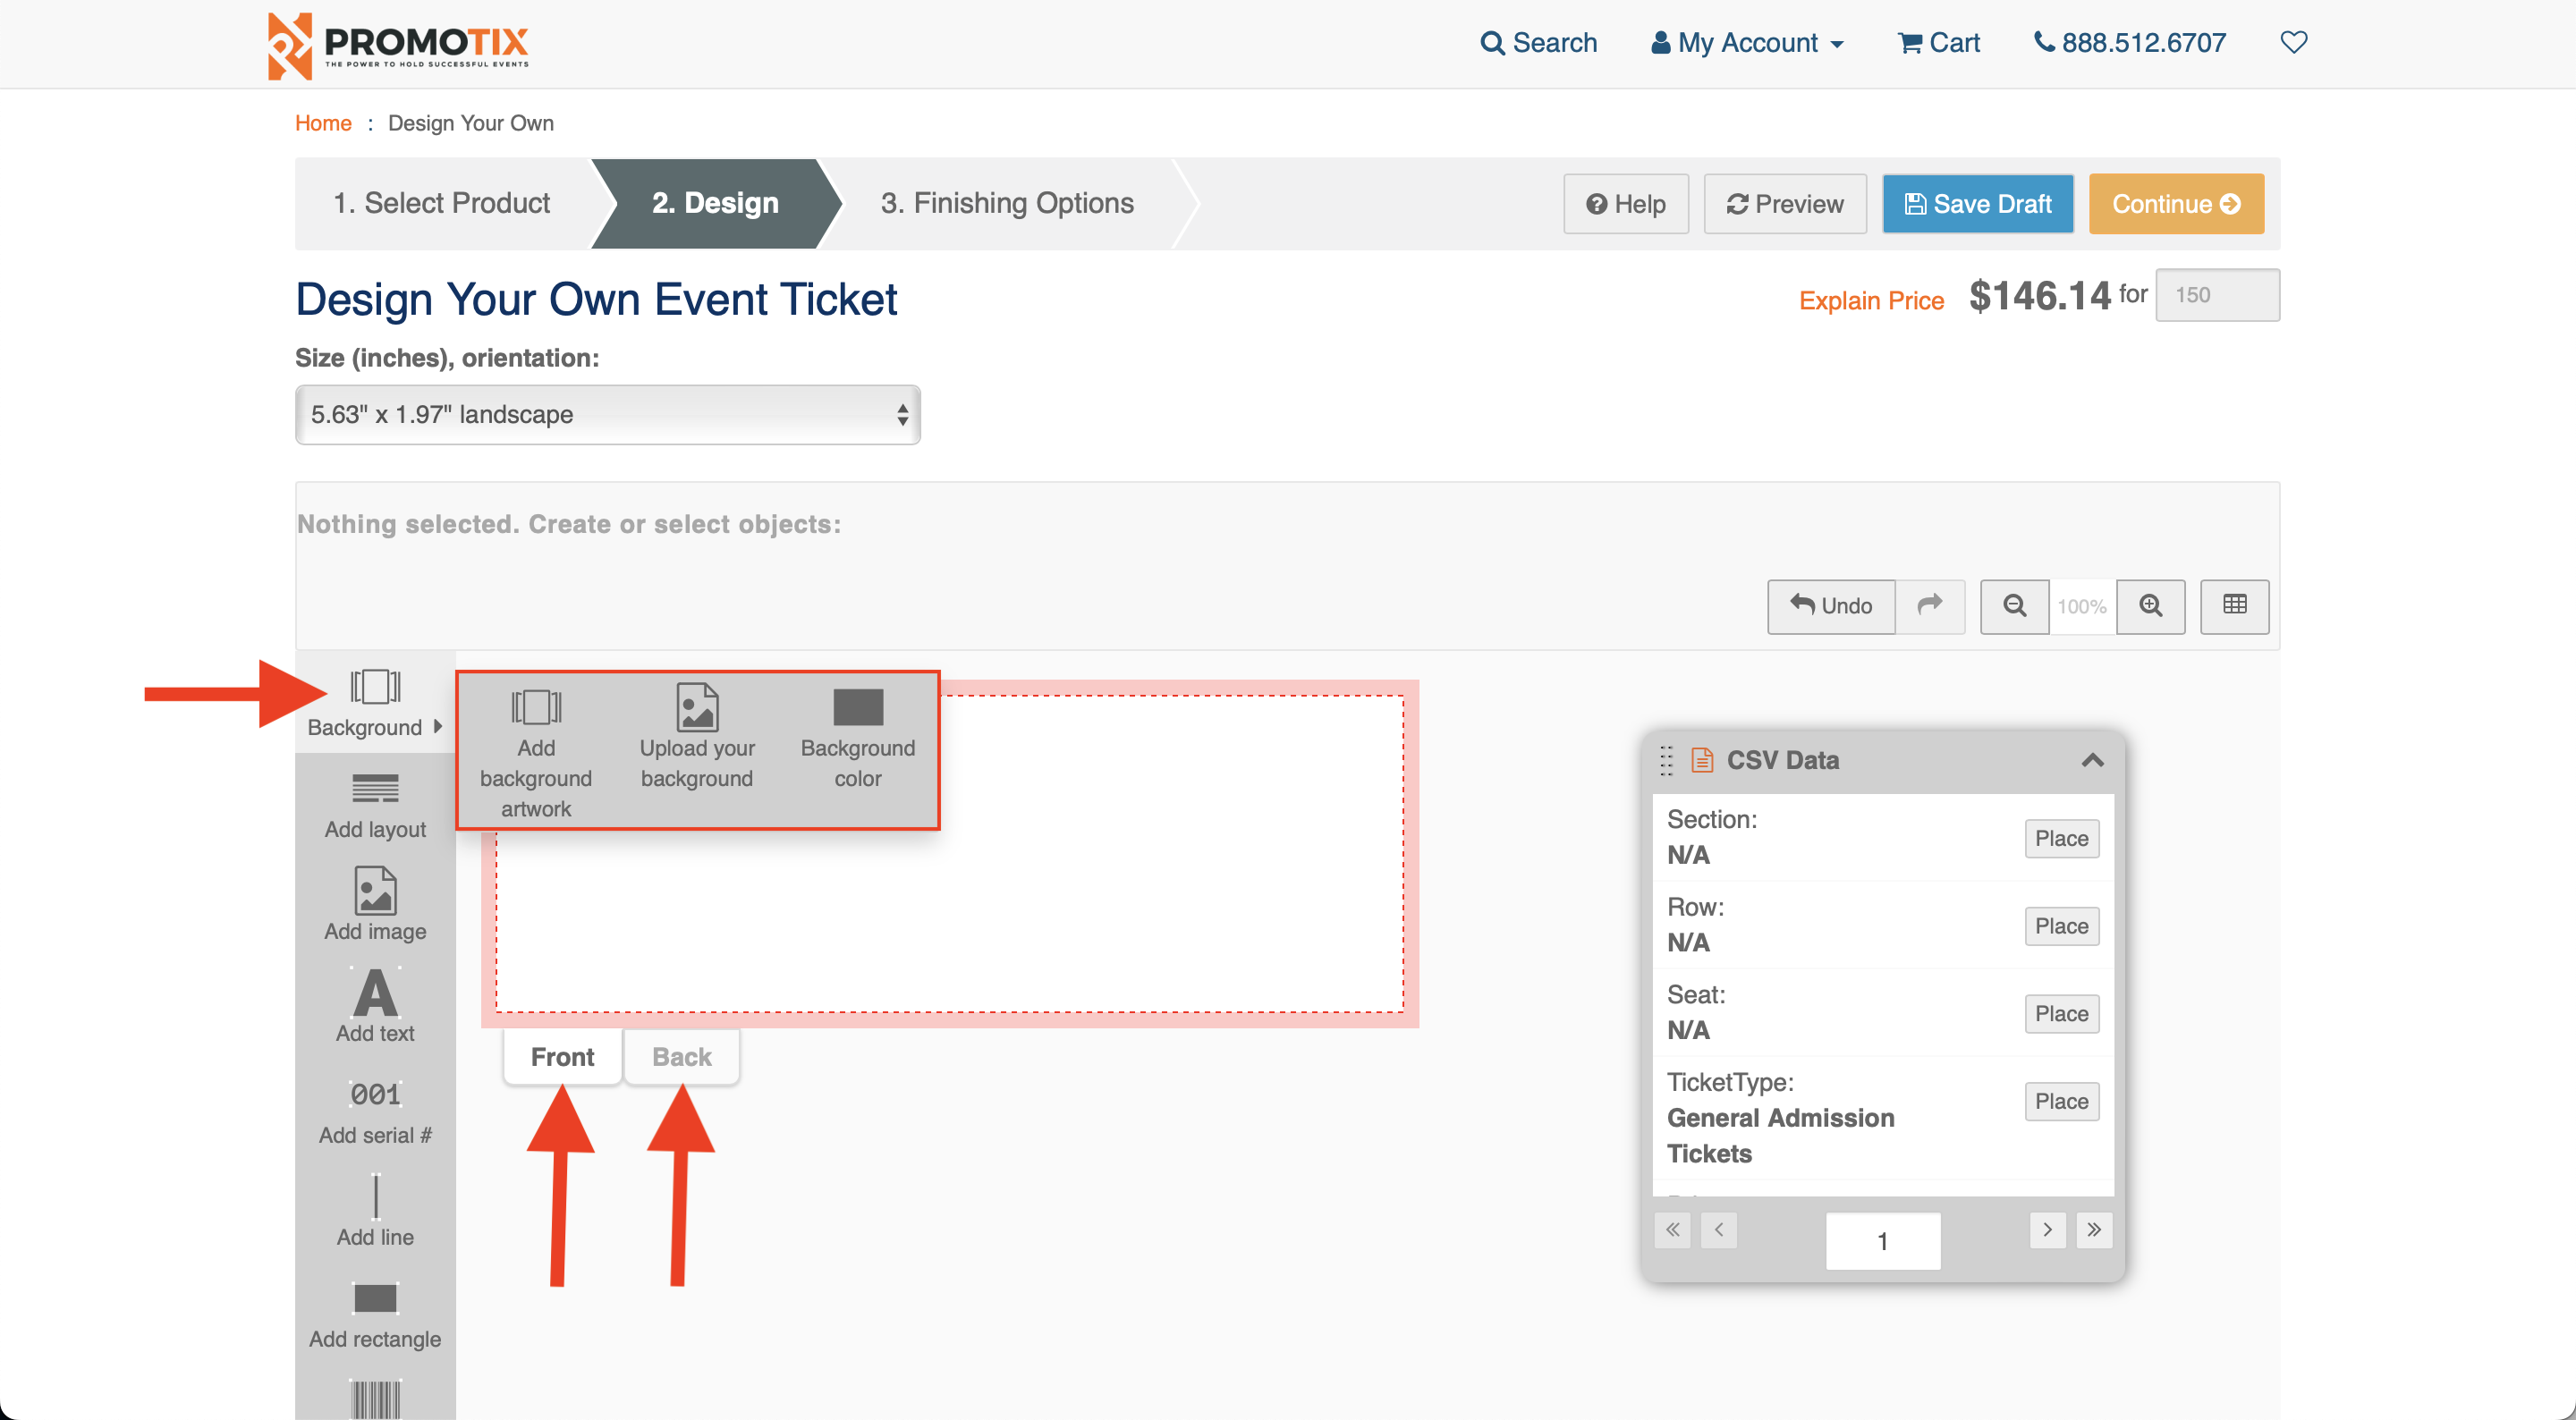
- When the Front option is selected, hover your mouse over the Background button and then select an option to upload a background image to the front of your ticket design.
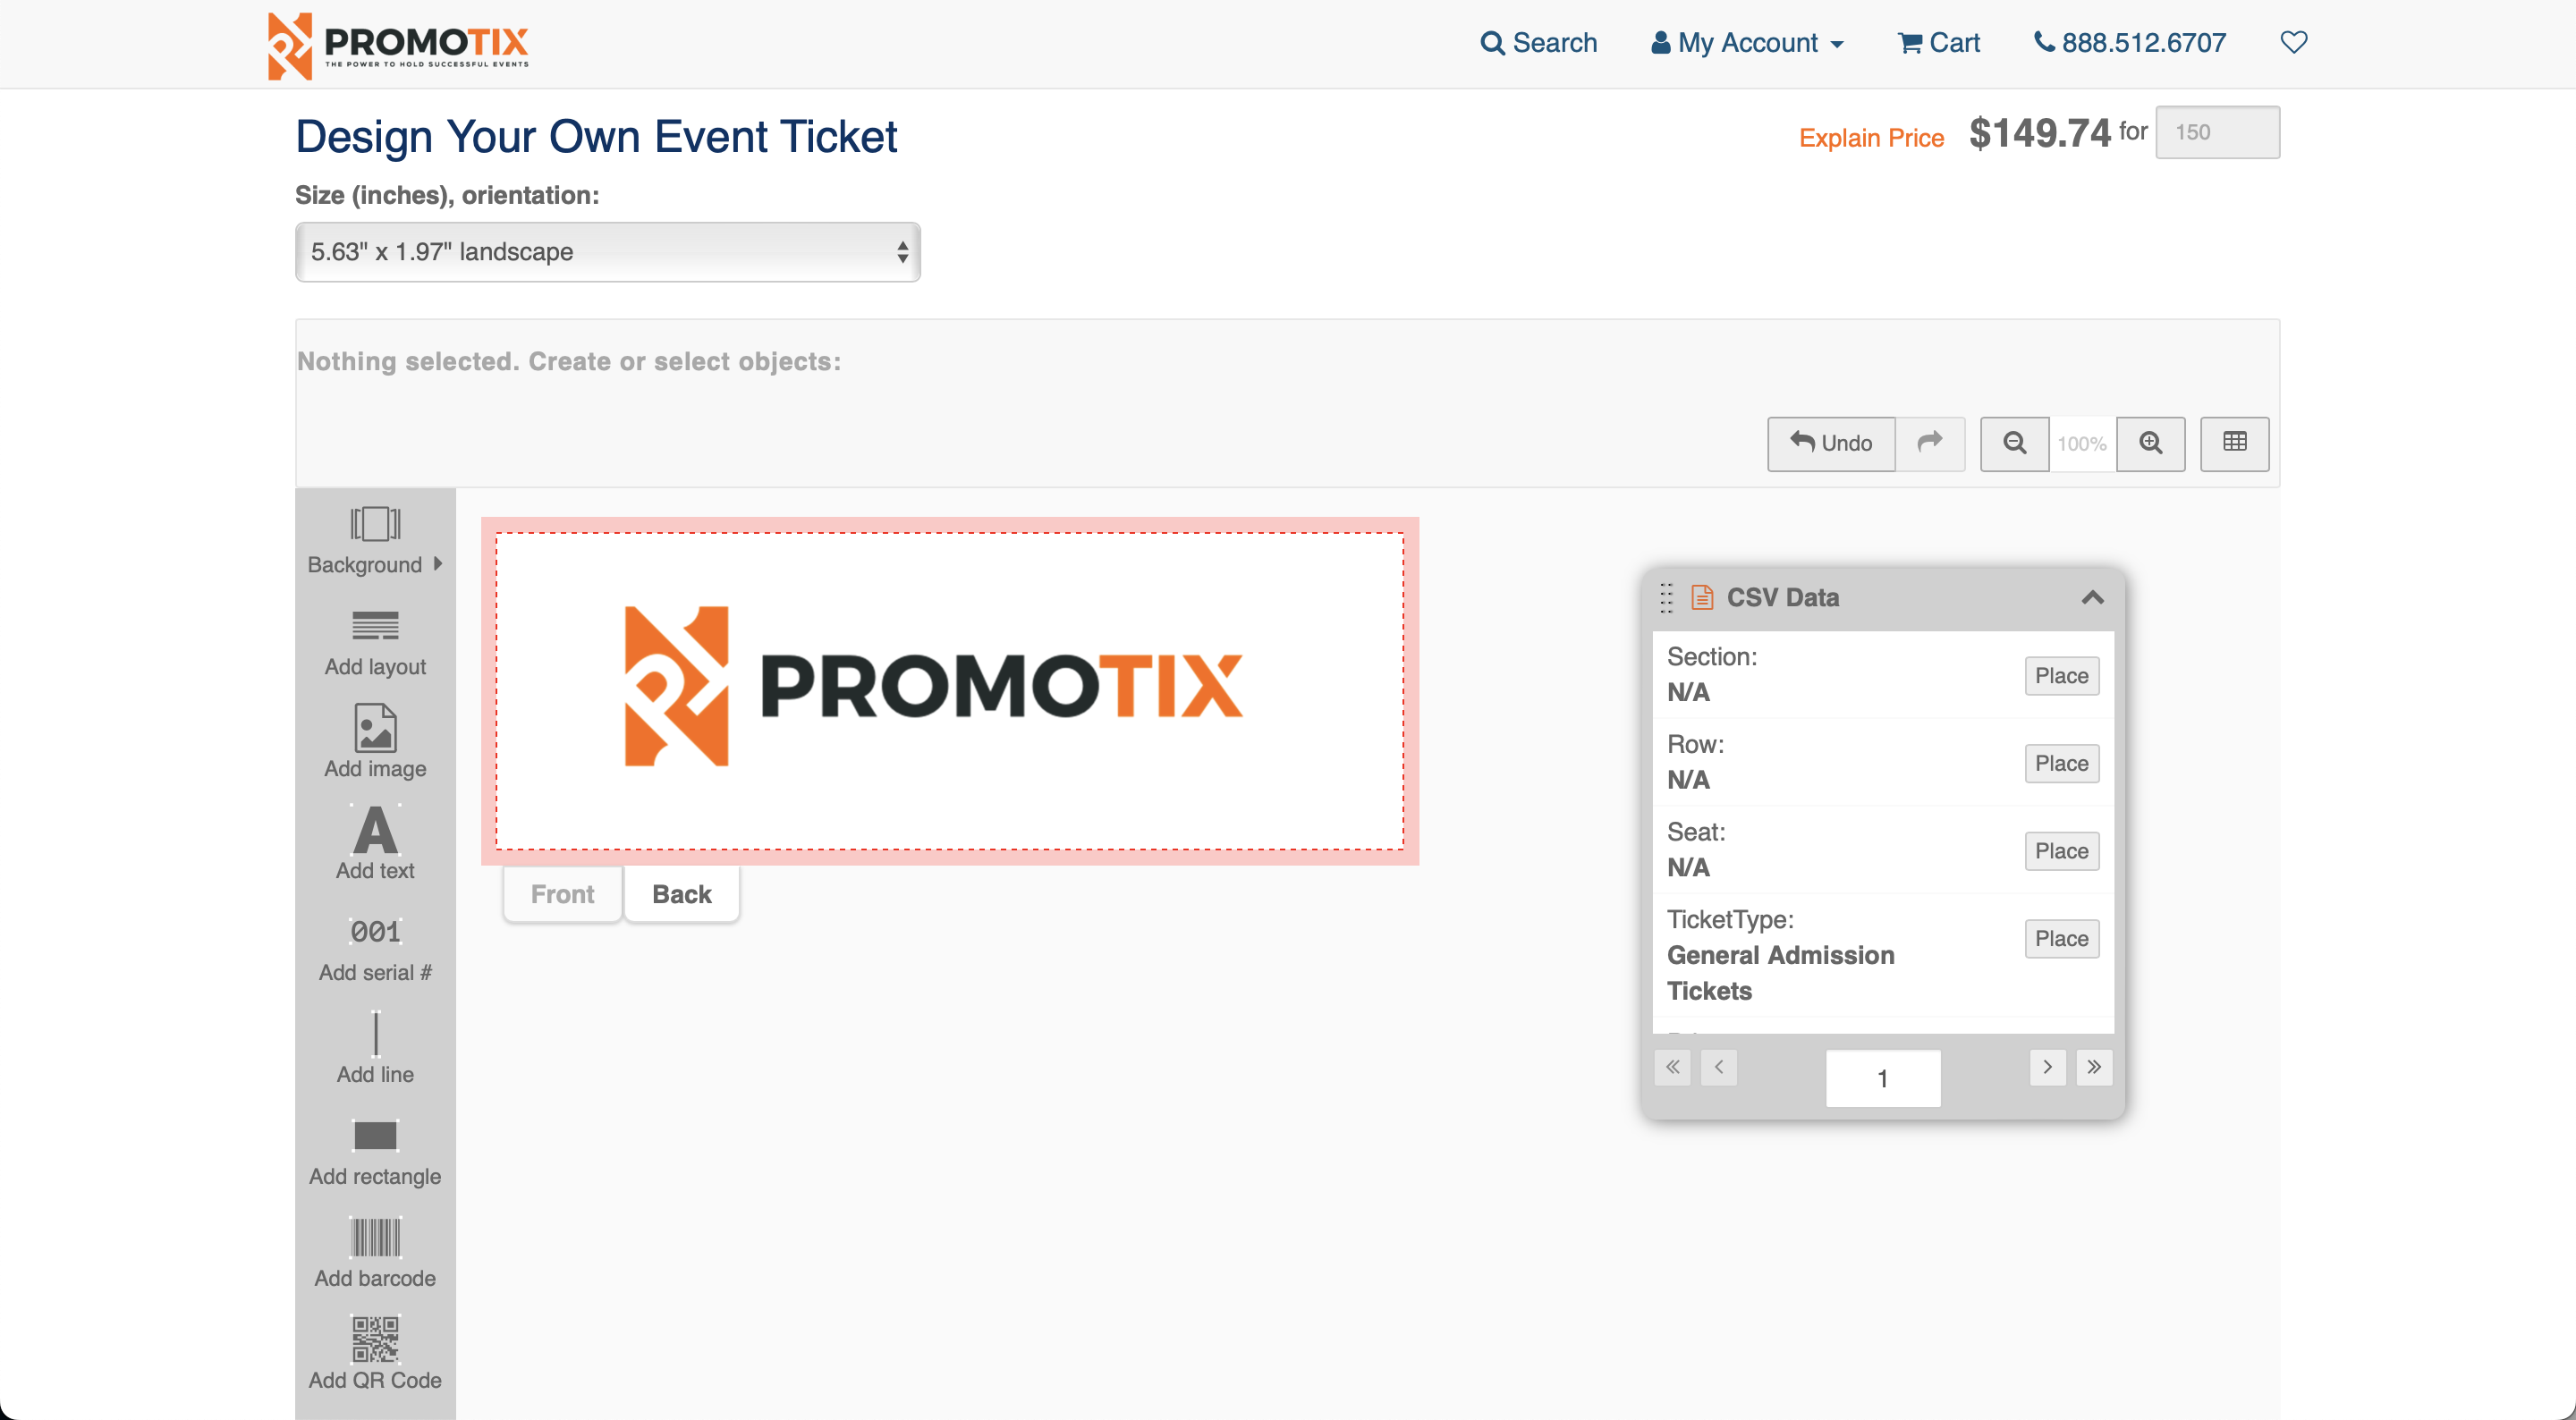
- When the Back option is selected, hover your mouse over the Background button and then select an option to upload a background image to the back of your ticket design.
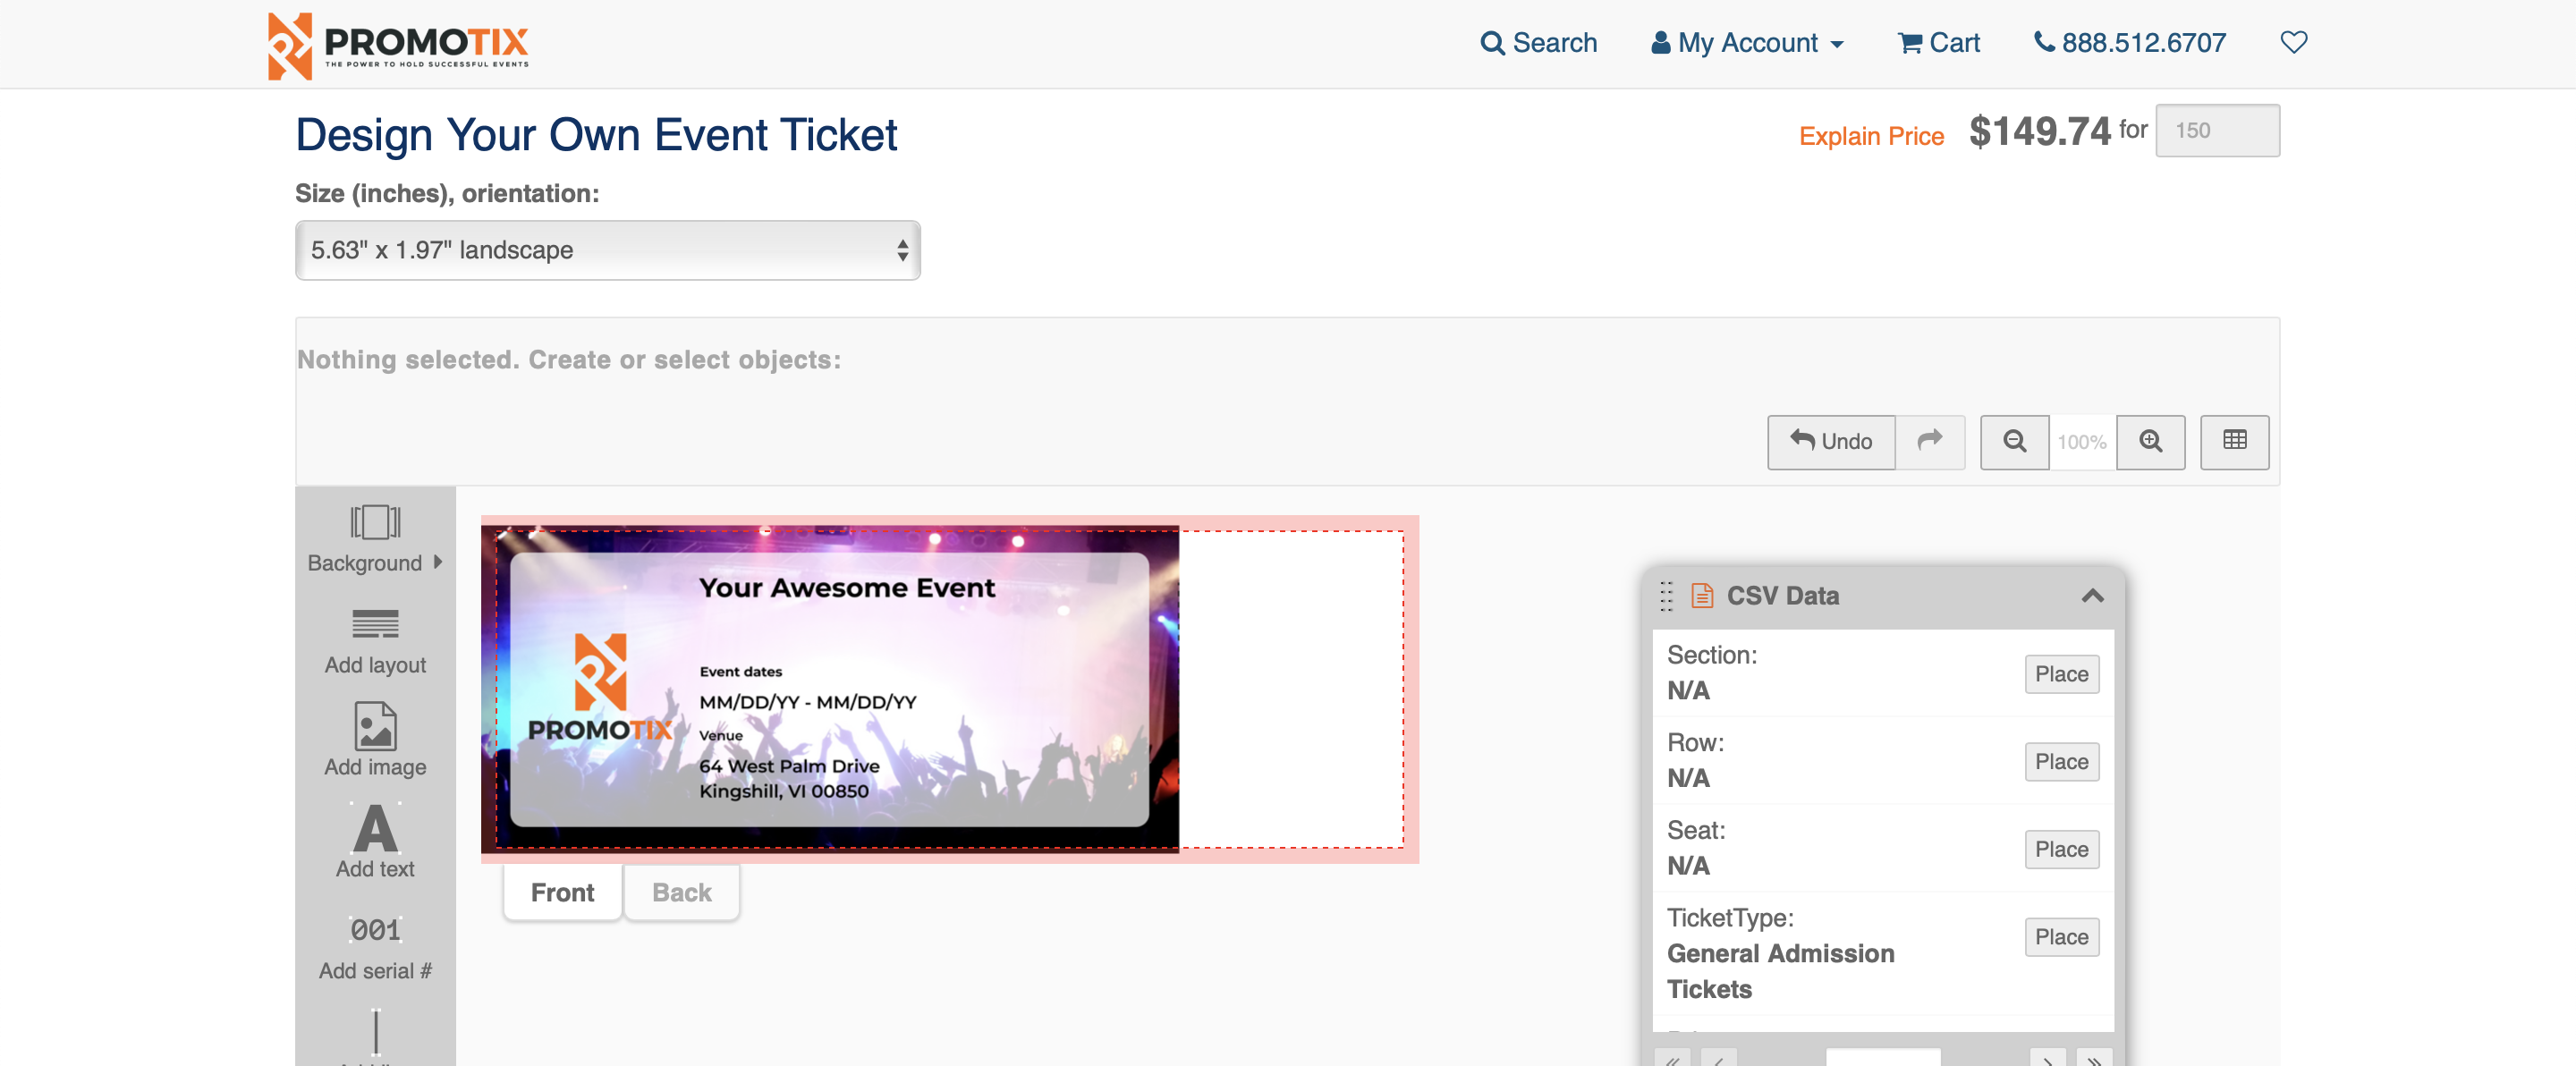
TIP: for the front background image, leave some white space on the right side of the ticket, as well as some space for your ticket type title(s). We will fill this space with your QR codes and other ticket information later.
Once you're done, your ticket design should look something like this:
16. Place dynamic ticket data on your ticket design
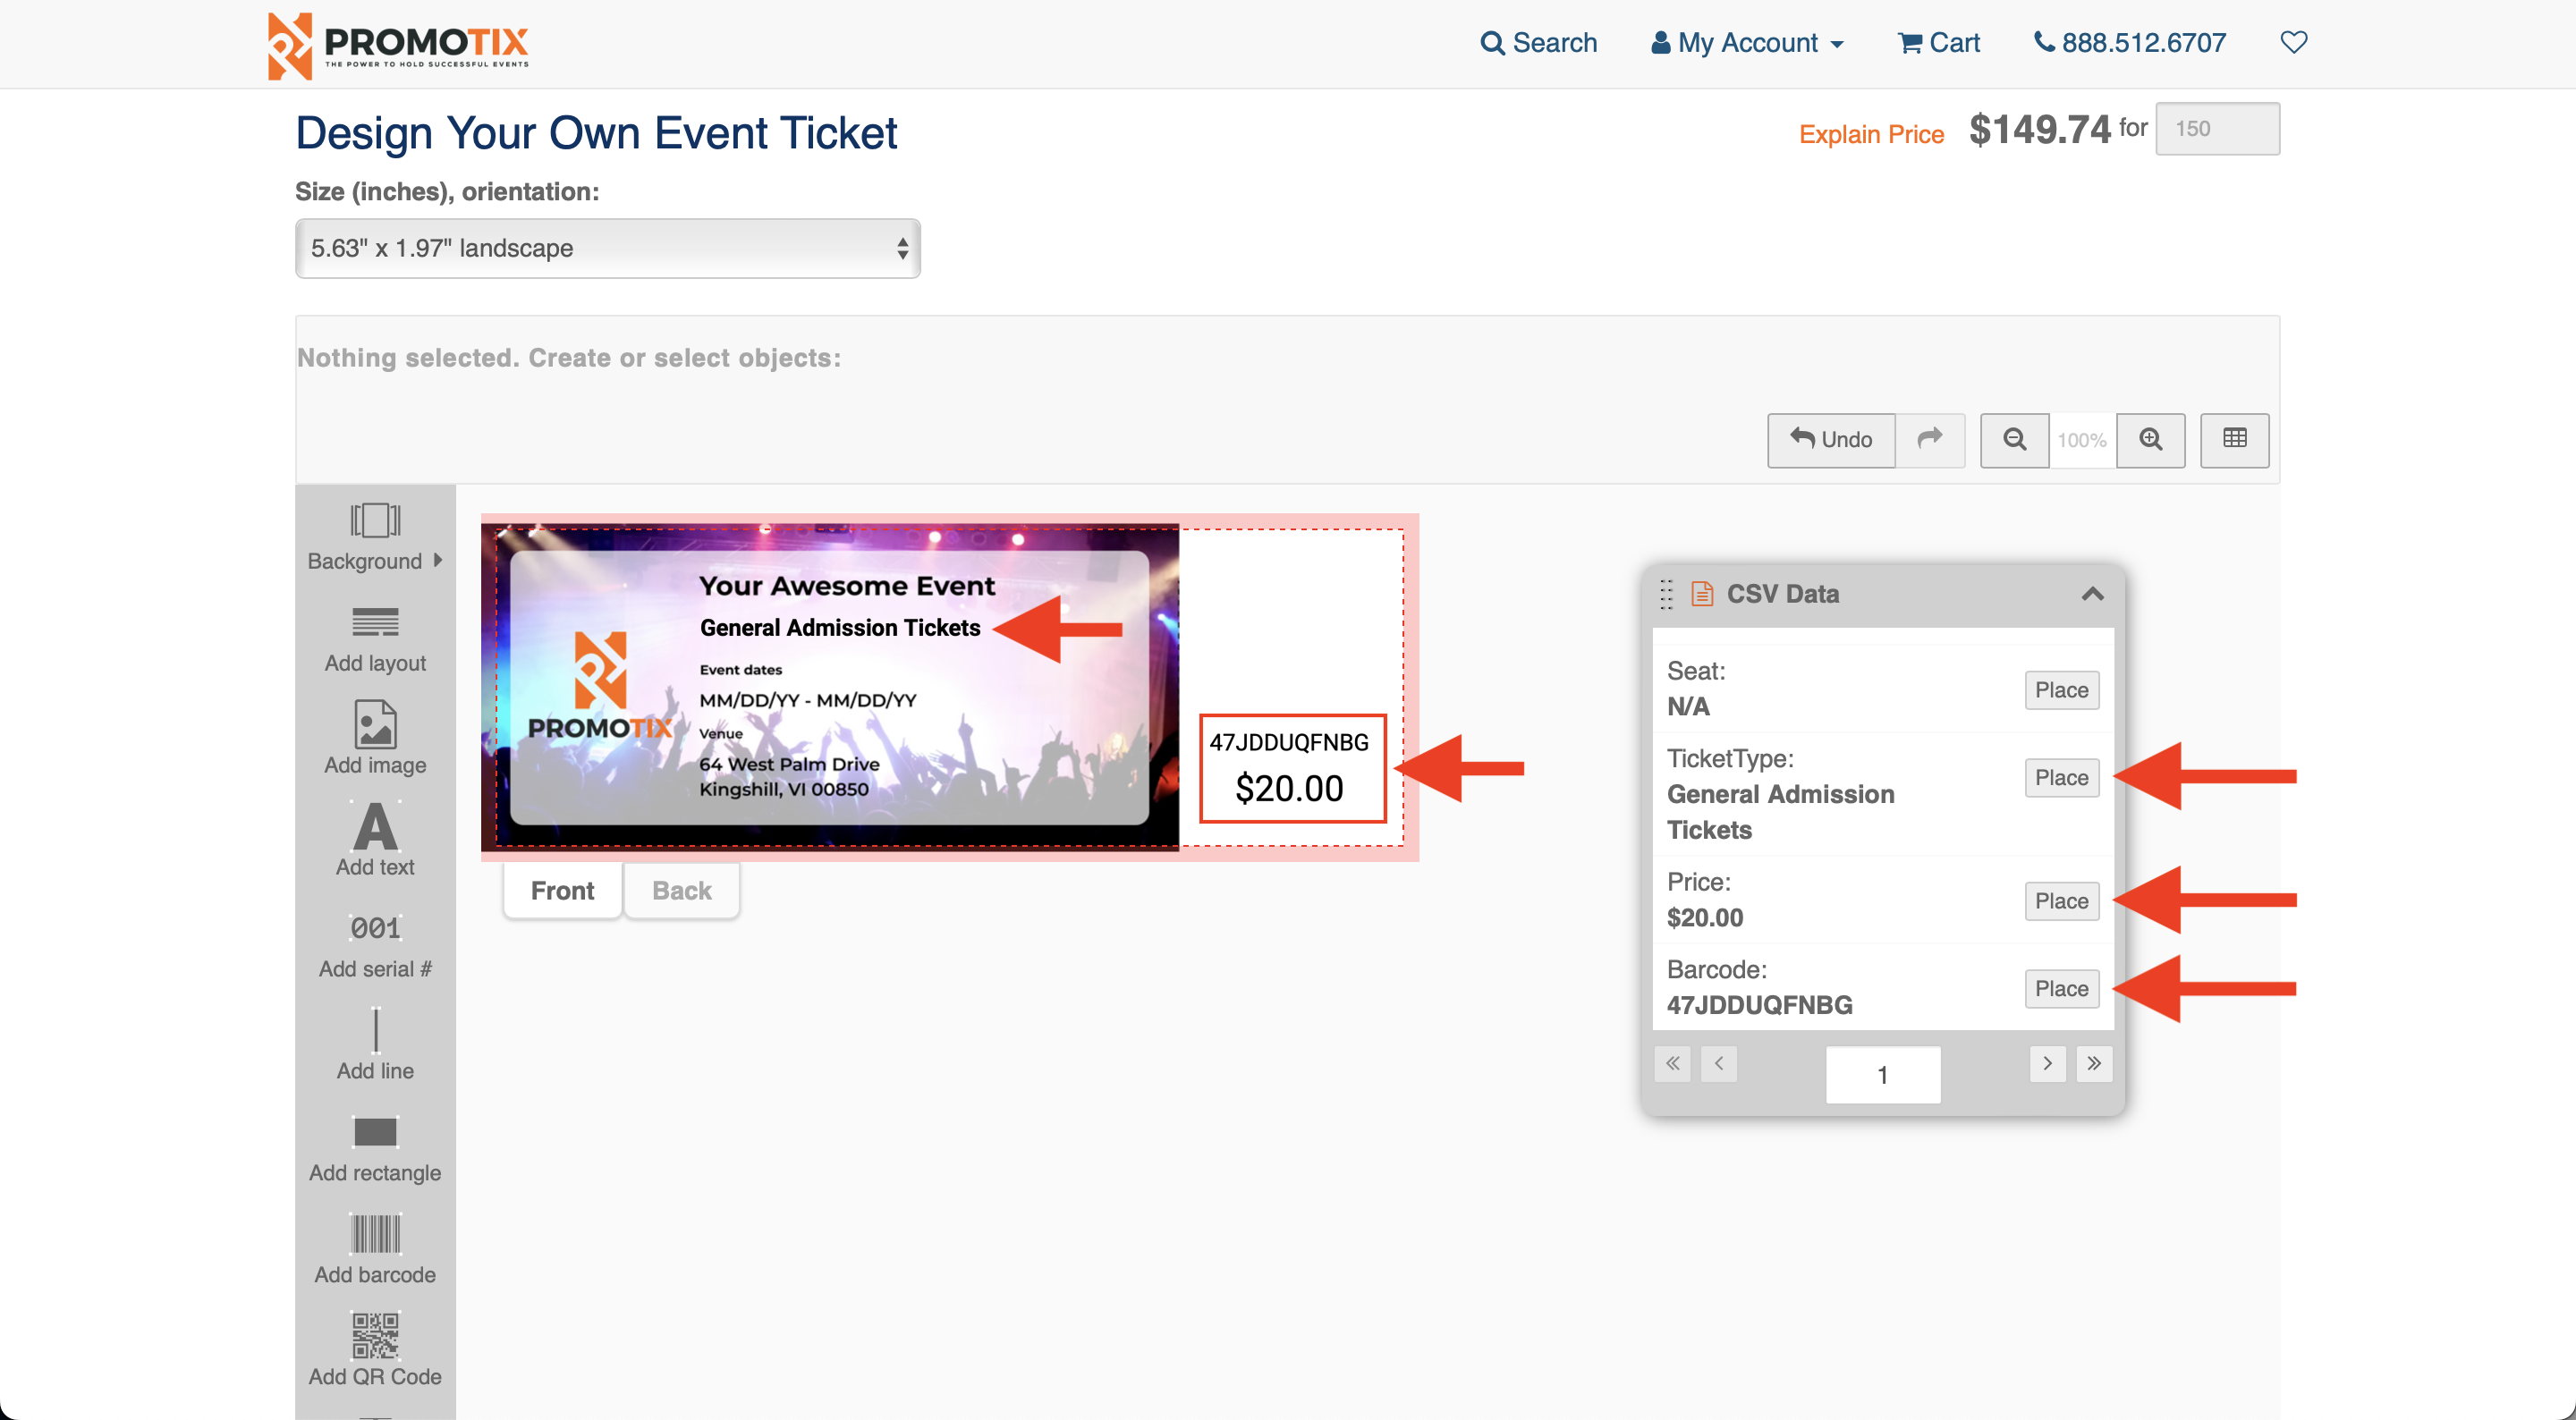 Use the Place buttons to add your dynamic ticket data to your ticket design (from your uploaded .csv file). You can use the controls on screen to re-size and place the data appropriately.
17. Place QR code on your ticket design
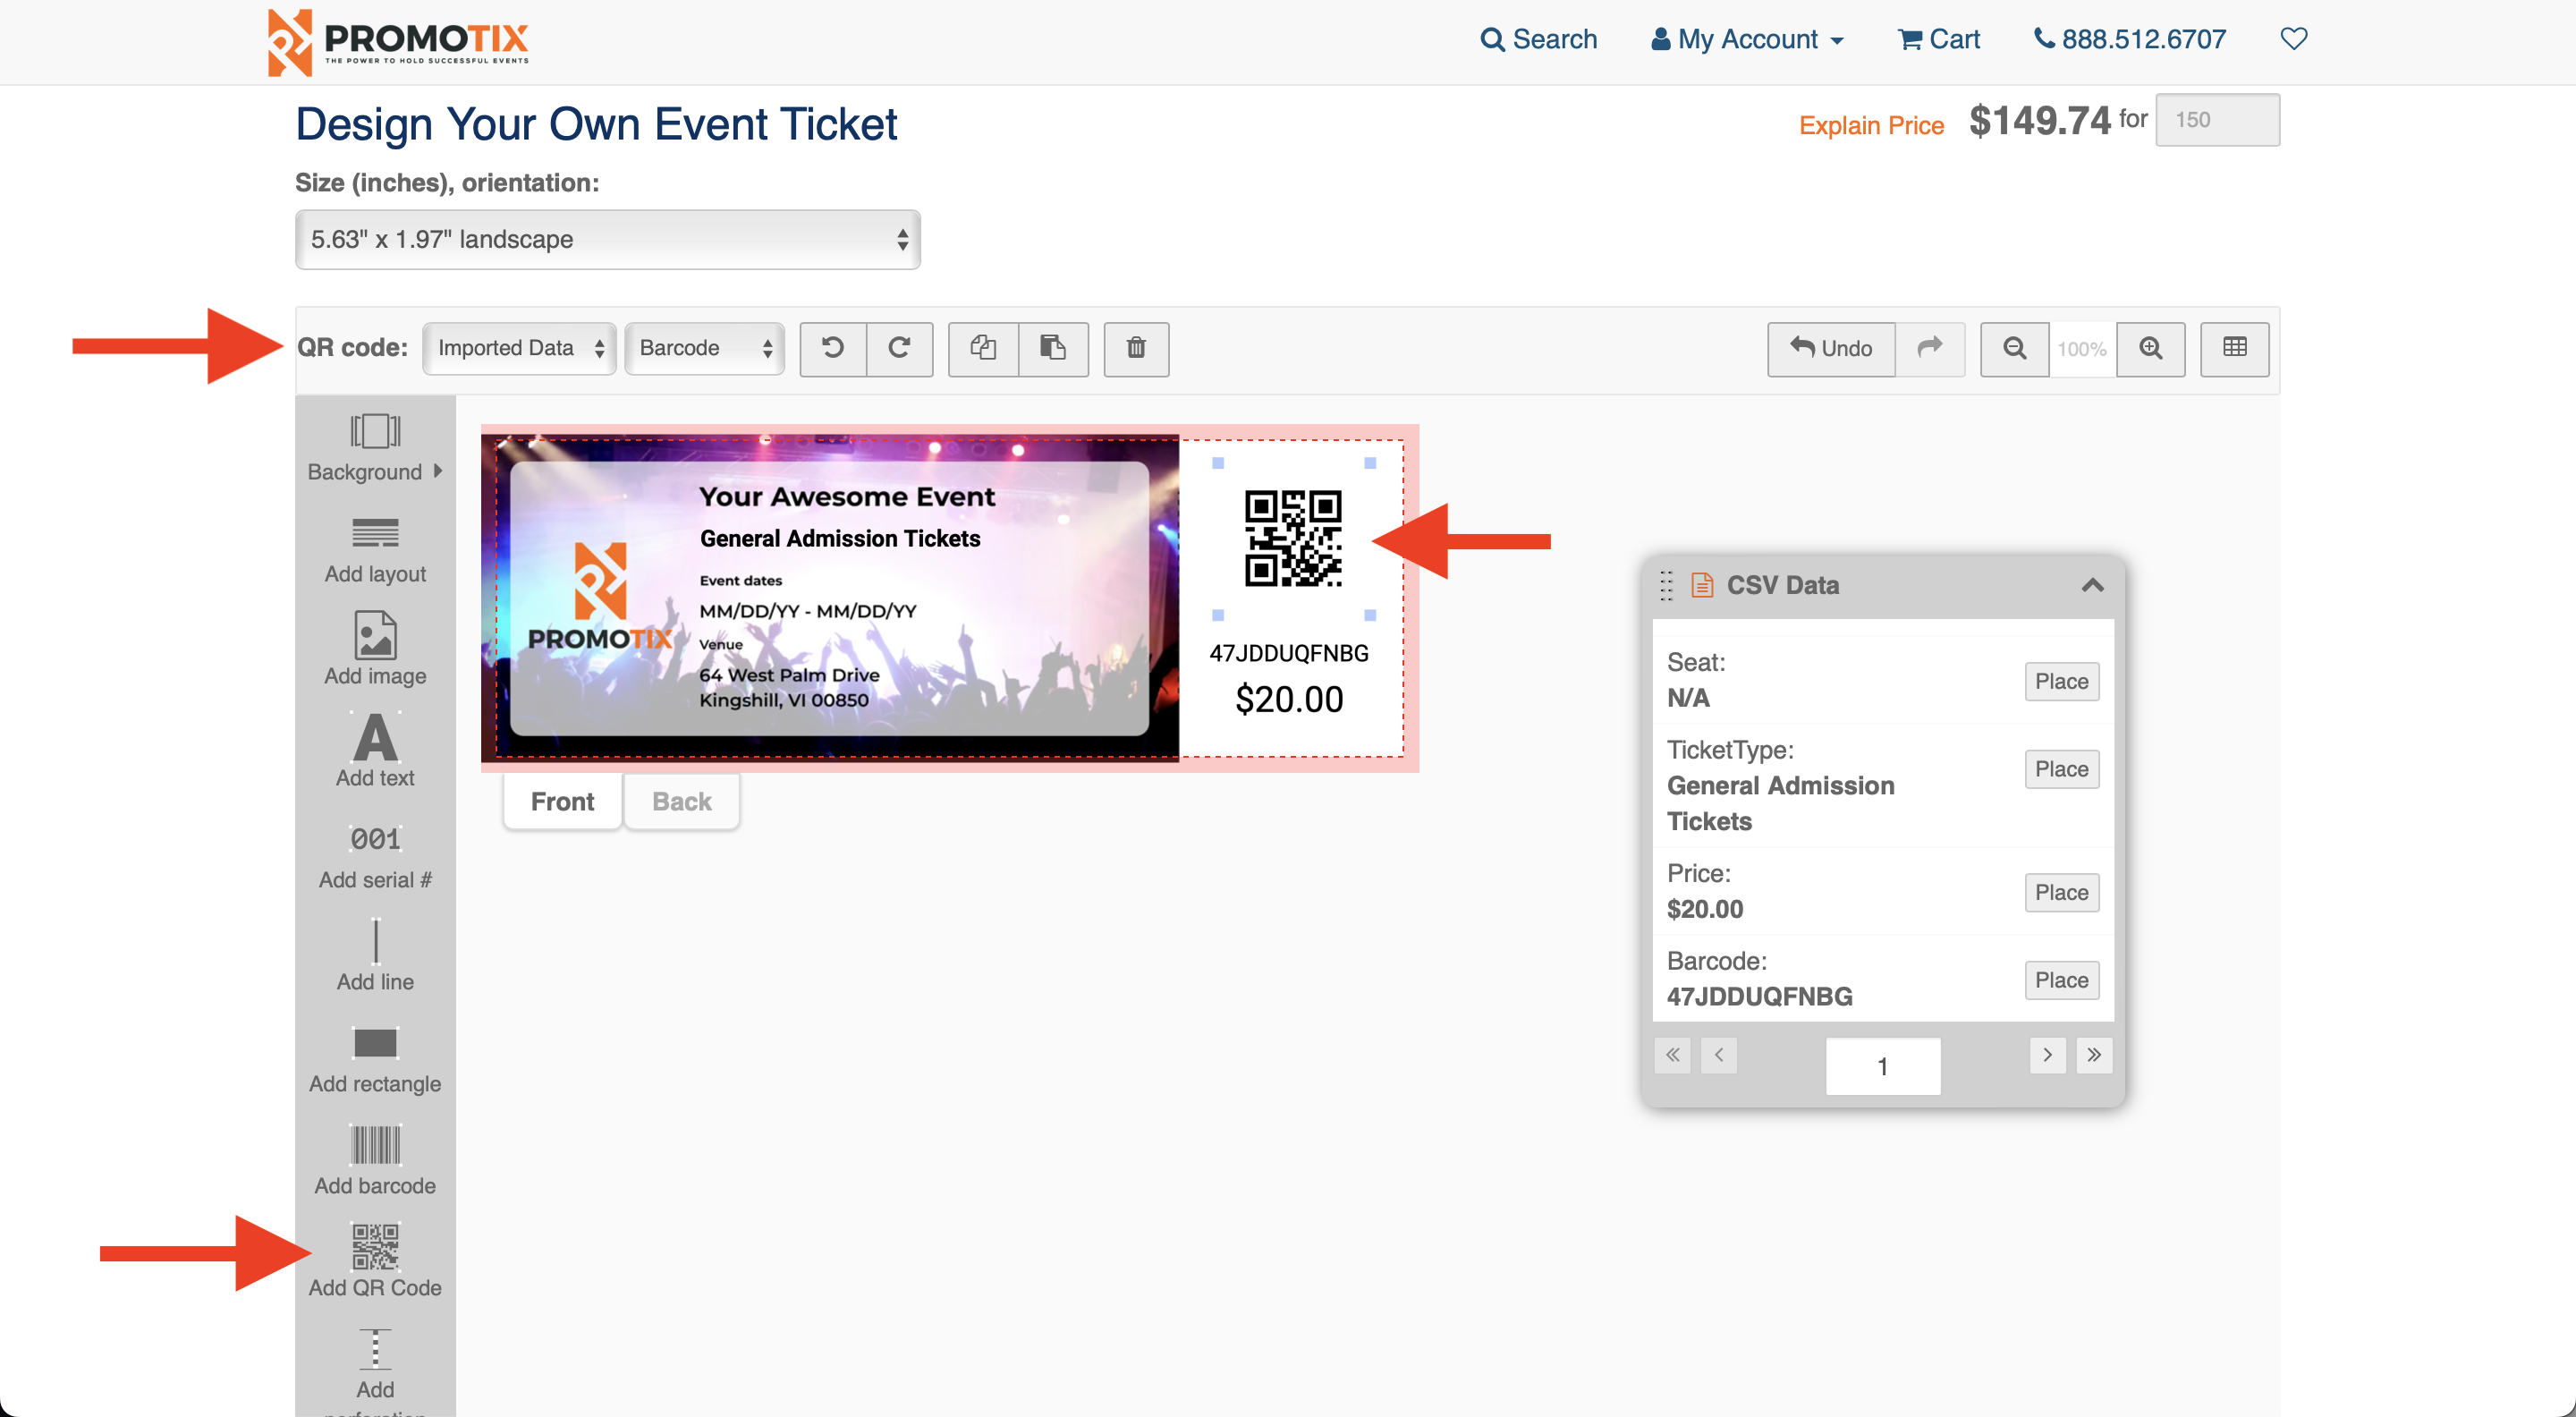 Click the Add QR Code button to place a QR code on your ticket design. The QR code will pull from your Barcode data (uploaded in your .csv file). You can use the controls on screen to re-size and place the QR code appropriately.
18. Cycle through tickets to check the design
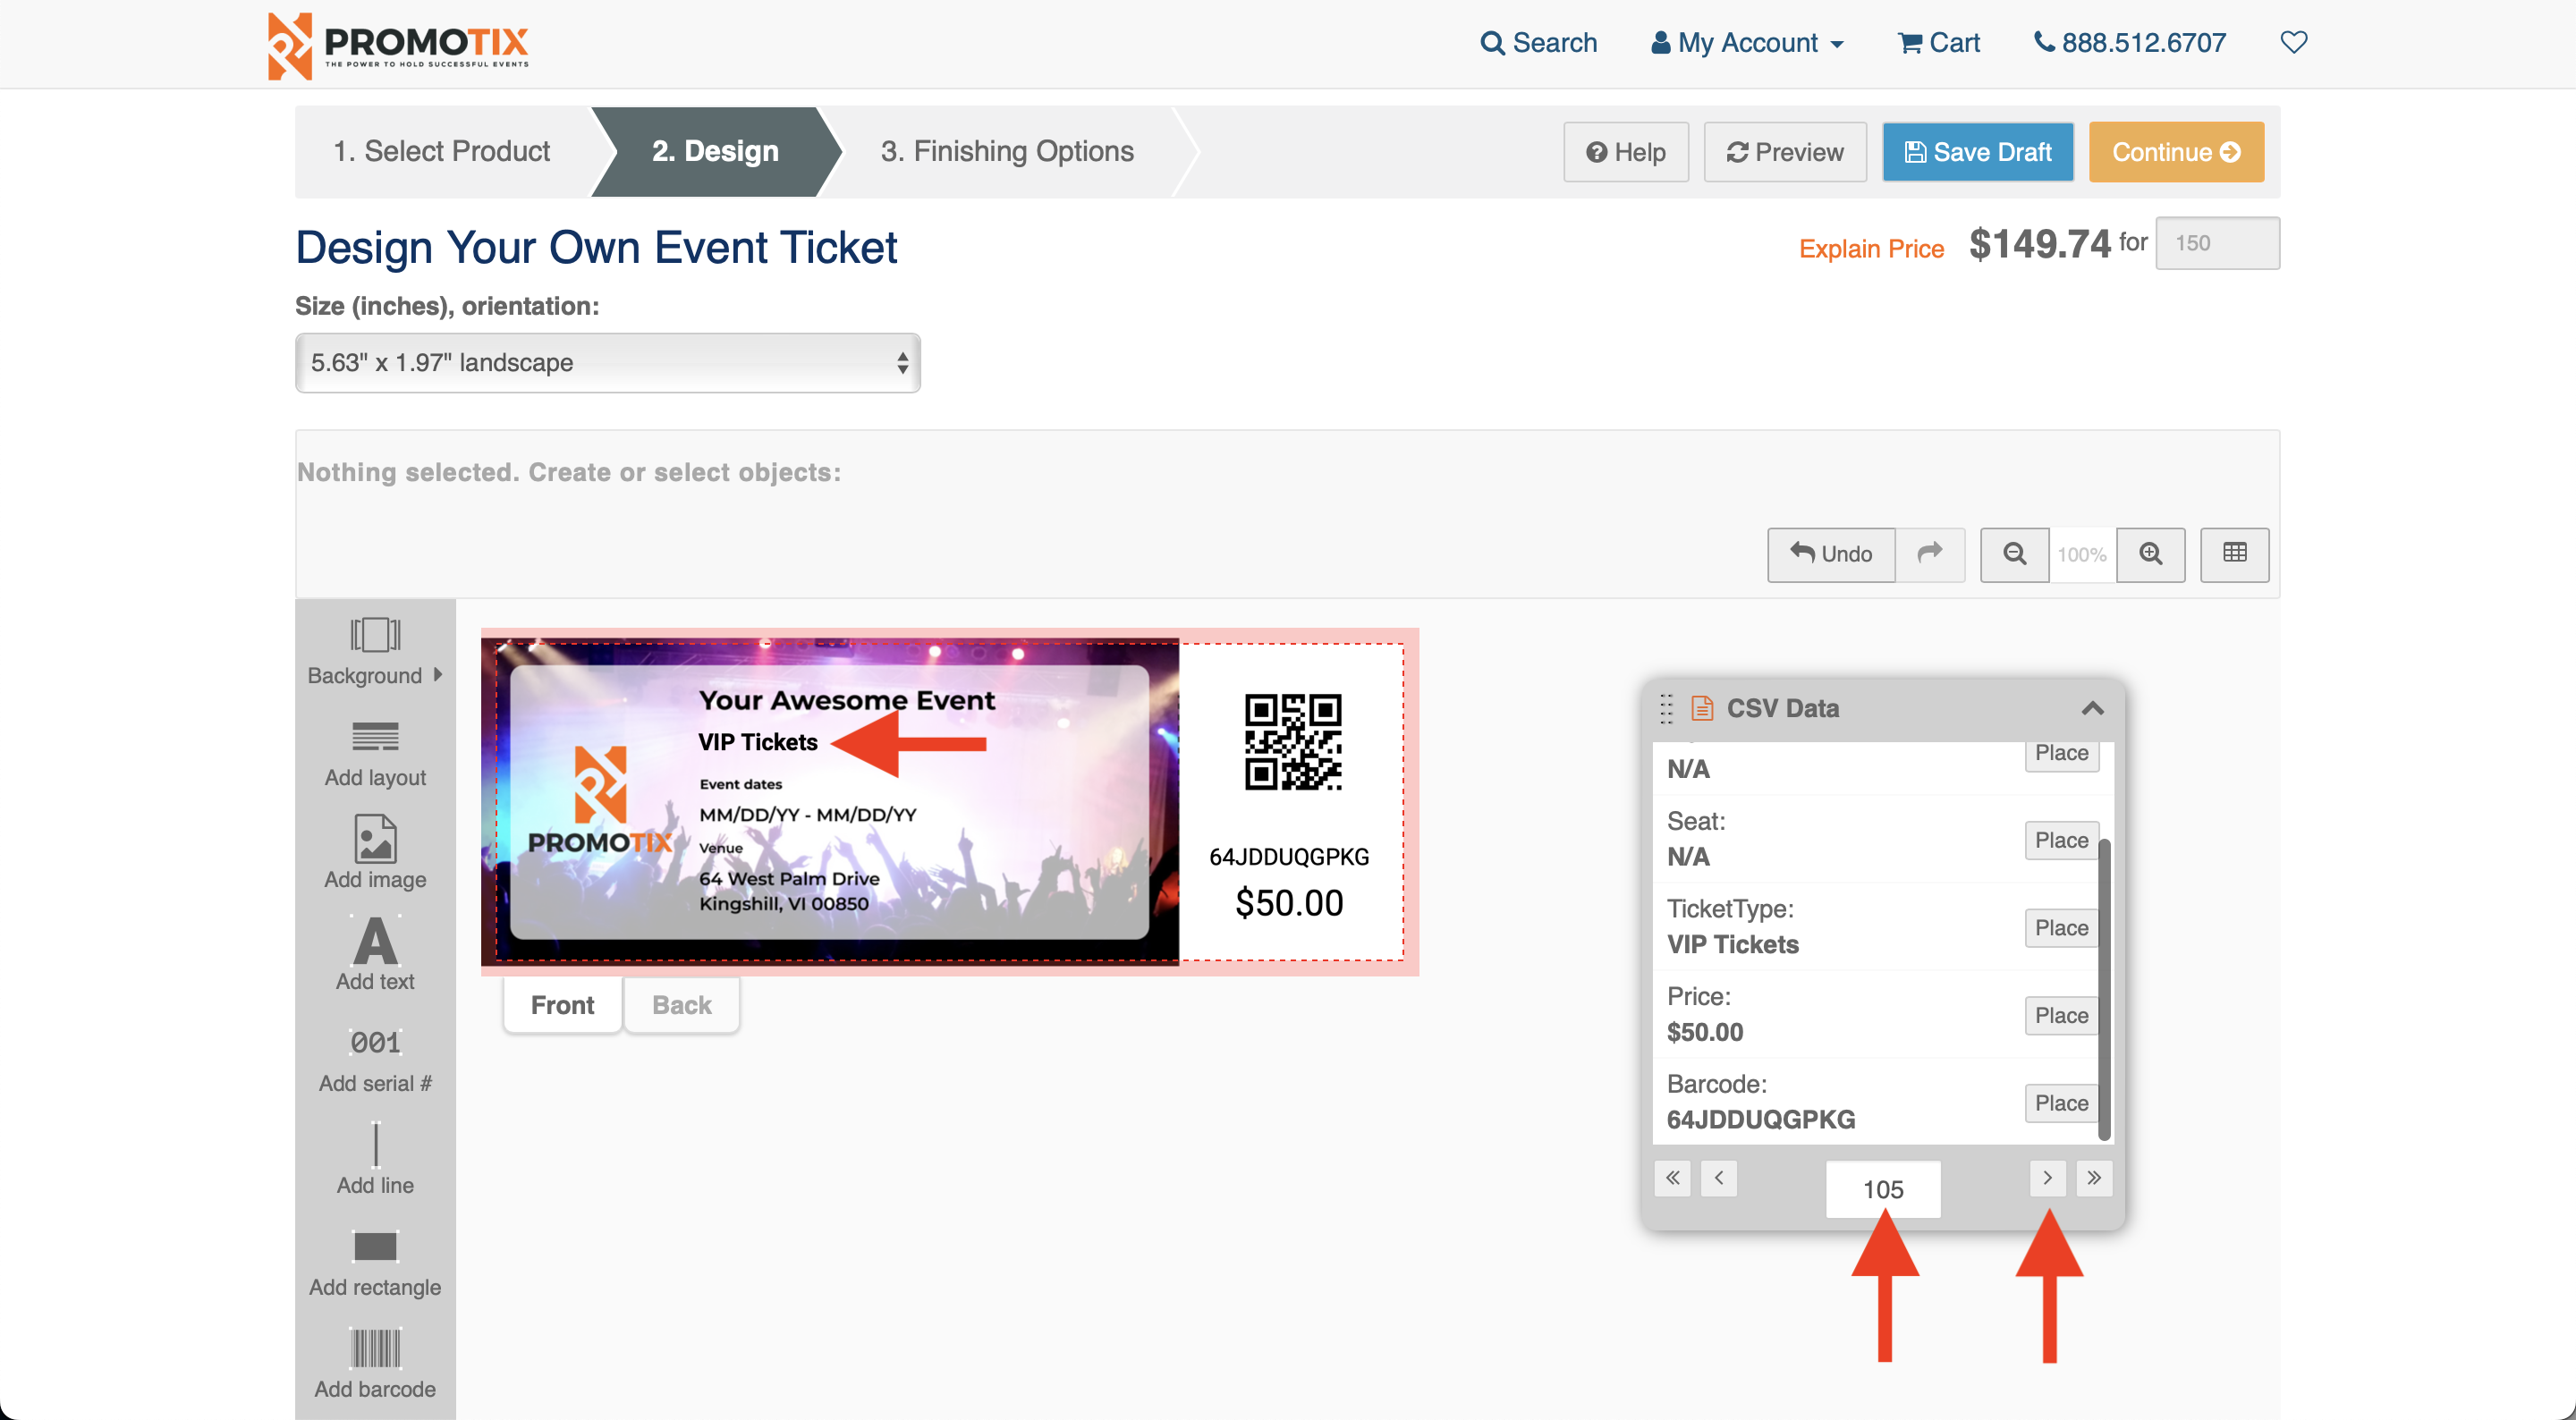 Use the < and > buttons to cycle through the different tickets on your order. You should see that the dynamic ticket data (from your uploaded .csv file) is unique for each ticket.
IMPORTANT: if you have multiple ticket types on your order (ex. "General Admission" and "VIP Admission"), make sure to check all of your ticket types for possible design issues.
Once you're done, click the Continue button in the top right hand corner of the screen.
19. Download proof and accept terms
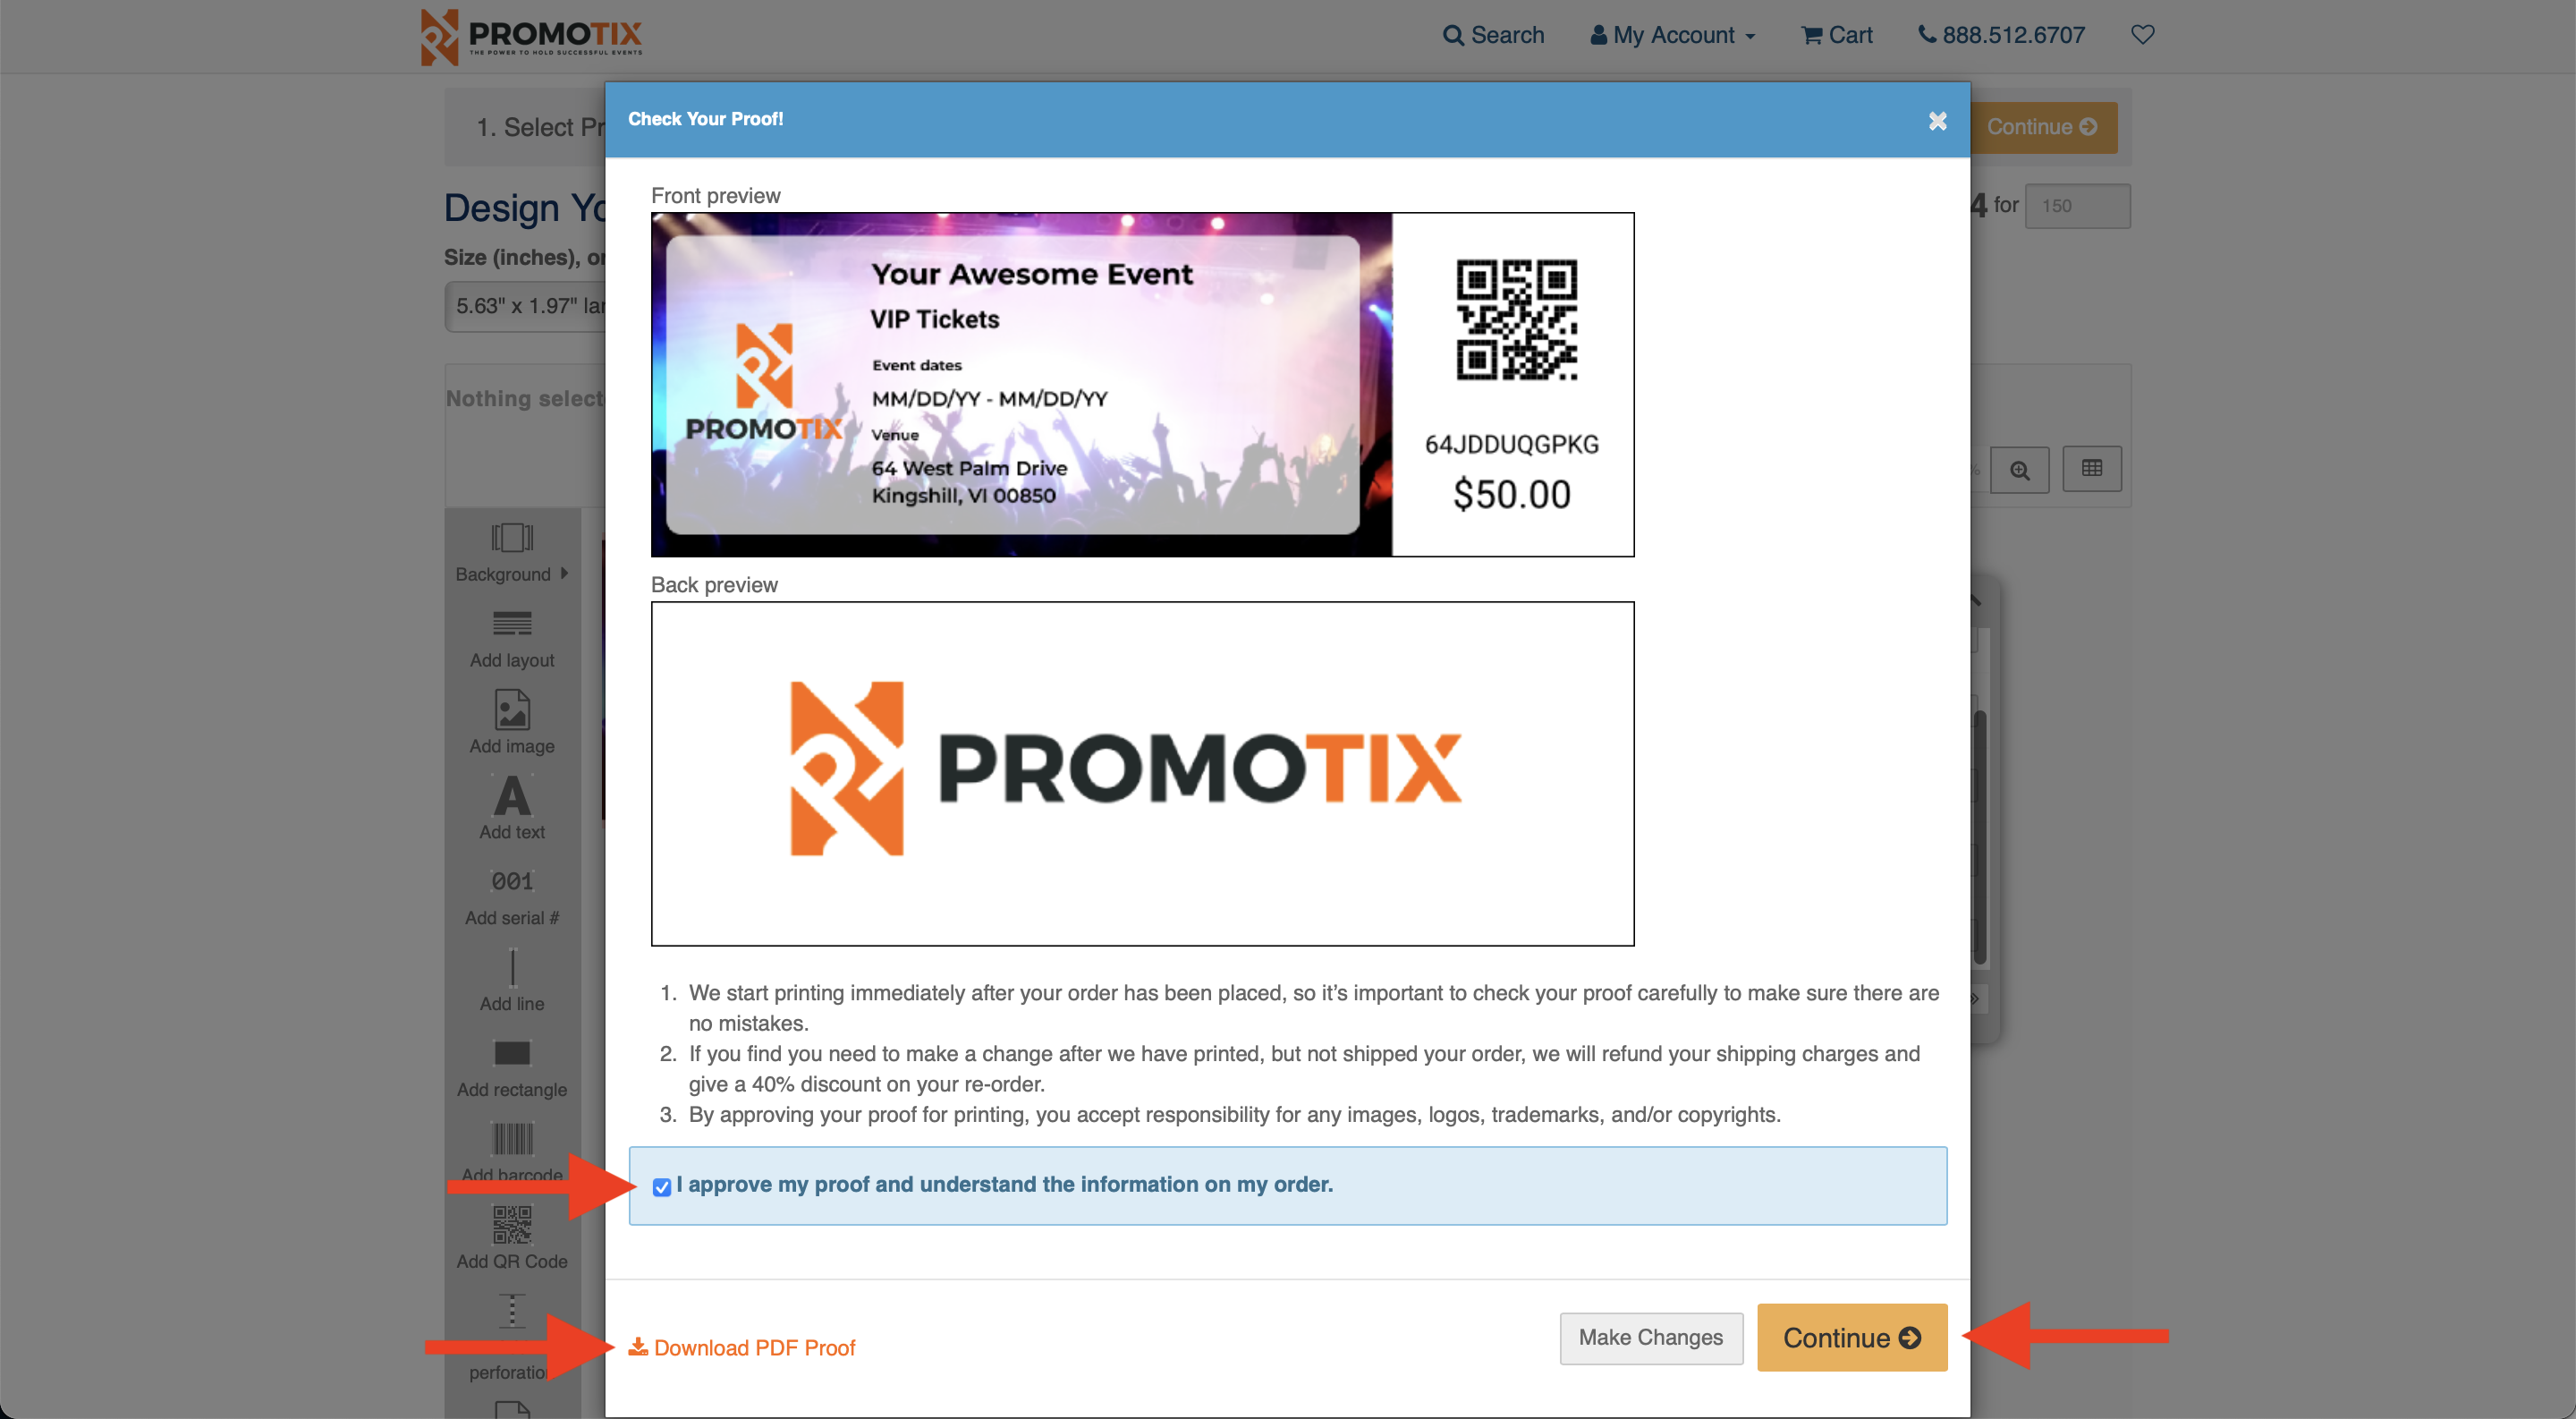 Before proceeding, save a copy of your design proof. Read the terms and check the box to accept them.
Once you're done, click the Continue button.
NOTE: you can still make changes to your design after proceeding past this step. You are unable to make any changes to your design only after your order is placed.
20. Select finishing options
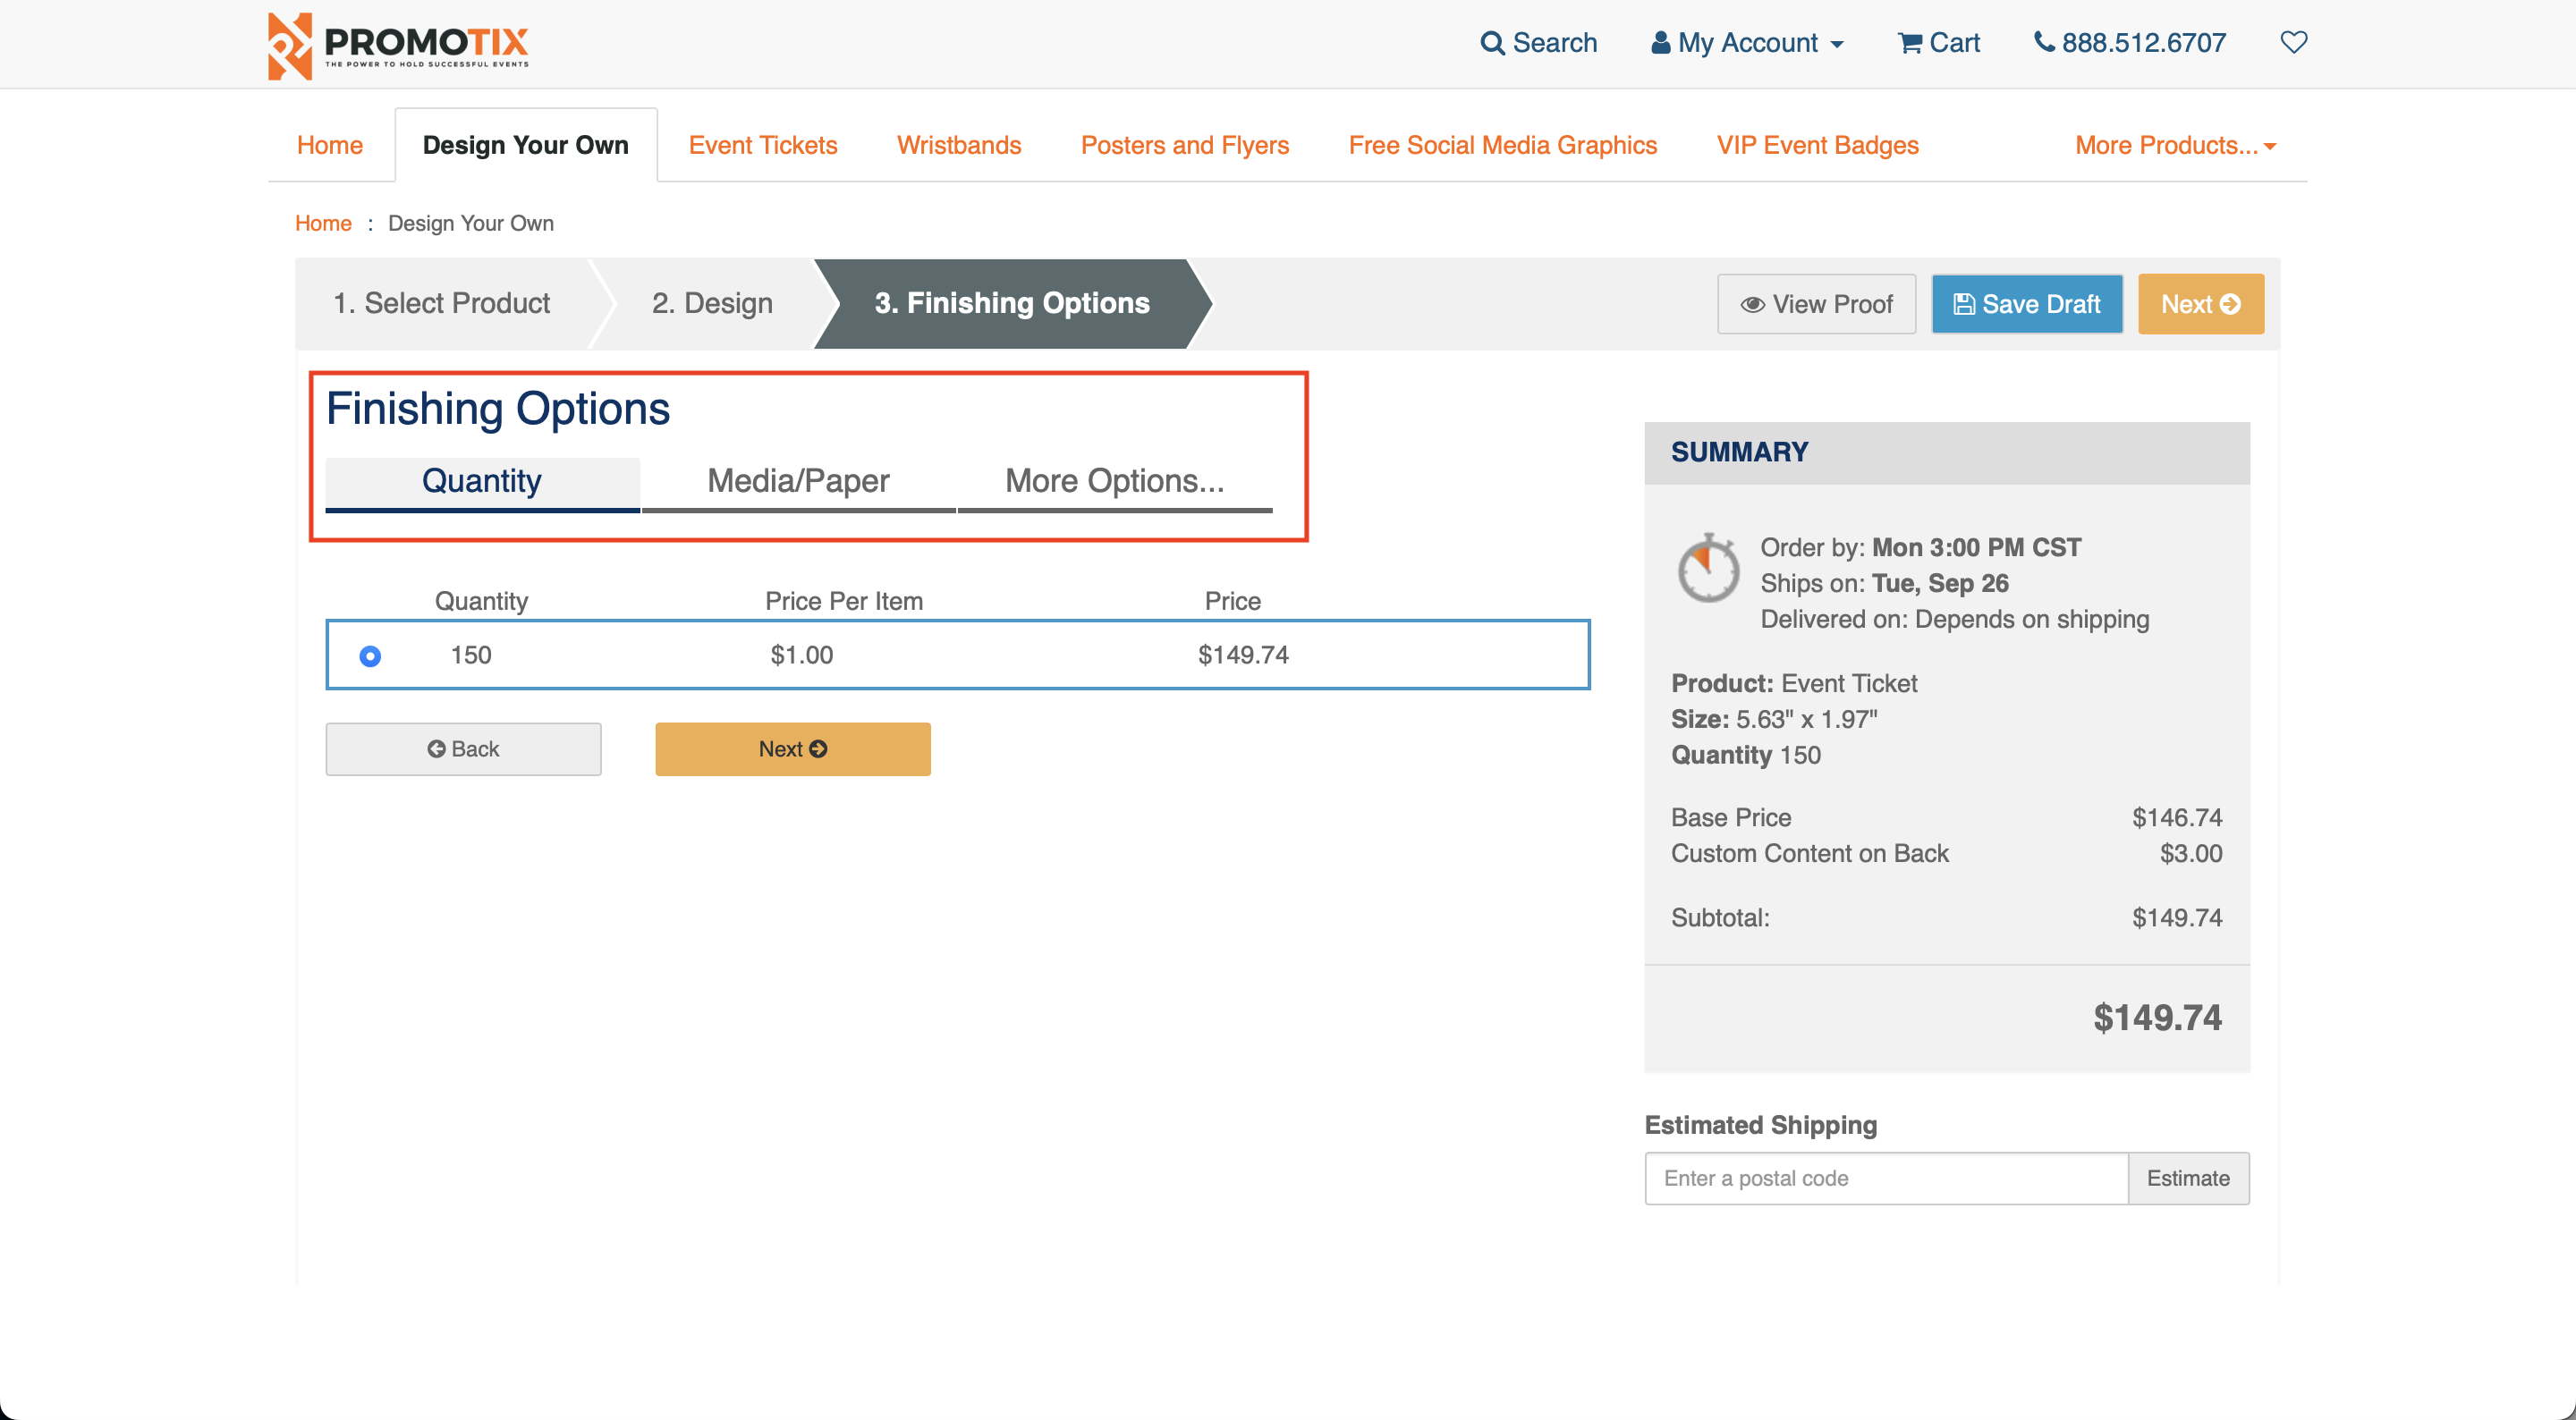 Select finishing options for your tickets. For example, you can pick which type of paper and finish is used.
Once you're done, click the Add To Cart button.
21. Continue shopping or proceed to checkout
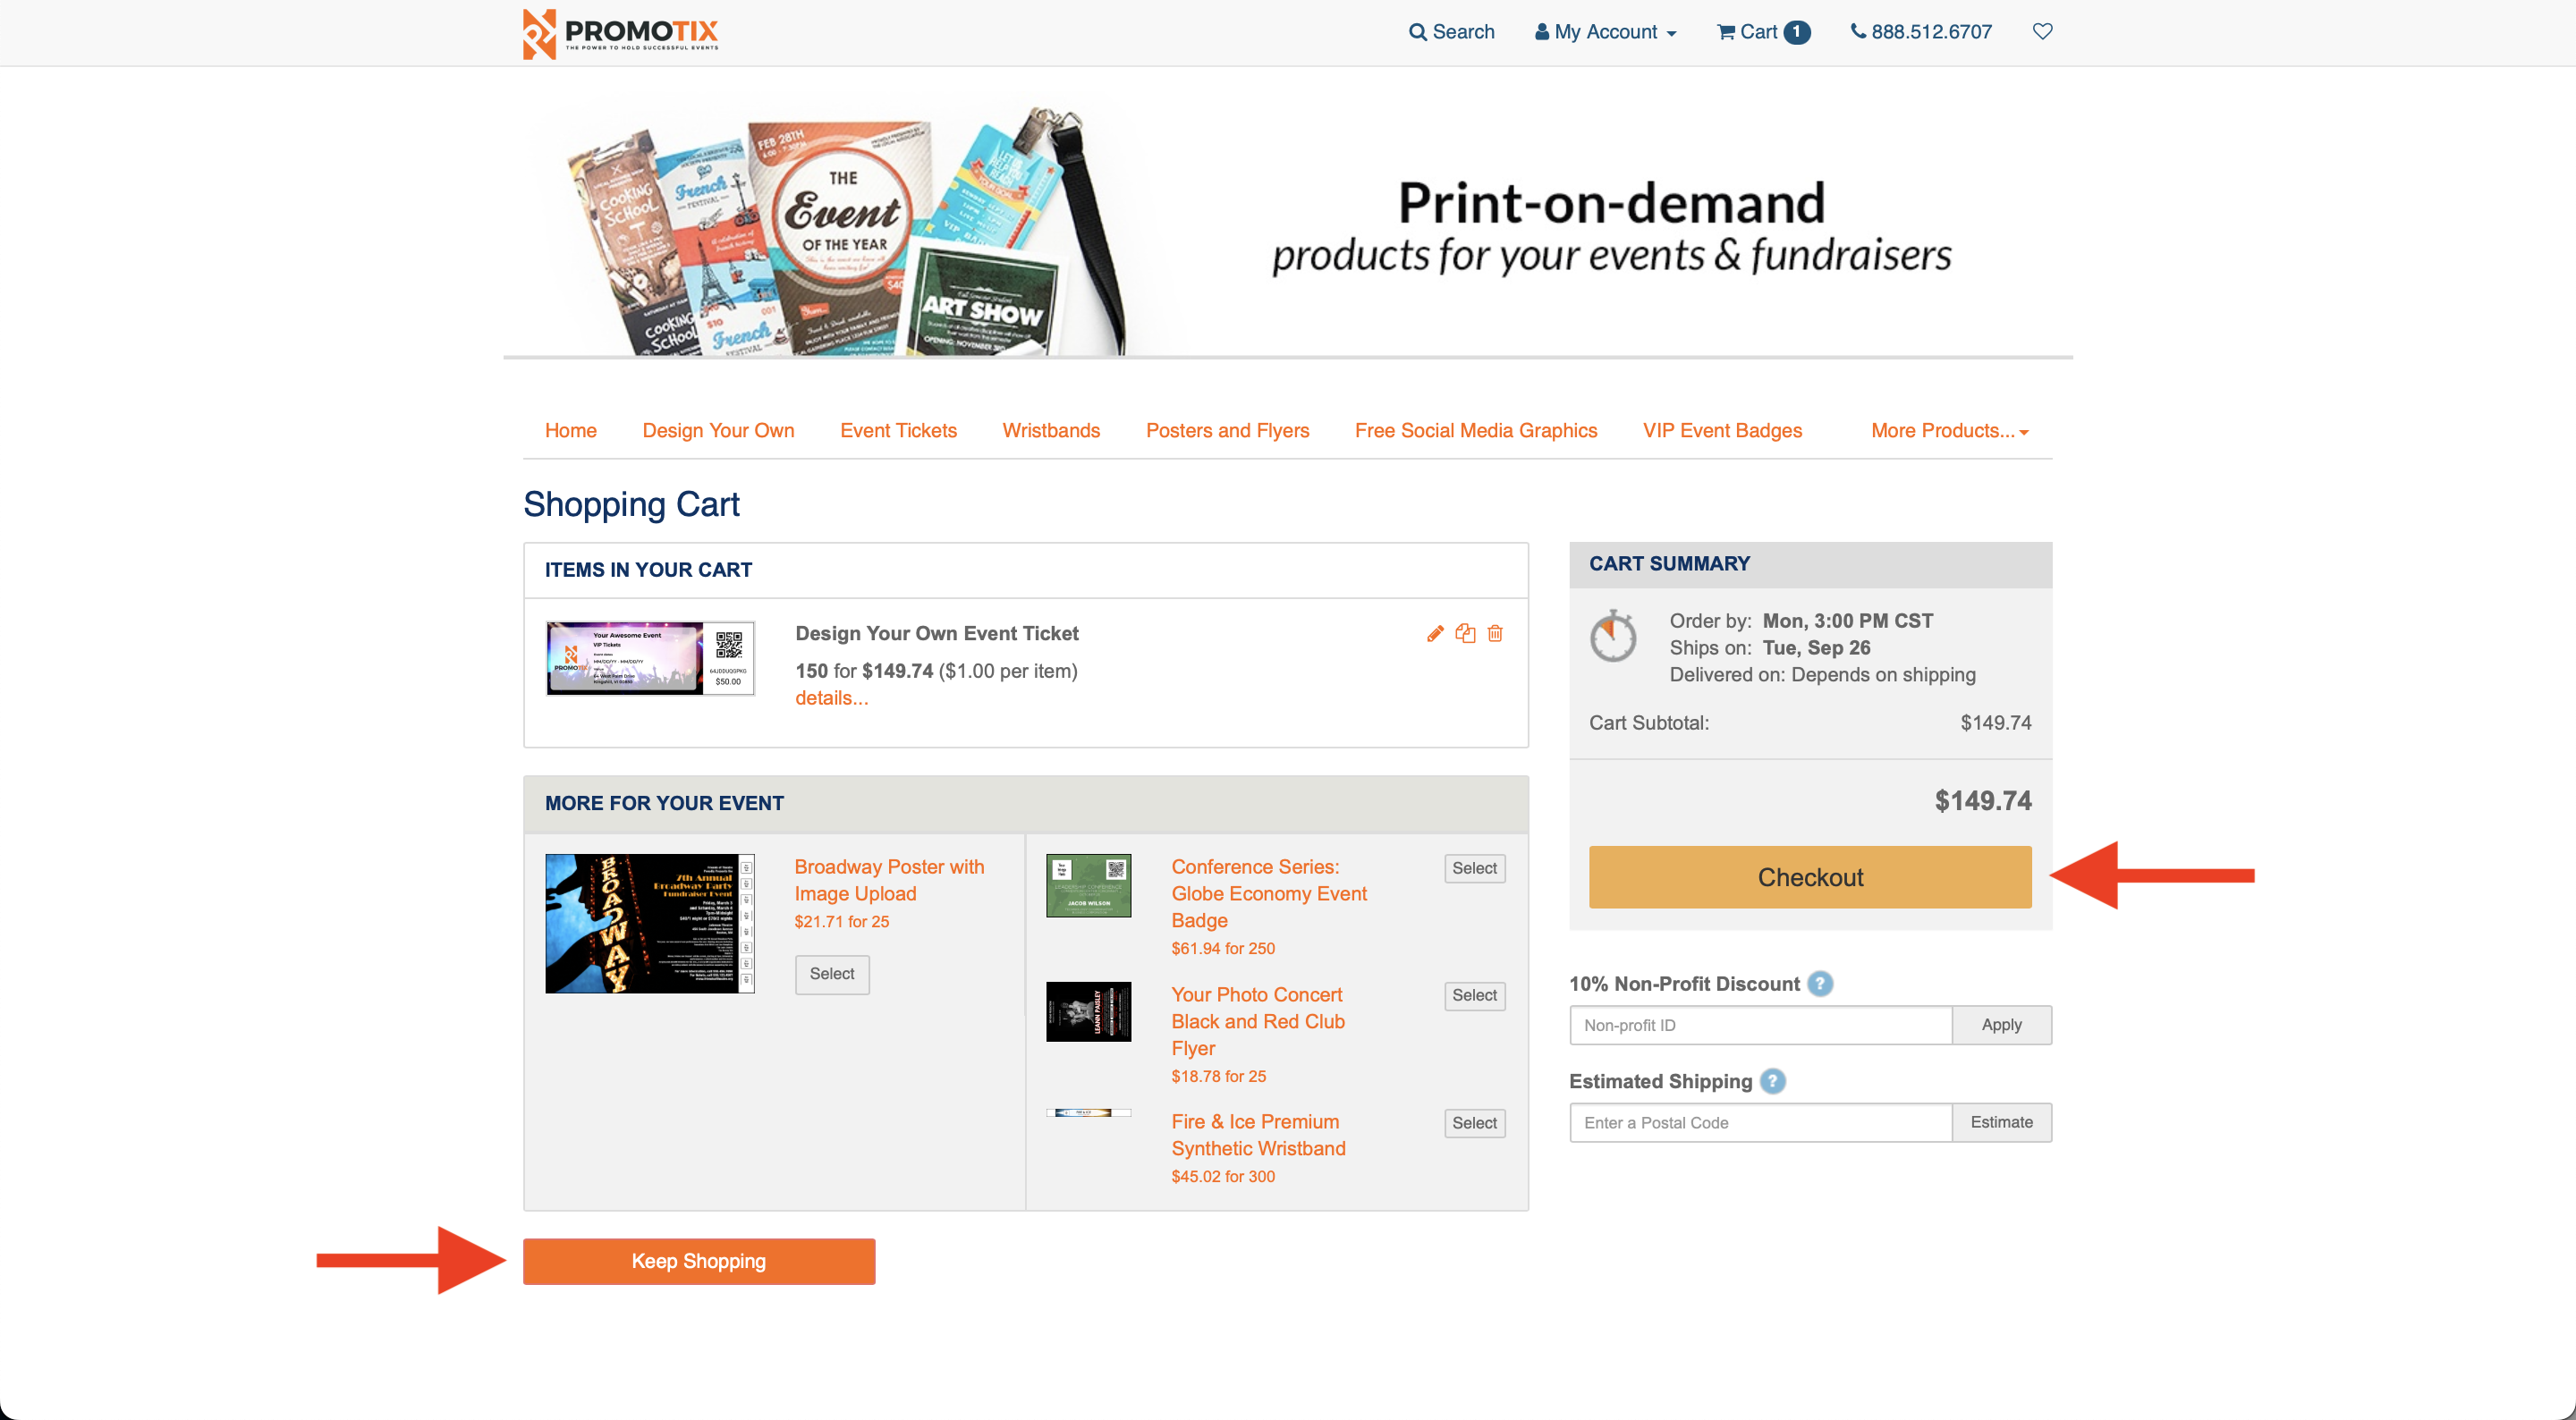 At this point, you can:
- Edit your existing tickets
- Create more tickets to add to your order
- Proceed to checkout
Once you're done, click the Checkout button to proceed to checkout.
22. Complete the checkout process and place your order
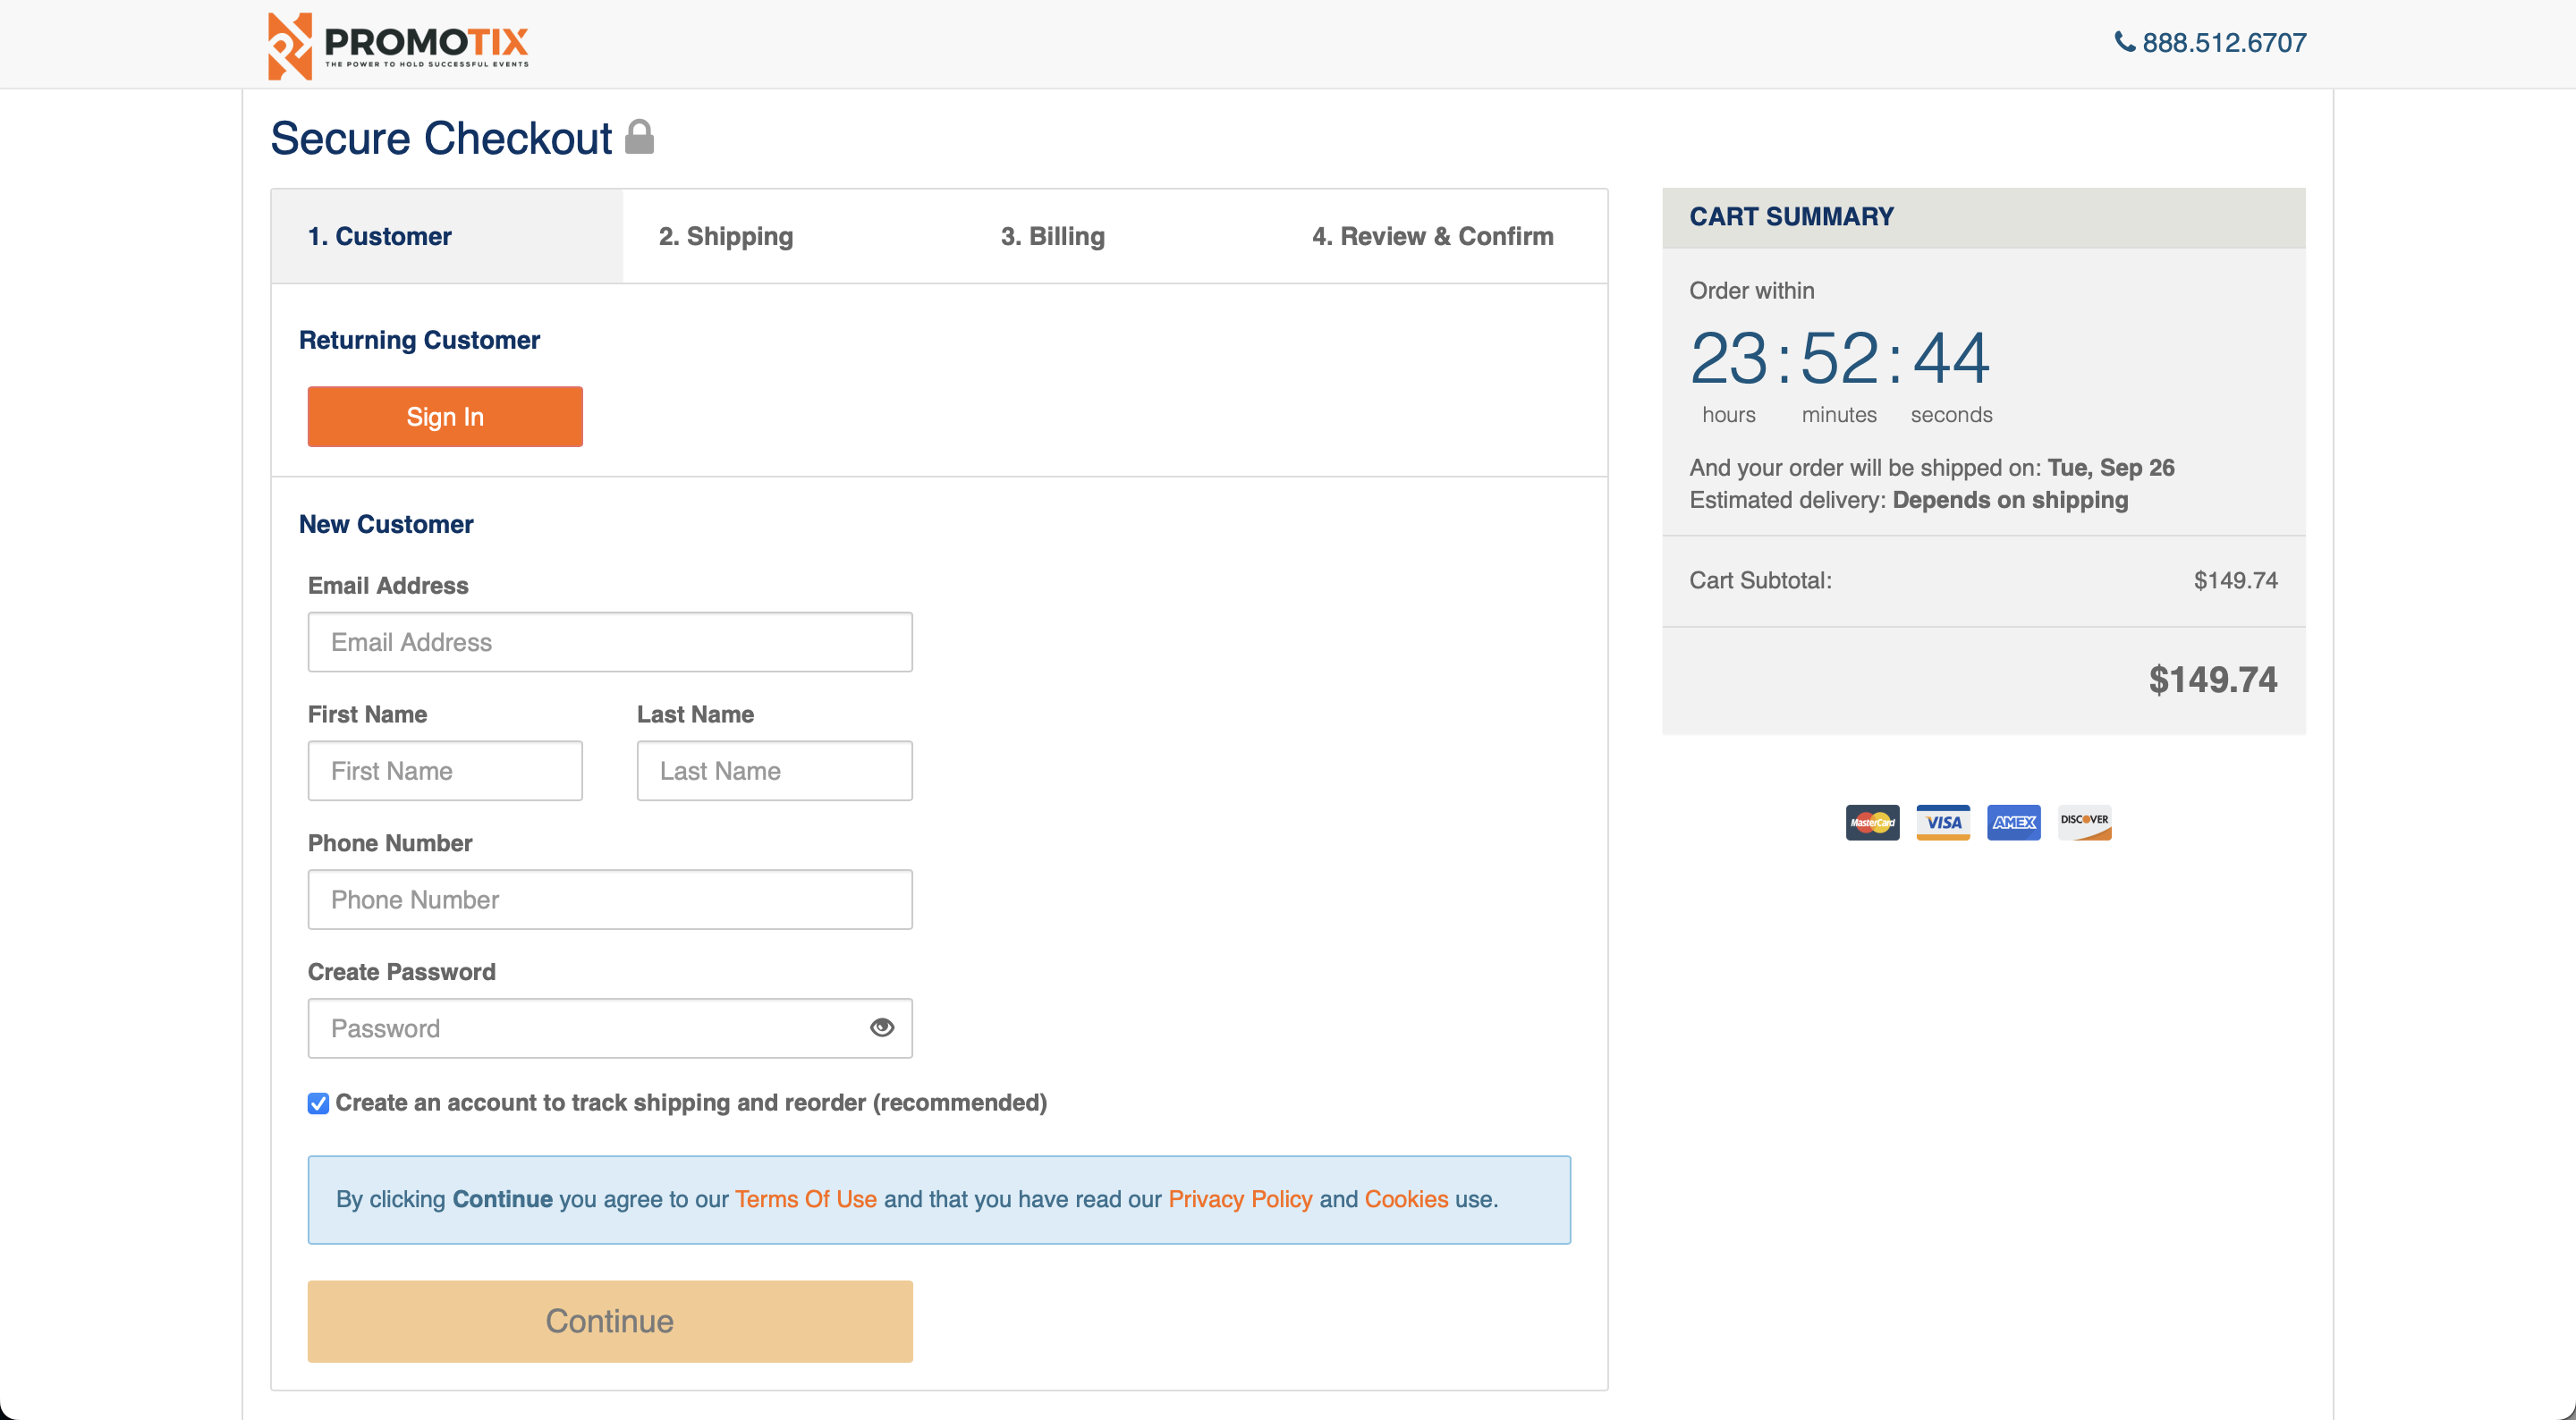 Complete the checkout process to place your order. You can create or sign in to an account to manage your orders, select your preferred shipping service, and more.
NOTE: PromoTix Printing accounts are different than regular PromoTix accounts. If you try to login using your regular PromoTix account credentials, you will not be able to login. Create a new PromoTix Printing account to manage your PromoTix Printing orders.
After placing your order, you will receive an email confirmation, tracking number, and your tickets will be shipped directly to your shipping address.
IMPORTANT: once you place your order, you will not be able to make any changes without re-ordering.

