All Posts

How to setup your organizer profile page

(Last Updated 12/17/22)

This guide will show you how to setup your organizer profile page on PromoTix. Your organizer profile page contains your website, social media links, company image, and other company information - all important information to want to share with your potential customers!

Your organizer profile page also contains a list of all your upcoming and past events on PromoTix which can be shared publicly.

1. Click on "Account settings"

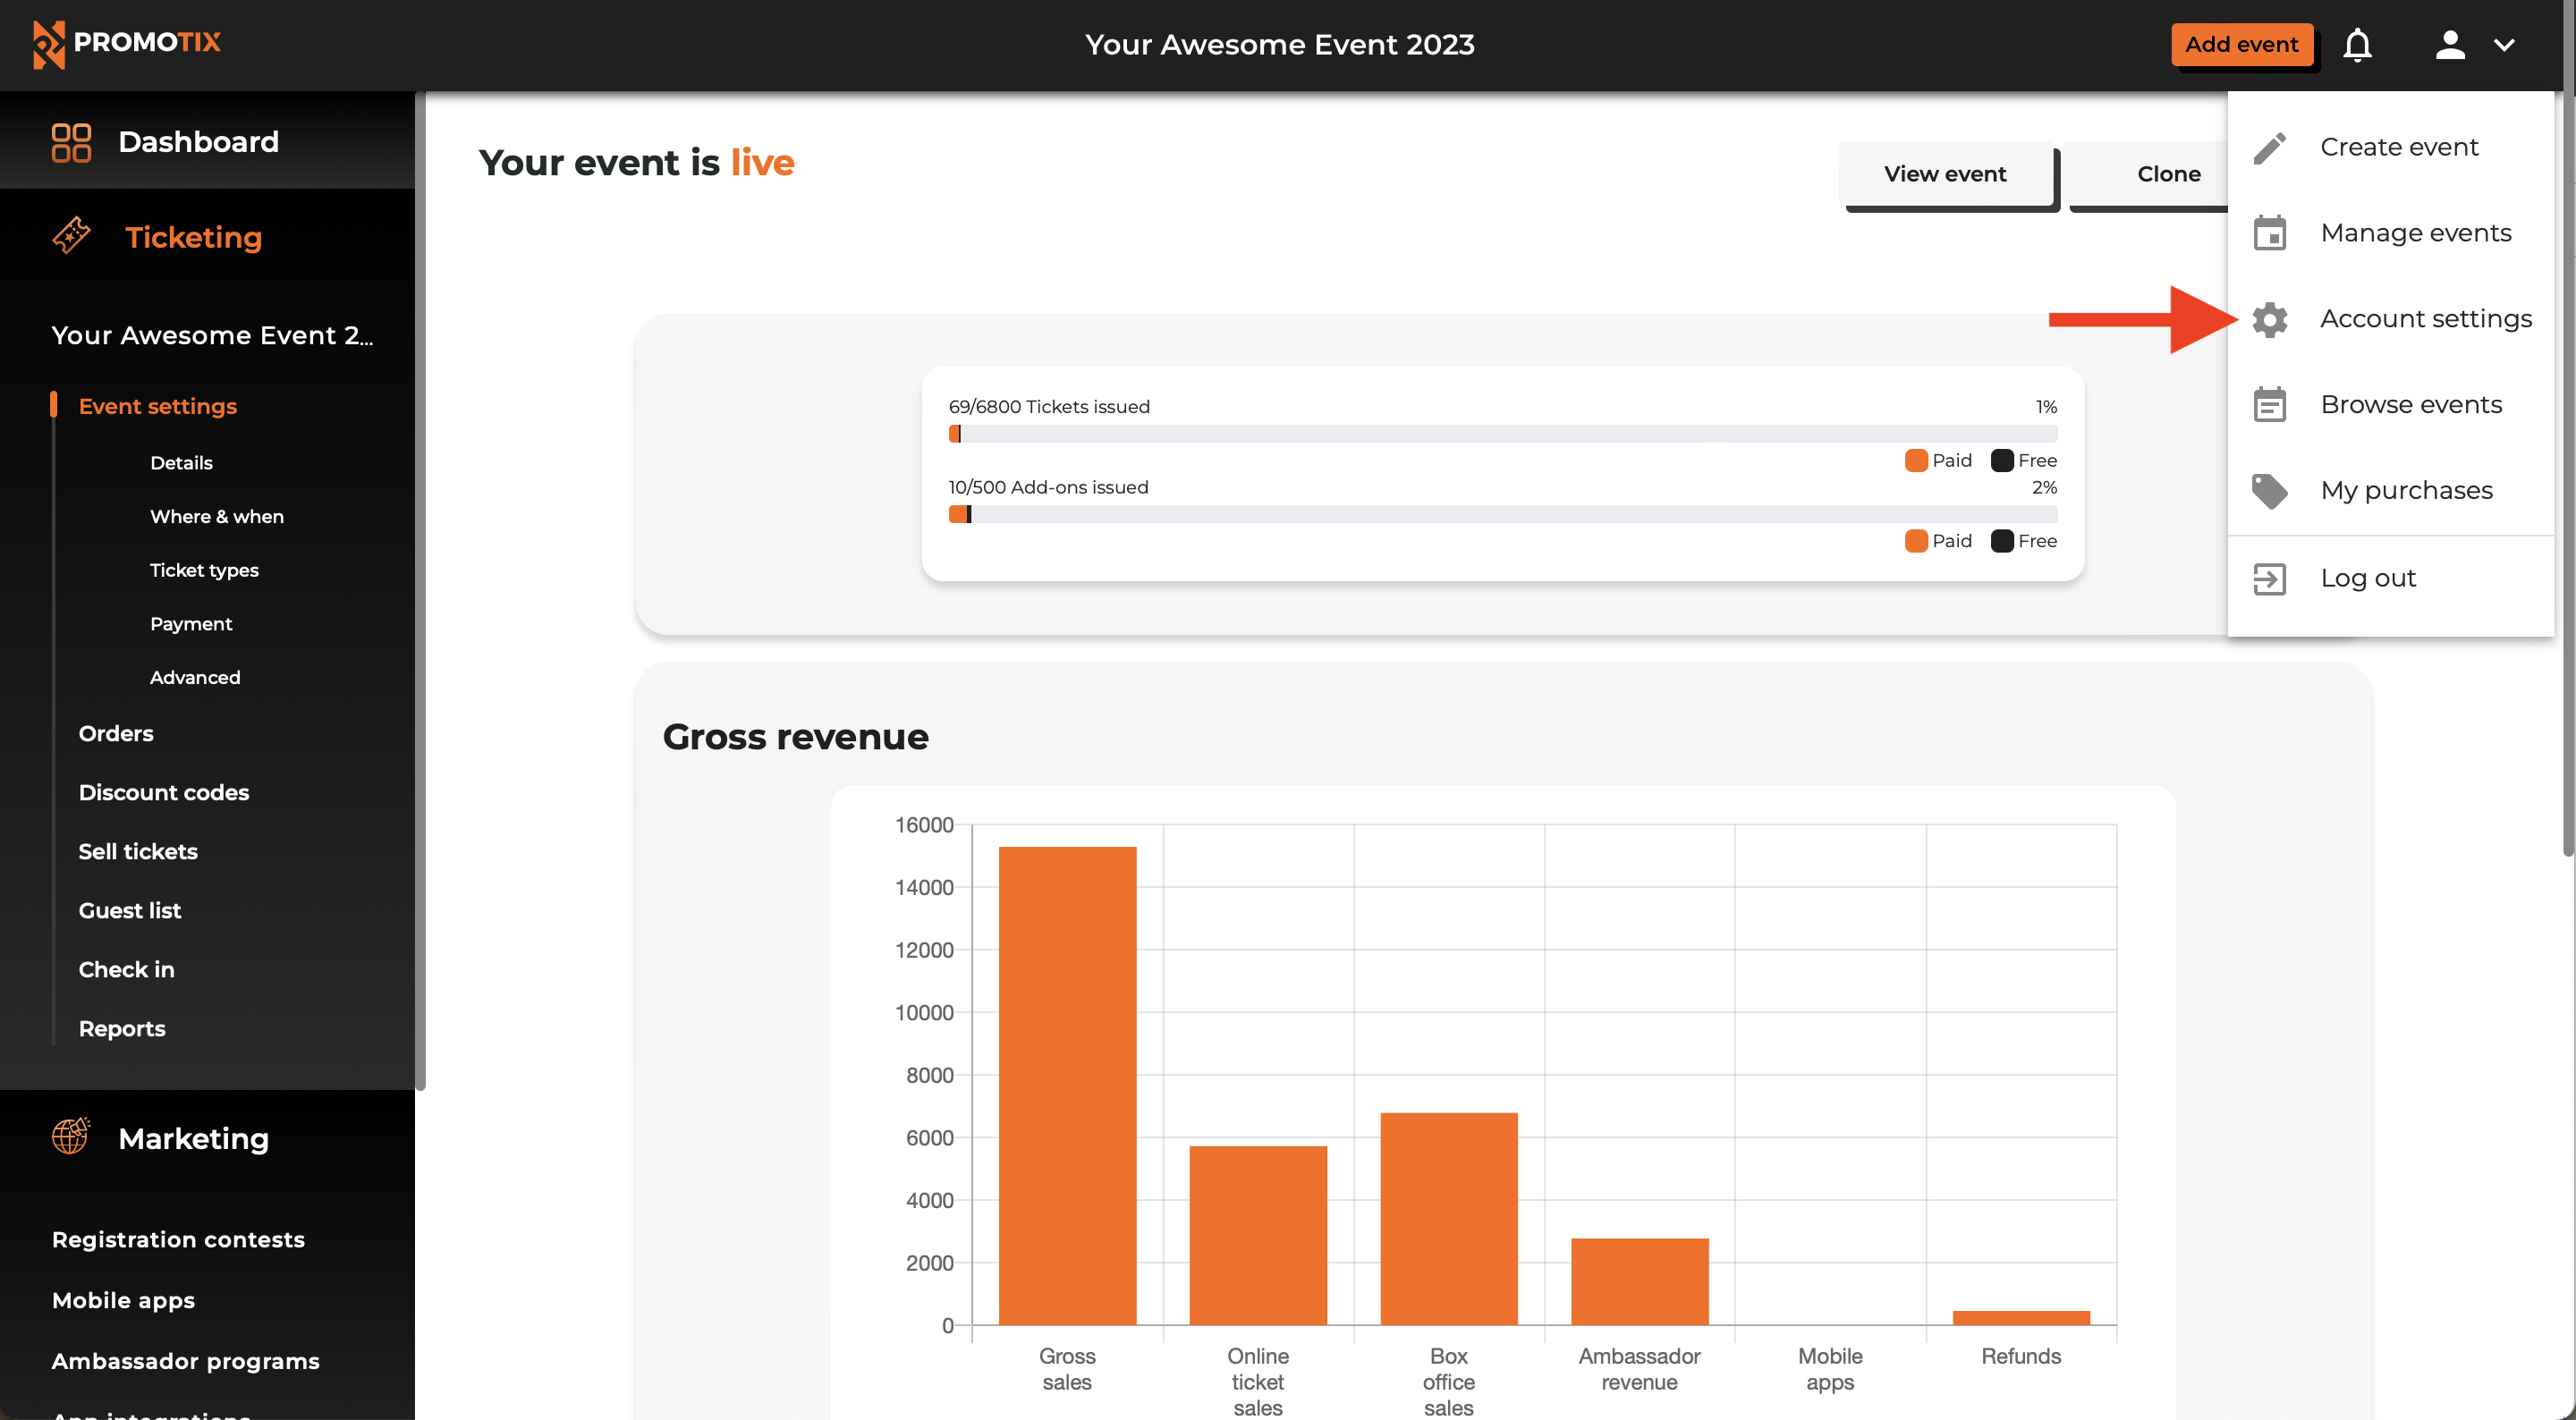
Login to your PromoTix account using a web browser, and then click on the profile icon in the top right hand corner of the screen to open the dropdown menu. Then, click on "Account settings."

2. Fill in your company details, then save changes

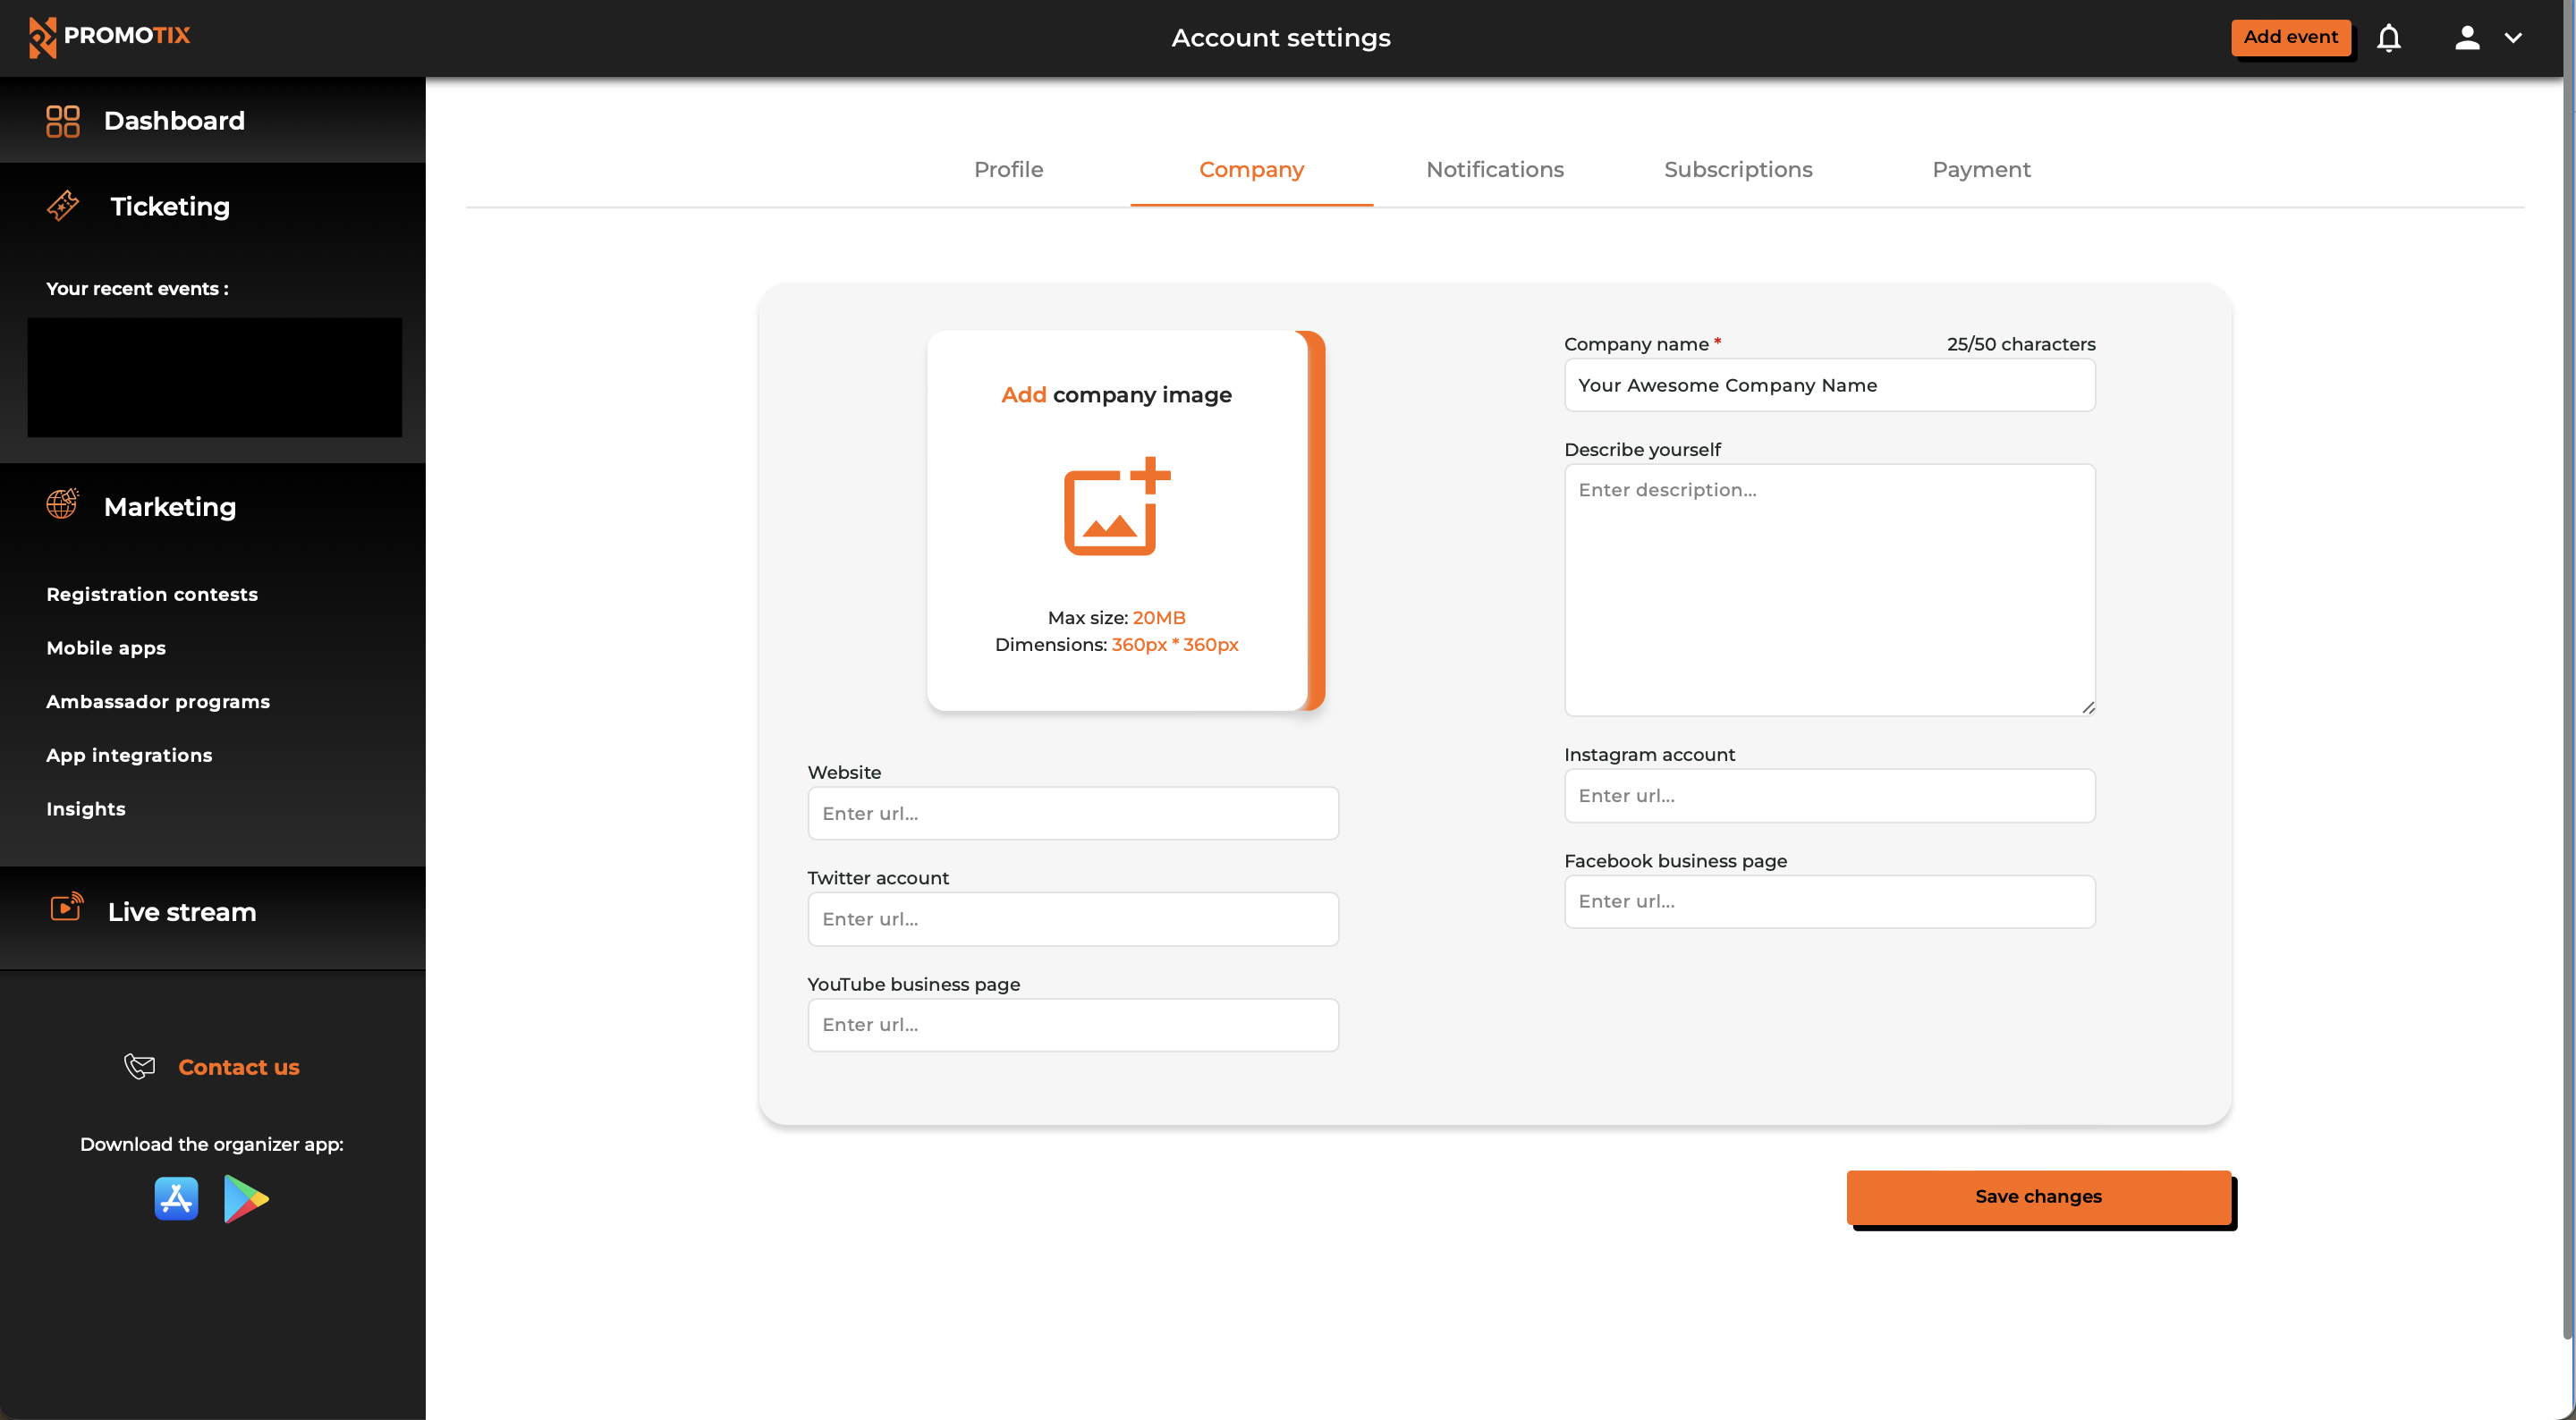
Click on the image box to upload a square image for your company or organization. Afterwards, fill in the rest of the fields (you can leave certain fields blank if they do not apply to you).

Once you're done, don't forget to click the "Save changes" button in the lower right hand corner of the screen.

3. View your organizer profile page publicly

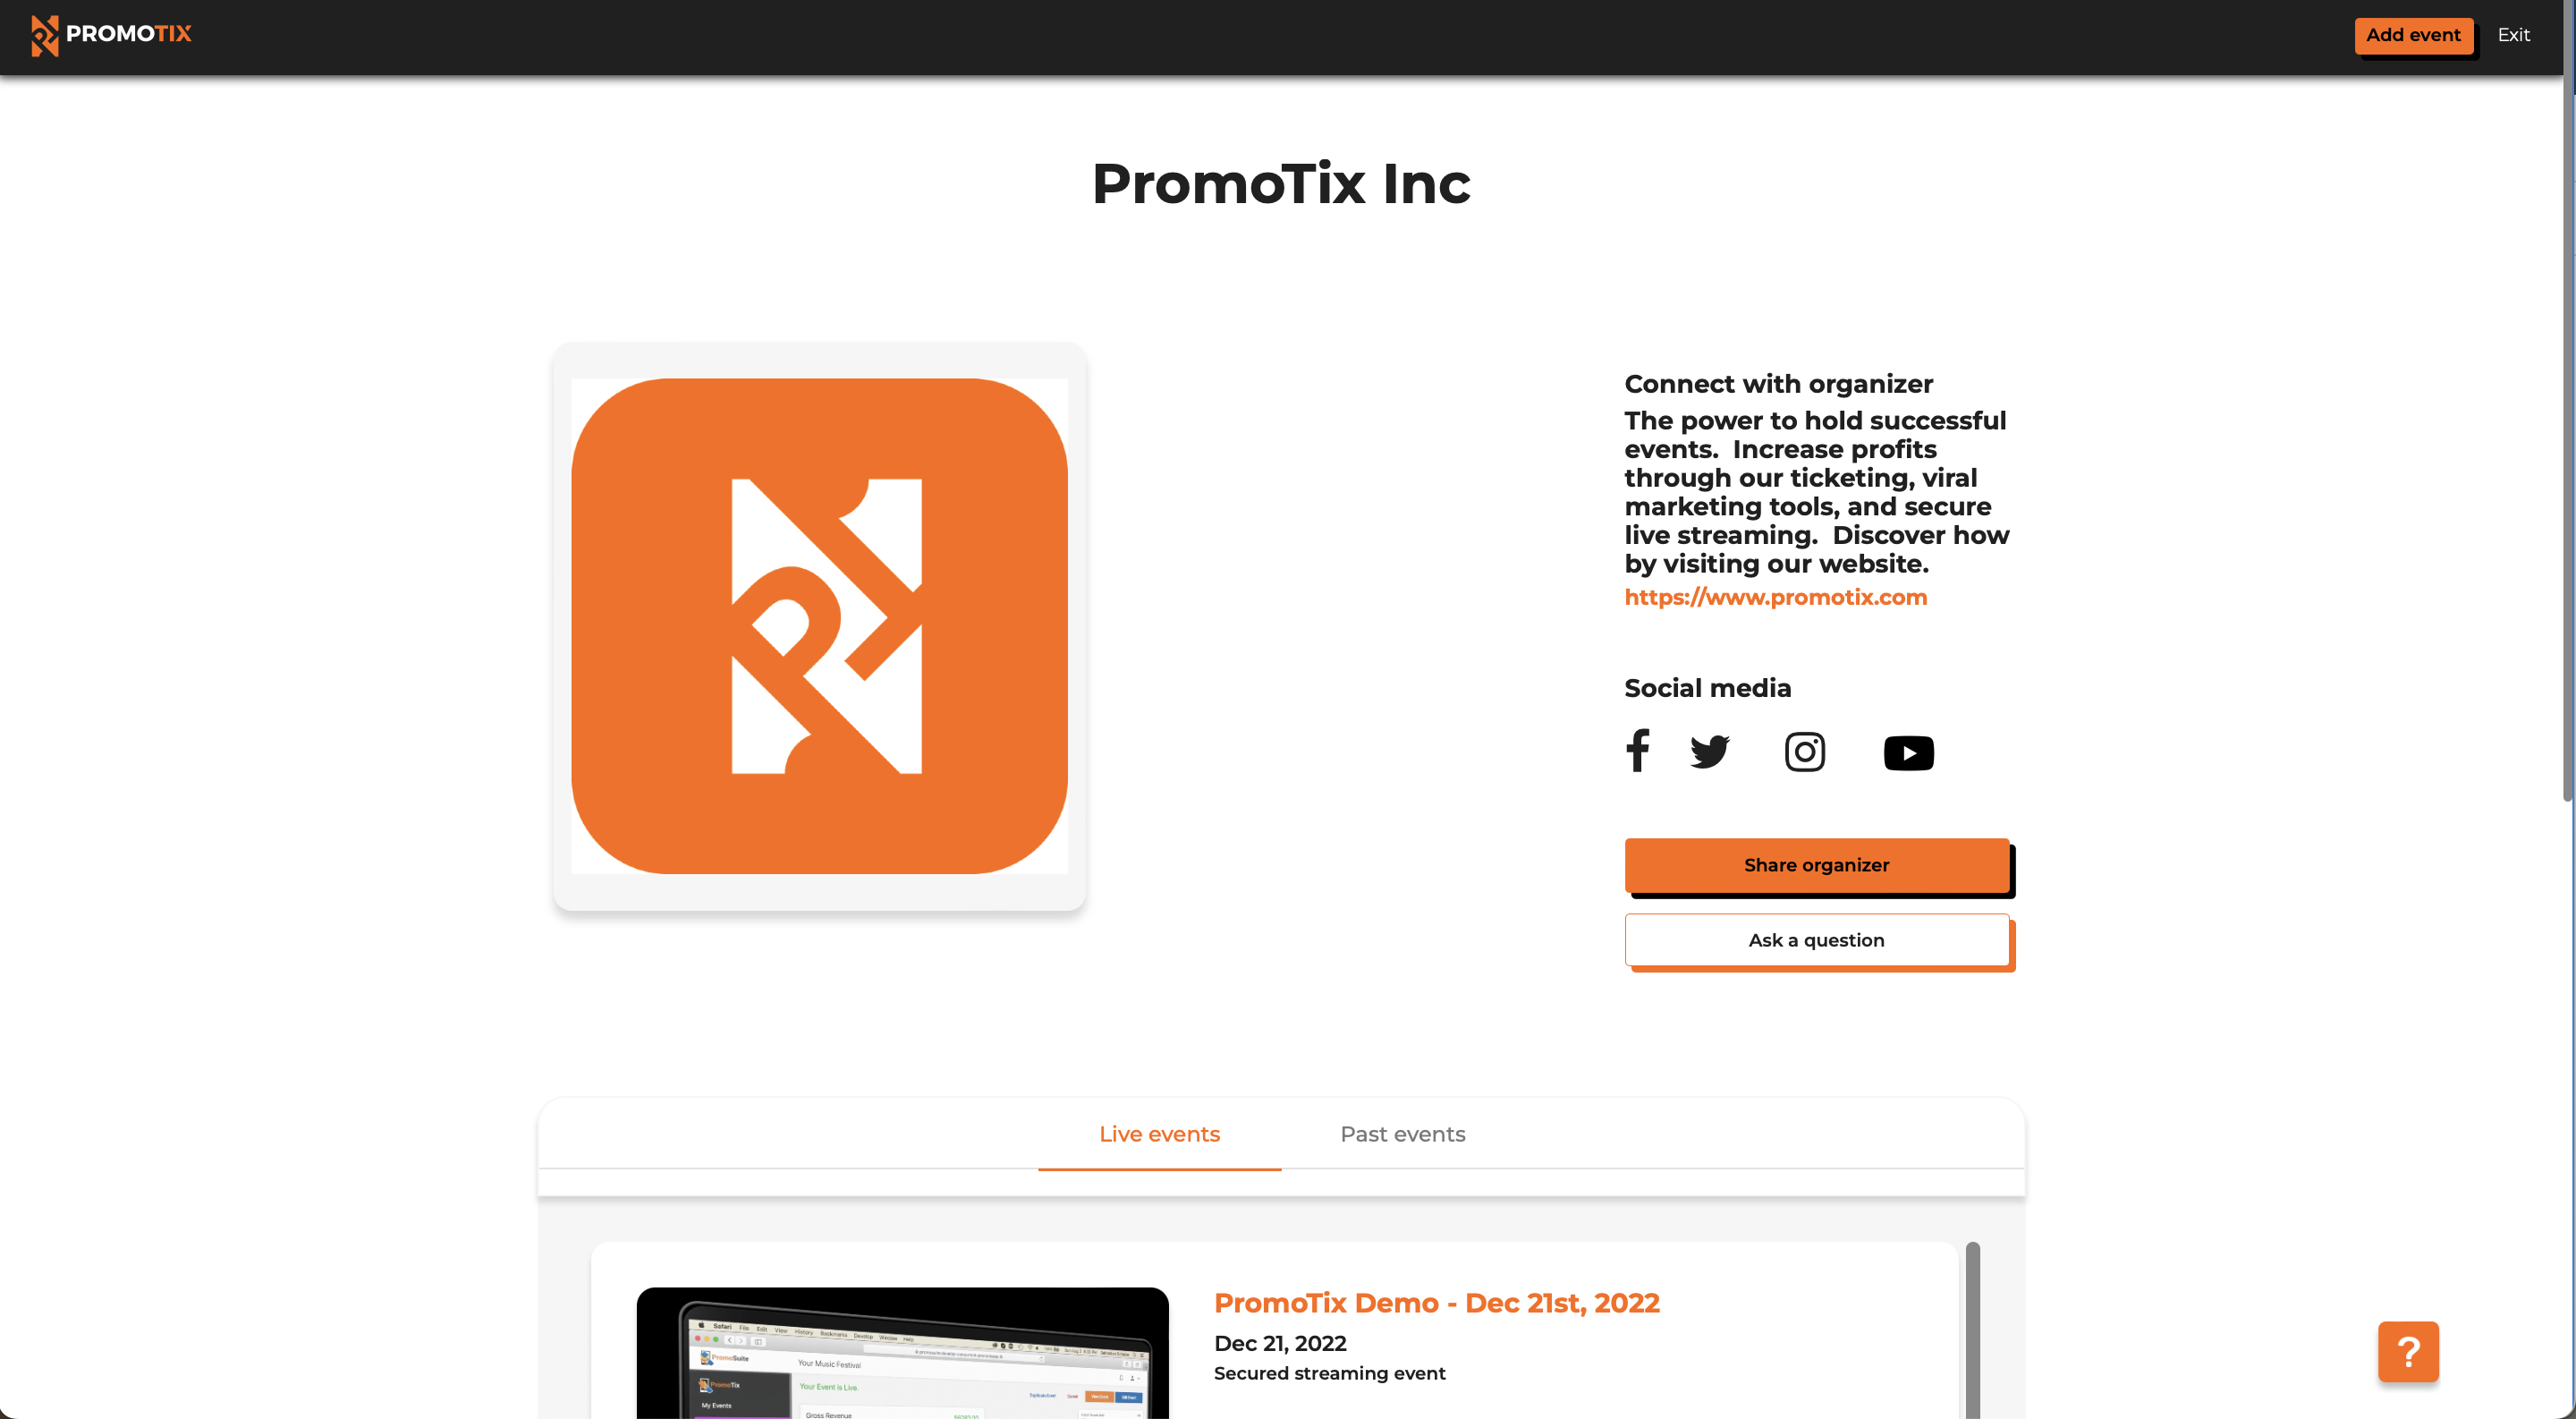
To see what your new organizer profile page will look like to the rest of the world:

  1. View any of your public event pages (published events only)
  2. Underneath the "Organizer(s)" section, your company name will be listed and hyperlinked
  3. Click on your company name. This will redirect you to your public organizer profile page

Still Have Questions?

Contact Us

Danielle Deojay
Danielle Deojay
Danielle is the Executive Assistant to the leadership team here at PromoTix. She has Bachelor's in Marketing and is pursuing a Master's in HR Management.

PromoTix is an established provider of event ticketing platforms, event marketing software, event promotion tools, and event management technology used by event organizers around the world to sell more tickets and grow their audiences.

Related Posts

How to connect your Authorize.net account to PromoTix

(Last Updated 3/4/26) Currently PromoTix supports Stripe, PayPal, and Authorize.net for credit card processing. In order to sell paid tickets on PromoTix, you will need to connect at least one payment processor to your events. All revenue from ticket sales will be deposited directly into your chosen payment processing account. For the latest information on Authorize.net's platform, payout schedules, and associated fees, please visit their website here. NOTE: a PromoTix enterprise package is required in order to use Authorize.net with PromoTix. NOTE: the following currencies are supported by both Authorize.net and PromoTix: USD, CAD, AUD, EUR, GBP, NZD, DKK, NOK, ZAR, and SEK. NOTE: currently no credit card terminal is supported by both Authorize.net and PromoTix (only "card not present" transactions are currently supported).

How to connect your PayPal account to PromoTix

(Last Updated 8/11/25) PromoTix supports PayPal as an option for payment processing. In order to sell paid tickets on PromoTix, you will need to connect a supported payment processor (like PayPal) to your events. All revenue from ticket sales will be deposited directly into your PayPal account. For the latest information on PayPal's platform, payout schedules, and associated fees, please visit their website here.

  • 6 min read
  • Aug 14, 2025 4:17:30 PM

How to create custom checkout questions

(Last Updated 7/9/25) There may be times when you need to gather additional information from your ticket buyers that will allow them to enter their own personalized response. Follow this guide to start using the Custom checkout questions feature.

  • 3 min read
  • Jul 9, 2025 2:46:04 PM