It’s incredibly easy to sell tickets on a Squarespace site for your event. With one simple line of code, and a ticketing service provider, you can have the entire checkout process embedded on a page of your Squarespace site and begin selling your event tickets in just minutes.
Selling tickets on Squarespace
If you want your customers to be able to purchase tickets directly on your Squarespace website, without ever leaving your domain, you’ll first want to create a new page on the website with a slug such as “/tickets.”
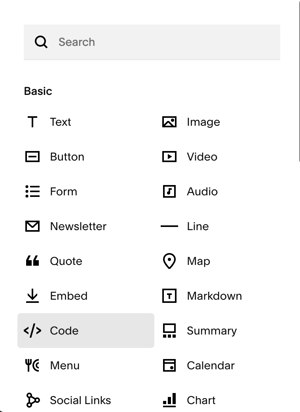
 For now, just keep it a blank page using your header. The only module you should look to include on the page is an HTML "code" module and possibly a "text" module above it, where you may provide the user a little bit of instruction such as on-sale dates, or any other pertinent information you want the ticket buyer to read before making their purchase.
Next we’re going to open a PromoTix account so that you can create and manage your ticket types, orders, and have an application to scan QR codes at the event to validate tickets for entry.
Create a PromoTix account to sell tickets on Squarespace
PromoTix is a ticketing system that costs nothing to signup, create events, and begin selling tickets. PromoTix only charges a small fee when you sell a ticket, so there’s no credit card needed to start, monthly fees, or payment necessary to list tickets for sale on Squarespace.
Get started by creating your PromoTix account here. If you need help setting up your event, PromoTix has several guides on how to create your event and ticket types.

No credit card or payment required.
Once you’ve created your PromoTix account and have published your event, your tickets will be available for sale on the PromoTix event page that the system creates for you. Now comes the step where we will embed the PromoTix checkout flow onto your Squarespace website "code" module, so you can sell tickets under your own domain and website header without customers ever having to visit PromoTix.
Embed the PromoTix checkout on Squarespace
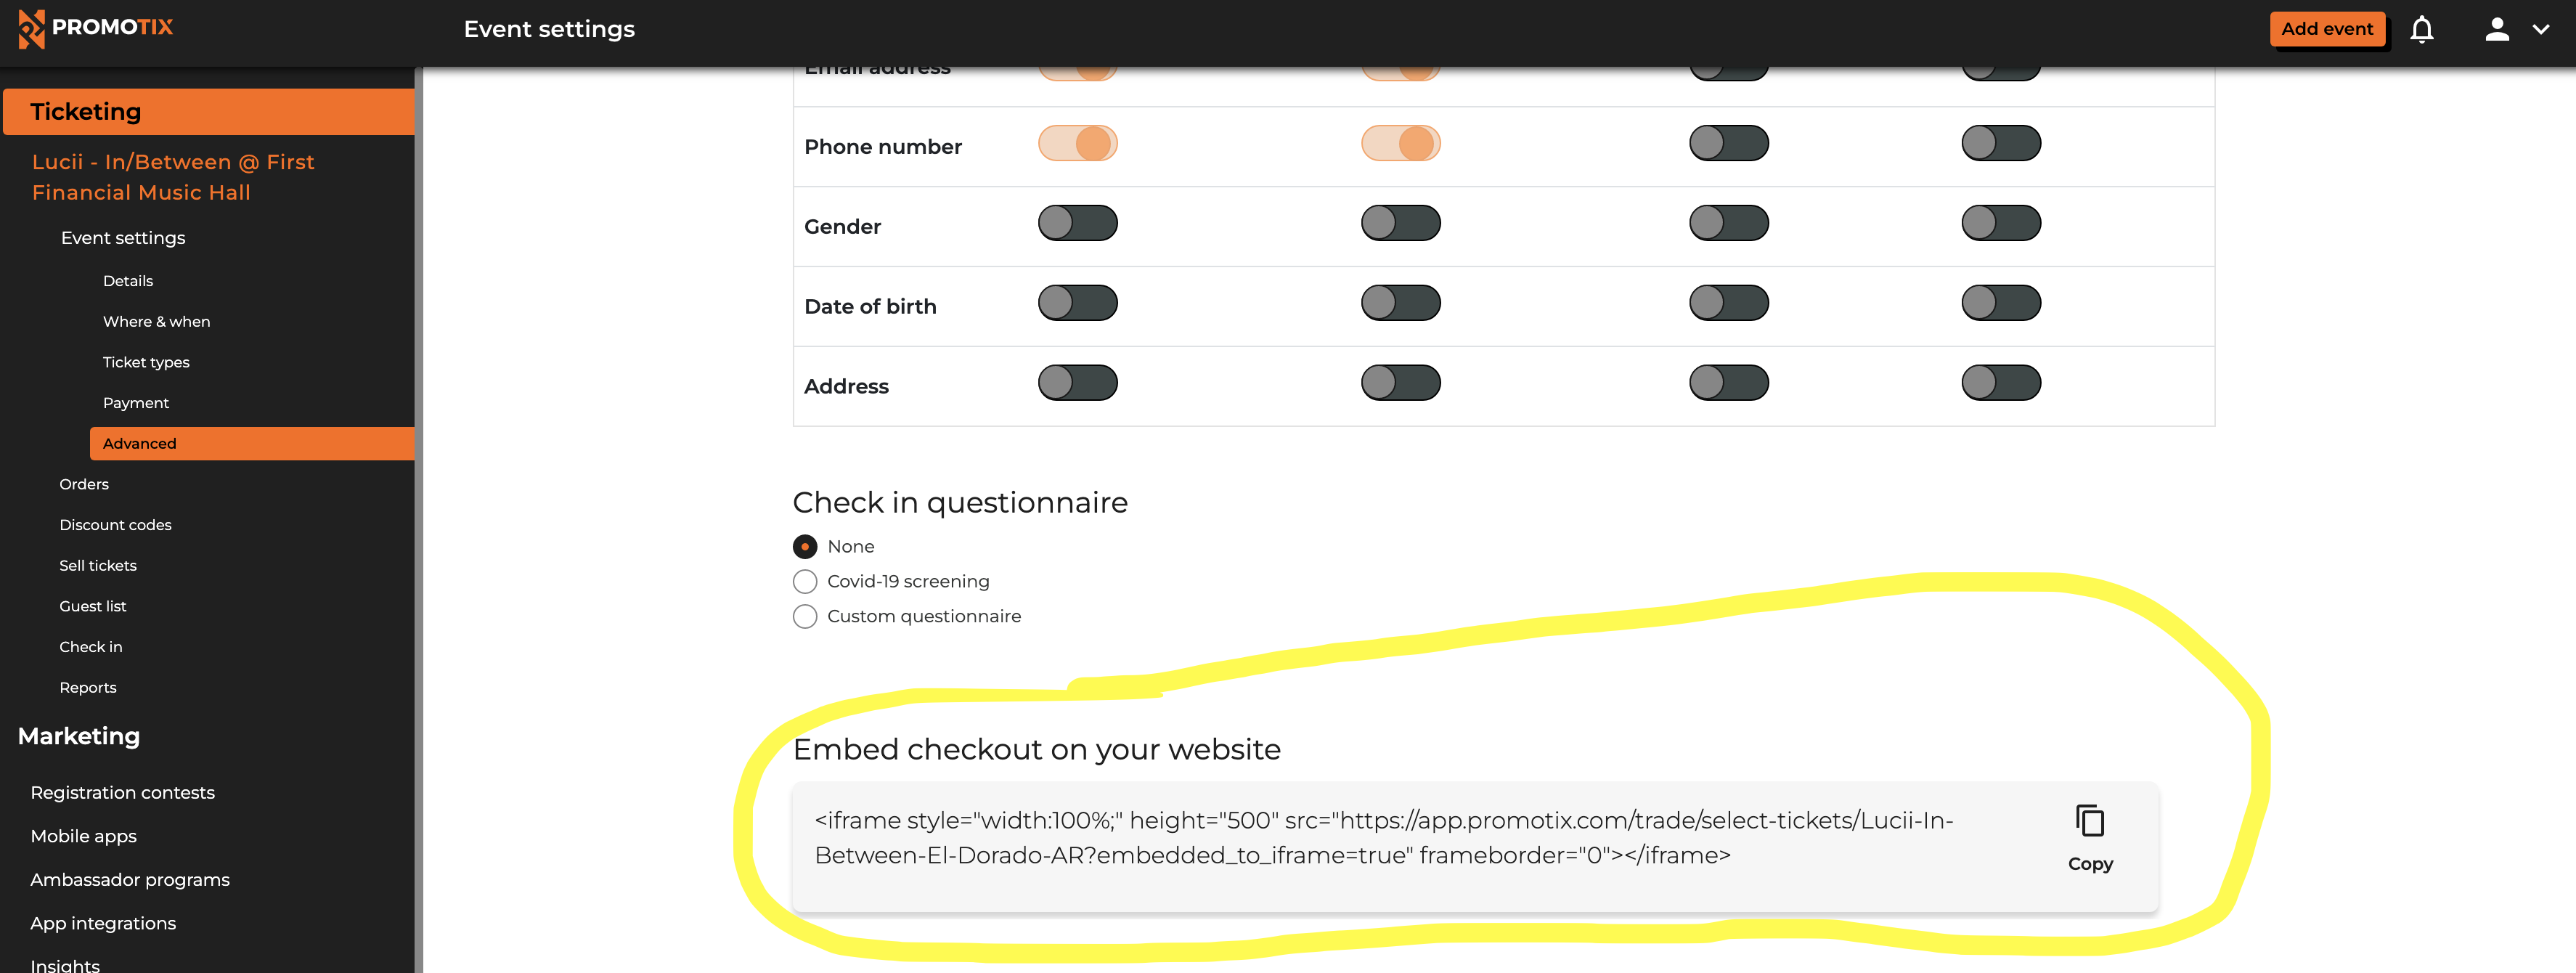
In your PromoTix dashboard, click on the event, navigate to the "Advanced" tab under settings, and then on the first "Checkout" tab, and find “Embed checkout on your website." This code should be a very short line that starts with "<iframe".
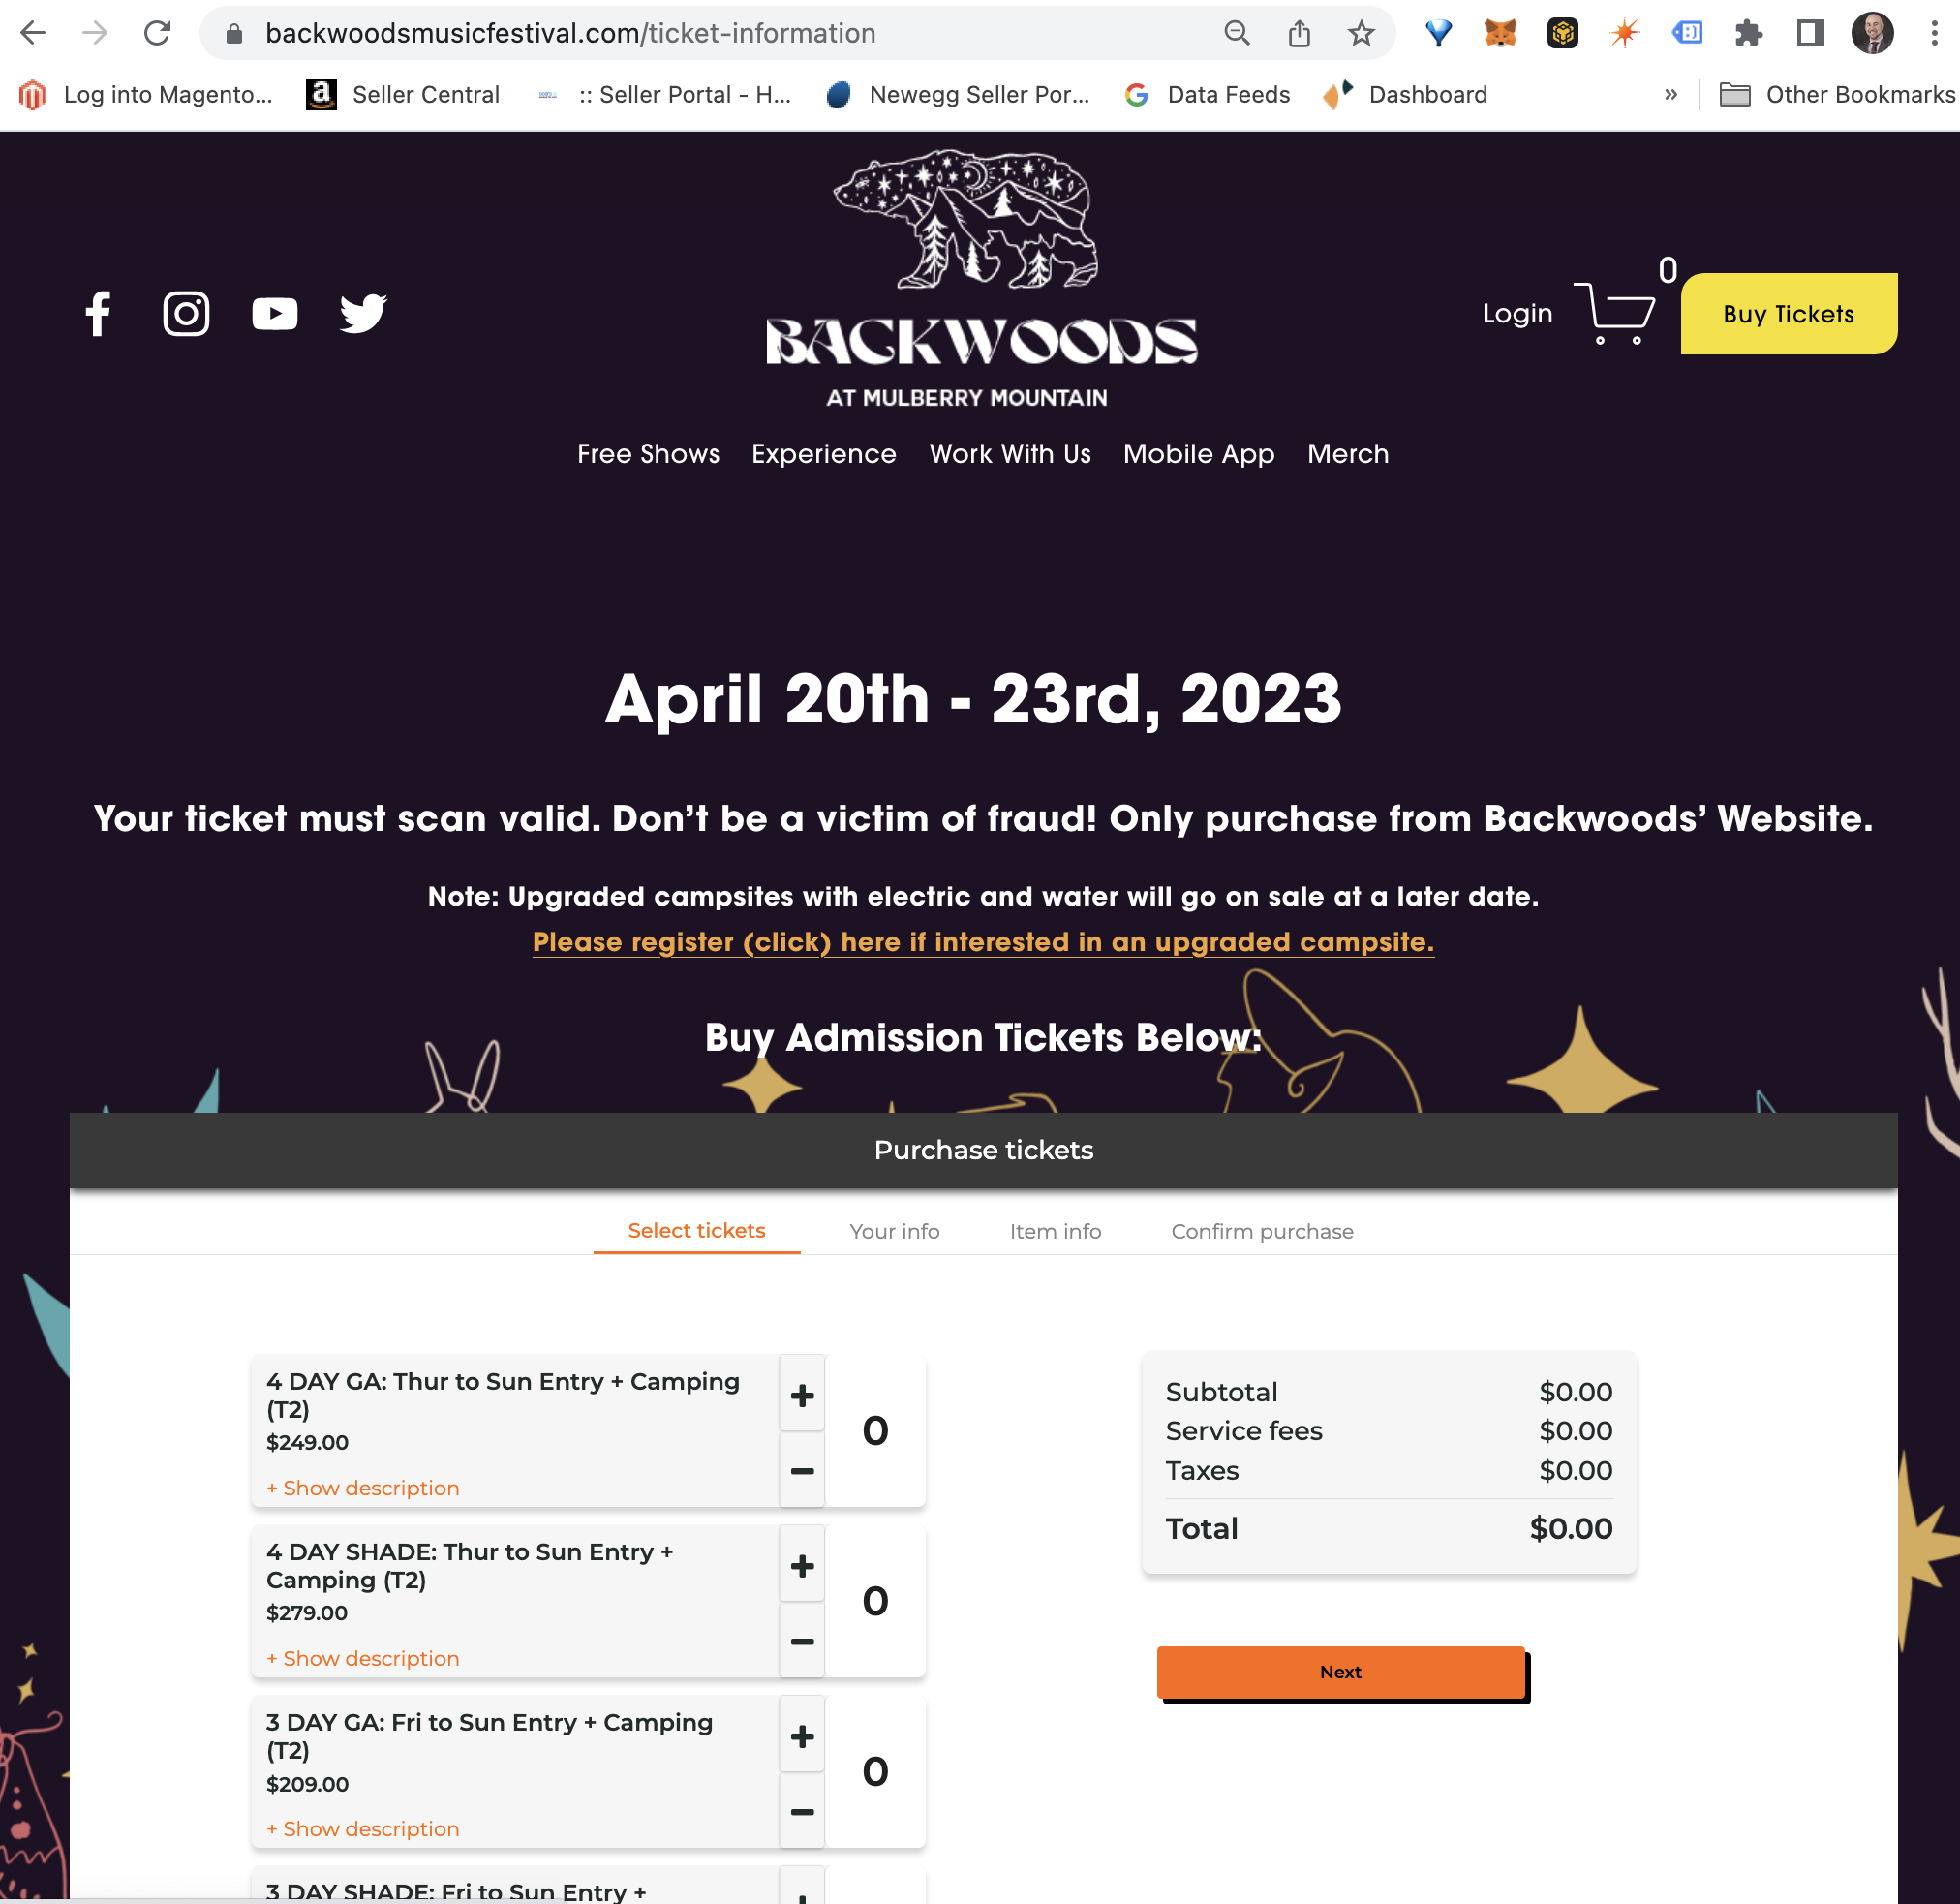
Copy the code and go back to the initial blank page you created on your Squarespace site. Paste the code into the html code module and voila! You should now see the checkout on your Squarespace site with the listing of ticket types you created for sale. The customers can complete checkout now and purchase your tickets without ever leaving your Squarespace website. Check out this example below.
 If you have a lot of ticket types and the list is long, you may experience a “scroll within a scroll” with the standard code which could be annoying to some users. To resolve this, simply increase the “height” tag value inside the <iframe code until the scroll is gone.
List multiple events with tickets for sale on Squarespace
If you have multiple events that you want to list on Squarespace with tickets for sale, you can simply repeat the process above and create a separate checkout flow/page for each event.
Then, after creating the individual event checkout pages, you can create a master event listing page to advertise your events. On this page you may want to spruce it up with images of the event flyers in a grid or listing format, or possibly build a calendar view where visitors can select the day/event.
When the user selects the event listing on your master event listings page, it should link them to the individual event checkout page you created with the PromoTix event embed code. Here's an example of a master event listings page:

And that’s it!
As you can see, the process from start to finish is incredibly easy. You can sell tickets on your Squarespace site and be up and running in a matter of minutes with a professional look, and system to manage your orders and checkin process at the event.


