(Last Updated 5/22/25)
Here's how you create an in-person event on PromoTix! You can also see our YouTube demo -
Create, Sell, and Manage Tickets for Any Event: PromoTix Ticketing Demo
1. Click on "+ New event"

Click on the "+ New Event" button to start creating your event.
TIP: You can also create a new event using the method below:

2. Fill out your event's details
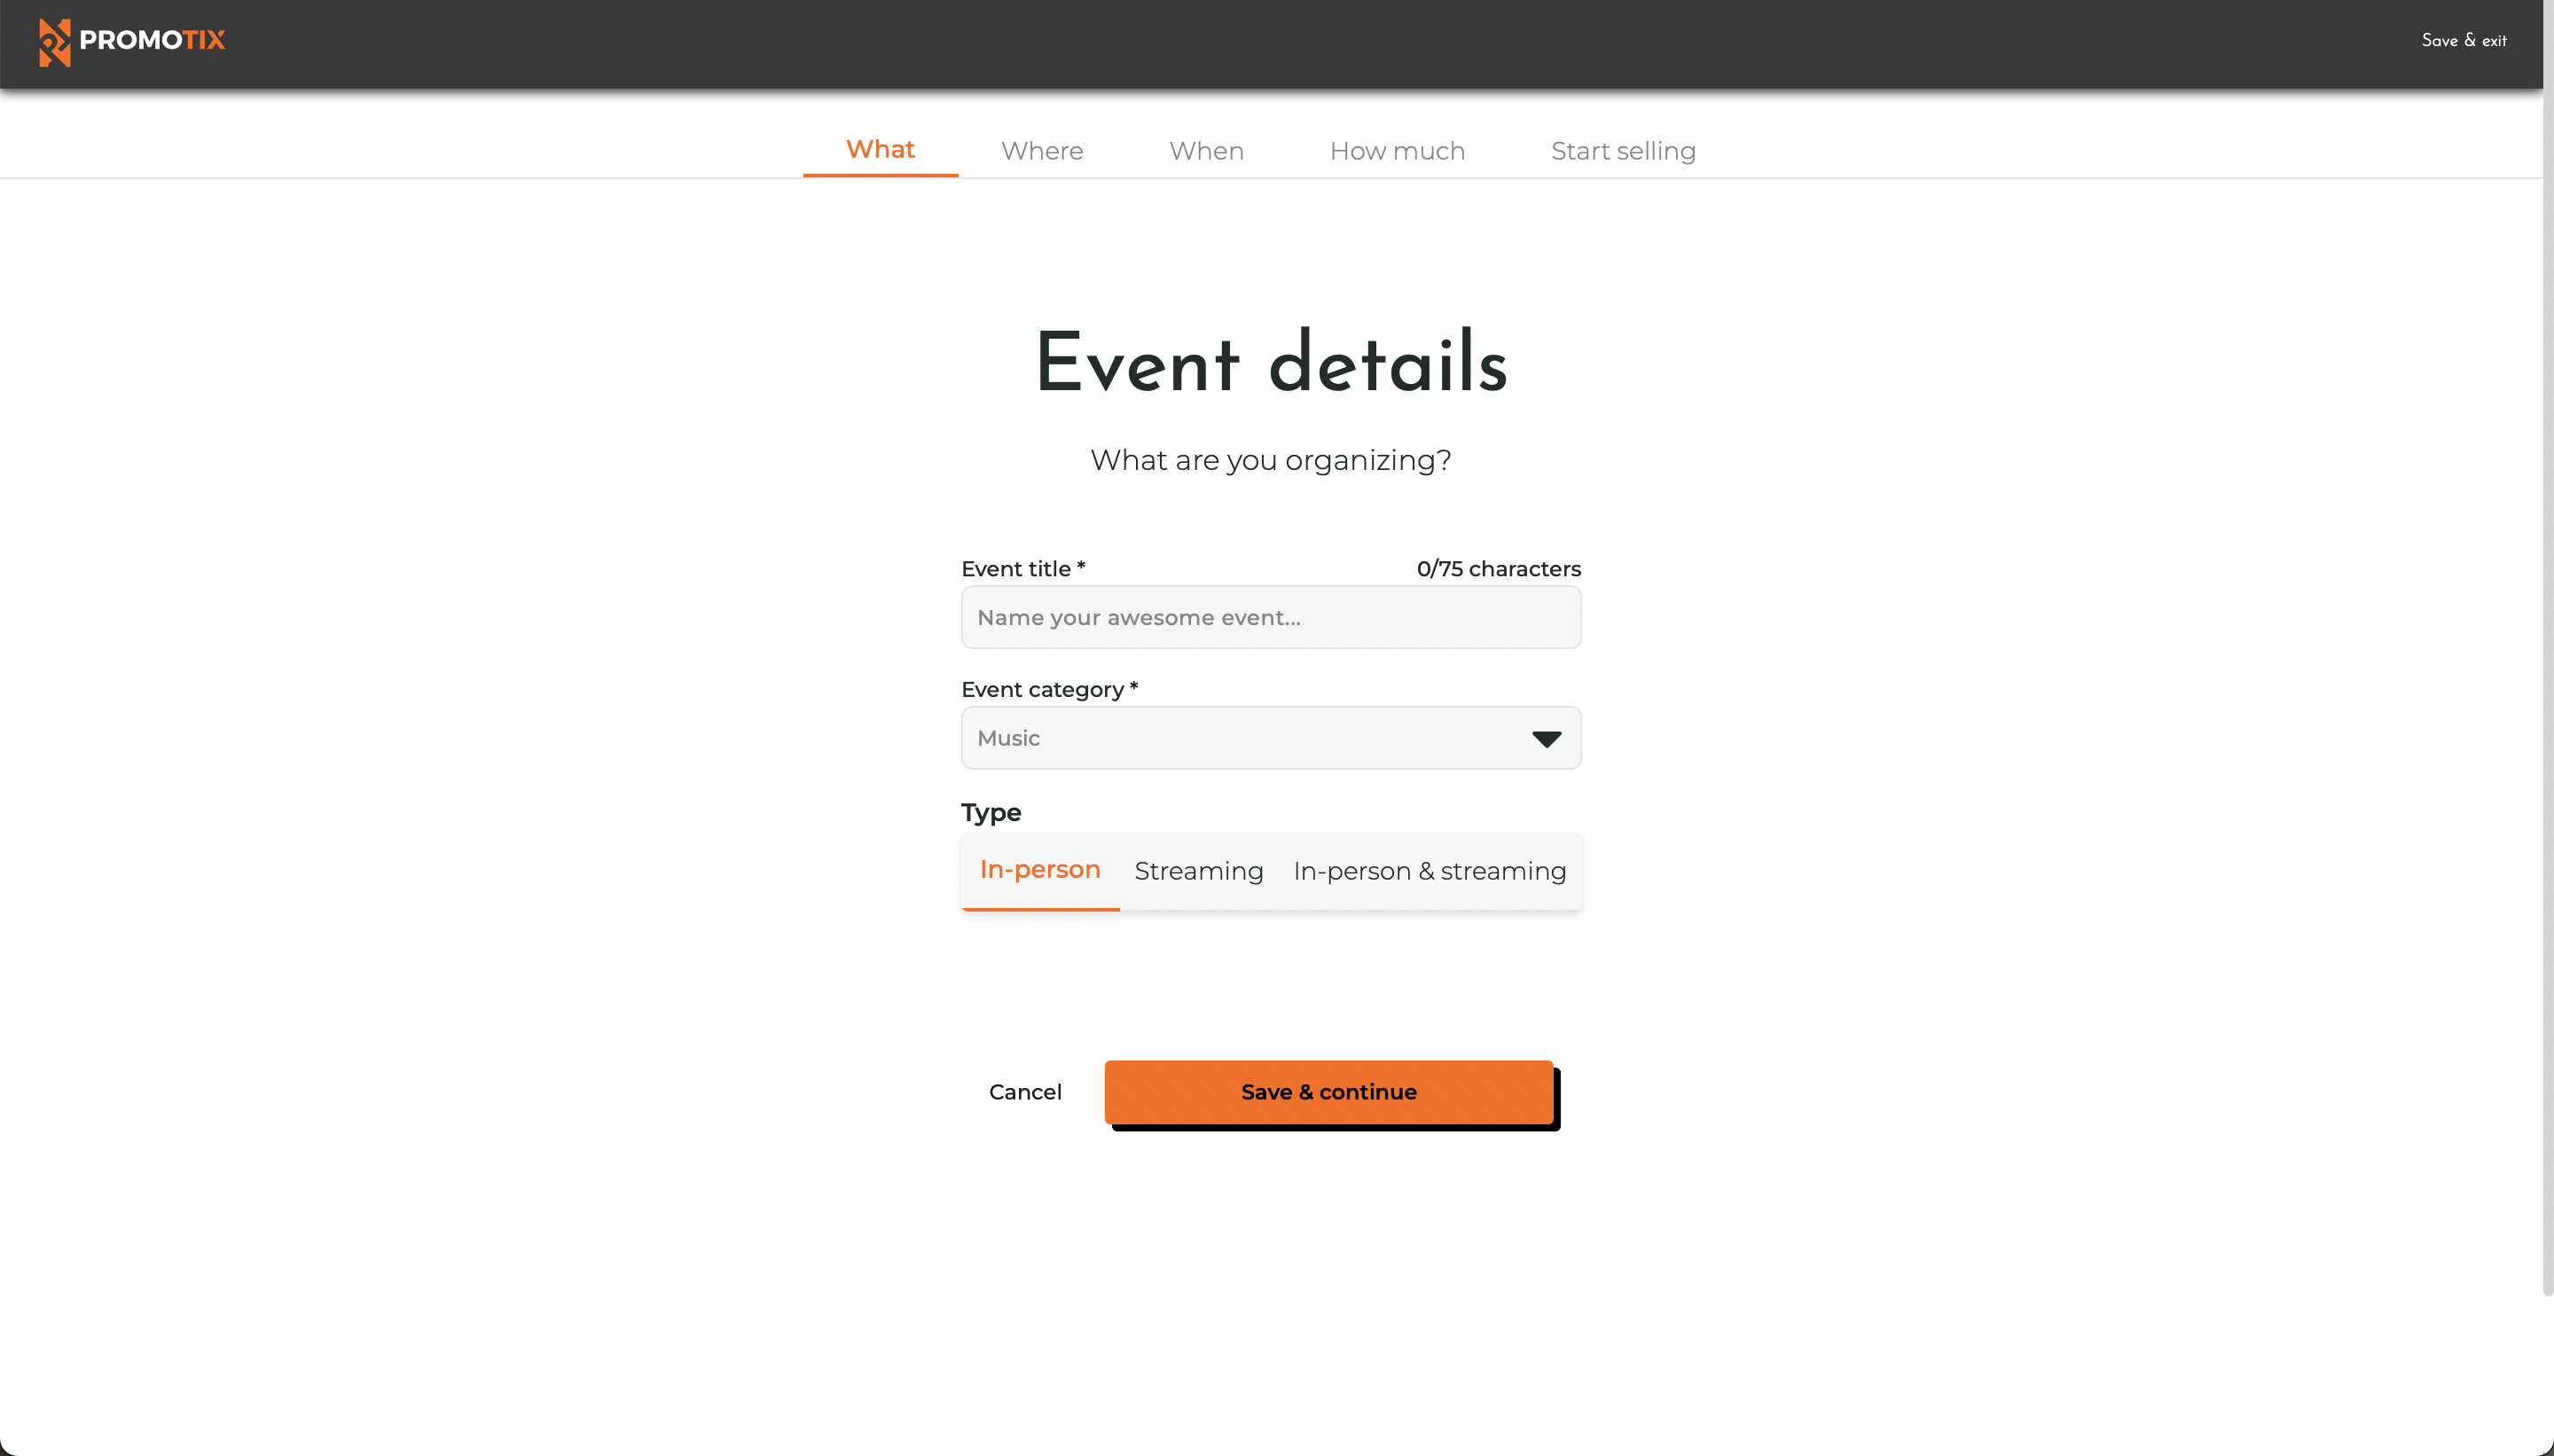 Add some basic details for your event. Add the title of your event, select your event category, and select the "In-person" event type. Once you're done, click on the "Save & continue" button.
3. Add your event's venue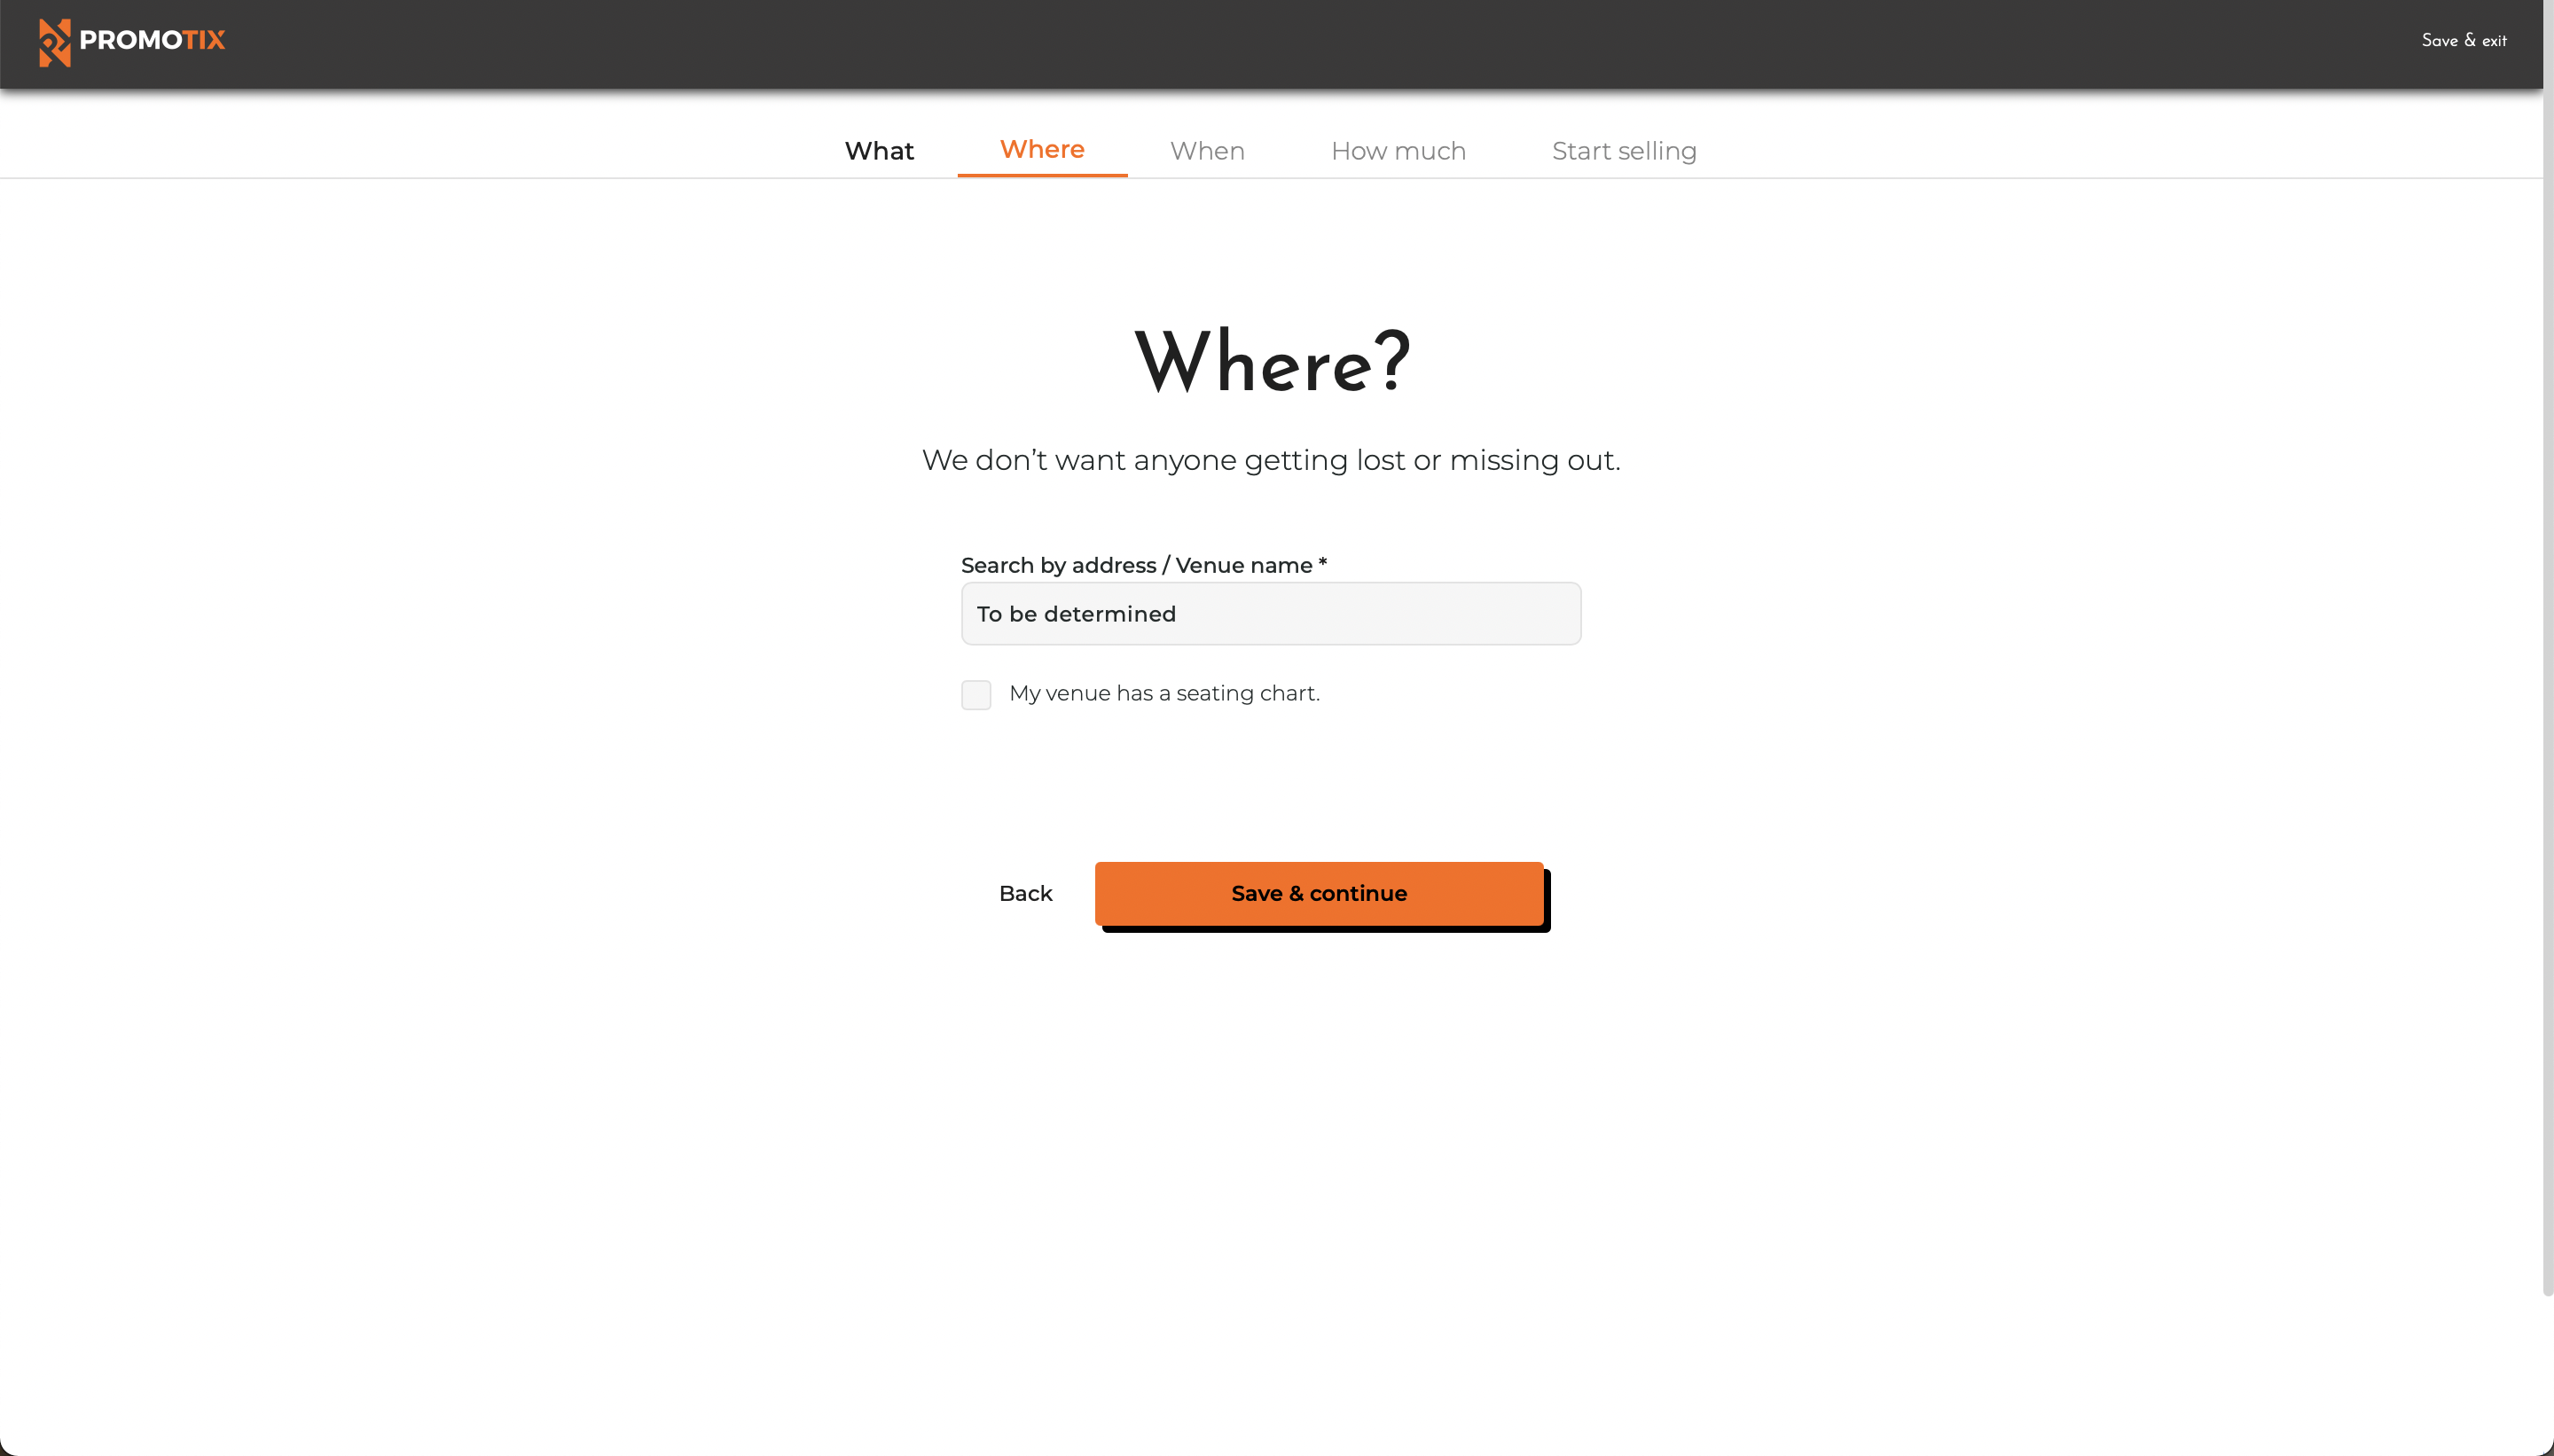
Once you're done, click on the "Save & continue" button.
TIP: if you do not want to publicly announce your venue yet, leave "To be determined" in the venue field. Don't forget to come back and update this later!
4. Select your time zone, date(s), and time(s) of your event
.png?width=694&height=312&name=Screenshot%20(212).png) Select the drop down menu to choose your even time zone, enter your start date, start time, and end time. If your event continue past midnight, check the box that says "End time is past midnight."
Select the drop down menu to choose your even time zone, enter your start date, start time, and end time. If your event continue past midnight, check the box that says "End time is past midnight."
- Single event - choose this event type if you have a single day event or an event that spam over multiple days but does not require ticket holder to choose a specific time slot to attend. To add multiple days to your event, click the "+ Add another day" button.
- Recurring event - choose this event type if your event has specific time slots for your ticket buyers to choose from on the calendar. To learn more, click here.
Once you're done, click on the "Save & continue" button.
IMPORTANT: double check that your time zone is correct, because you won't be able to change it once your event is published. By default, your current time zone will be automatically selected. If your event is taking place in a different time zone, you will need to select it manually.
5. Create ticket types
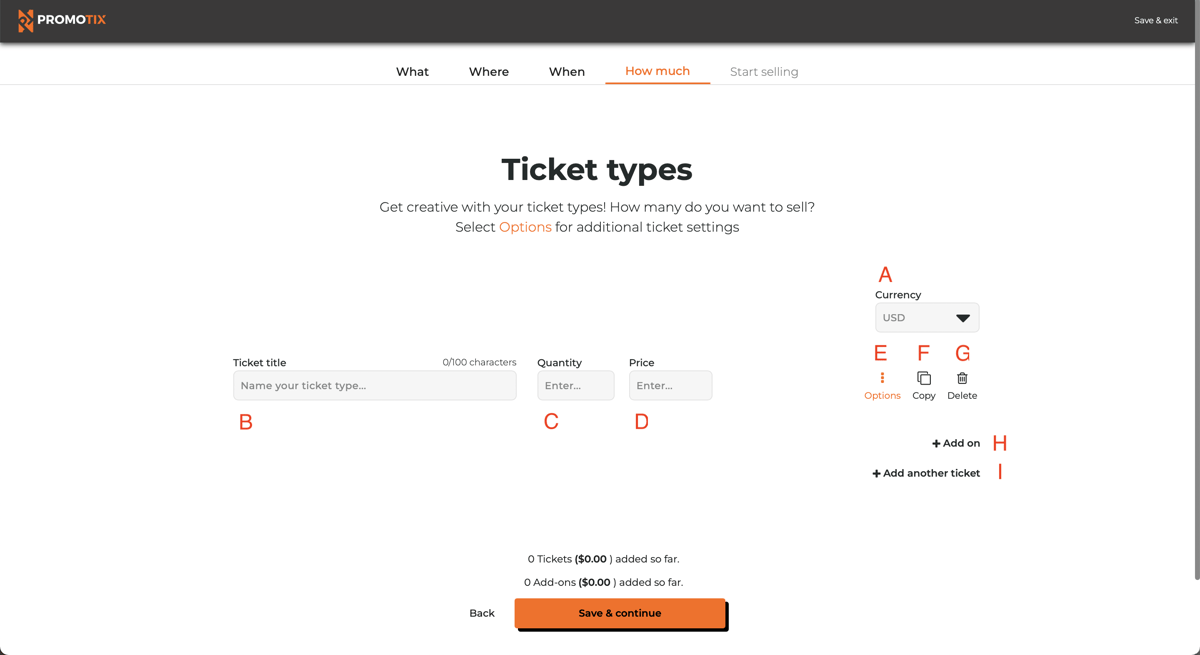 Time to let people know what you're selling! After you've set up all of your tickets, click on the "Save & continue" button.
-
A 👉Select your currency from the dropdown menu
IMPORTANT: Event organizers are limited to one currency per account, so make sure that you select your preferred currency here.
-
B 👉 Add a title for your ticket type
-
C 👉 Set the available ticket inventory for your ticket type
-
D 👉 Set a price for your ticket type
-
E 👉 Show additional settings (see below)
-
F 👉 Duplicate your ticket type
- G 👉Delete your ticket type
- H 👉 Create an add-on
TIP: Add-ons are similar to ticket types however they will not affect your attendance numbers. For example, create add-ons for products like VIP upgrades, parking passes, and merchandise items. You can also create multiple different variations of a single add-on (for example, different sizes of a T-shirt).
- I 👉 Create a new ticket type
Here are the additional settings you can adjust for each of your ticket types:
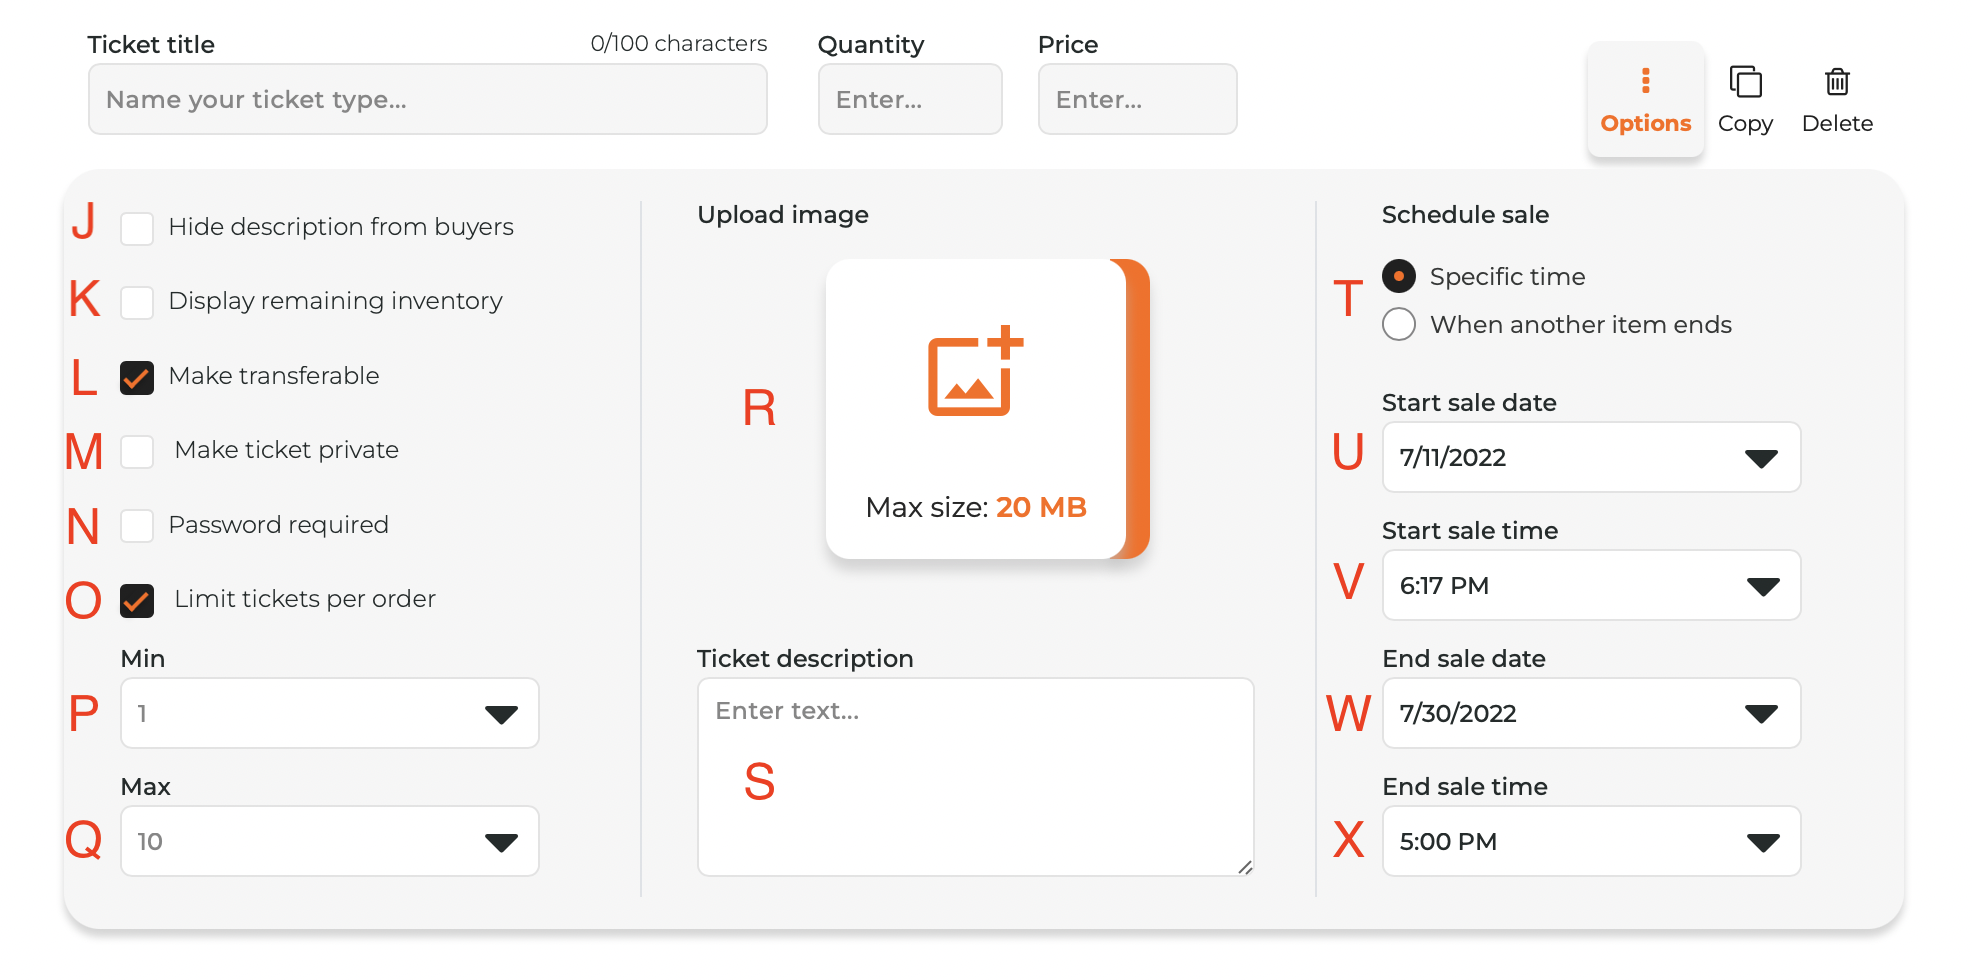
- J 👉 If checked, your ticket type description will not be shown publicly, but it will be visible to you
- K 👉 If checked, the number of remaining tickets available for this ticket type will be shown publicly
- L 👉 If checked, ticket holders will be allowed to safely transfer this ticket type to others using PromoTix
- M 👉 If checked, your ticket type will not be shown publicly, but it can still be sold by you
- N 👉 If checked, your ticket type will only be shown publicly to customers who enter in the password set by you
- O 👉 If checked, you can edit the minimum and maximum number of this ticket type that can be purchased at a time
-
P 👉 The minimum number of this ticket type that can be purchased at a time
-
Q 👉 The maximum number of this ticket type that can be purchased at a time
-
R 👉 Upload an image for your ticket type to display during the checkout process (optional)
- S 👉 Add a ticket description to display during the checkout process (optional)
-
T 👉 Decide on when this ticket type will go on sale. You can either choose a specific date & time, or have this ticket type go on sale automatically once another ticket type goes off sale
- U 👉 Set the date when this ticket type will go on sale
- V 👉 Set the time when this ticket type will go on sale
- W 👉 Set the date when this ticket type will go off sale
- X 👉 Set the time when this ticket type will go off sale
TIP: by default, in-person ticket types on PromoTix are automatically scheduled to go off-sale when your event ends. When your event starts, if you would like to sell tickets at the door (usually for a higher price), then follow these steps:
- Copy the ticket types that you plan on selling during the event and title them appropriately (ex. "Day-Of-Show: General Admission").
- Set these ticket types to "Private" using the "Options" menu for each ticket type.
- Manually schedule all other ticket types to go off-sale when your event starts using the "Options" menu for each ticket type.
6. Start selling and publish your event


- A 👉 Check this box if you would like to allow your customers to request refunds through the PromoTix system. Note that you always have the power to issue refunds regardless if this box is checked or not.
- B 👉 Enter in your refund policy (recommended)
- C 👉 Enter in any terms & conditions that you have (recommended). Note that your customers will have to agree to these terms & conditions before placing their orders.
-
D 👉 Click "Additional settings" to see advanced options.
-
E 👉 You can preview your event before you publish and see how the rest of the world will see it.
- F 👉 Connect a PayPal account so you can get paid! (must choose at least one payment gateway if you are selling tickets). Your funds will be paid out to your PayPal account.
- G 👉 Connect a Stripe account so you can get paid! (must choose at least one payment gateway if you are selling tickets). Your funds will be deposited into your Stripe account instantly when orders are placed. For more detailed instructions on connecting your Stripe account to PromoTix, please click here.
- H 👉 Click here to activate PromoTix Processing Pro to lower your credit card processing rates to 2.75% + $0.25/transaction. NOTE: the Professional package is required in order to activate PromoTix Processing Pro.
Once you're done, click on the Save & continue button then click the "Publish event" button to start selling!
7. View your event
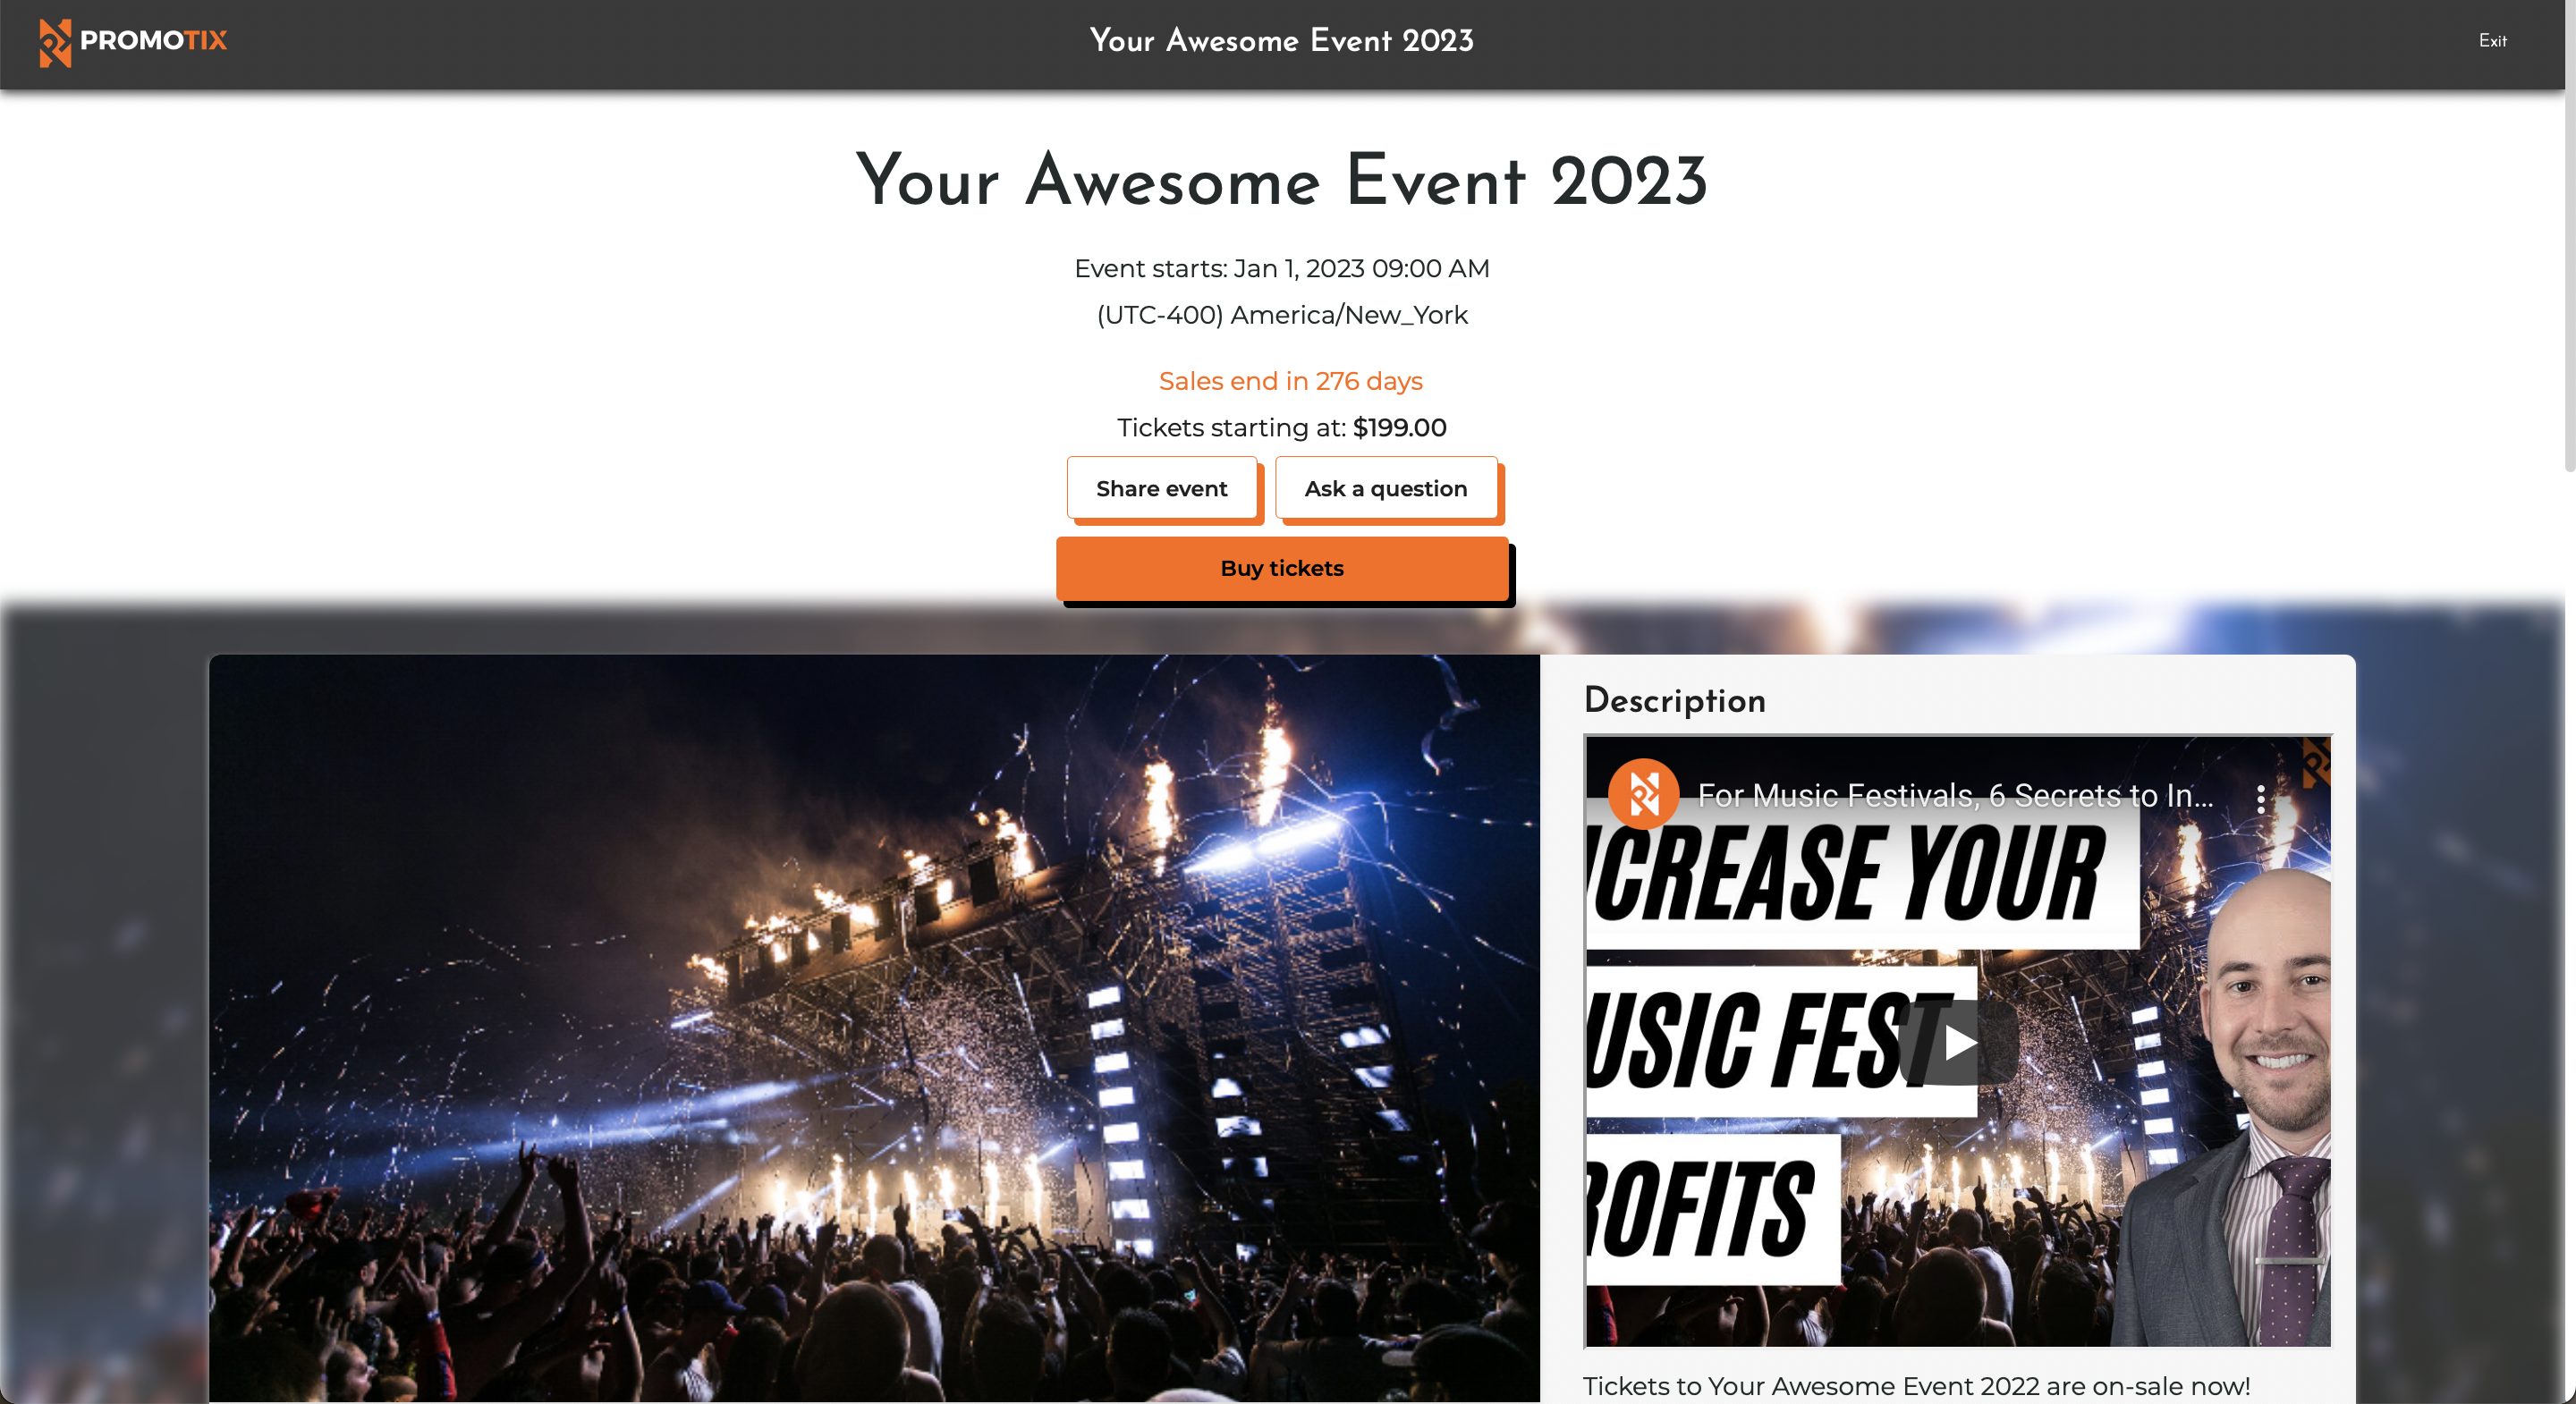 Congratulations, your event is now live!
Follow these steps to view your brand new event page, and share it with the world:
- Click on your event from your PromoTix dashboard (the small orange circle that says "Live" indicates that your event has been published)
- Click on the "View event" button in the top right hand corner of the screen
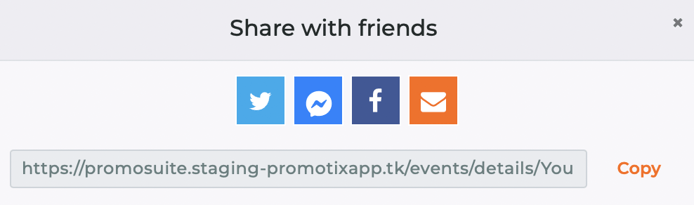
- Click on the orange "Share event" button
- Copy your event page's link (shown below) and start sharing it to begin selling tickets