For some types of events, it's important that the customer is able to choose a specific date and time before purchasing tickets. In this case, a recurring event is the perfect option. To create a recurring event, see the following steps:
NOTE: only in-person recurring events are supported at this time.
1. Click on "+ New event"
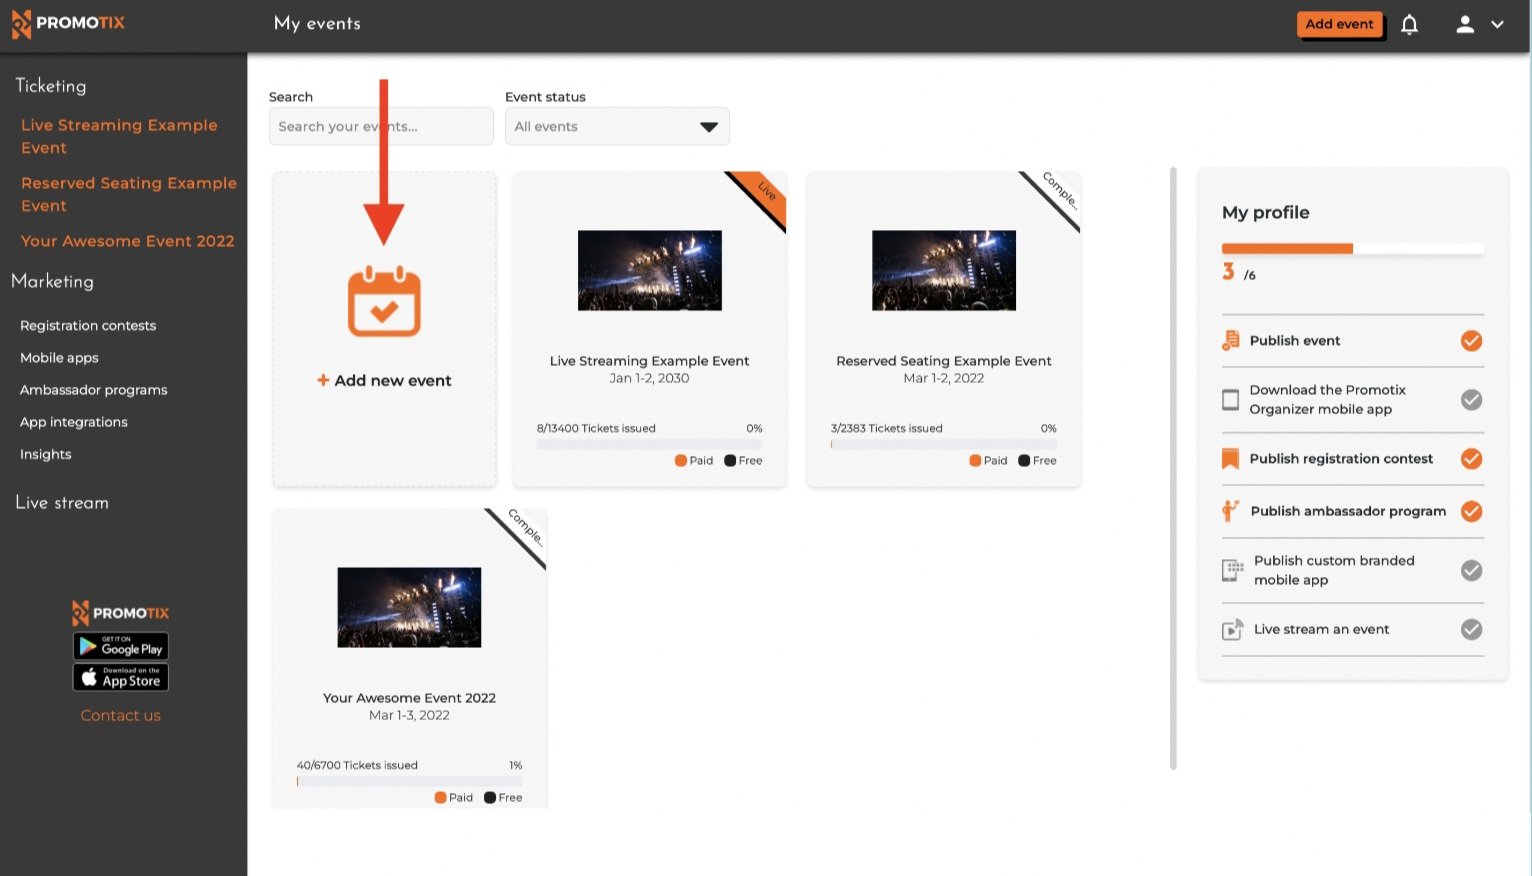 Click on the "+ New Event" button to start creating your recurring event.
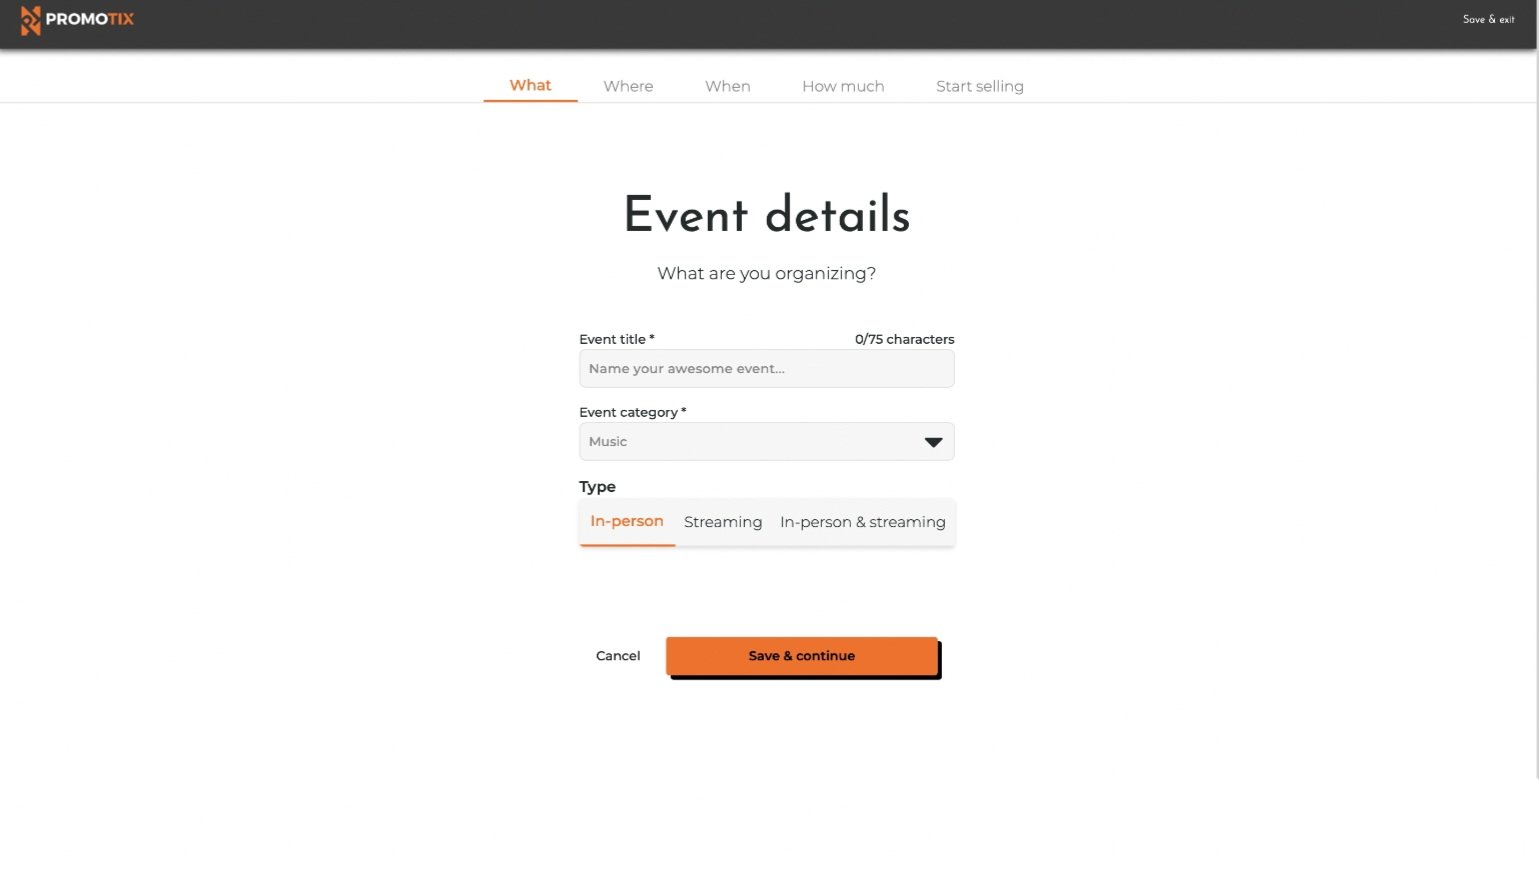
2. Enter your event details
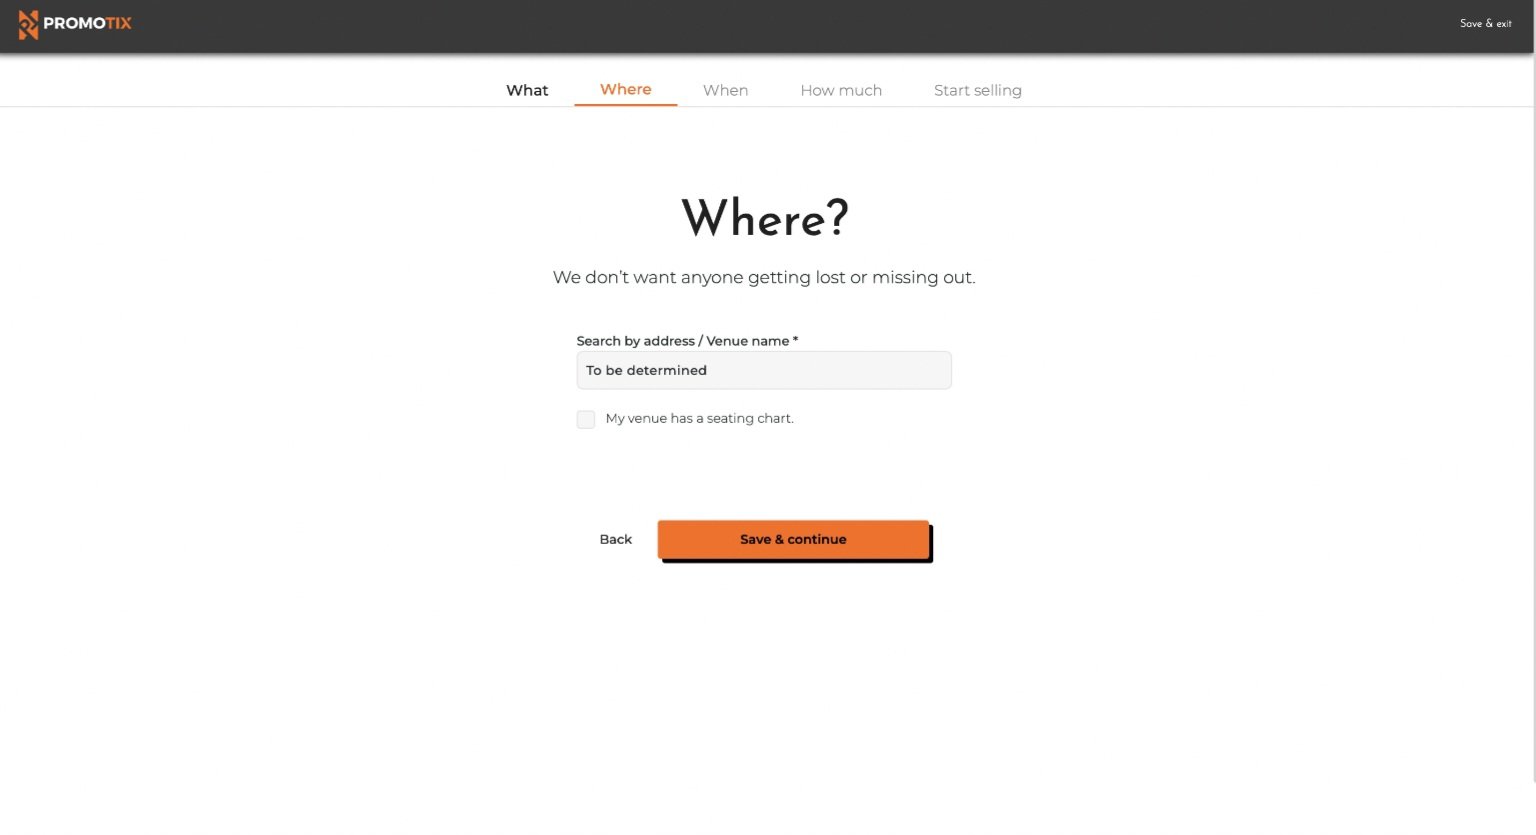
 3. Enter where your event will take place
 4. Click on "Recurring event"

Choose Recurring event for events that will have multiple time slots to choose from.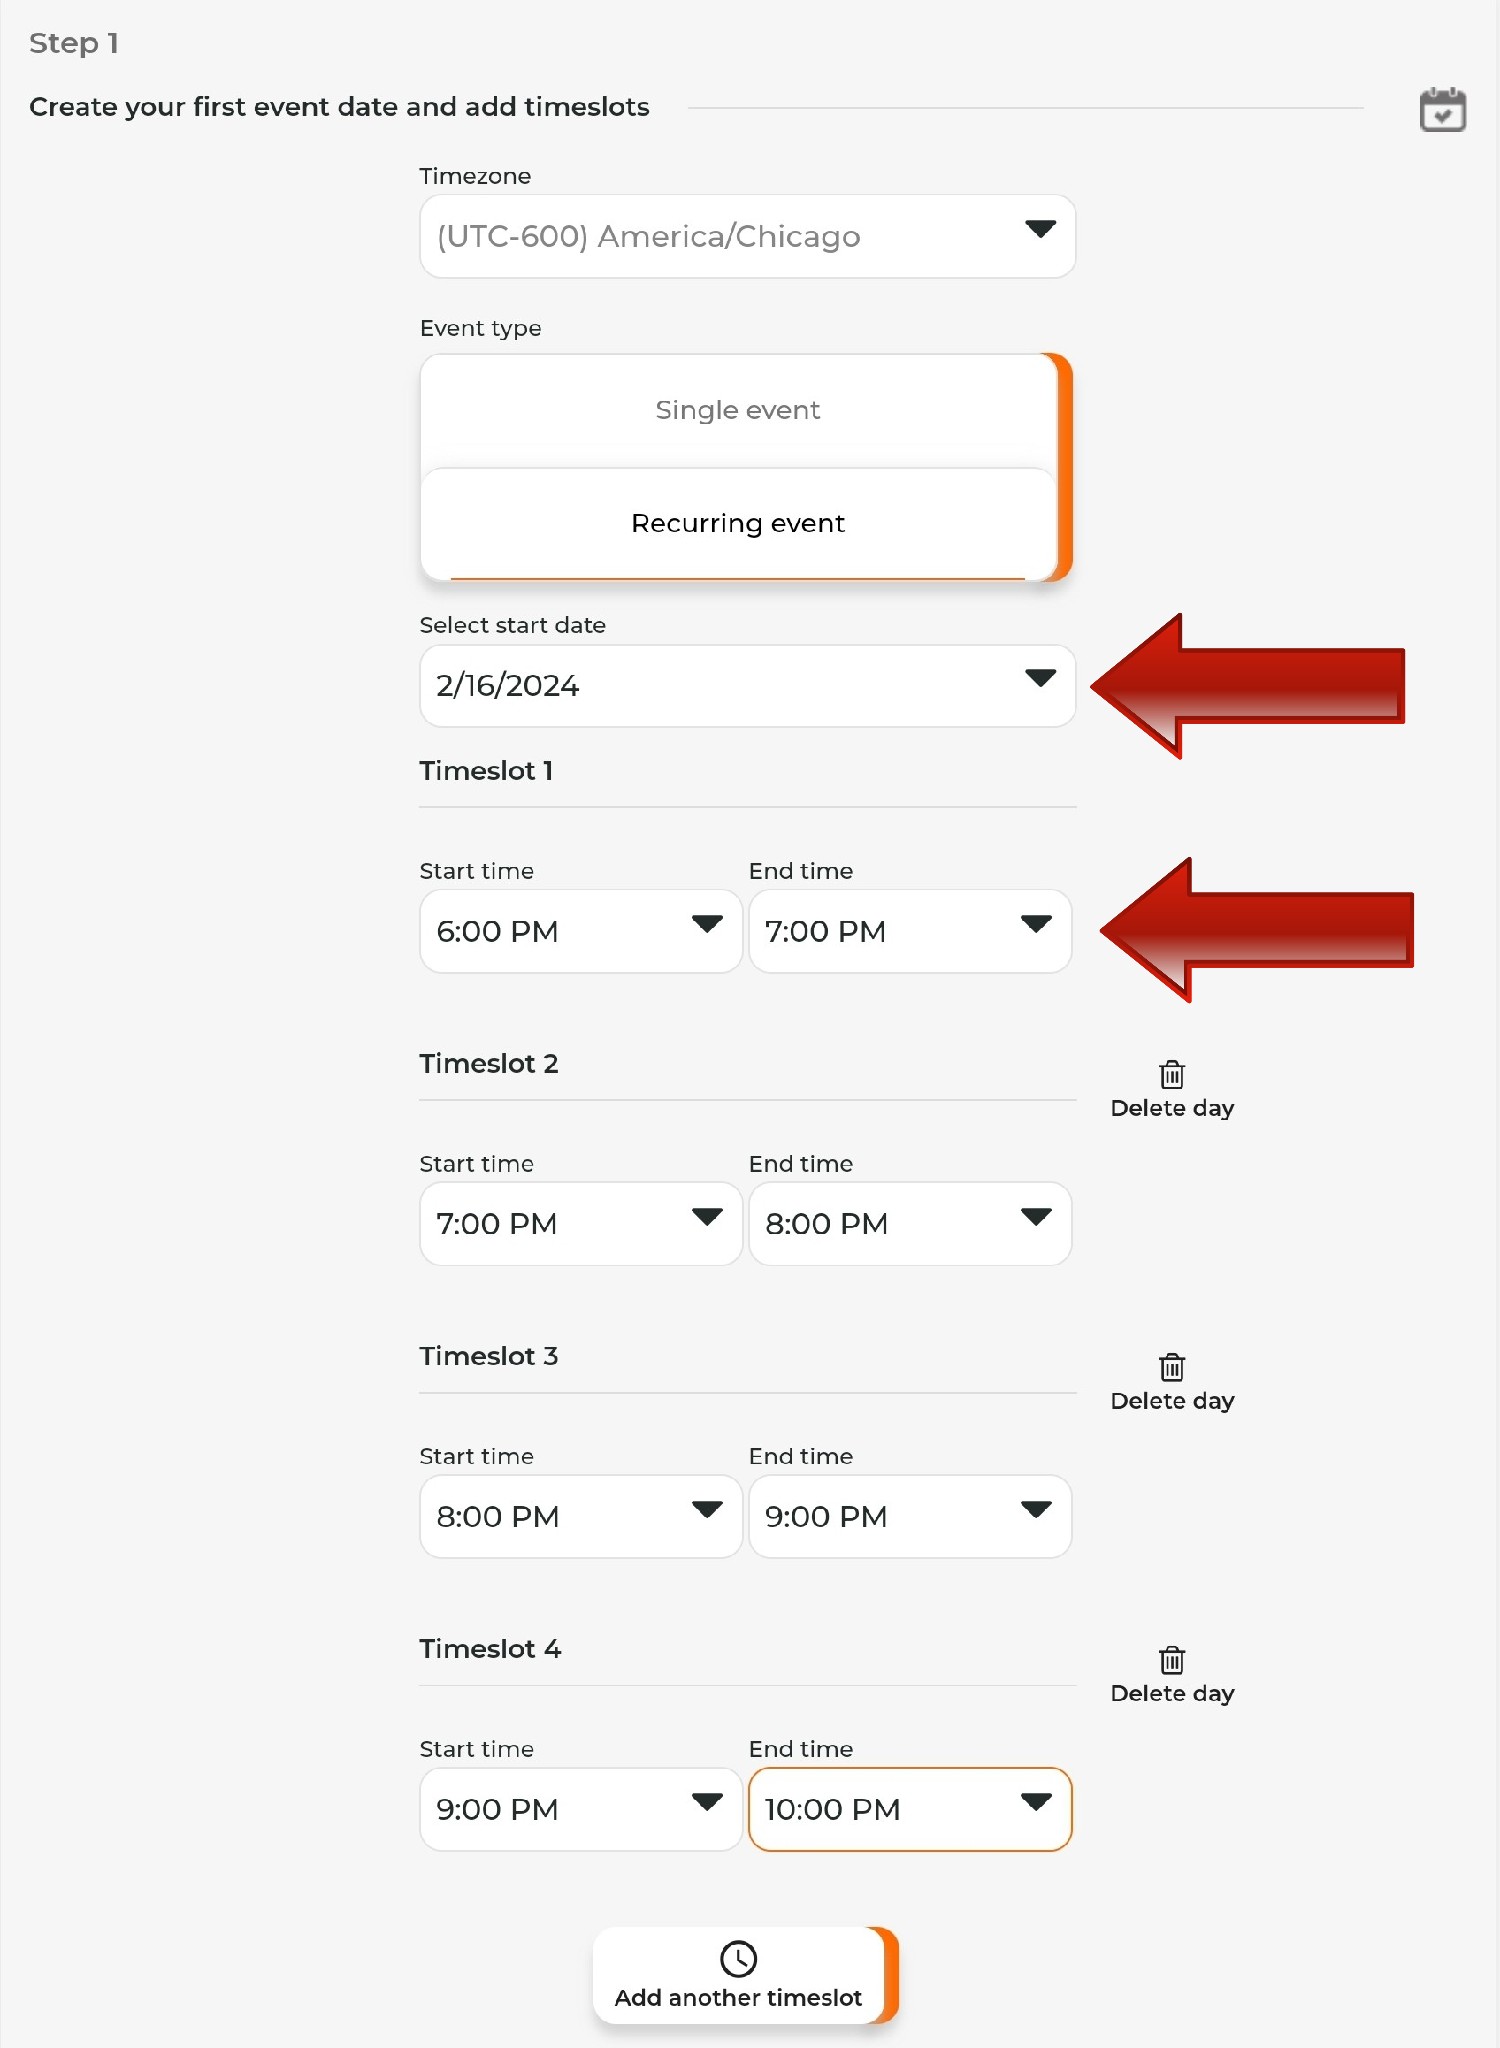 Step 1: Here you will enter the starting date of your event and each time slot that you wish to be made available for your customers to be able to choose from. You can add as many time slots you wish by clicking the Add "another timeslot" button.
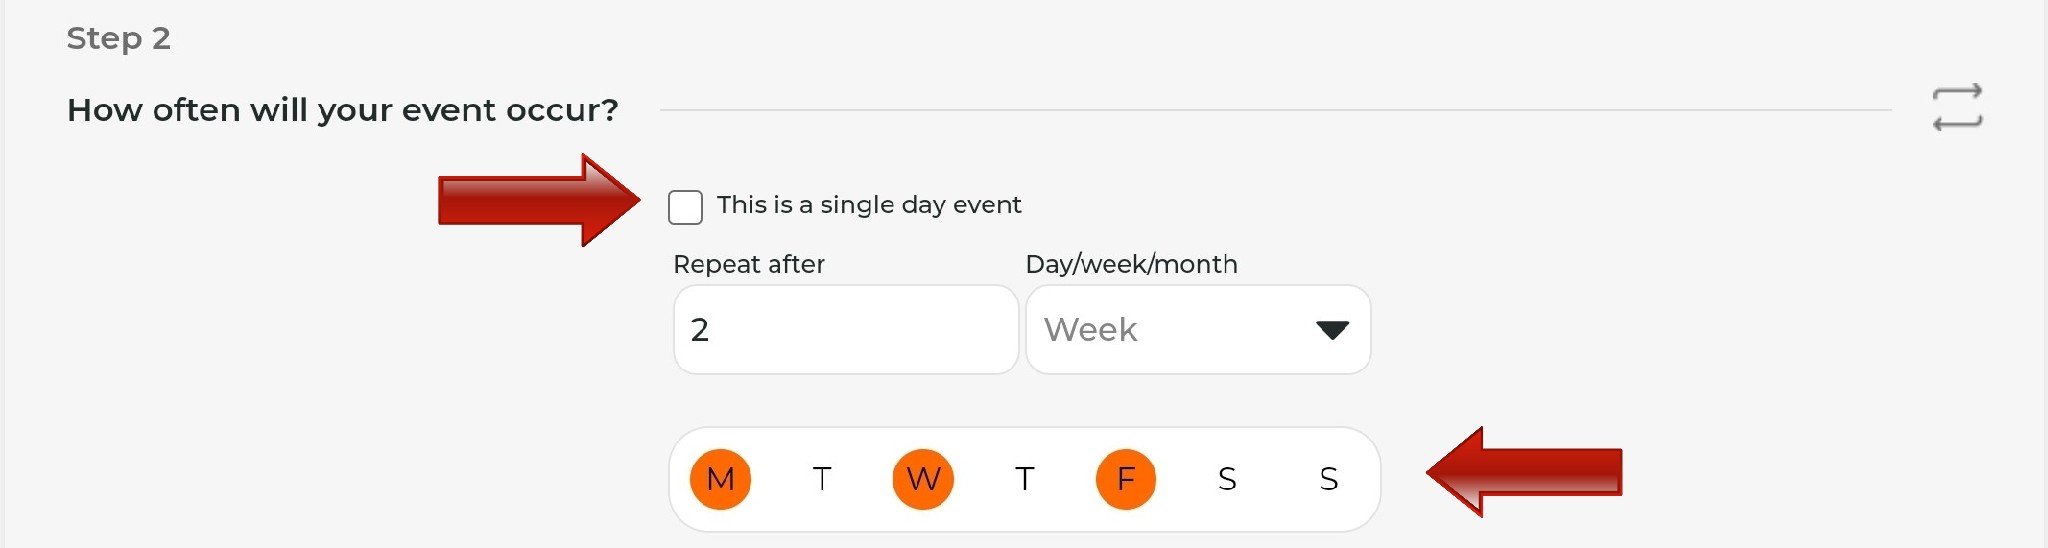
Step 2: How often will your event occur?
- If this is a single day event, you will click the check box here.
- Repeat after - here you will enter how often you want your original start date and time slots to repeat. NOTE: typically you will enter 1 here (for example, to "repeat after 1 day"). For a "one-off" occurrence, see Step 3.
- Daily/Weekly/Monthly: select if you want your start date and time slots to repeat daily, weekly, or monthly.
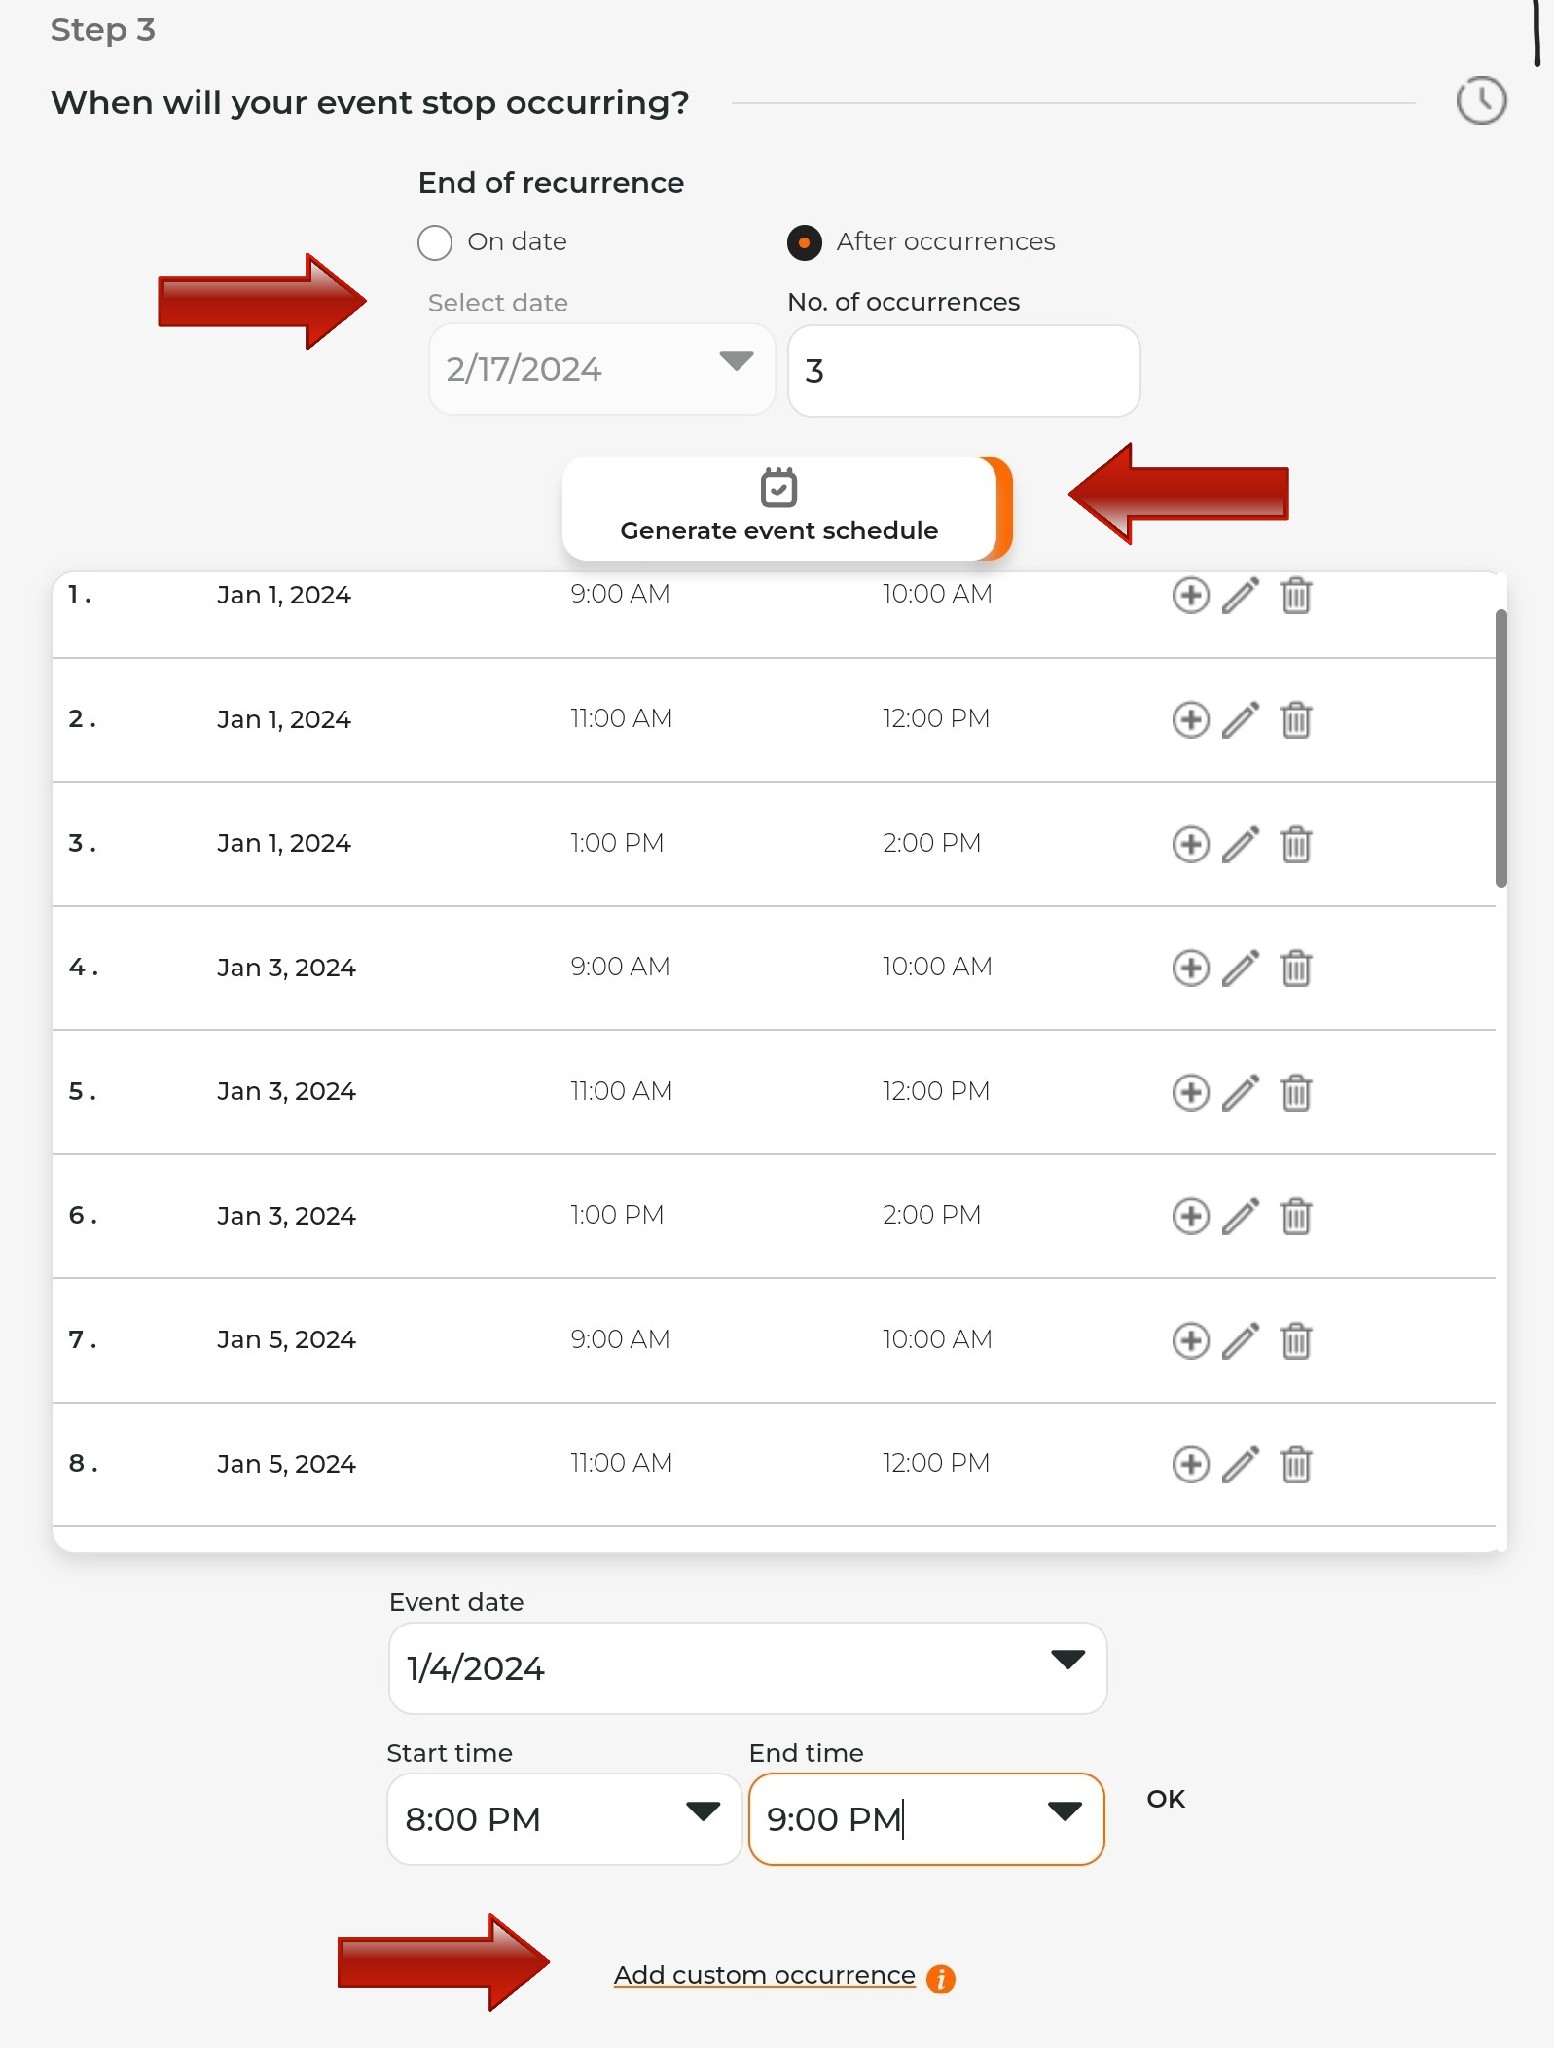 Step 3: When will your event stop occurring?
- You can choose to have your event stop occurring on a specific date or after a specific amount of occurrences.
- Click "Generate Event Schedule" to generate the entire schedule. Next to each time slot you have the option to add another time slot, edit or delete. *These will be the available date and time options that your ticket buyers will be able to select from.
- You can also add a "Custom Occurrence" in the event that you need to add another occurrence that wasn't accounted for previously.
Click Save & continue to proceed.
5. Create ticket types for your event
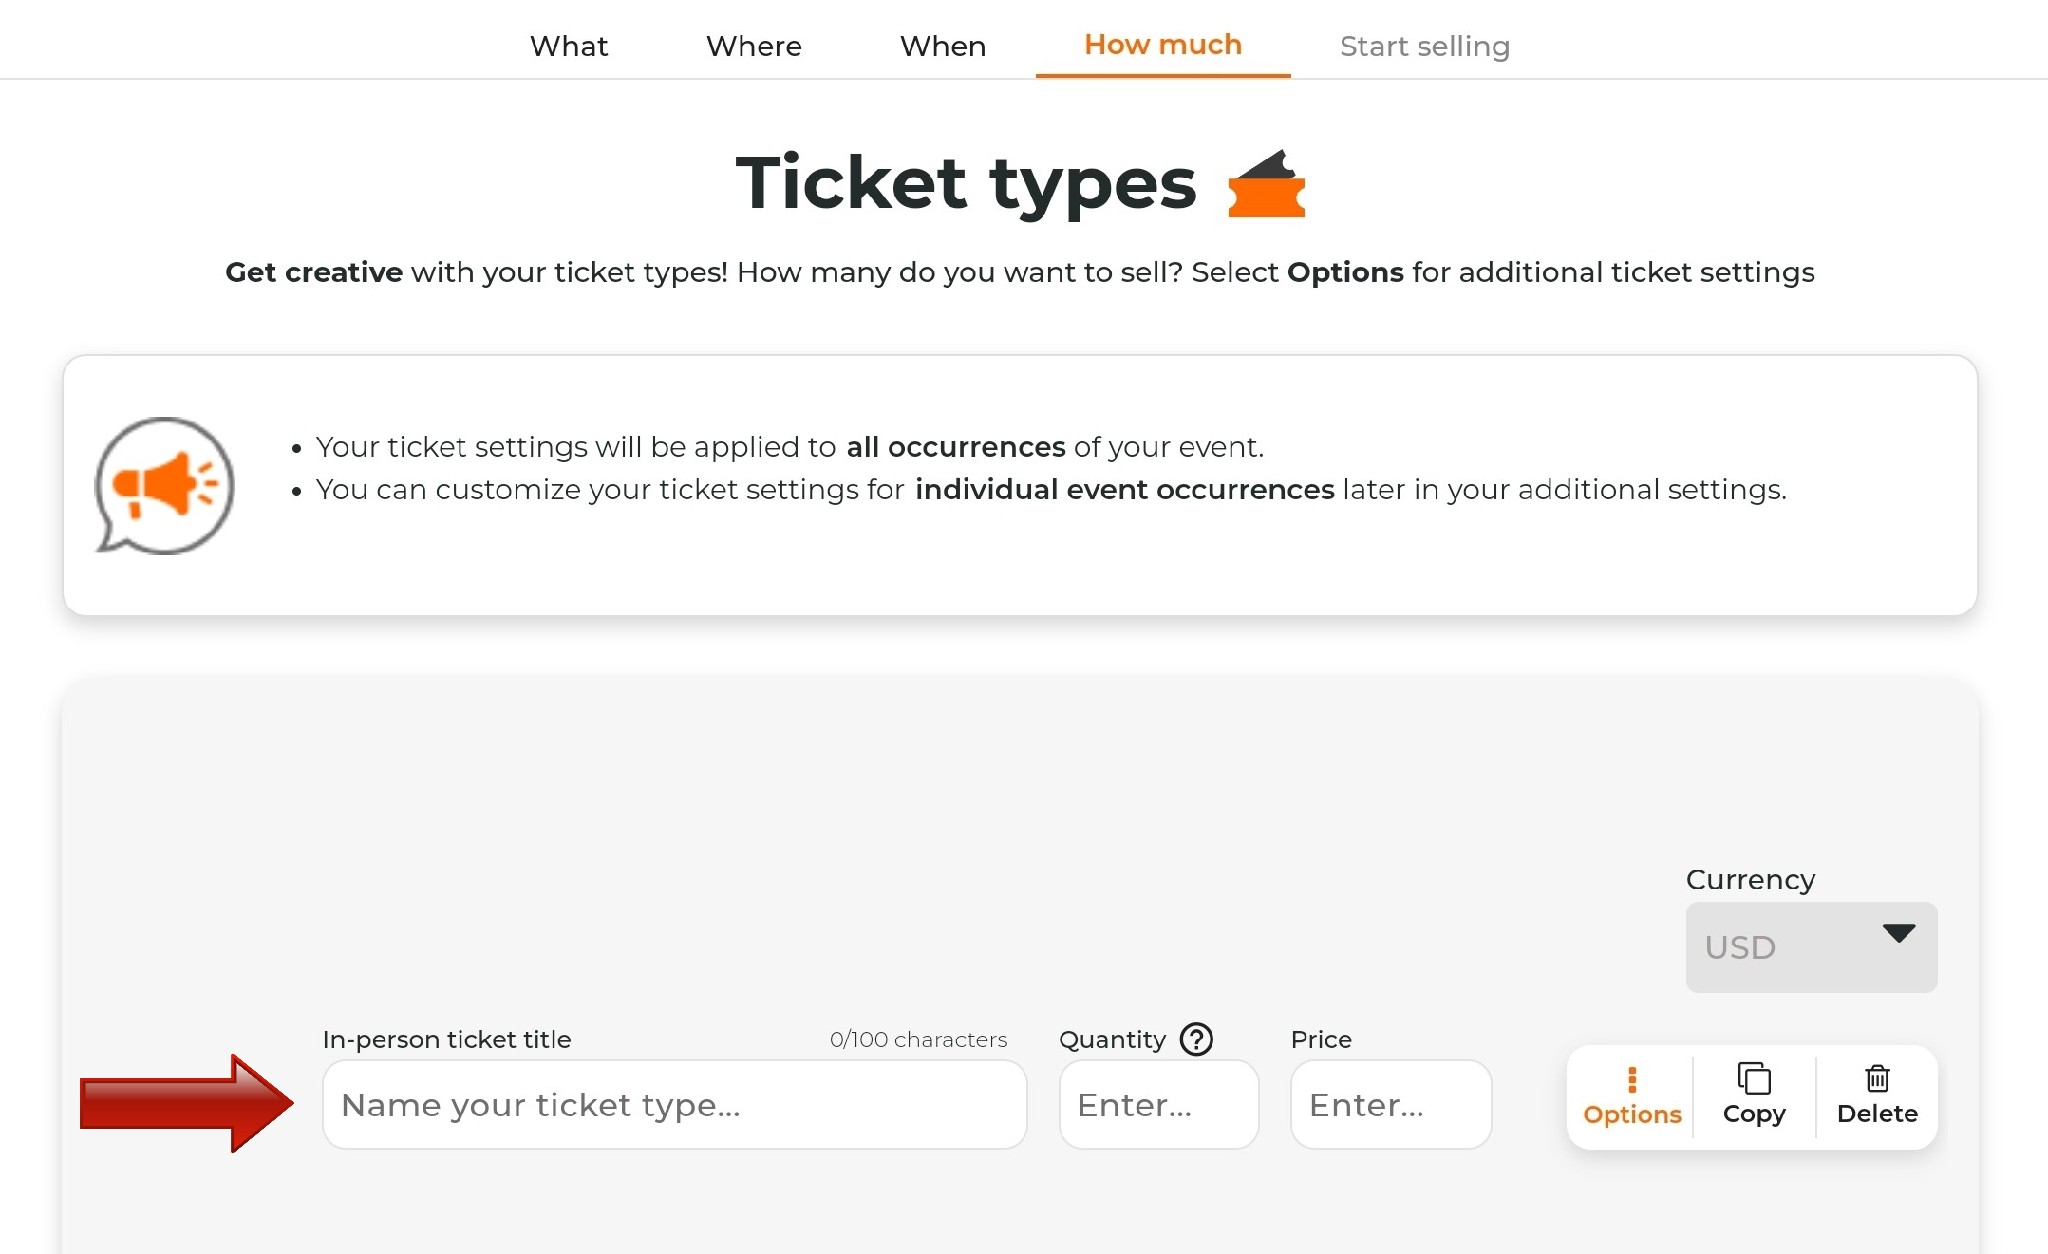 Click "Save & continue".
6. Start selling
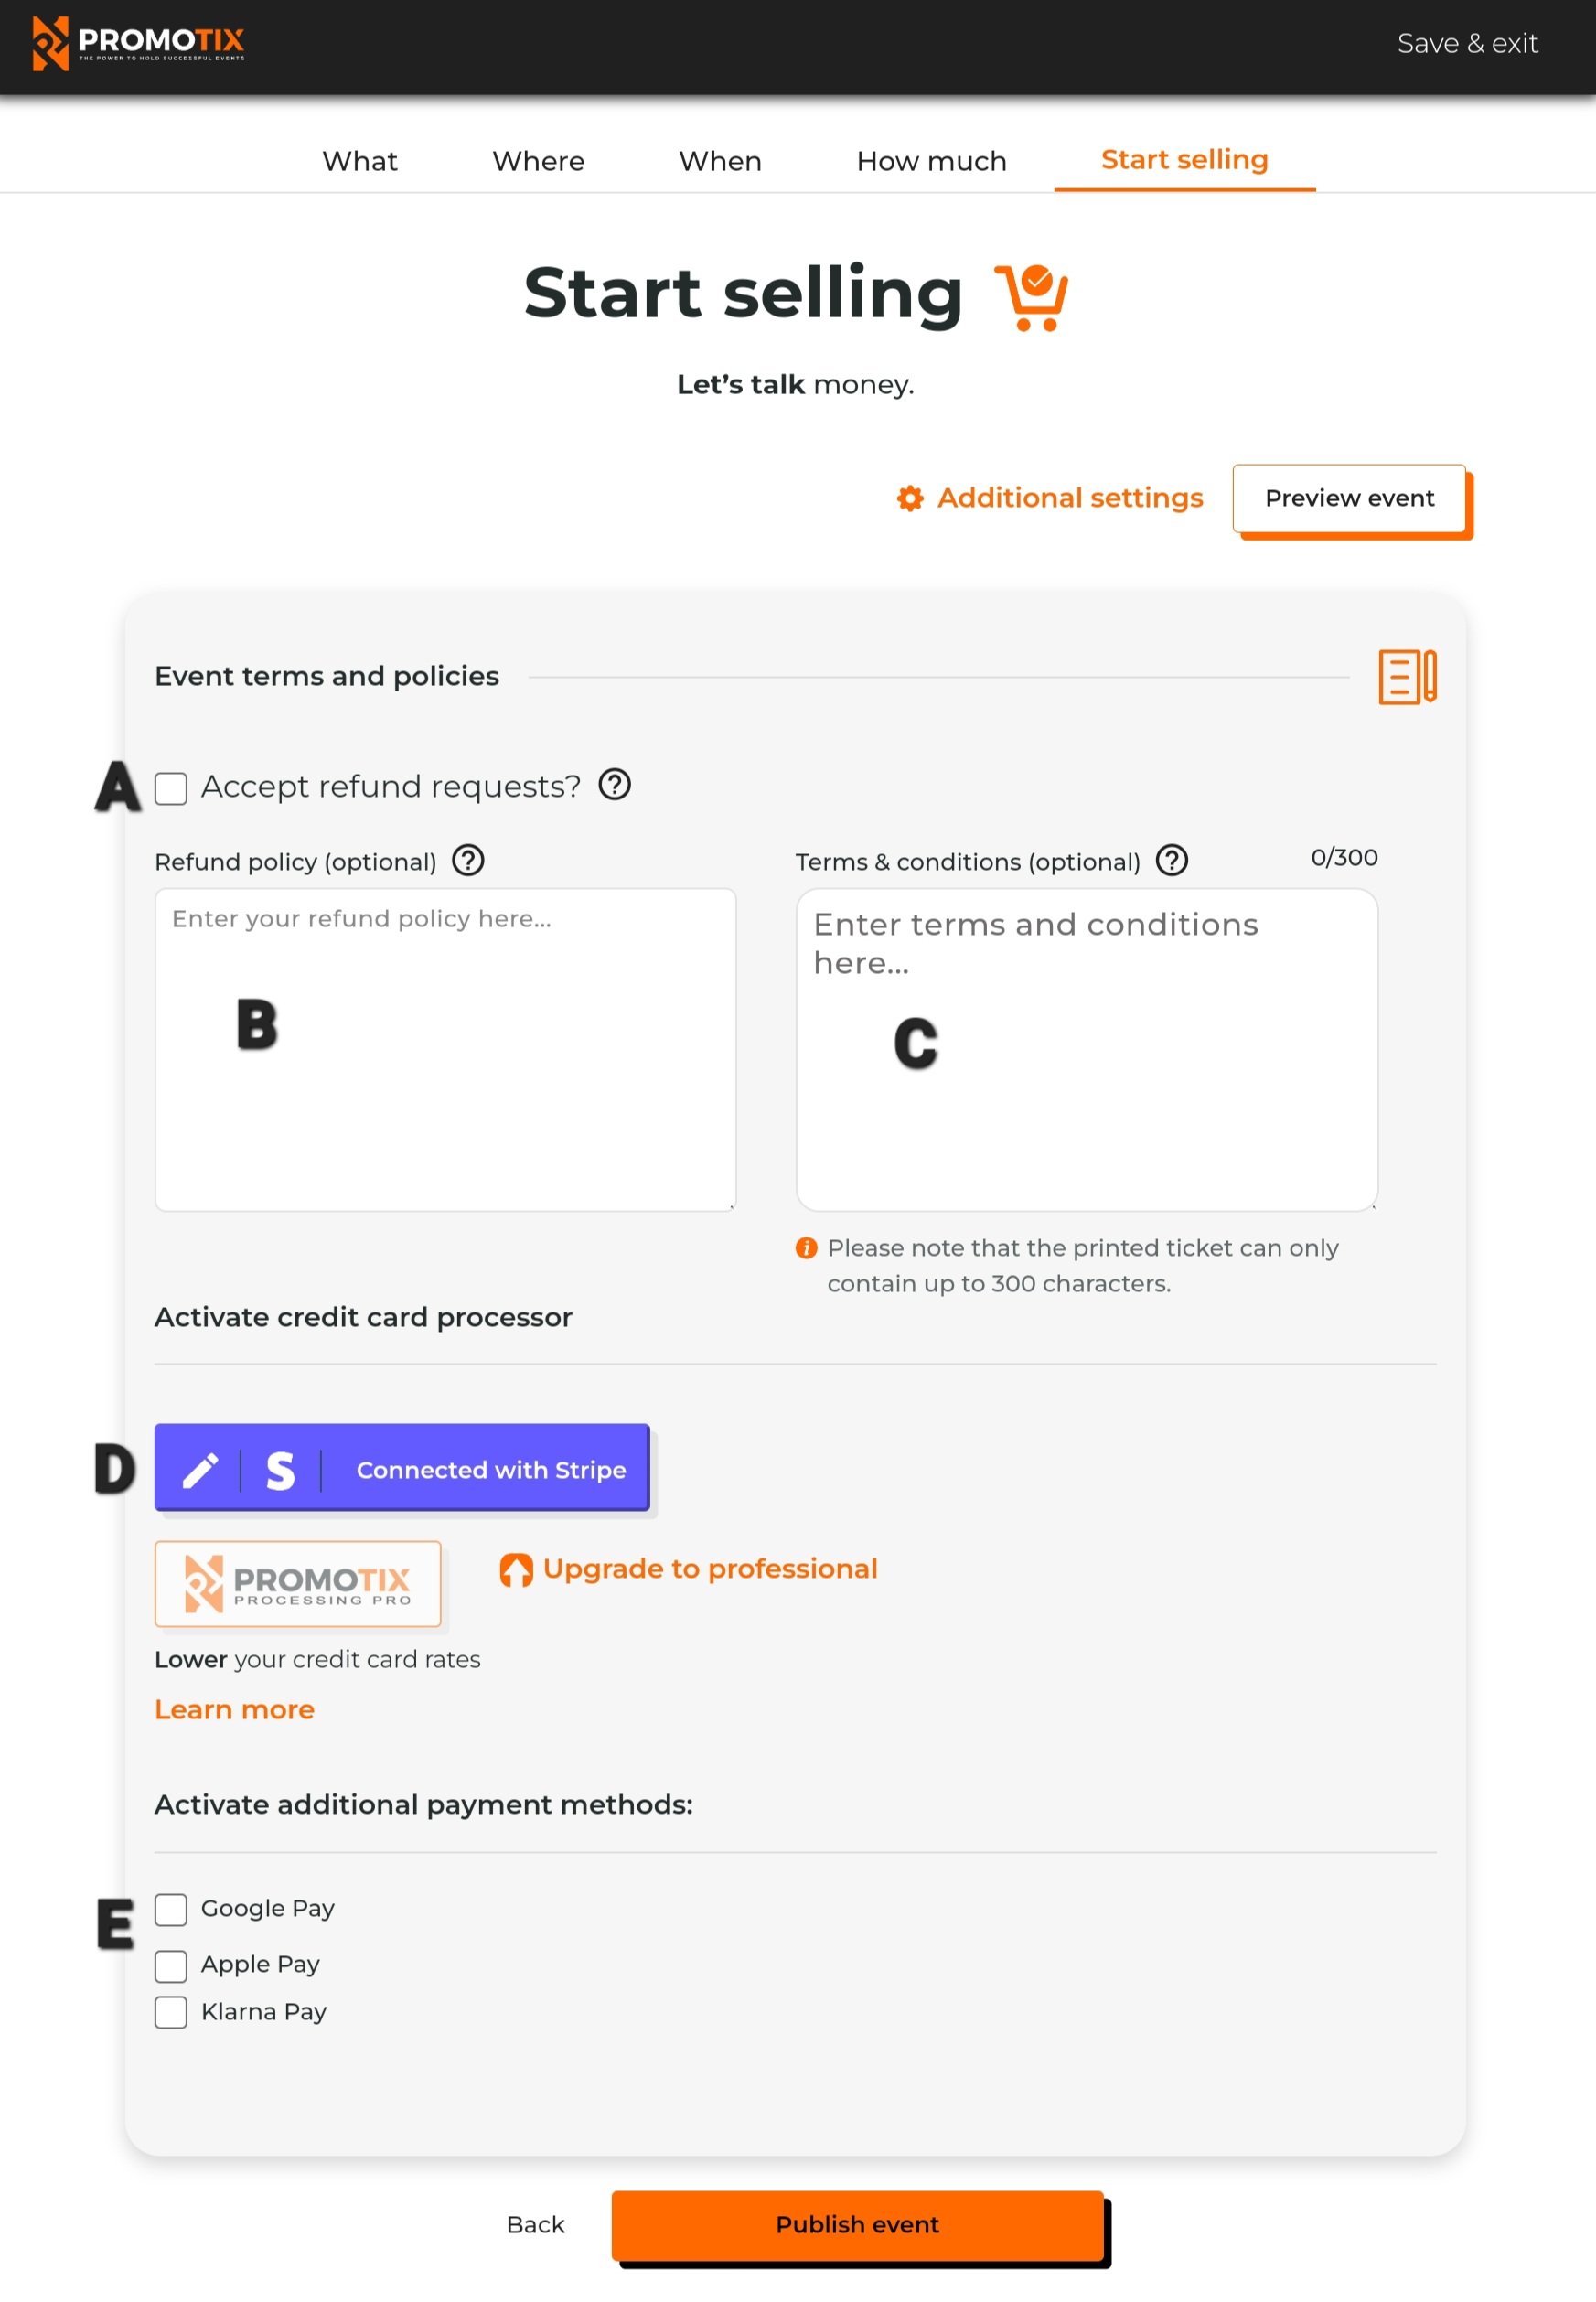
- A 👉 Check this box if you would like to allow your customers to request refunds through the PromoTix system. Note that you always have the power to issue refunds regardless if this box is checked or not.
- B 👉 Enter in your event refund policy (recommended)
- C 👉 Enter your event terms & conditions (recommended). Note that your customers will have to agree to these terms & conditions before placing their orders.
- D 👉 Connect a Stripe account so you can get paid! Connect an existing account or create a new one. For more detailed instructions on connecting your Stripe account to PromoTix, please click here.
- E👉 Activate additional payment methods such as Apple Pay, Google Pay & Klarna.
That's it! Once you're done, click on the "Publish event" button to start selling! For more info on sharing your event, click here.