(Last Updated 8/21/24)
PromoTix's secured, built-in live streaming tools allow you to broadcast your event to viewers at home. Only individuals who have purchased a live stream ticket will be able to view your live stream, and live stream tickets can only be used by one device at a time.
This guide will show you how to live stream your event on PromoTix using a web browser.
TIP: instead of live streaming using your web browser, we recommend live streaming using OBS / RTMP. For instructions on how to live stream on PromoTix using OBS / RTMP, click here.
Follow these instructions to live stream your event on PromoTix using a web browser.
1. Click on your "Live stream" tab

NOTE: This tutorial assumes that you already know how to create a PromoTix secured streaming event. For instructions on how to create a PromoTix secured streaming event, click here.
Once logged in to your PromoTix account, click on your Live stream tab from the side navigation menu.
2. Select a PromoTix secured streaming event
.png?width=727&height=332&name=Design%2044%20(1).png) On this screen, you will see all of the PromoTix events that you have created. Click on the event that you would like to live stream.
On this screen, you will see all of the PromoTix events that you have created. Click on the event that you would like to live stream.
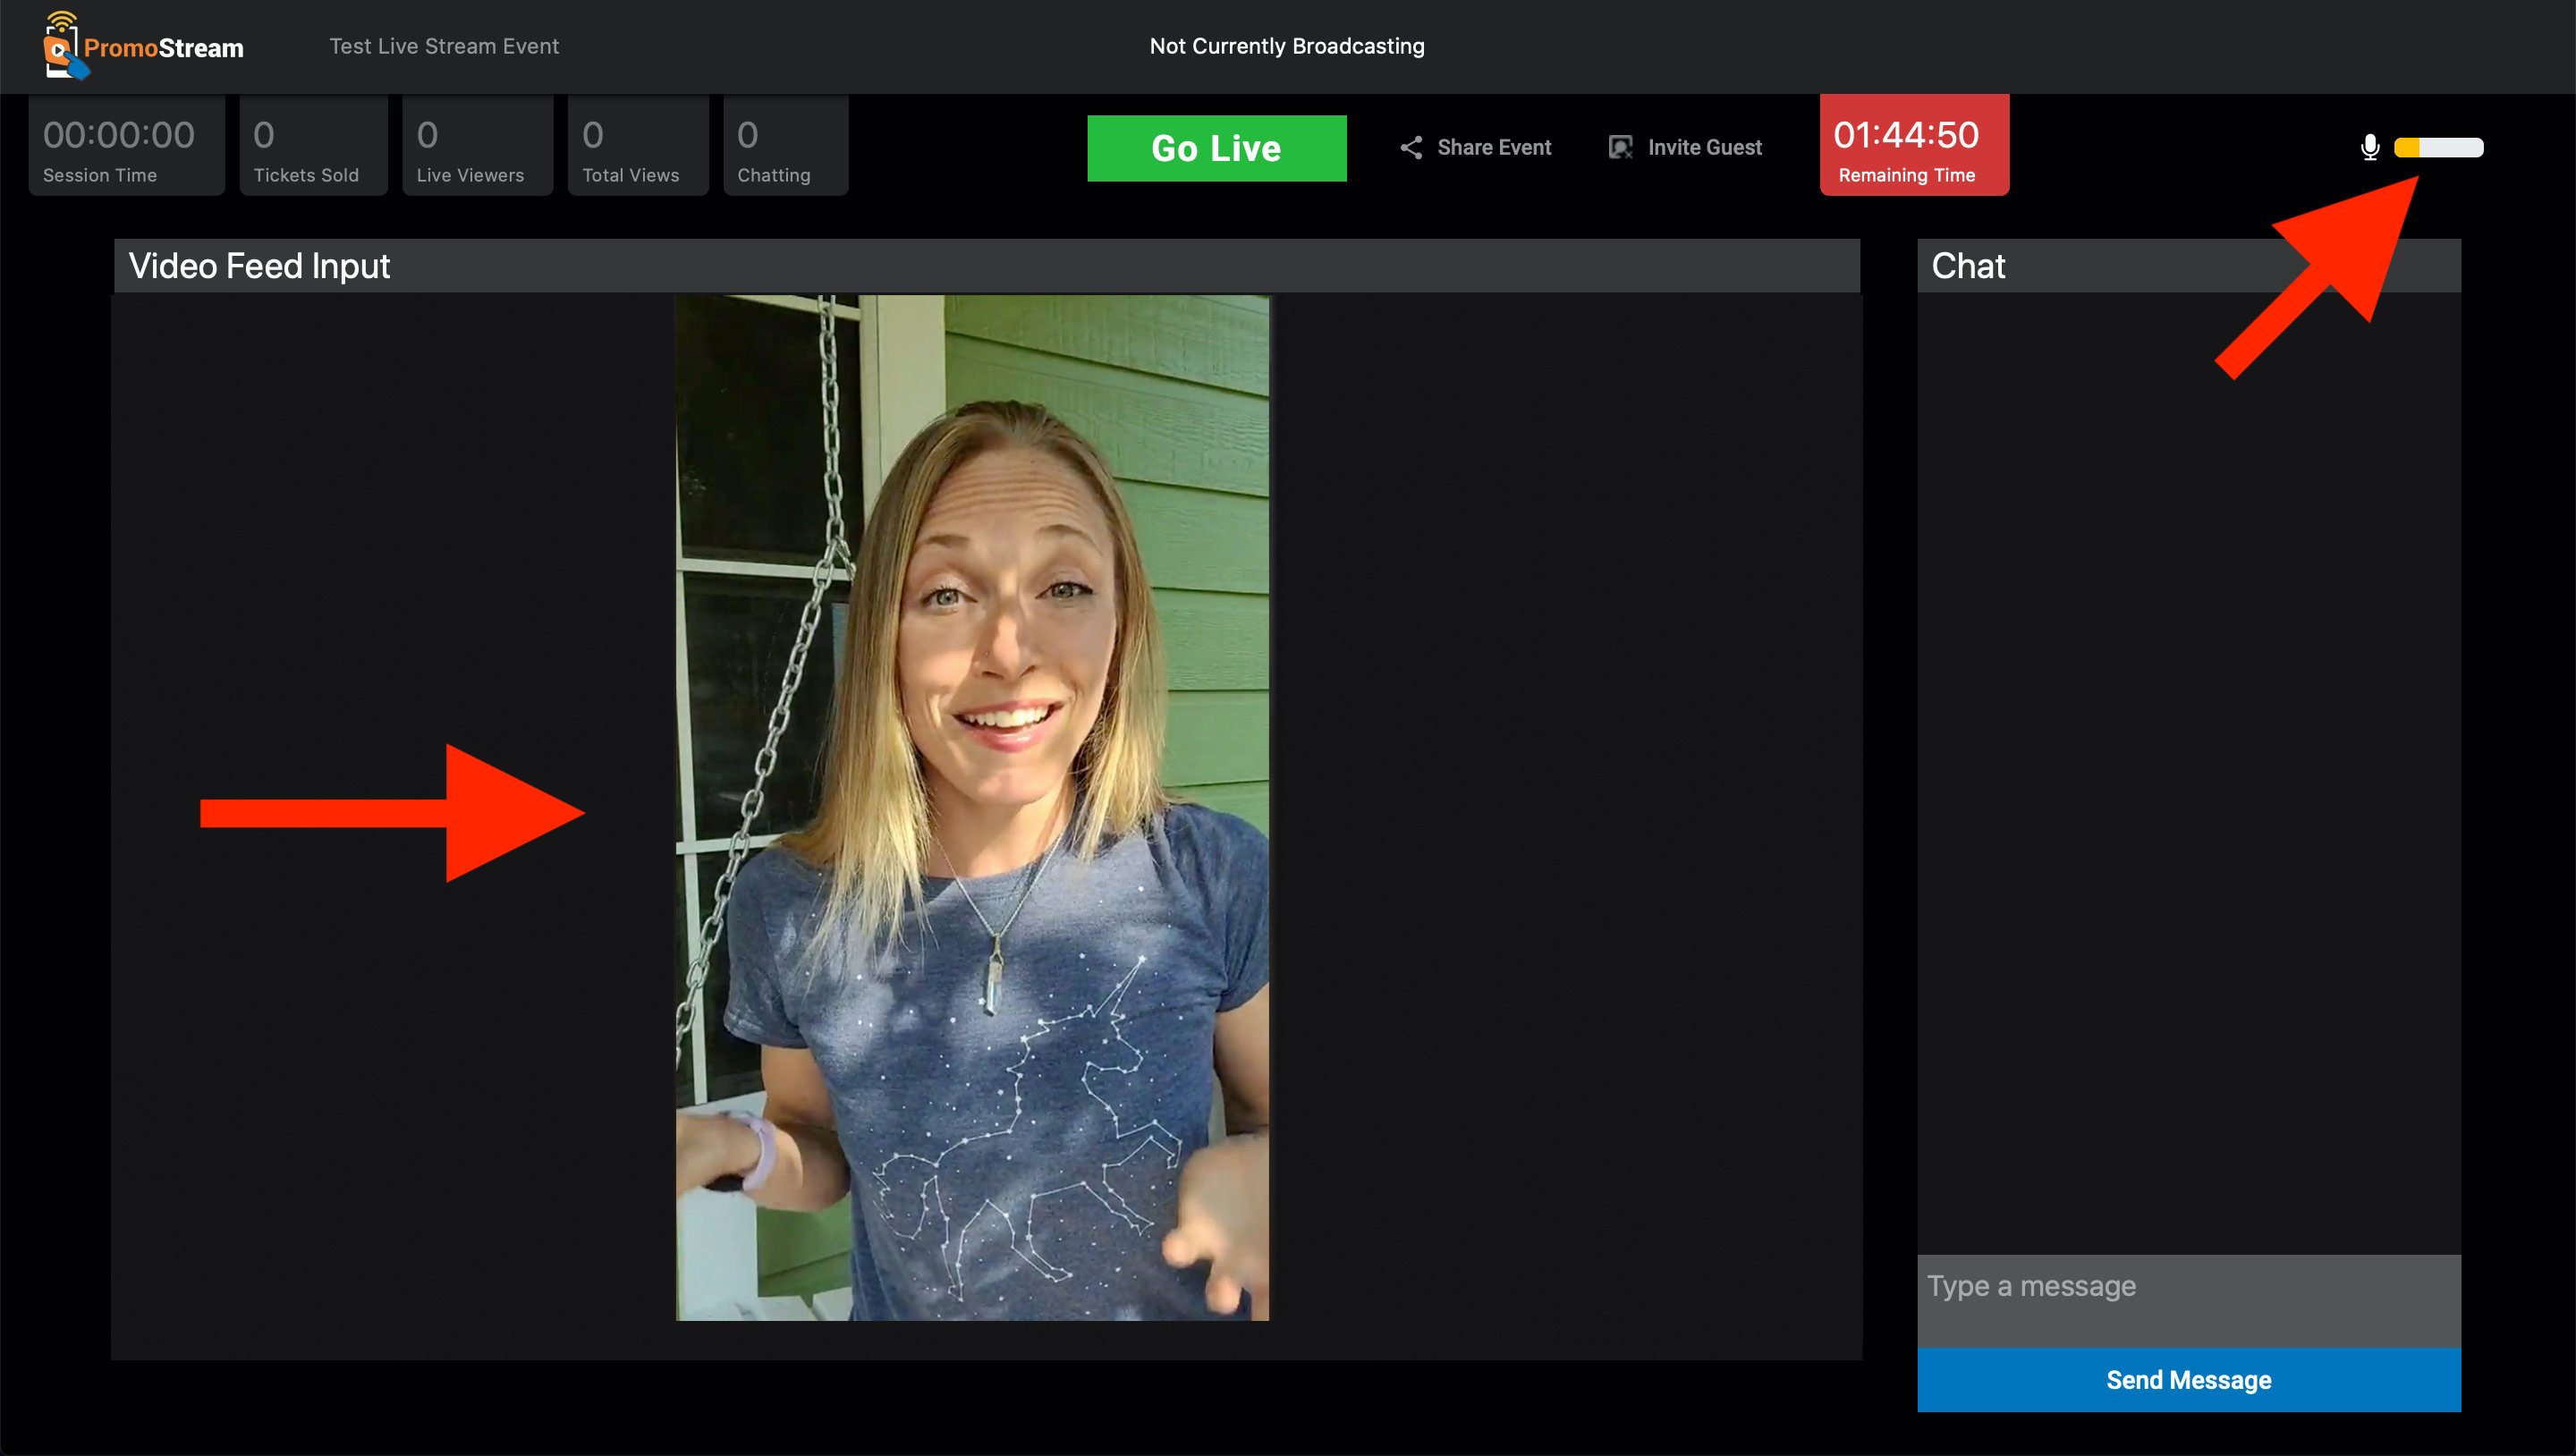
3. Get familiar with the interface
 This is your control center for live streaming with PromoTix. See below for descriptions on each feature:
- A 👉 The total duration that you've live streamed for this event
- B 👉 How many secured streaming tickets you've sold for this event
- C 👉 How many live viewers are tuned in
- D 👉 Your total number of views for this event
- E 👉 How many live viewers are currently using the chat feature
- F 👉 Start previewing an audio and video source connected to your device
- G 👉 Generate an RTMP address and a stream key for use with OBS / RTMP
- H 👉 Click to share your event page
- I 👉 Click to invite a guest to your live stream.
- J 👉 How much time you have remaining to live stream today. NOTE: this timer will only start counting down once your event is scheduled to begin.
- K 👉 Preview your video after clicking on the Start cam button
- L 👉 Send chat messages to your viewers
4. Click on the "Start cam" button to activate your device's camera and microphone
 There are two different options for live streaming with PromoTix:
- Start cam 👉 Use a camera and microphone connected to or built-in to your device
- Use RTMP 👉 Generate an RTMP address and unique stream key for this event for use with OBS / RTMP
For the purposes of this how-to, we will be using the Start cam option. For a complete guide on how to live stream on PromoTix using OBS / RTMP , click here.
To activate your device's camera and microphone, click on the Start cam button.
IMPORTANT: you will only be able to activate your device's camera and microphone once your live stream is scheduled to begin.
You may need to first enable permissions for PromoTix to access your device's camera and microphone. Check your web browser's settings for more information:

Once your camera and microphone have been detected, you will see your camera fee displayed on the screen. You can also preview your audio levels using the audio meter in the top right of the screen:
5. Go Live!
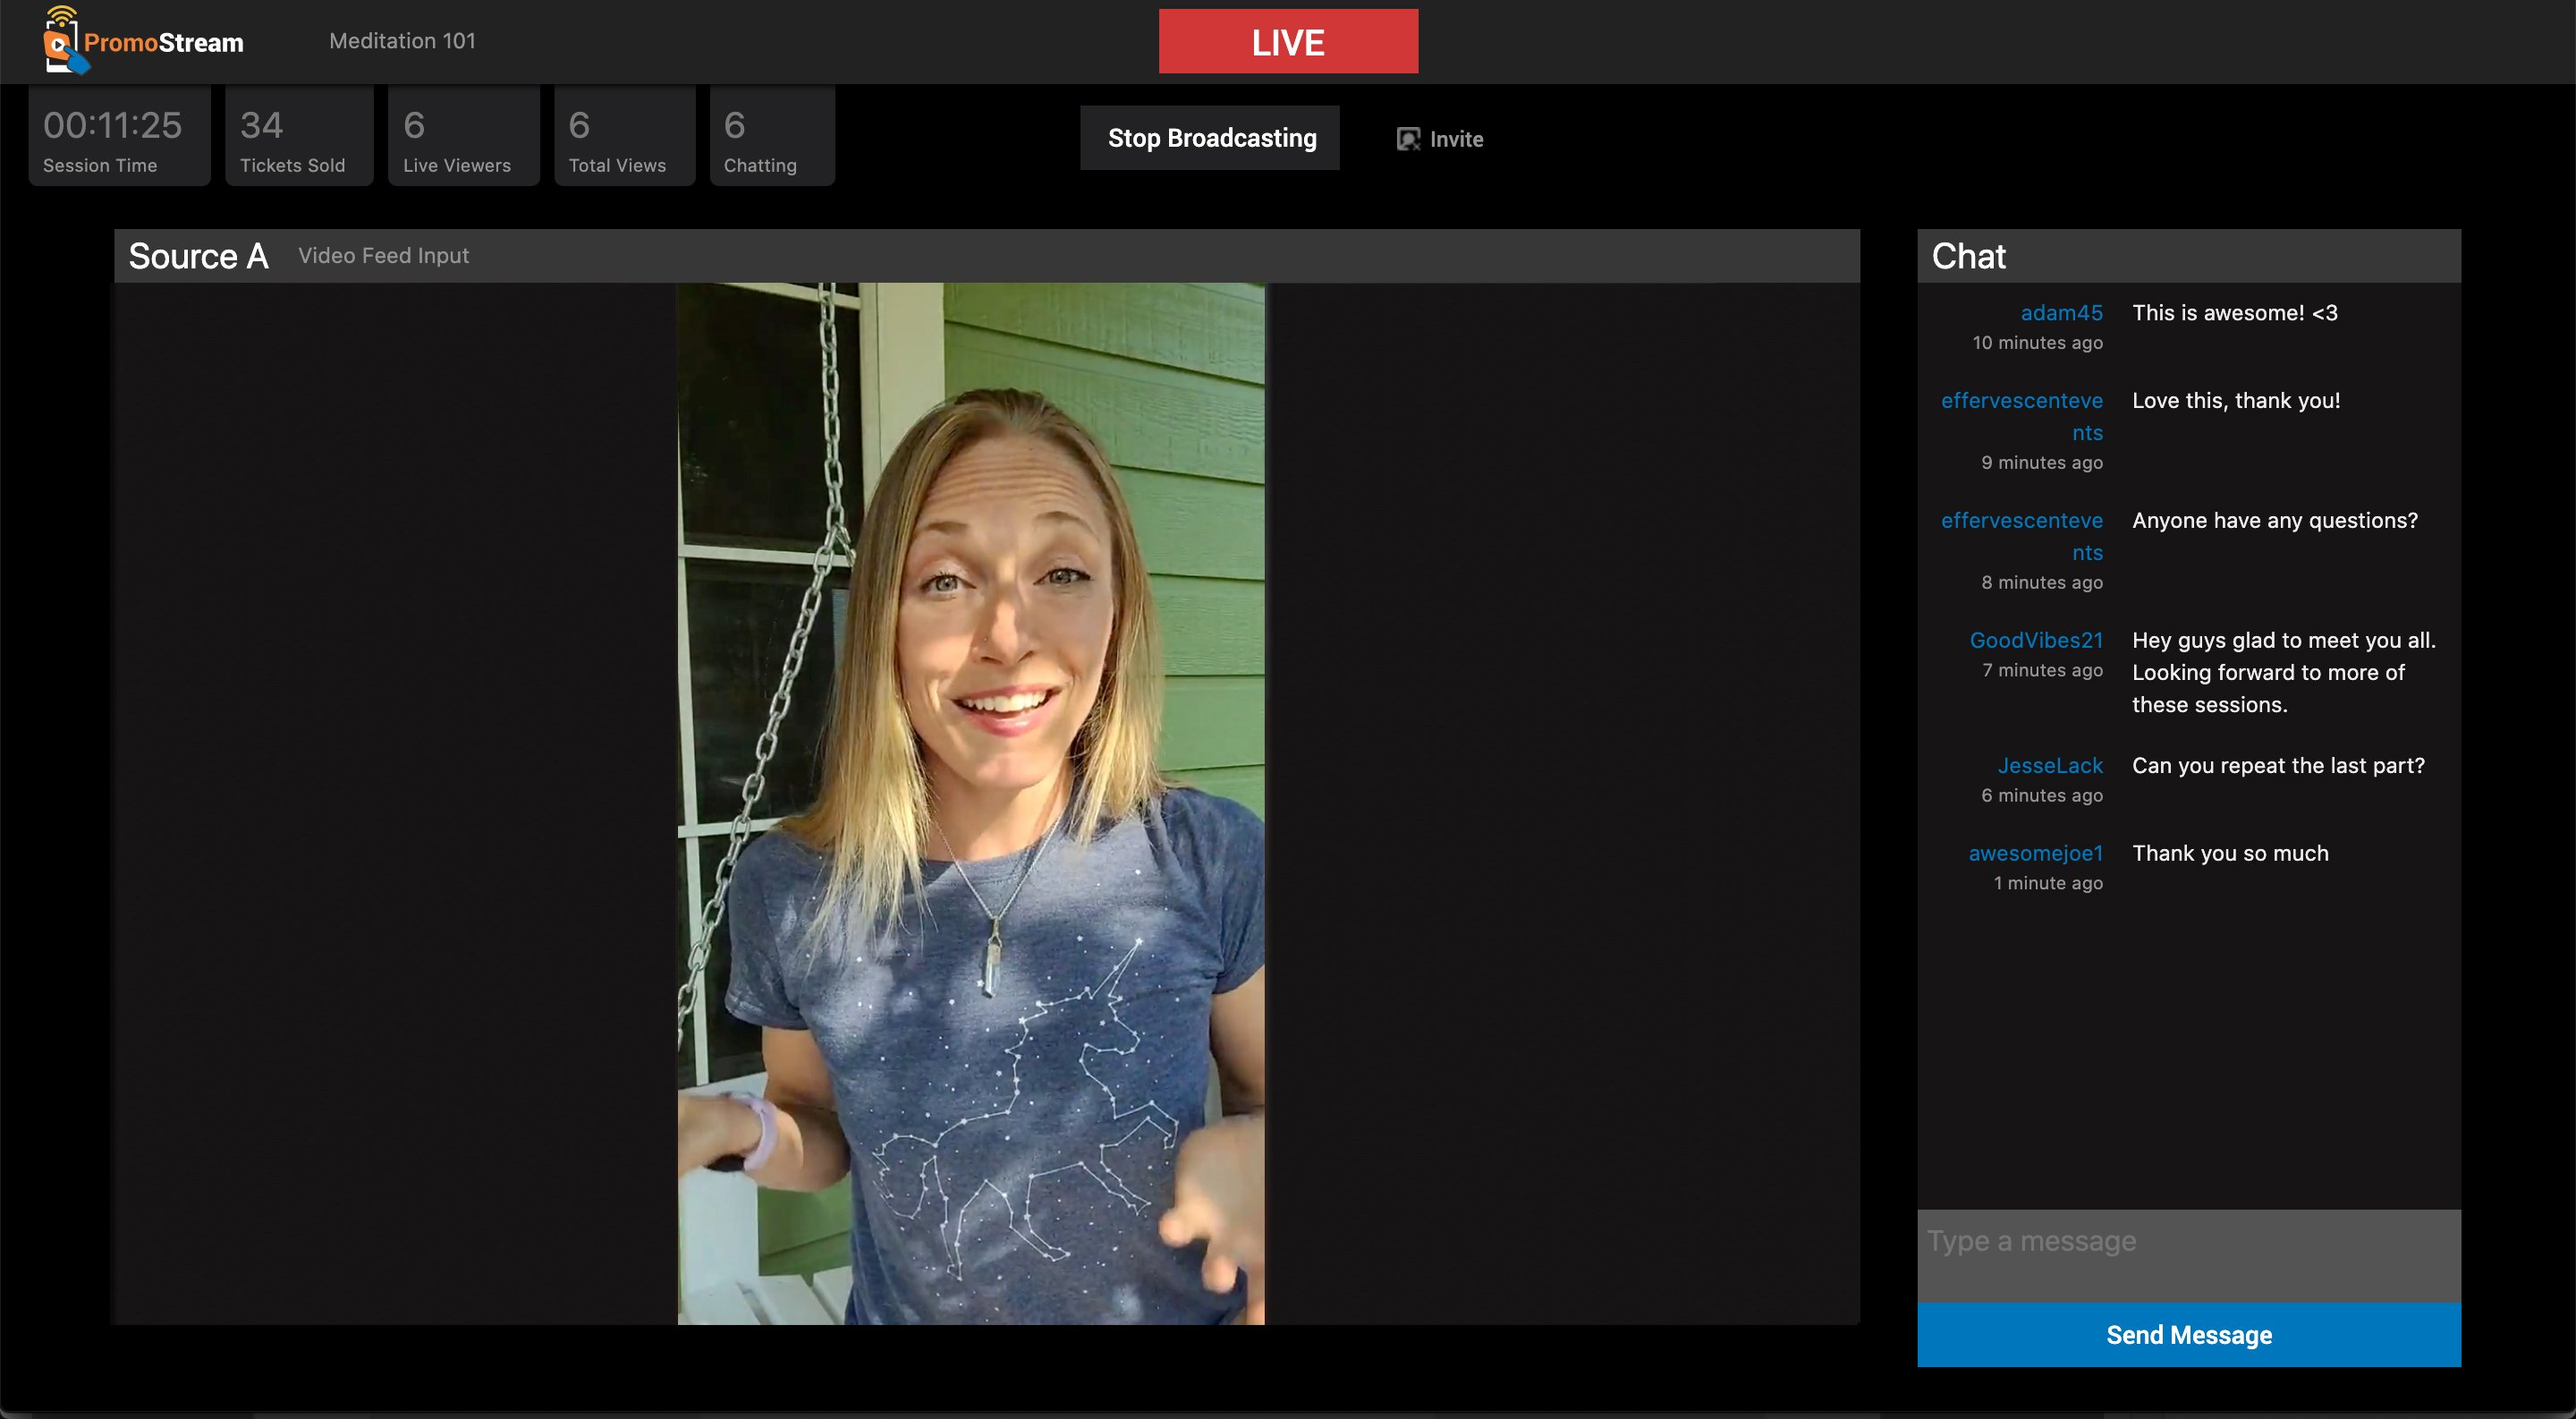 Once you're ready to start streaming, click on the green Go live button in the top of the screen. The rest is up to you!
Once you're ready to end your stream, click on the Stop broadcasting button.
TIP: If you ever need to boot someone from the chat feature, click on their name in the chat window.
NOTE: While it is possible to stop and start streaming again throughout an event, this is not recommended.