

(Last Updated 2/20/24)
IMPORTANT: the "Limit access on PromoTix Organizer" setting has been sunset as of 2/20/24. To add team members with custom permission levels, please see our new tutorial here.
When it comes time to scan tickets and handle day-of-show operations, you may have others helping you at the front gate. Understandably, you may not want your staff to be able to see sensitive data inside of the PromoTix Organizer mobile app. This tutorial will show you how to restrict access to certain screens within the mobile app.
1) Go to your account settings
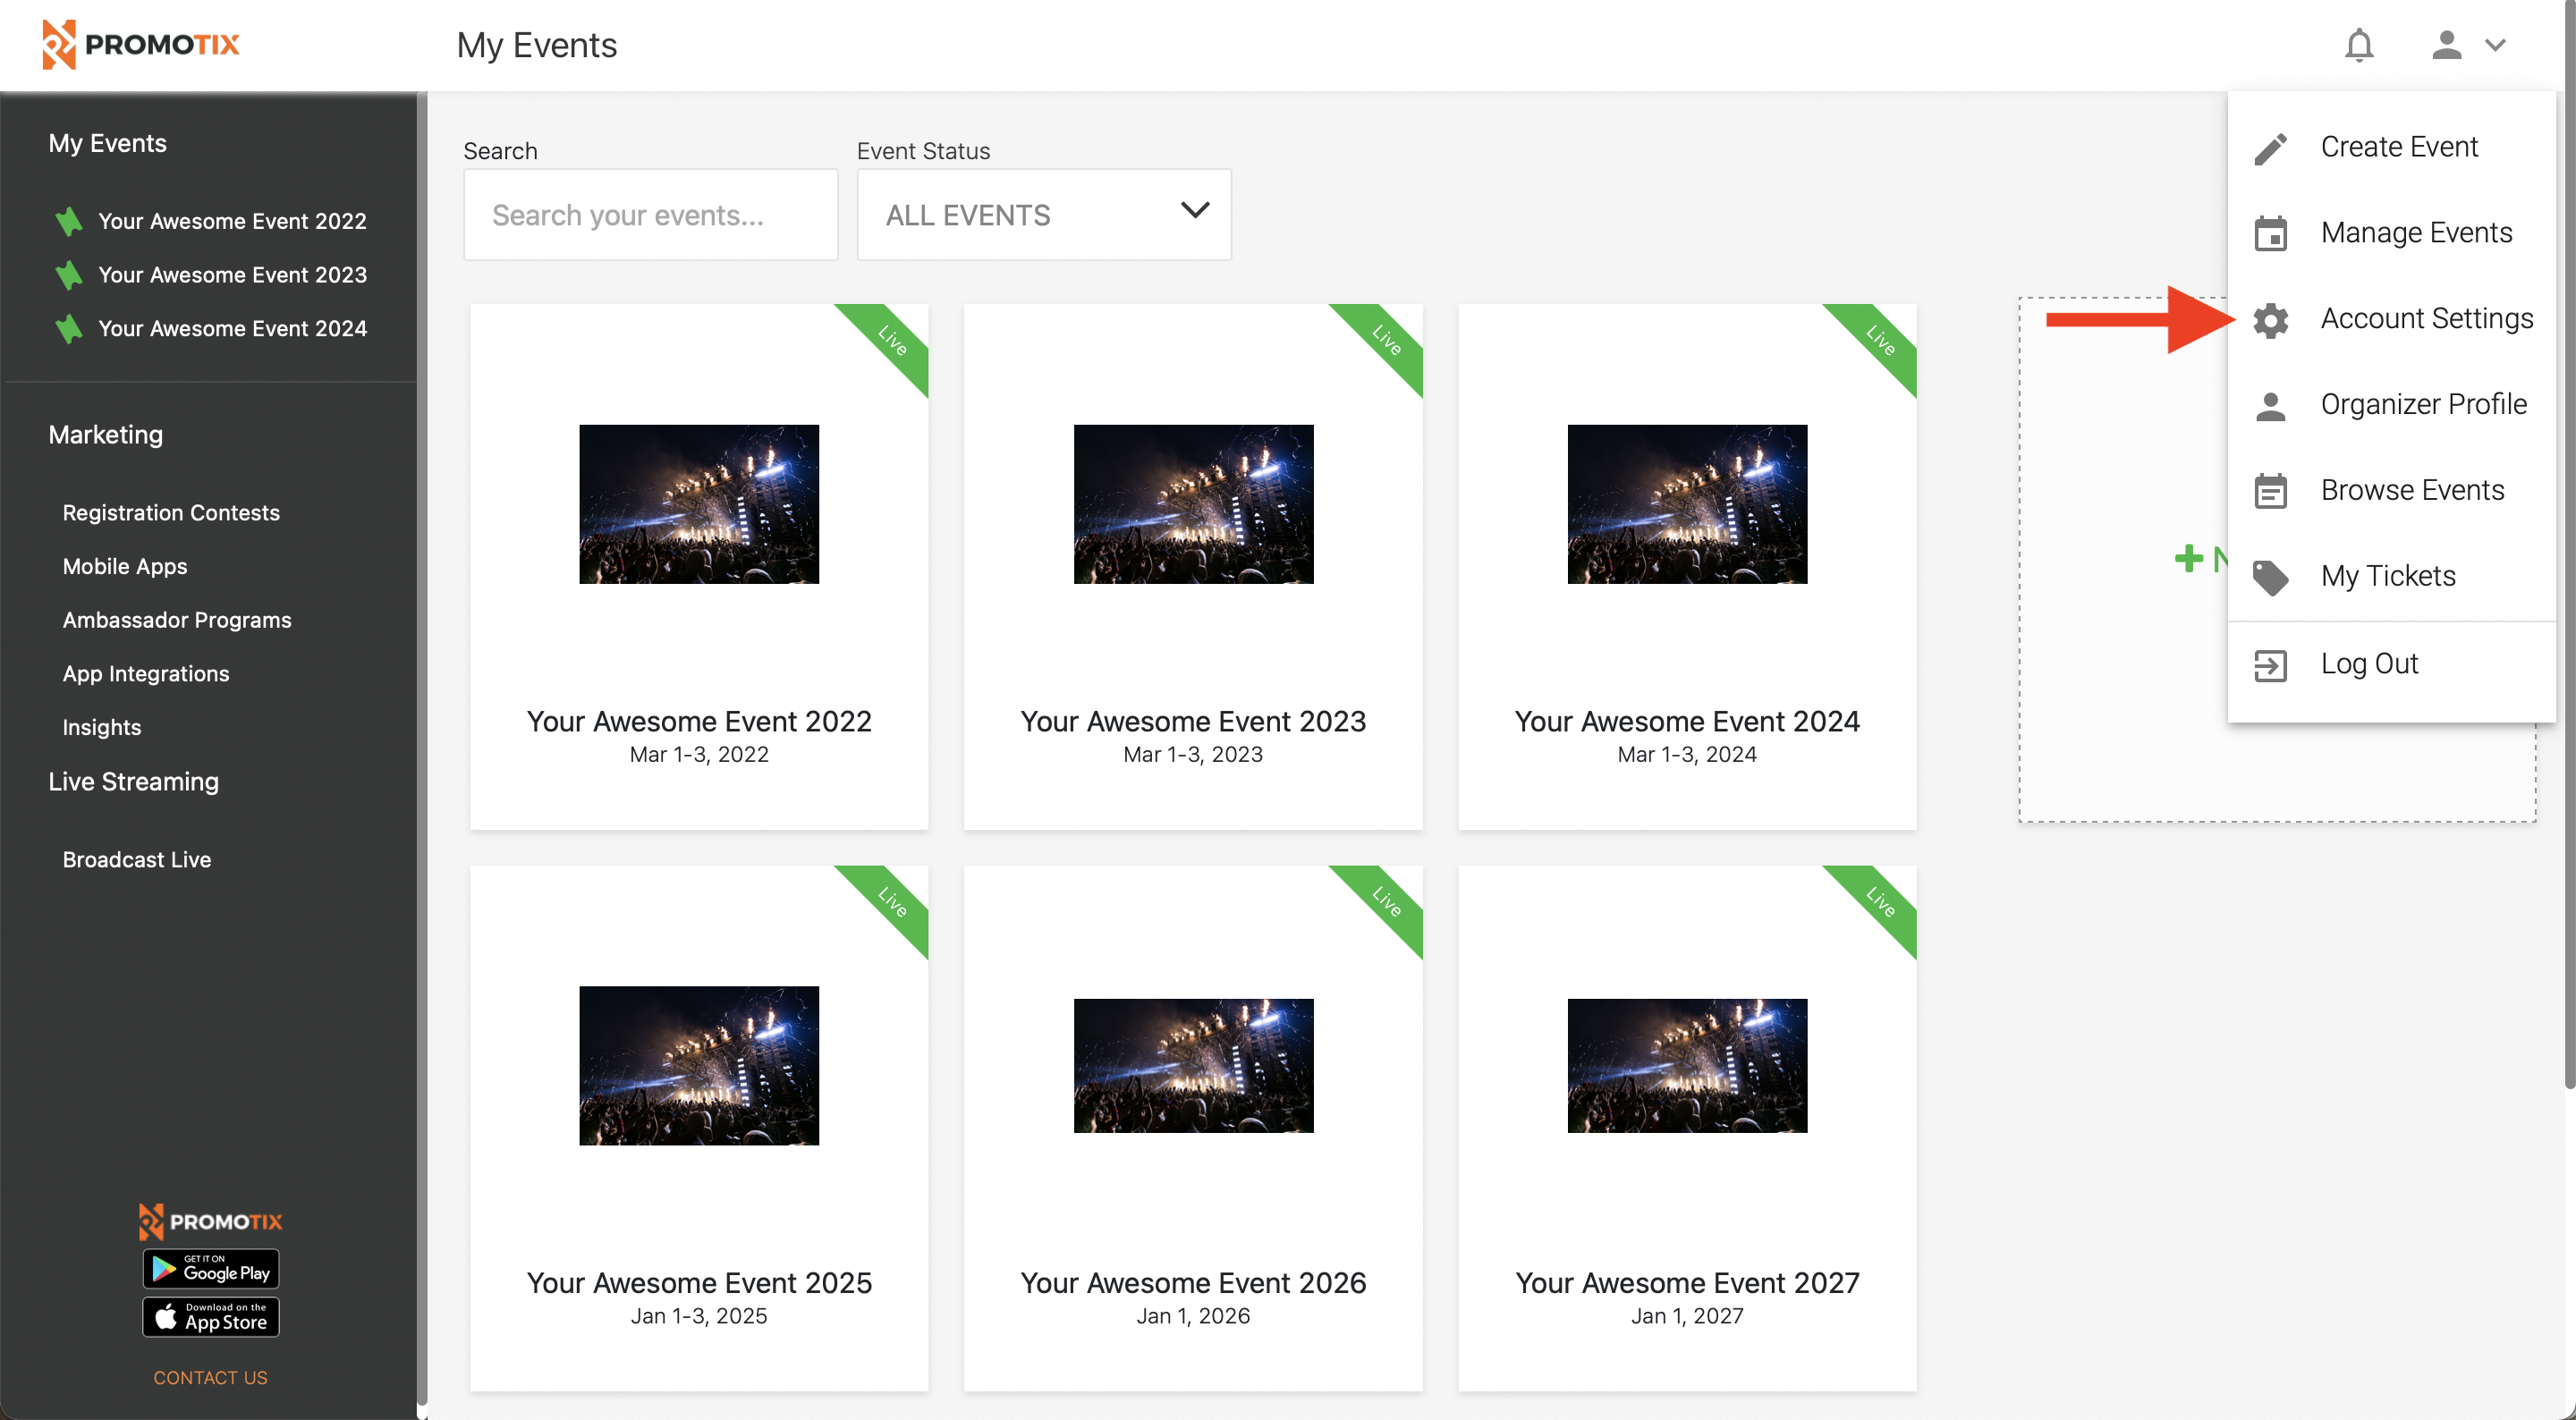 Once you've logged into your PromoTix account, click on the profile icon in the top right hand corner of the screen, and then click on "Account Settings."
2. Click on the Notifications tab, and then enable the "Restrict access on PromoTix Organizer" setting
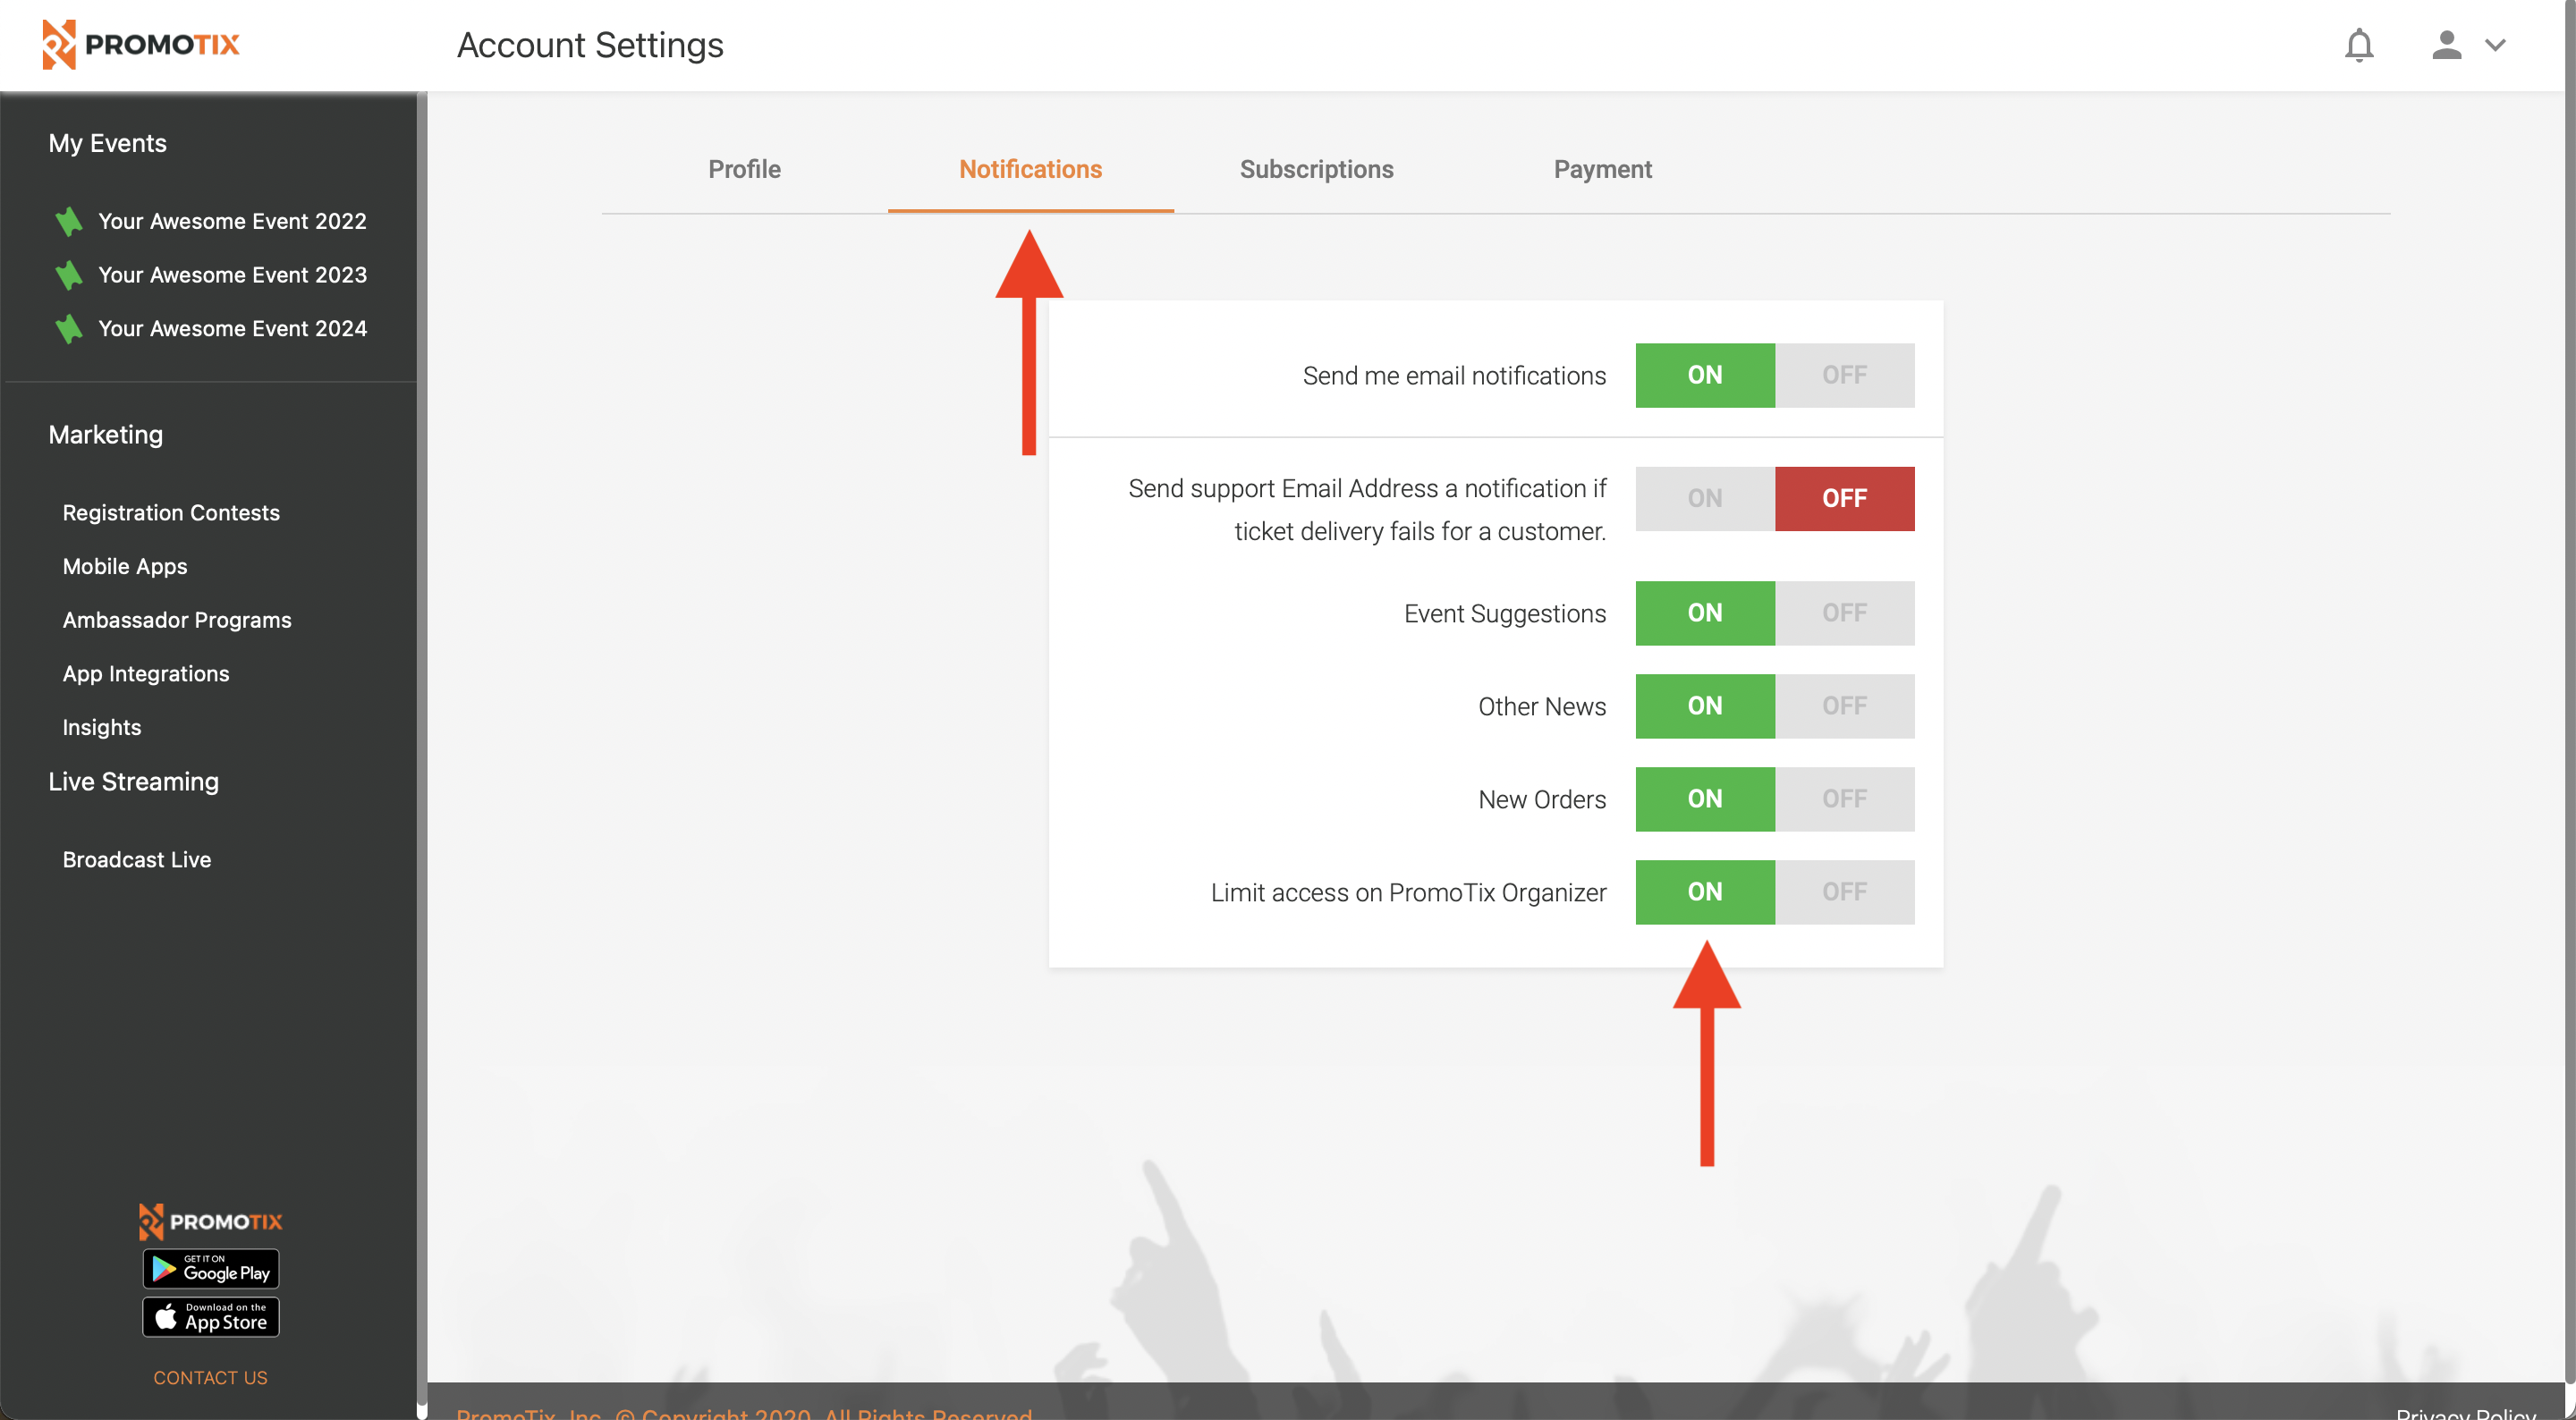
Click on your "Notifications" tab, and then find the "Limit access on PromoTix Organizer" setting. Click "ON" to enable it.
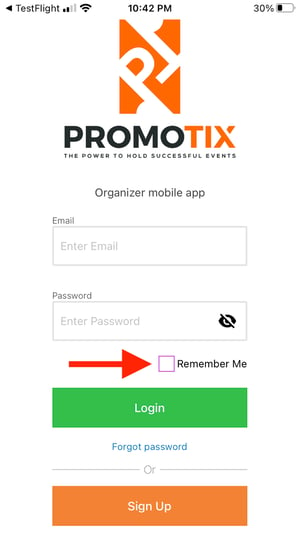
3. Login to the PromoTix Organizer mobile app
To download the PromoTix Organizer mobile app, click one of the download links below.
- iOS: https://apps.apple.com/us/app/promosuite-organizer/id1493907694
- Android: https://play.google.com/store/apps/details?id=com.ksolves.promosuite&hl=en_US
Once you've downloaded the mobile app, make sure to uncheck the "Remember Me" checkbox before logging in. This will automatically log your staff member out of your account when the application is closed.
Login to your PromoTix account.
IMPORTANT: do not share your PromoTix account email address or password with anyone. If staff members are helping you with your event, make sure that you personally login to your PromoTix account, and always uncheck the "Remember Me" checkbox.
3. Certain screens will be restricted within the app
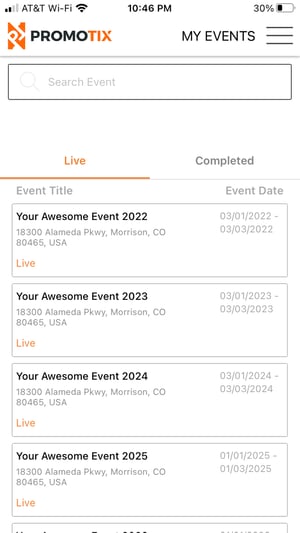
Once logged in to your account, no sales data will be shown in your list of events. Also, access to the following screens will be restricted:
- Dashboard
- Orders
- Guest List
When the "Limit access on PromoTix Organizer" setting is enabled, only two screens will be accessible:
- Sell Tickets
- Check In
At anytime, you can turn off the "Limit access on PromoTix Organizer" setting and all restrictions will be lifted.
Still Have Questions?

