

(Last Updated 3/1/26)
UPDATE: these are outdated instructions for setting up Universal Analytics which ceased processing data on July 1st, 2023. Google Analytics 4 (GA4) is the current version which is now also supported by PromoTix.
Right on your PromoTix event dashboard, you can track page views and your sales information broken down into different sales channels (online, point-of-sale, mobile apps, etc.). However, if you would like additional levels of tracking, Google Analytics is an excellent option and can be integrated easily with PromoTix.
For example, if you are running several ads and you would like to track the performance of each ad, Google Analytics can help.
1. Create a Google Analytics account
Before creating a Google Analytics account, you will first need an existing Google account. Click here to sign up for a Google account.
To create a Google Analytics account:
- Login to your Google account.
- Visit this URL.
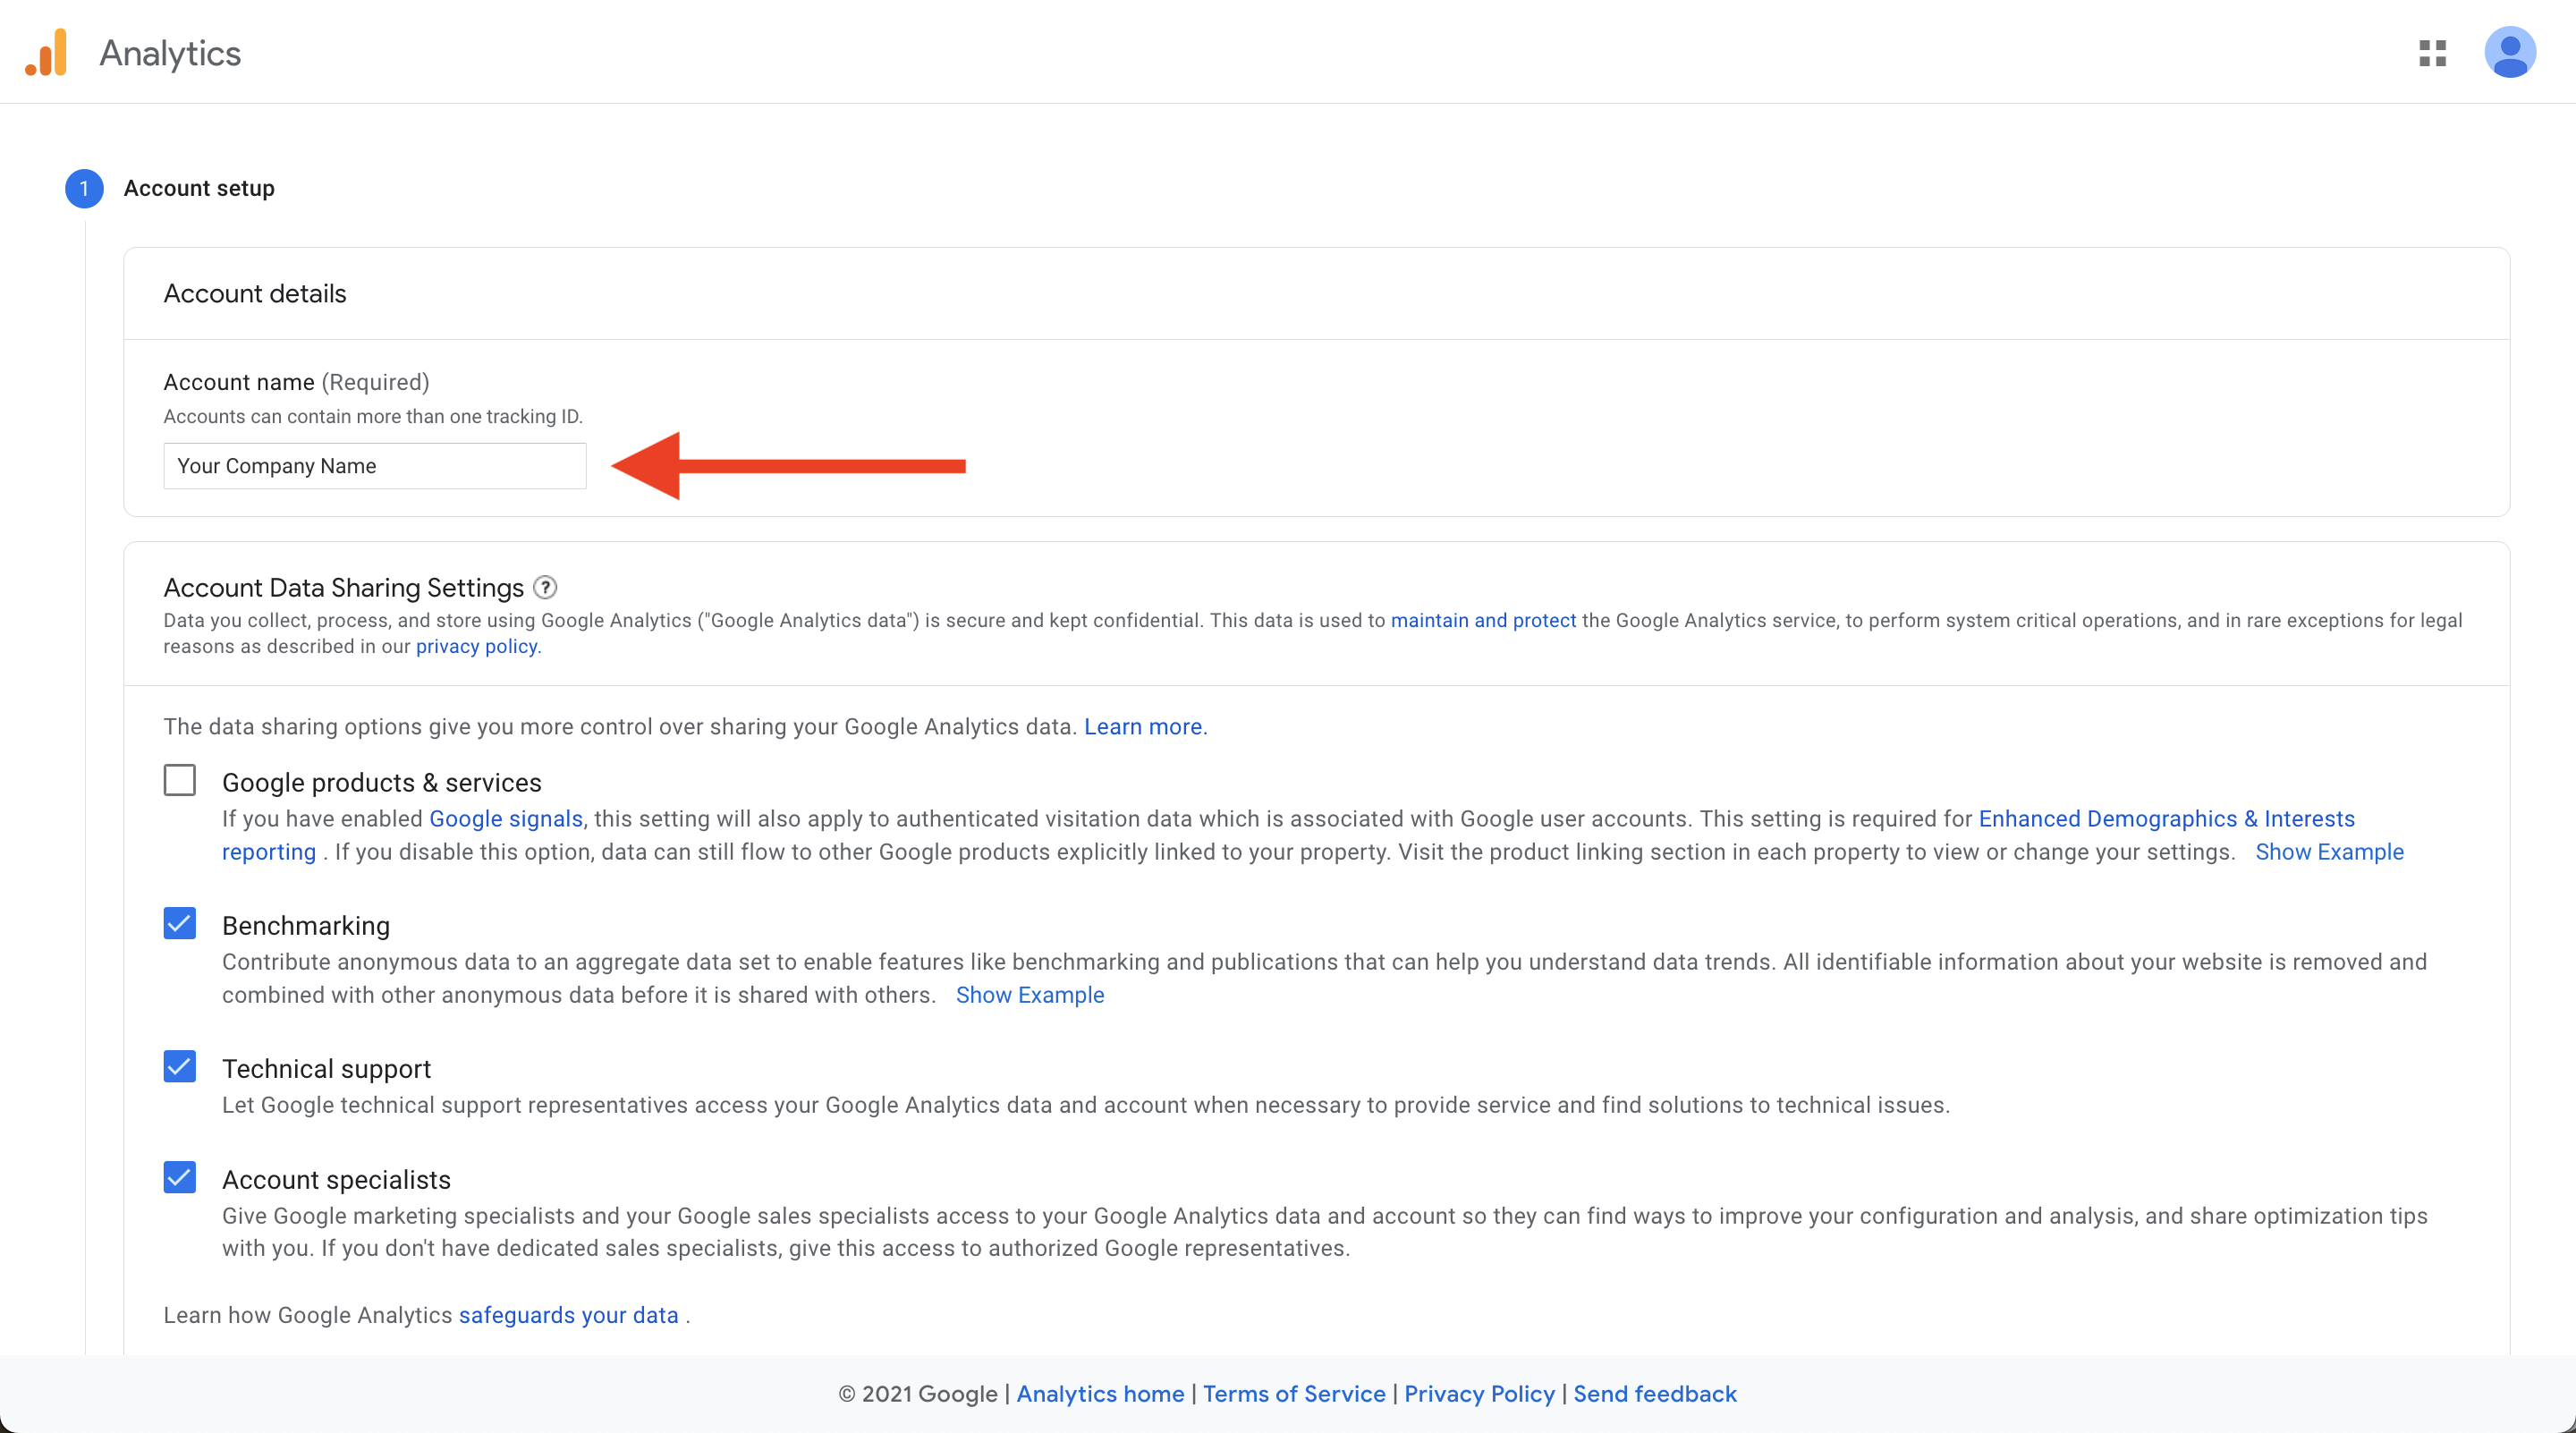
- Type your company name into the "Account name" field. Afterward, click "Next" at the bottom of the screen.
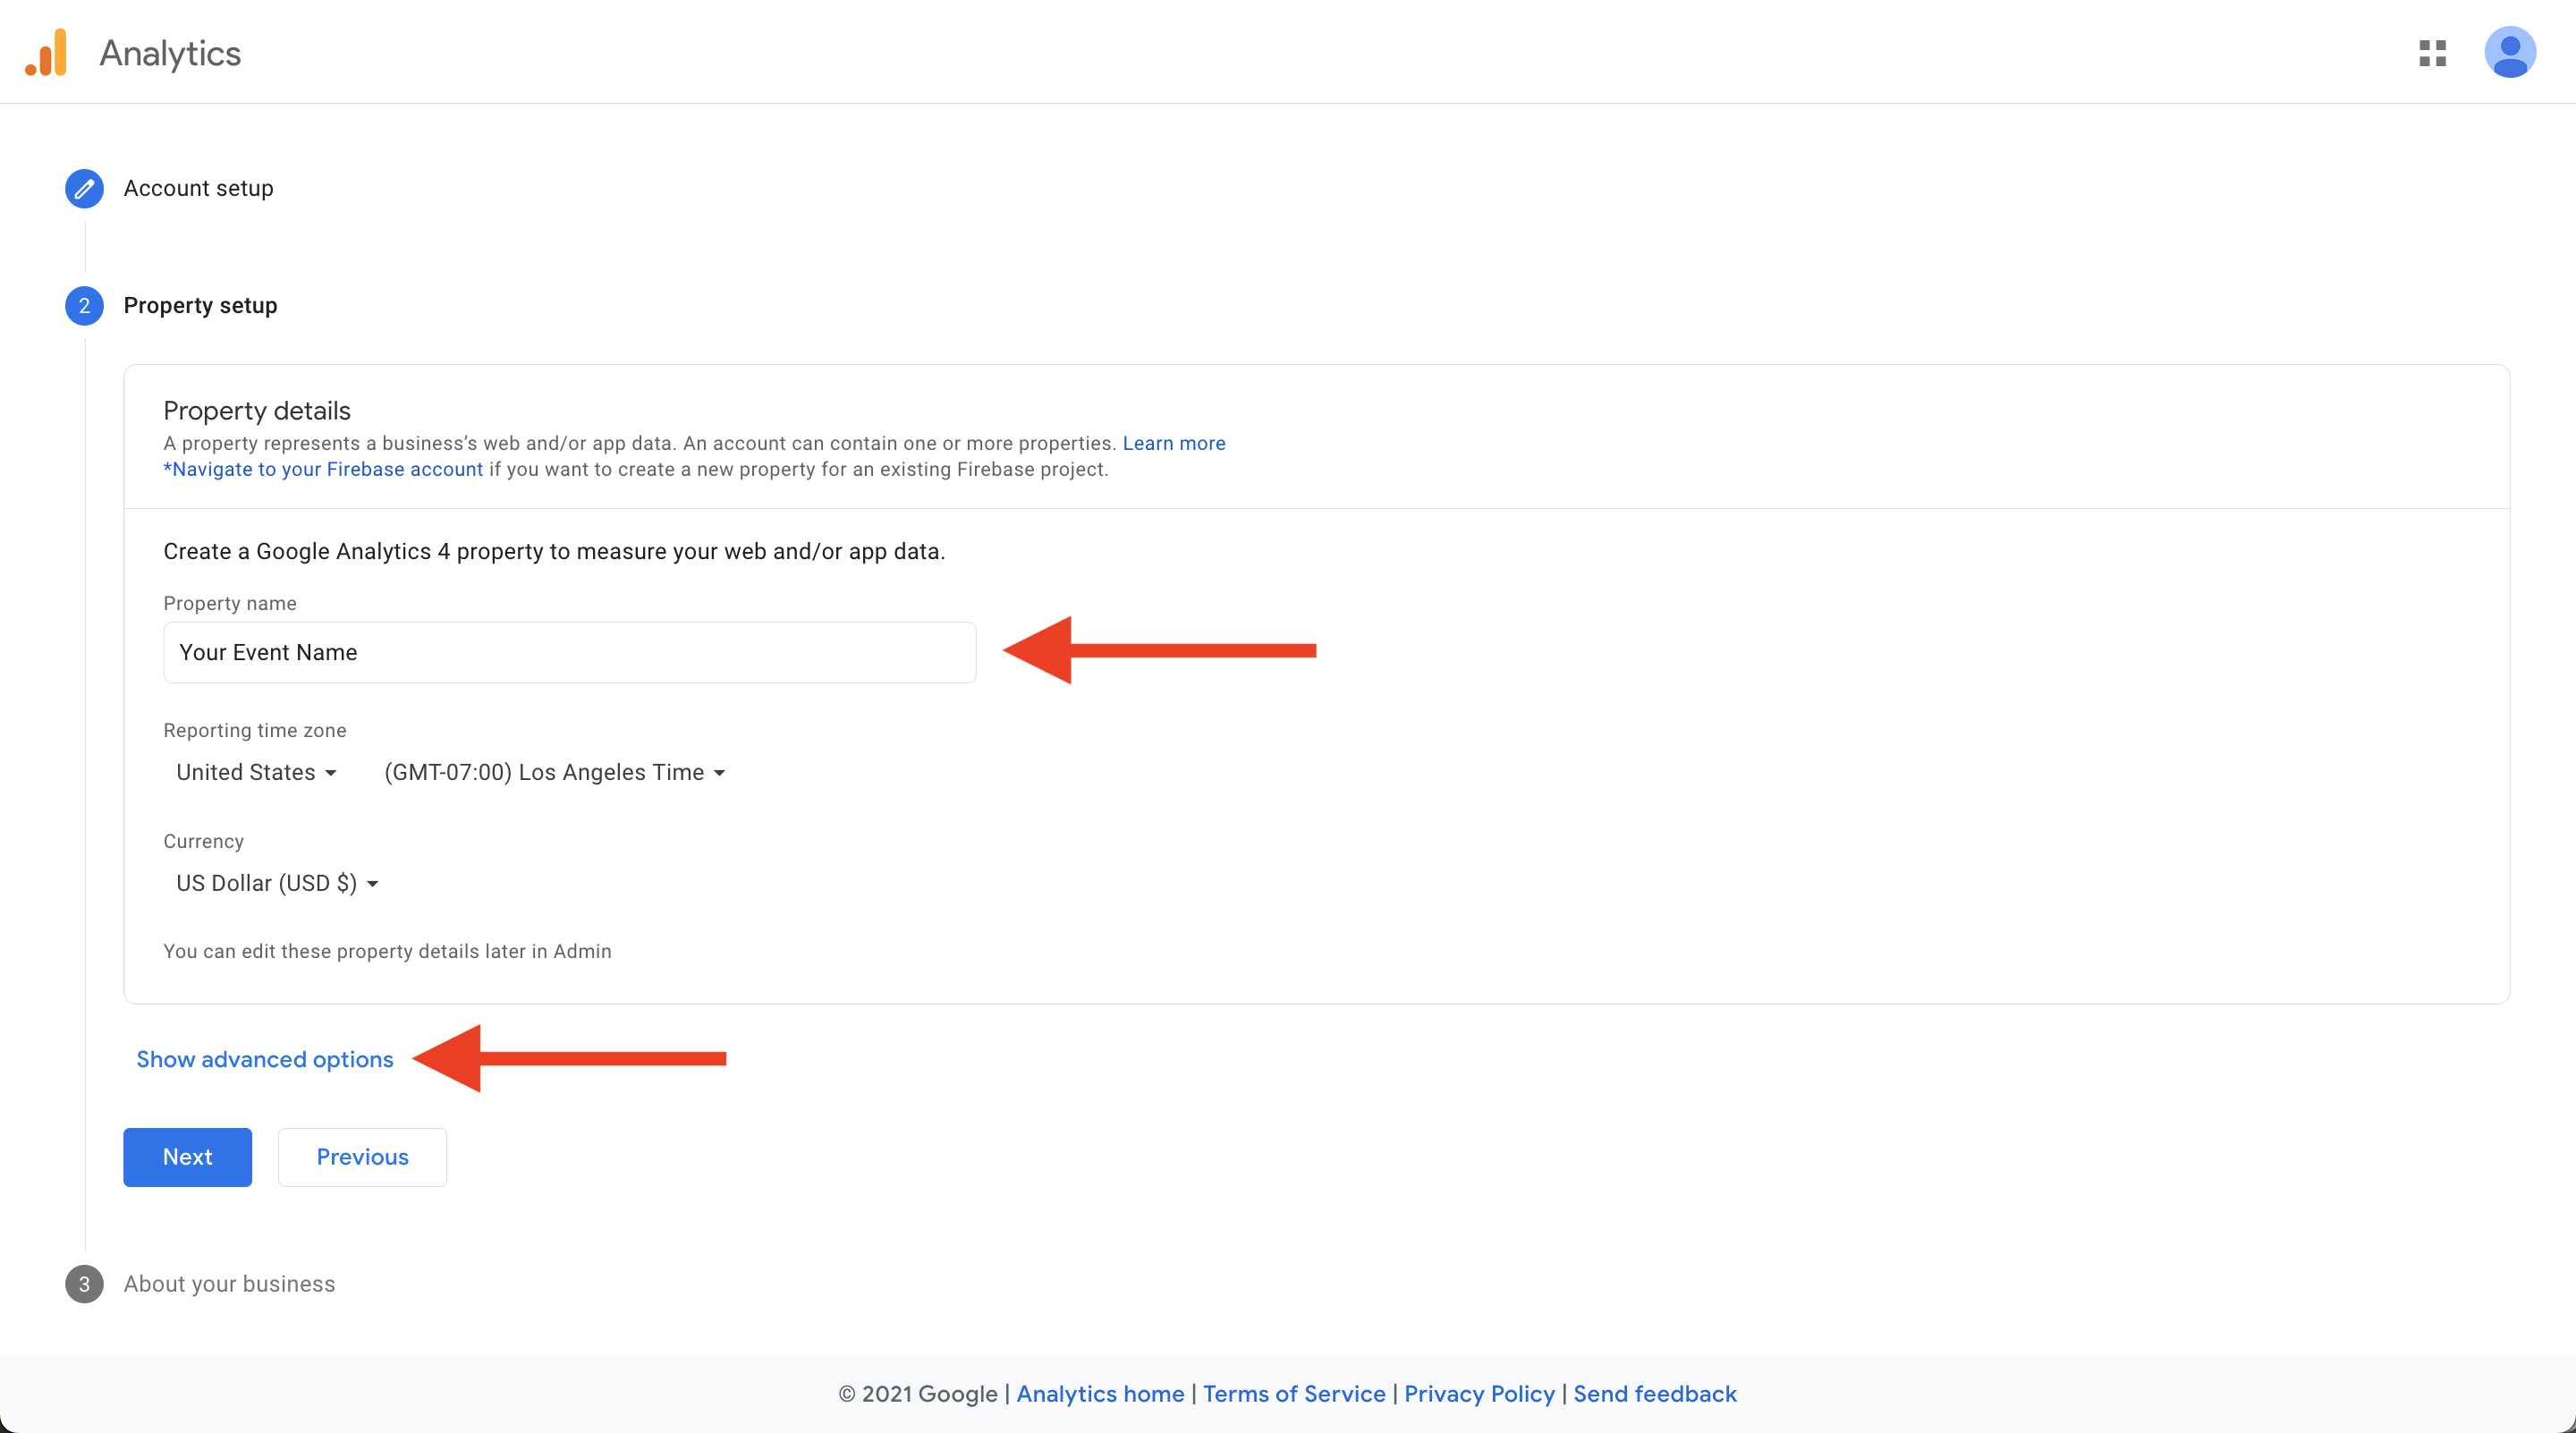
- Type in the title of one of your PromoTix events that you would like to track in the "Property name" field. Double-check your reporting time zone and currency settings (note that PromoTix currently only supports USD, EUR, GBP, CAN, and AUD currencies). Afterward, click on "Show advanced options."
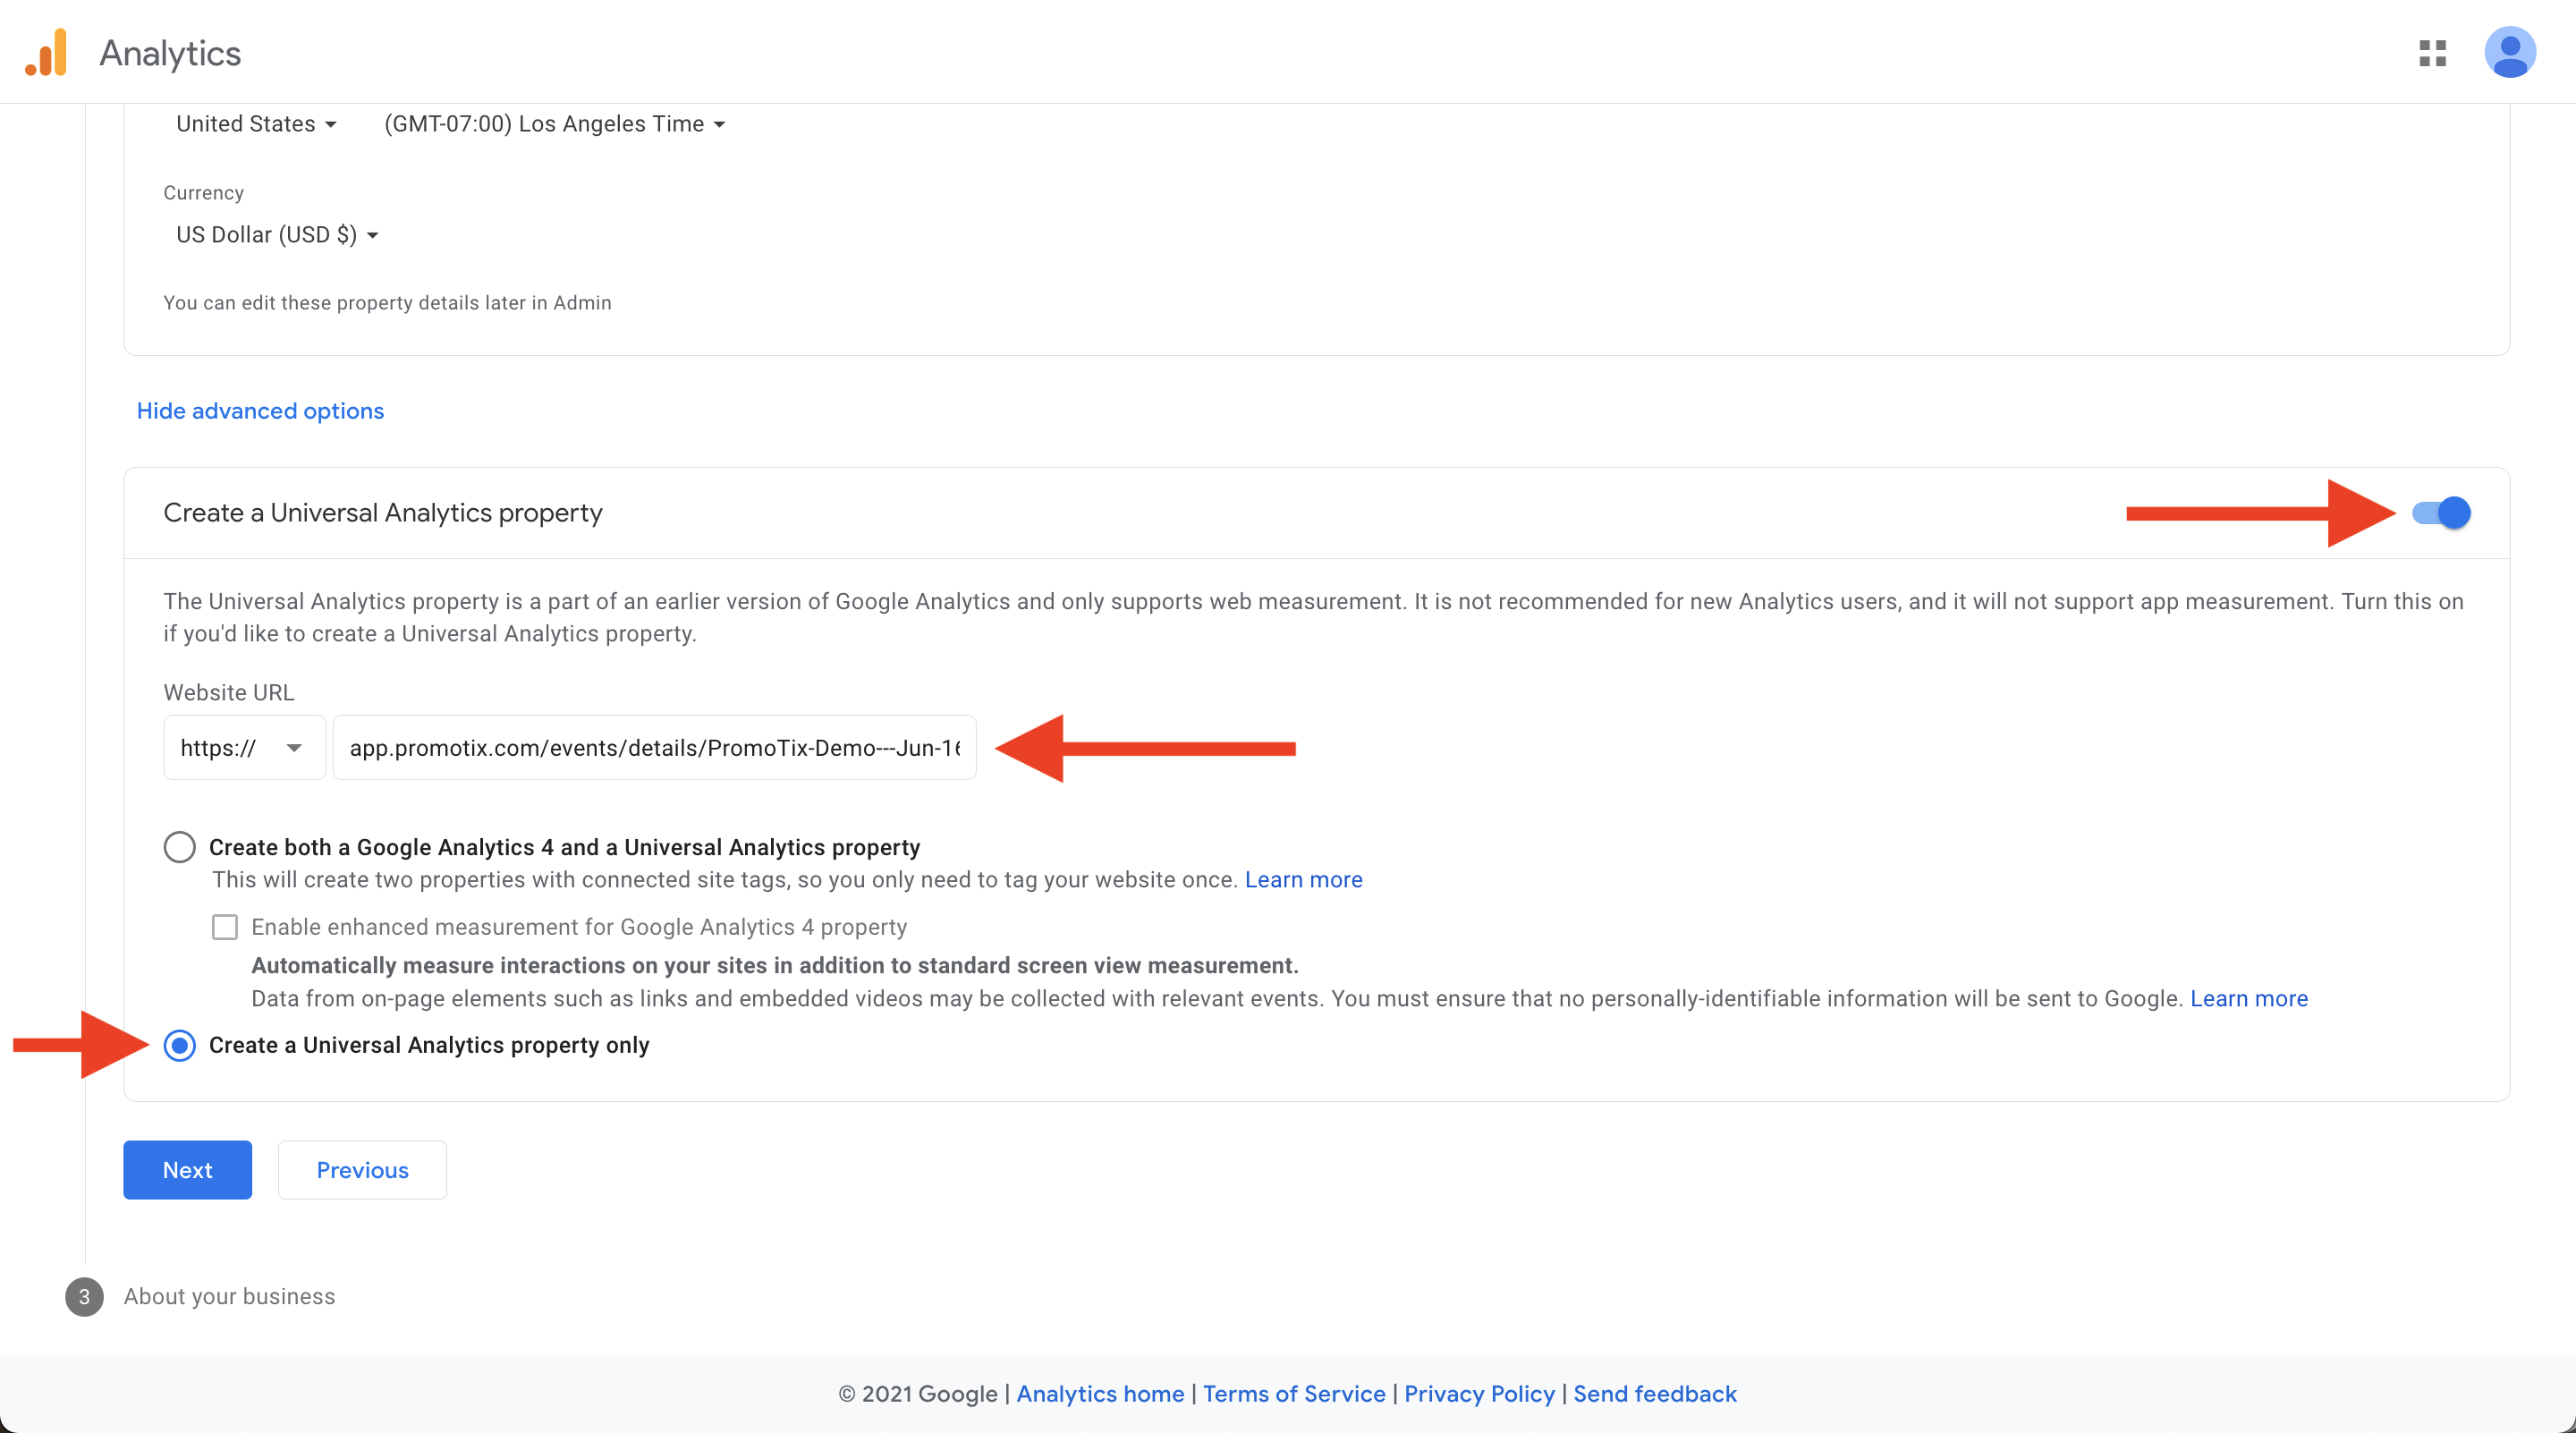
- Click on the toggle to the right of "Create a Universal Analytics property." Then, paste your event page URL into the "Website URL" field (for help on finding your event page URL, click here). Afterward, select the "Create a Universal Analytics property only" option, and then click "Next" at the bottom of the screen.
- Answer the following questions, and then click on "Create" at the bottom of the screen.

2. (Recommended) Enable Ecommerce in your Google Analytics account
If you would like to track your PromoTix ticket sales revenue in your Google Analytics account, then you will need to enable Ecommerce in your Google Analytics account:
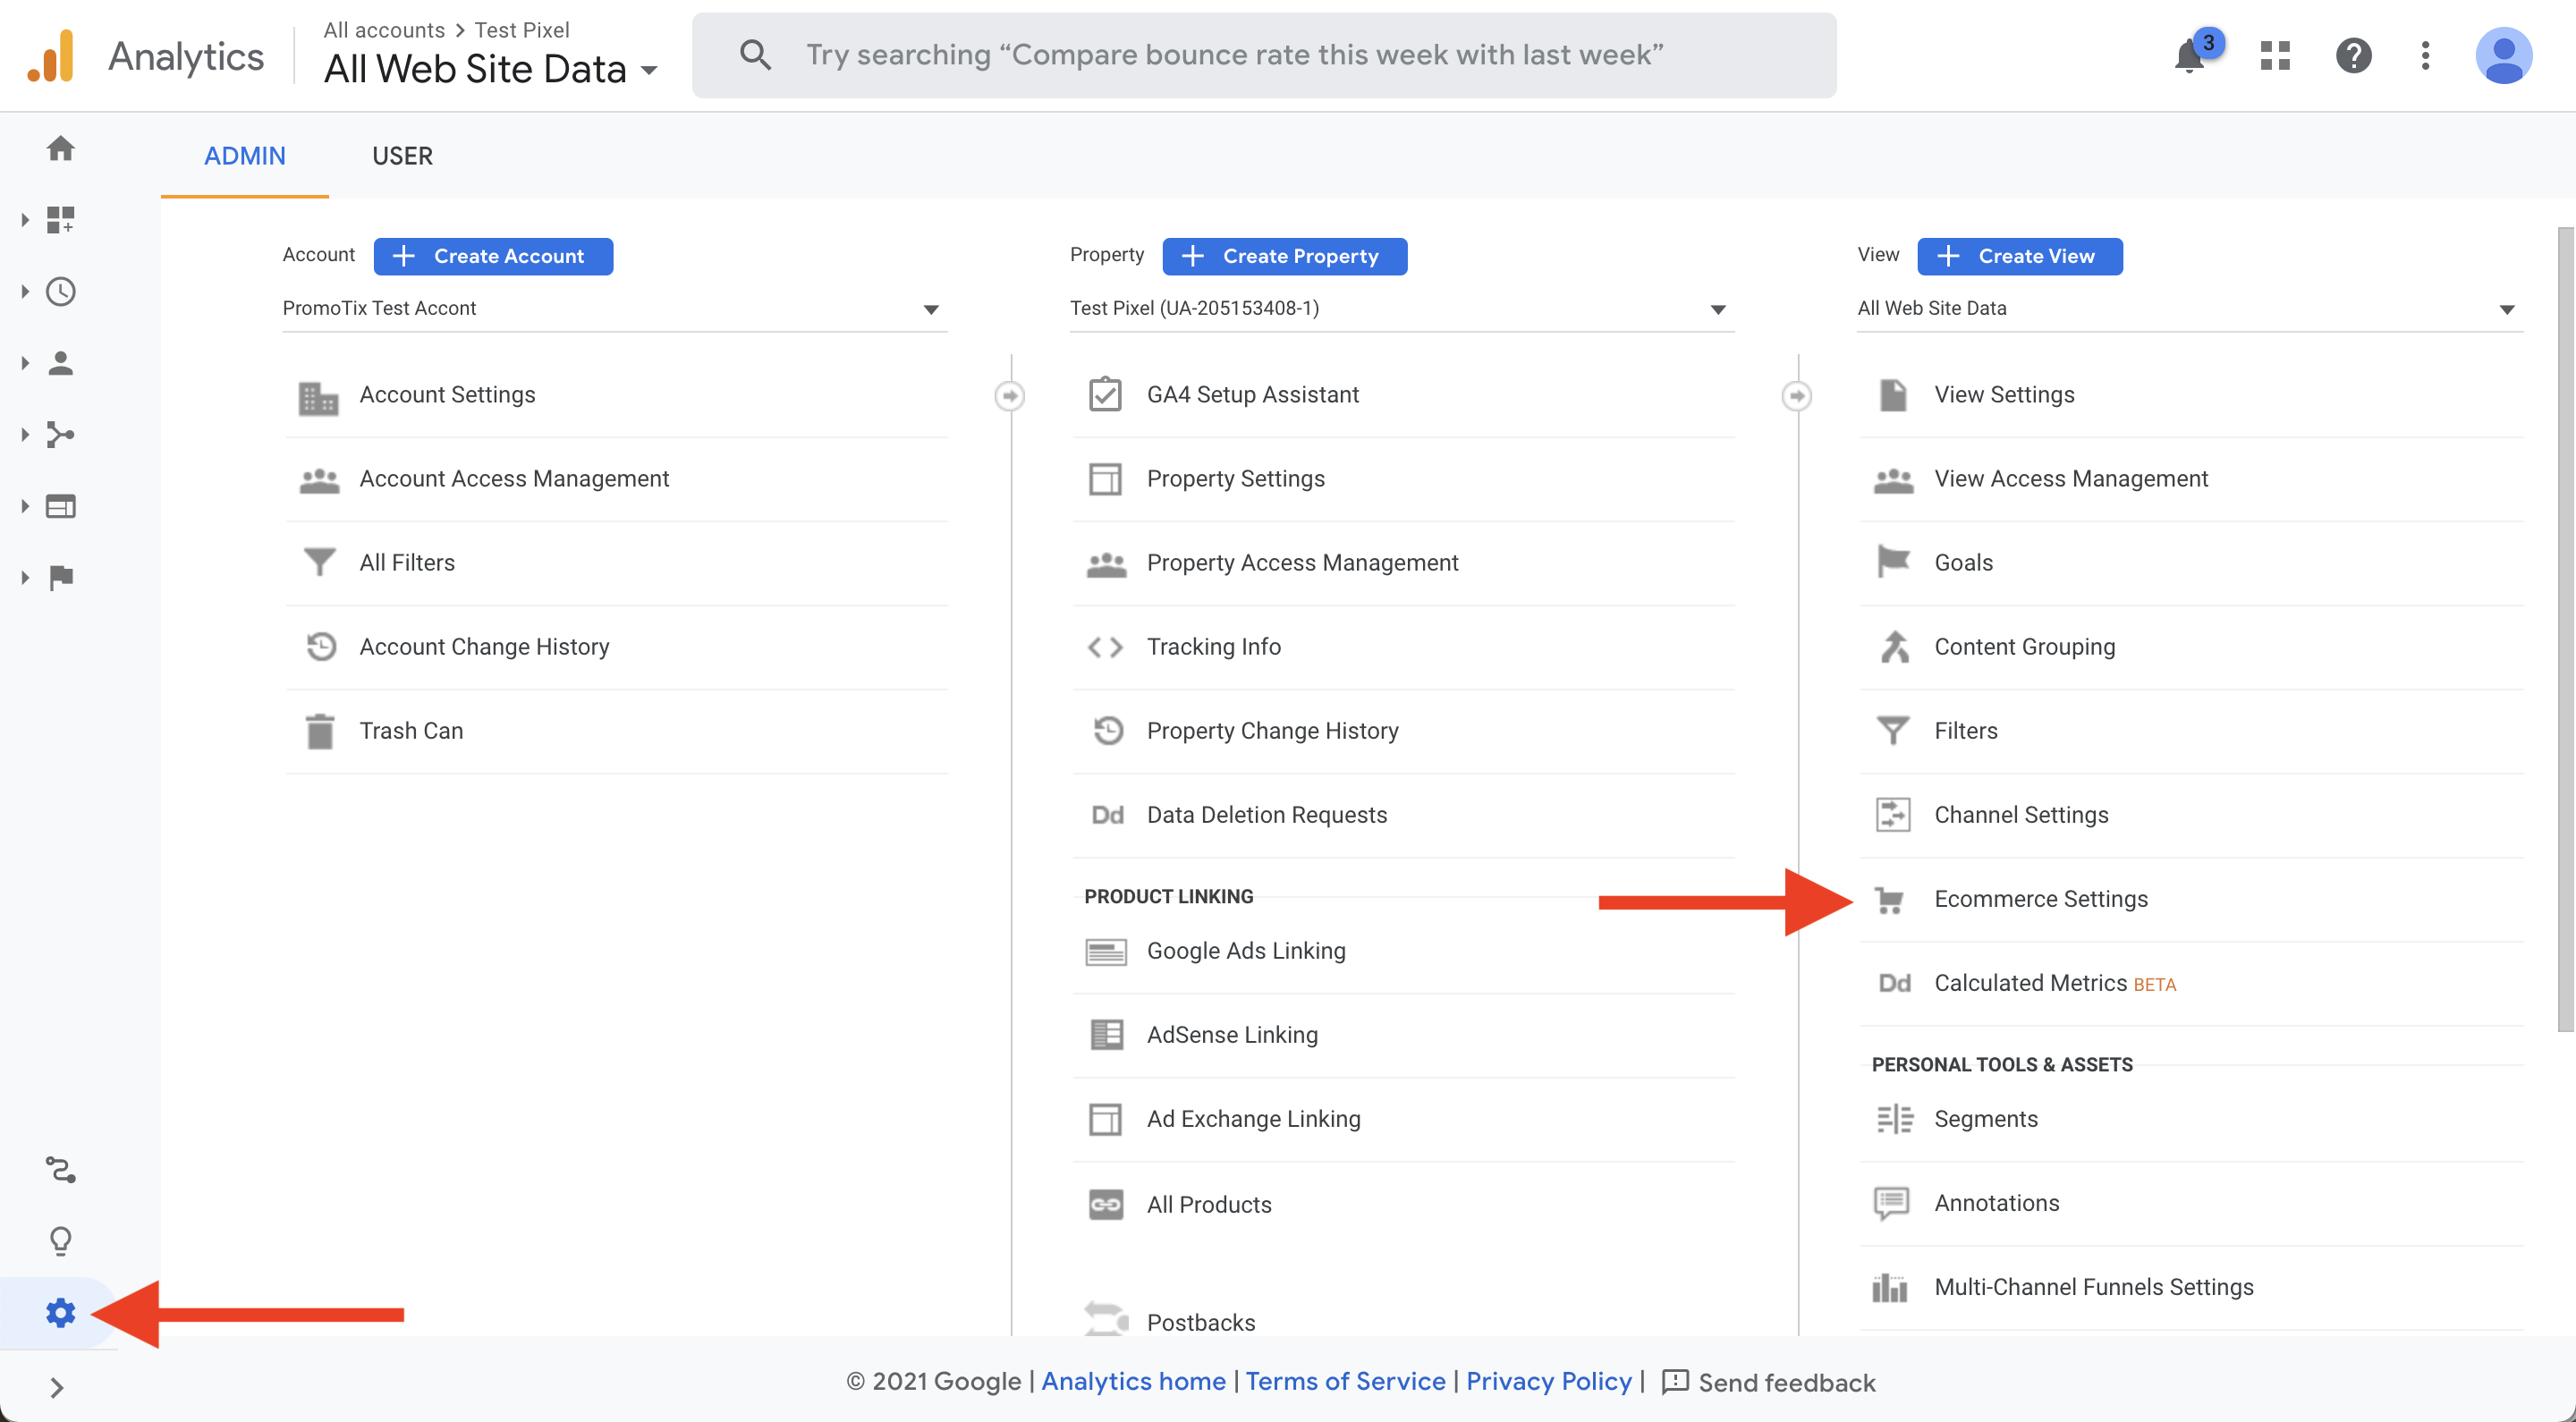
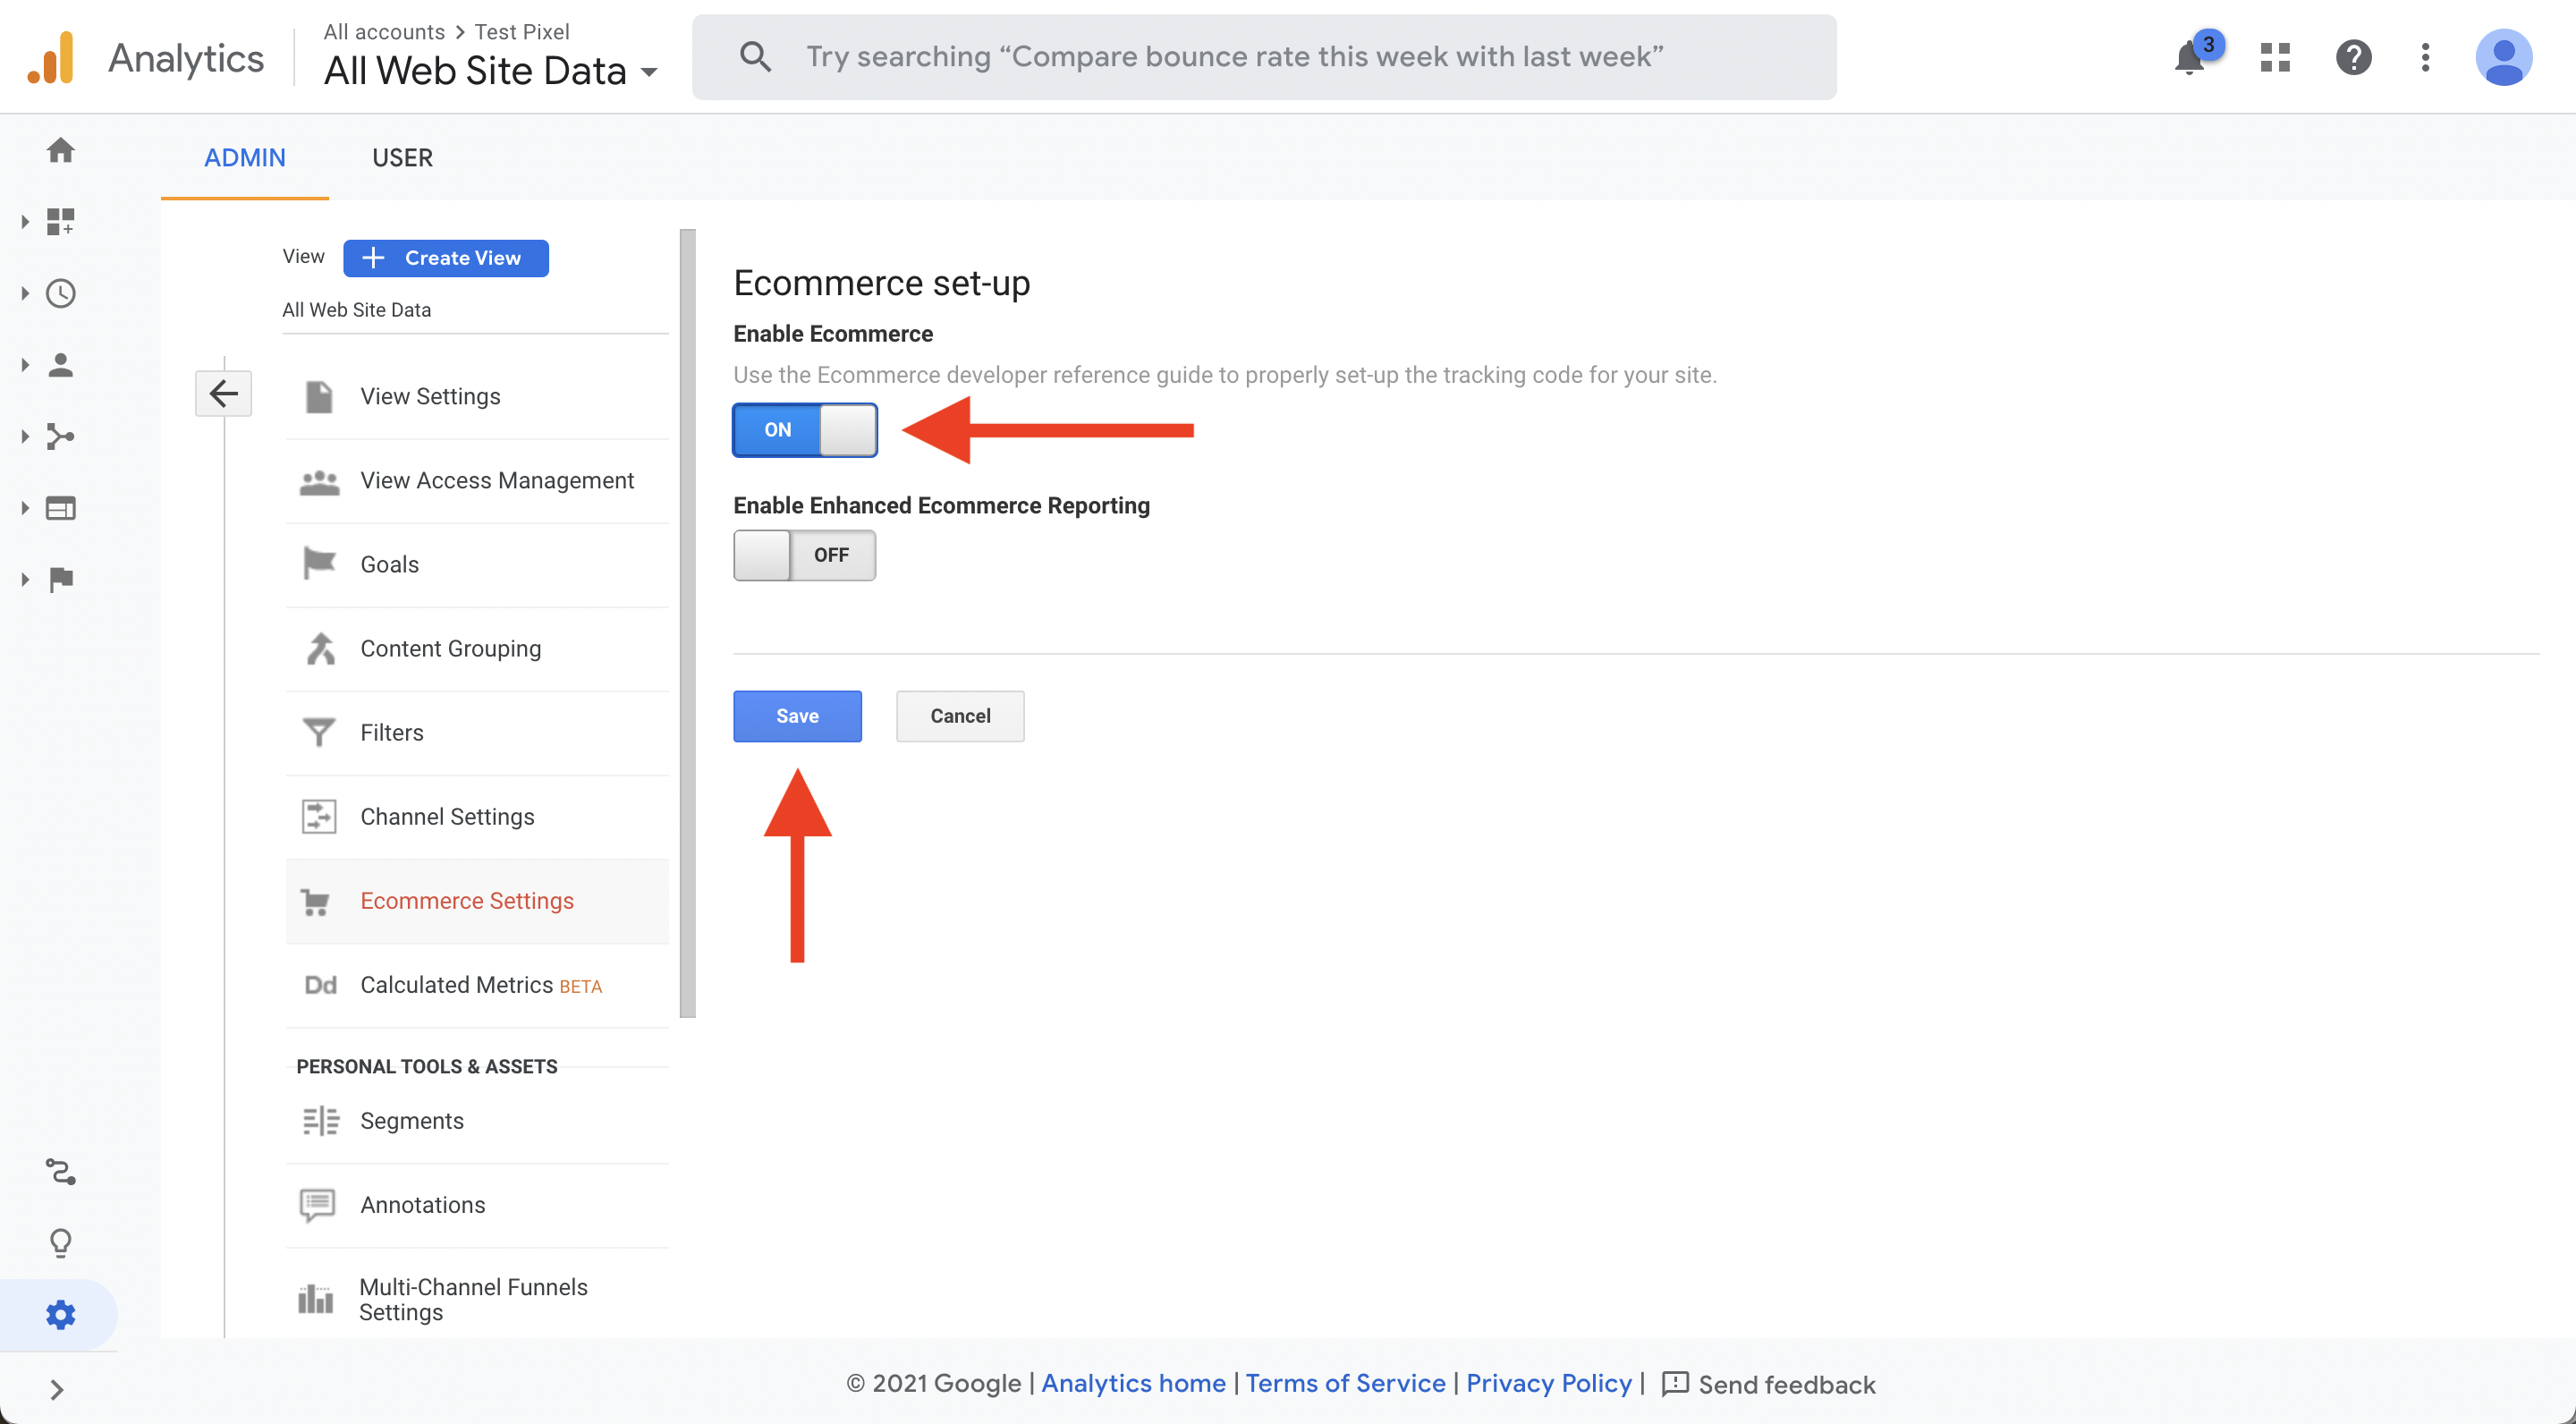
- Click on the gear icon, and then click on "Ecommerce Settings"
- Turn on Ecommerce and then click "Save"
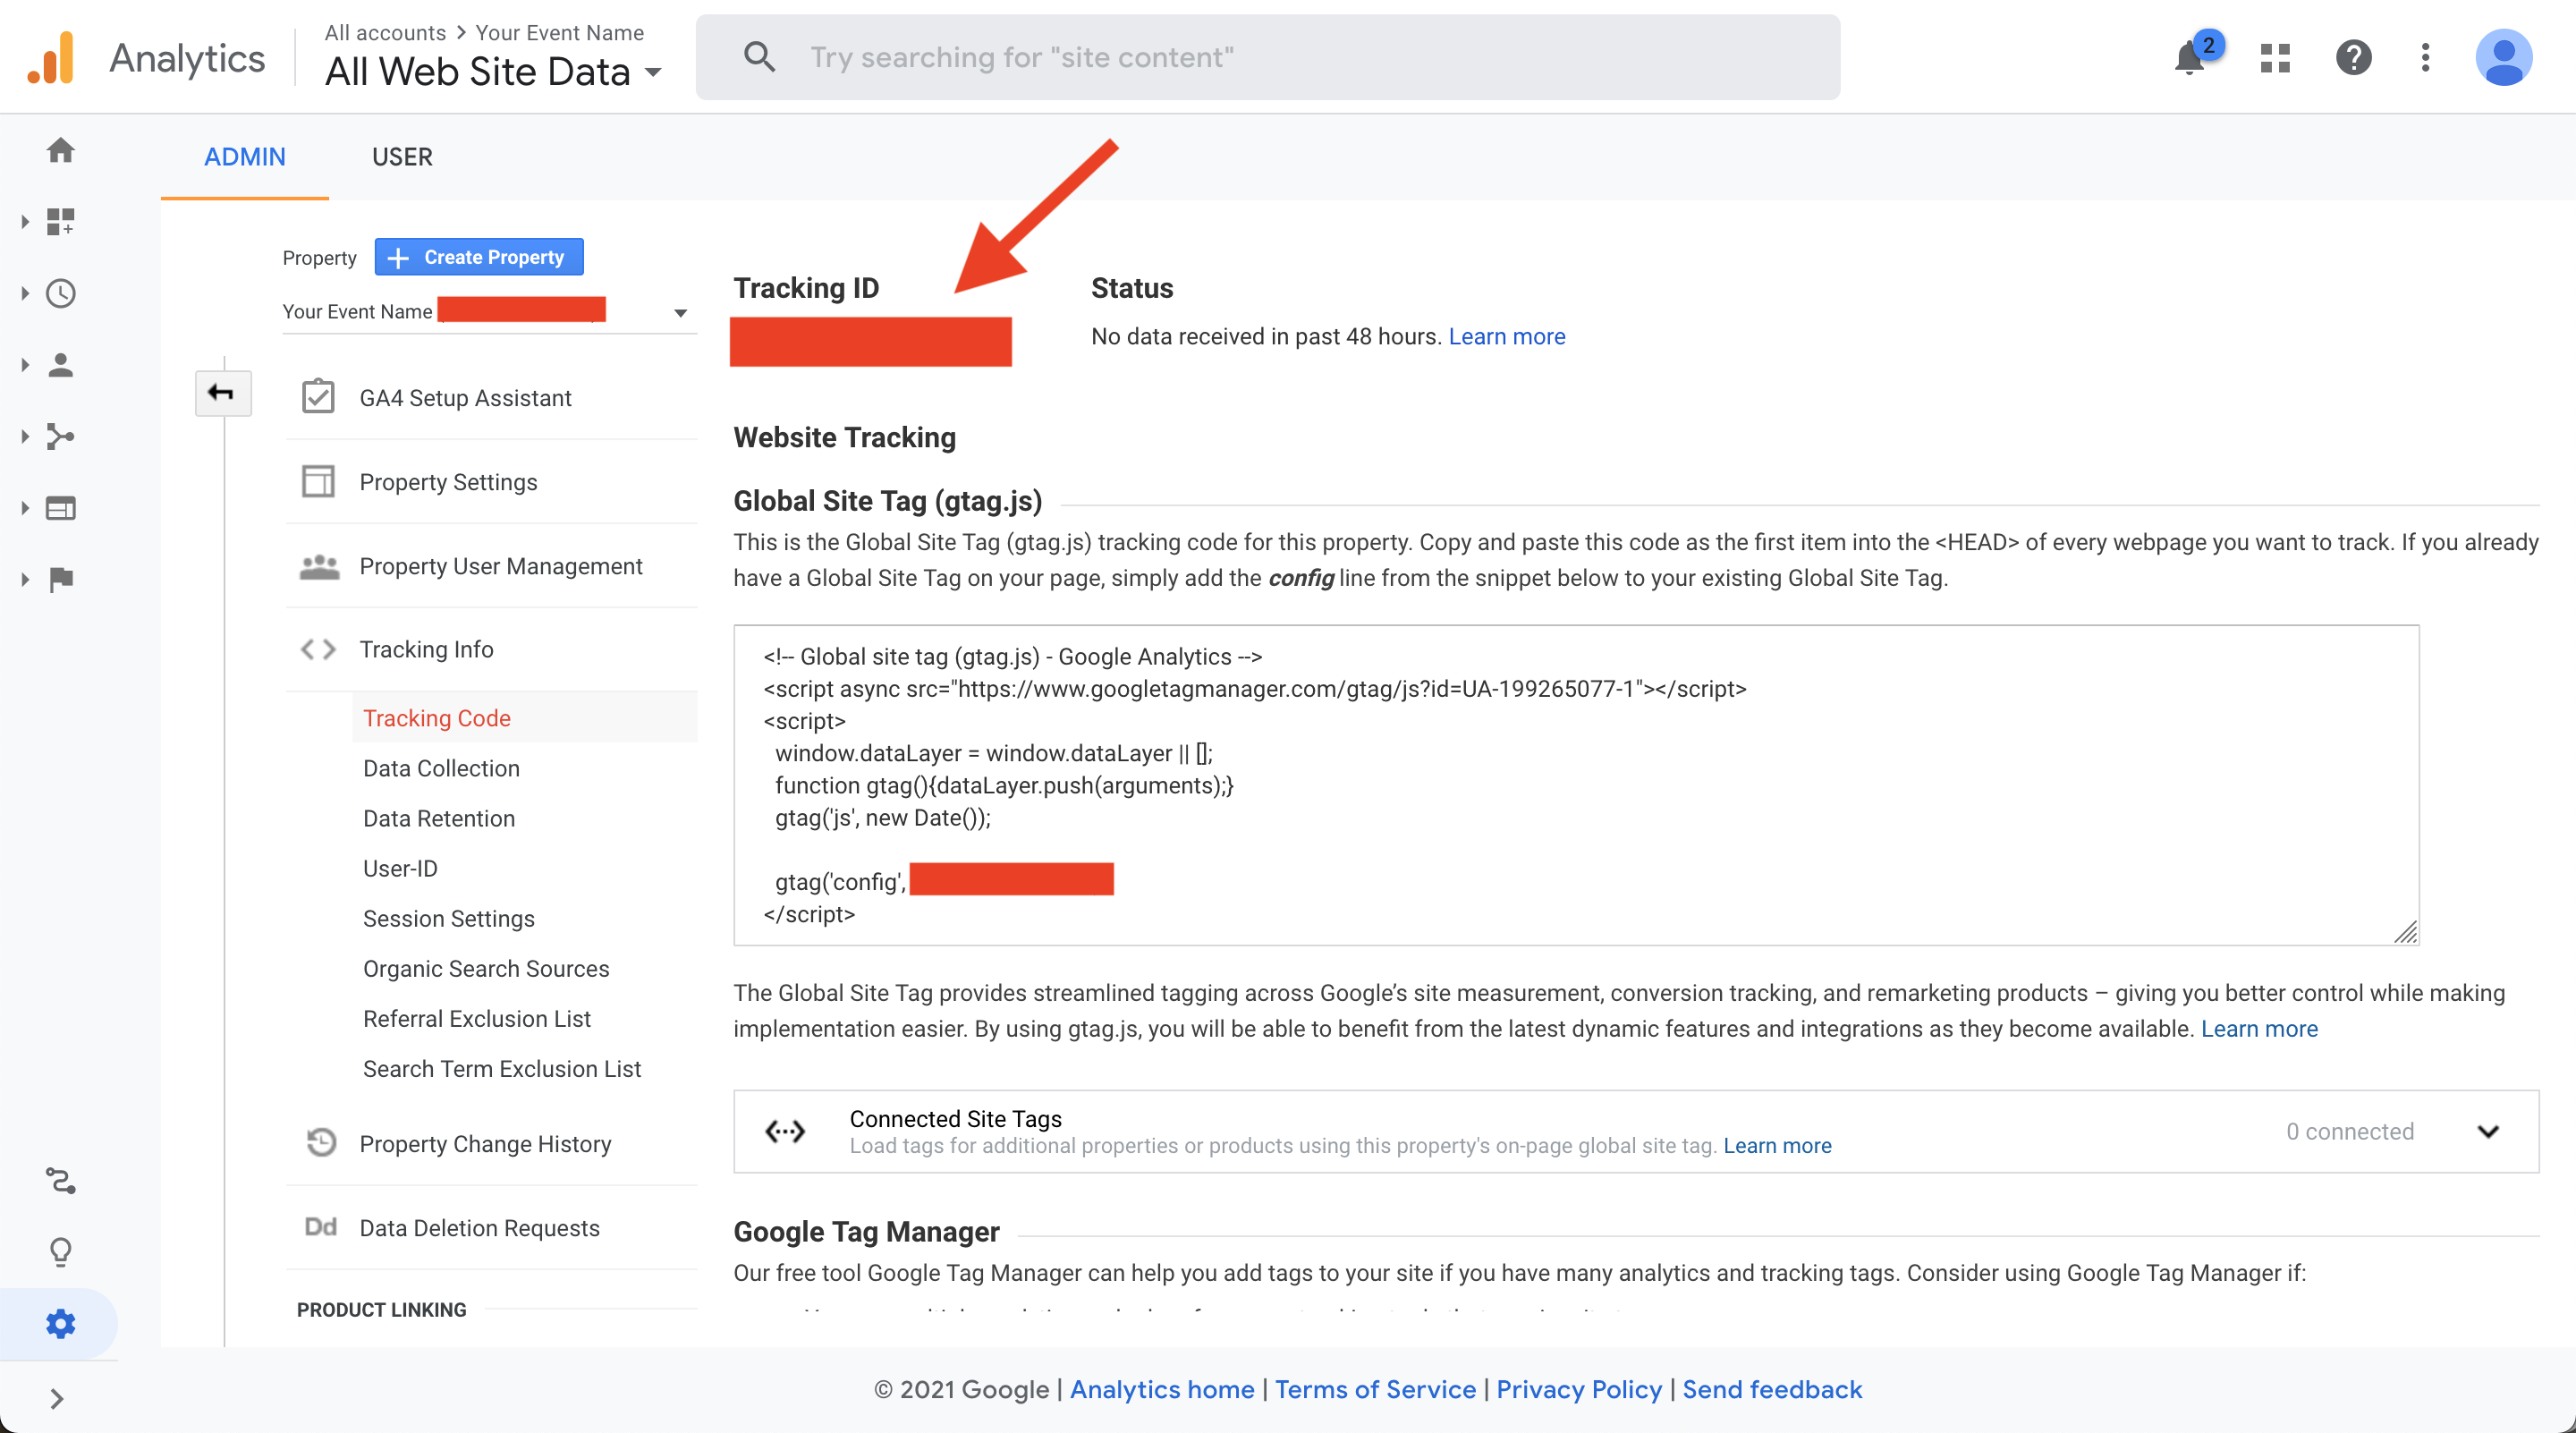
3. Paste your Tracking ID into your PromoTix event
Follow these steps to start tracking your PromoTix event page:
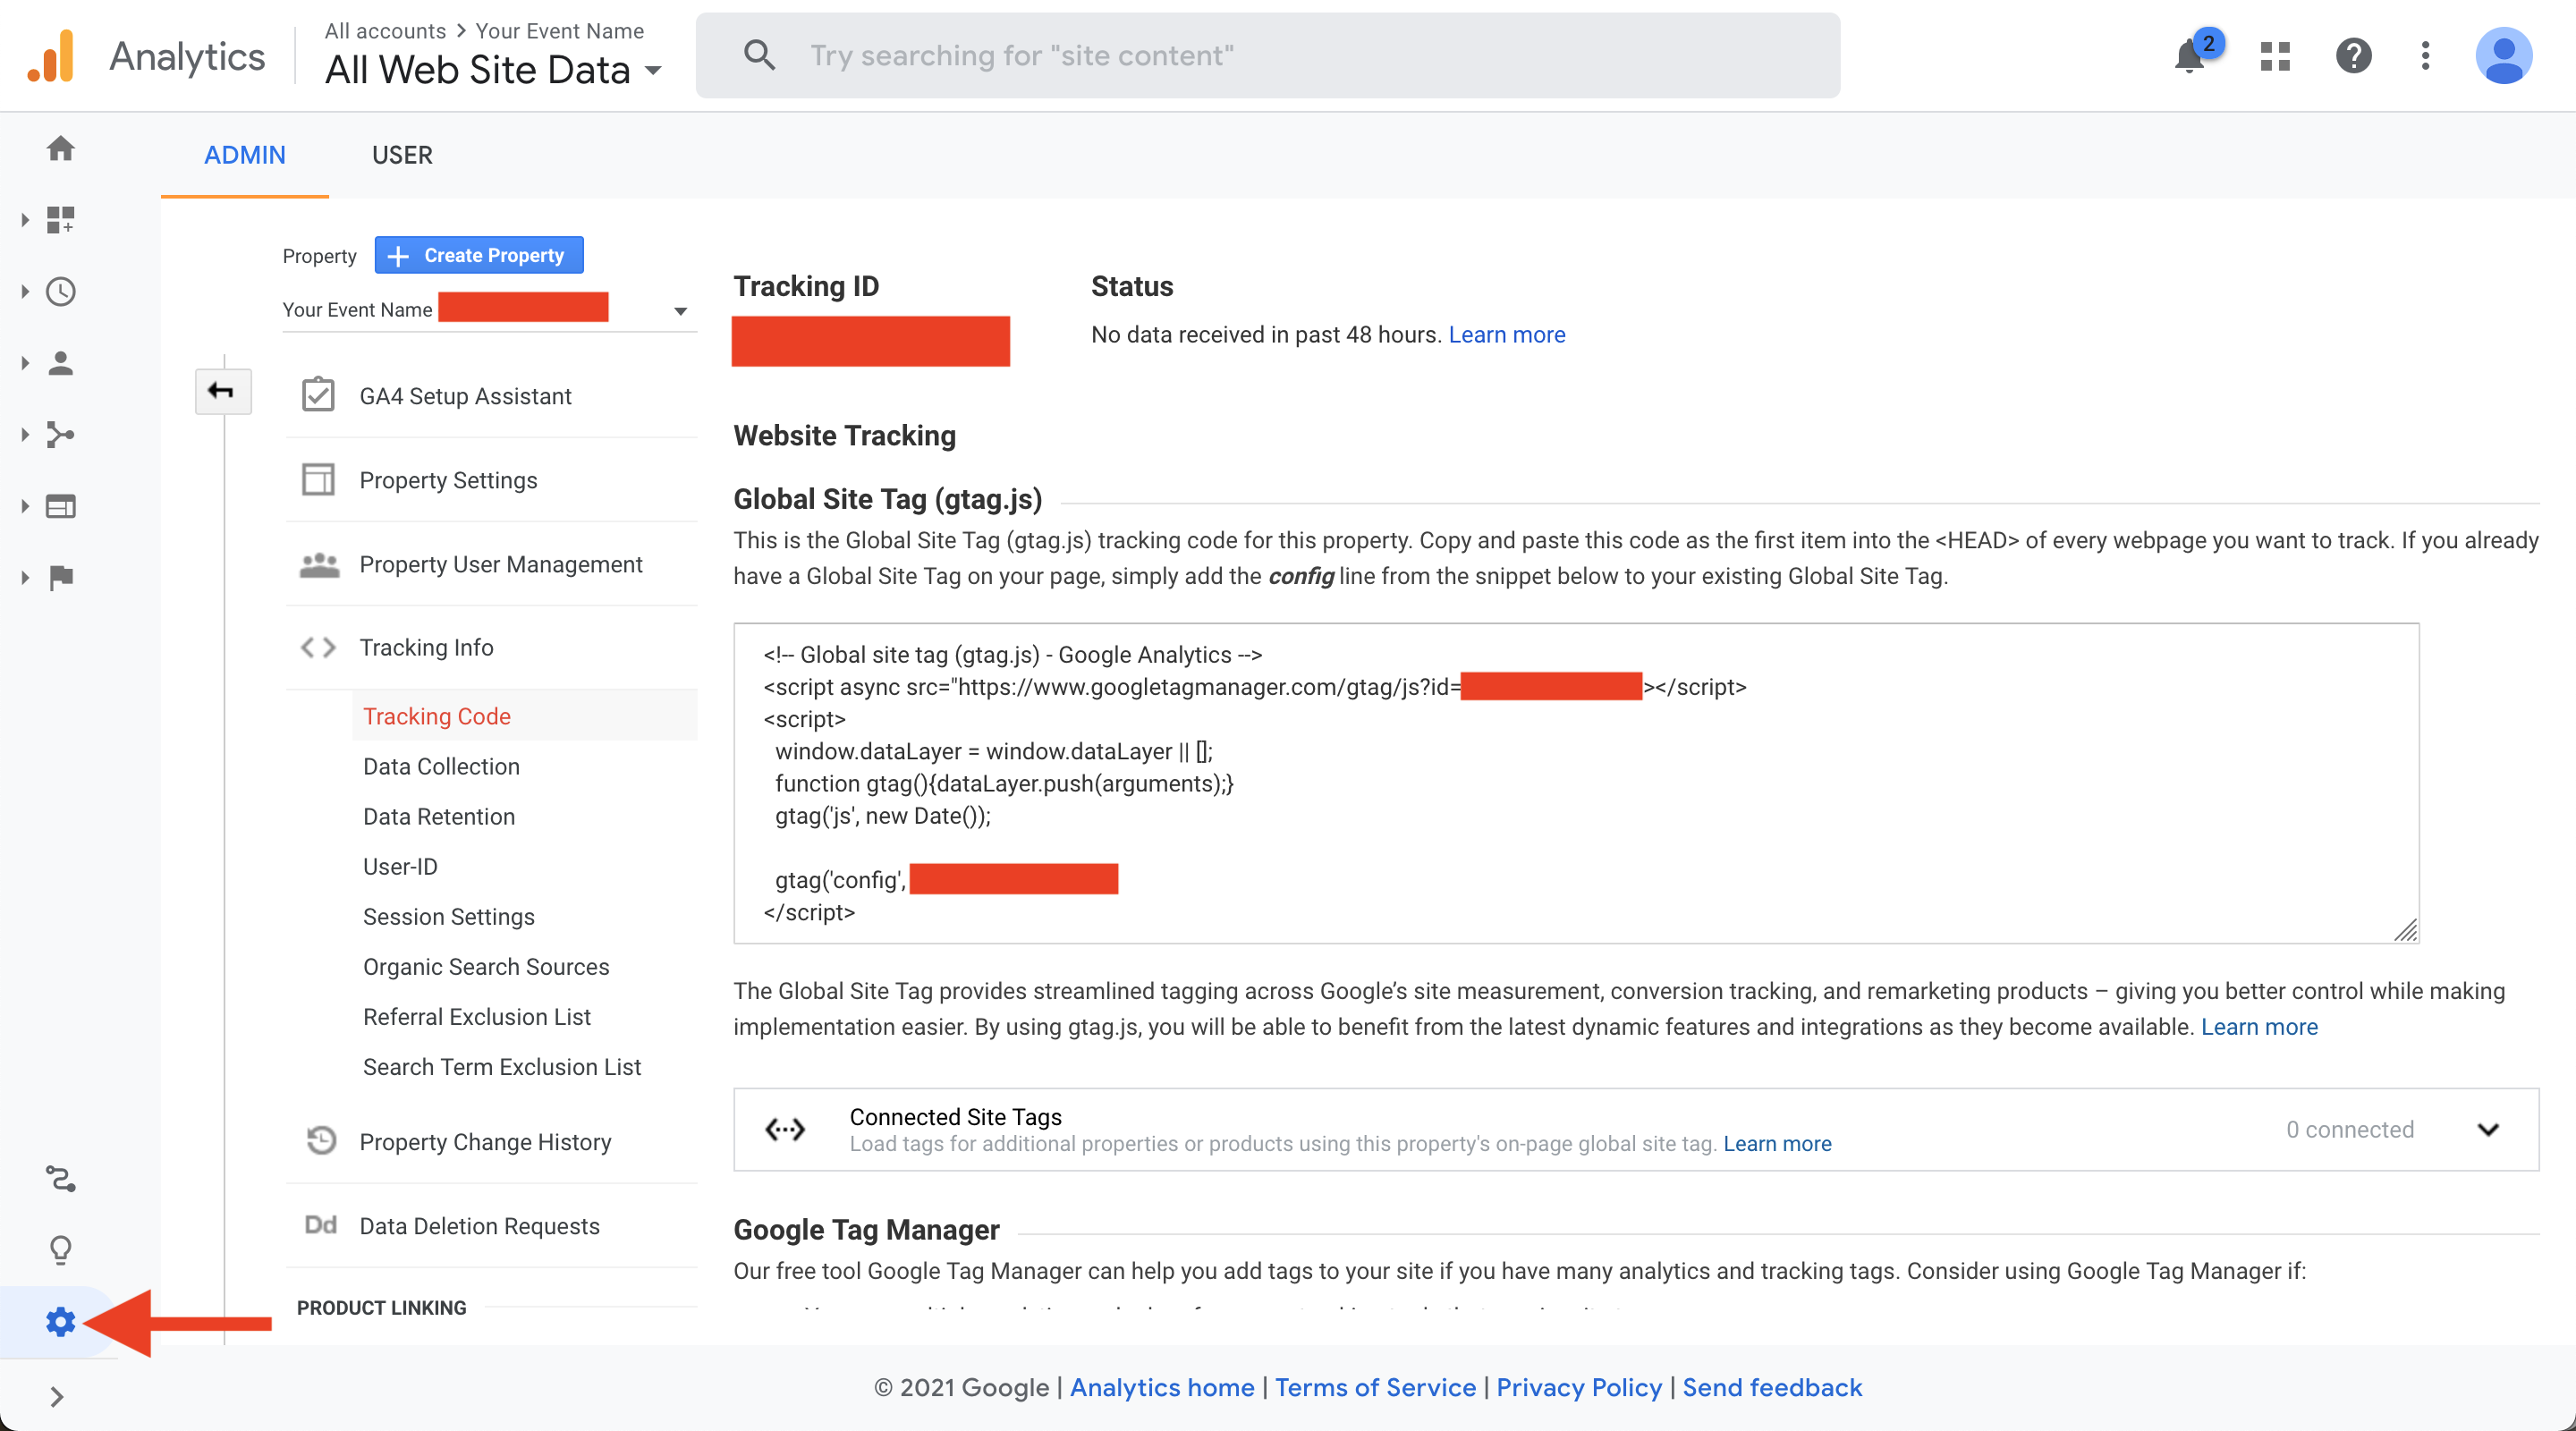
- Copy your Tracking ID from your Google Analytics ADMIN page.
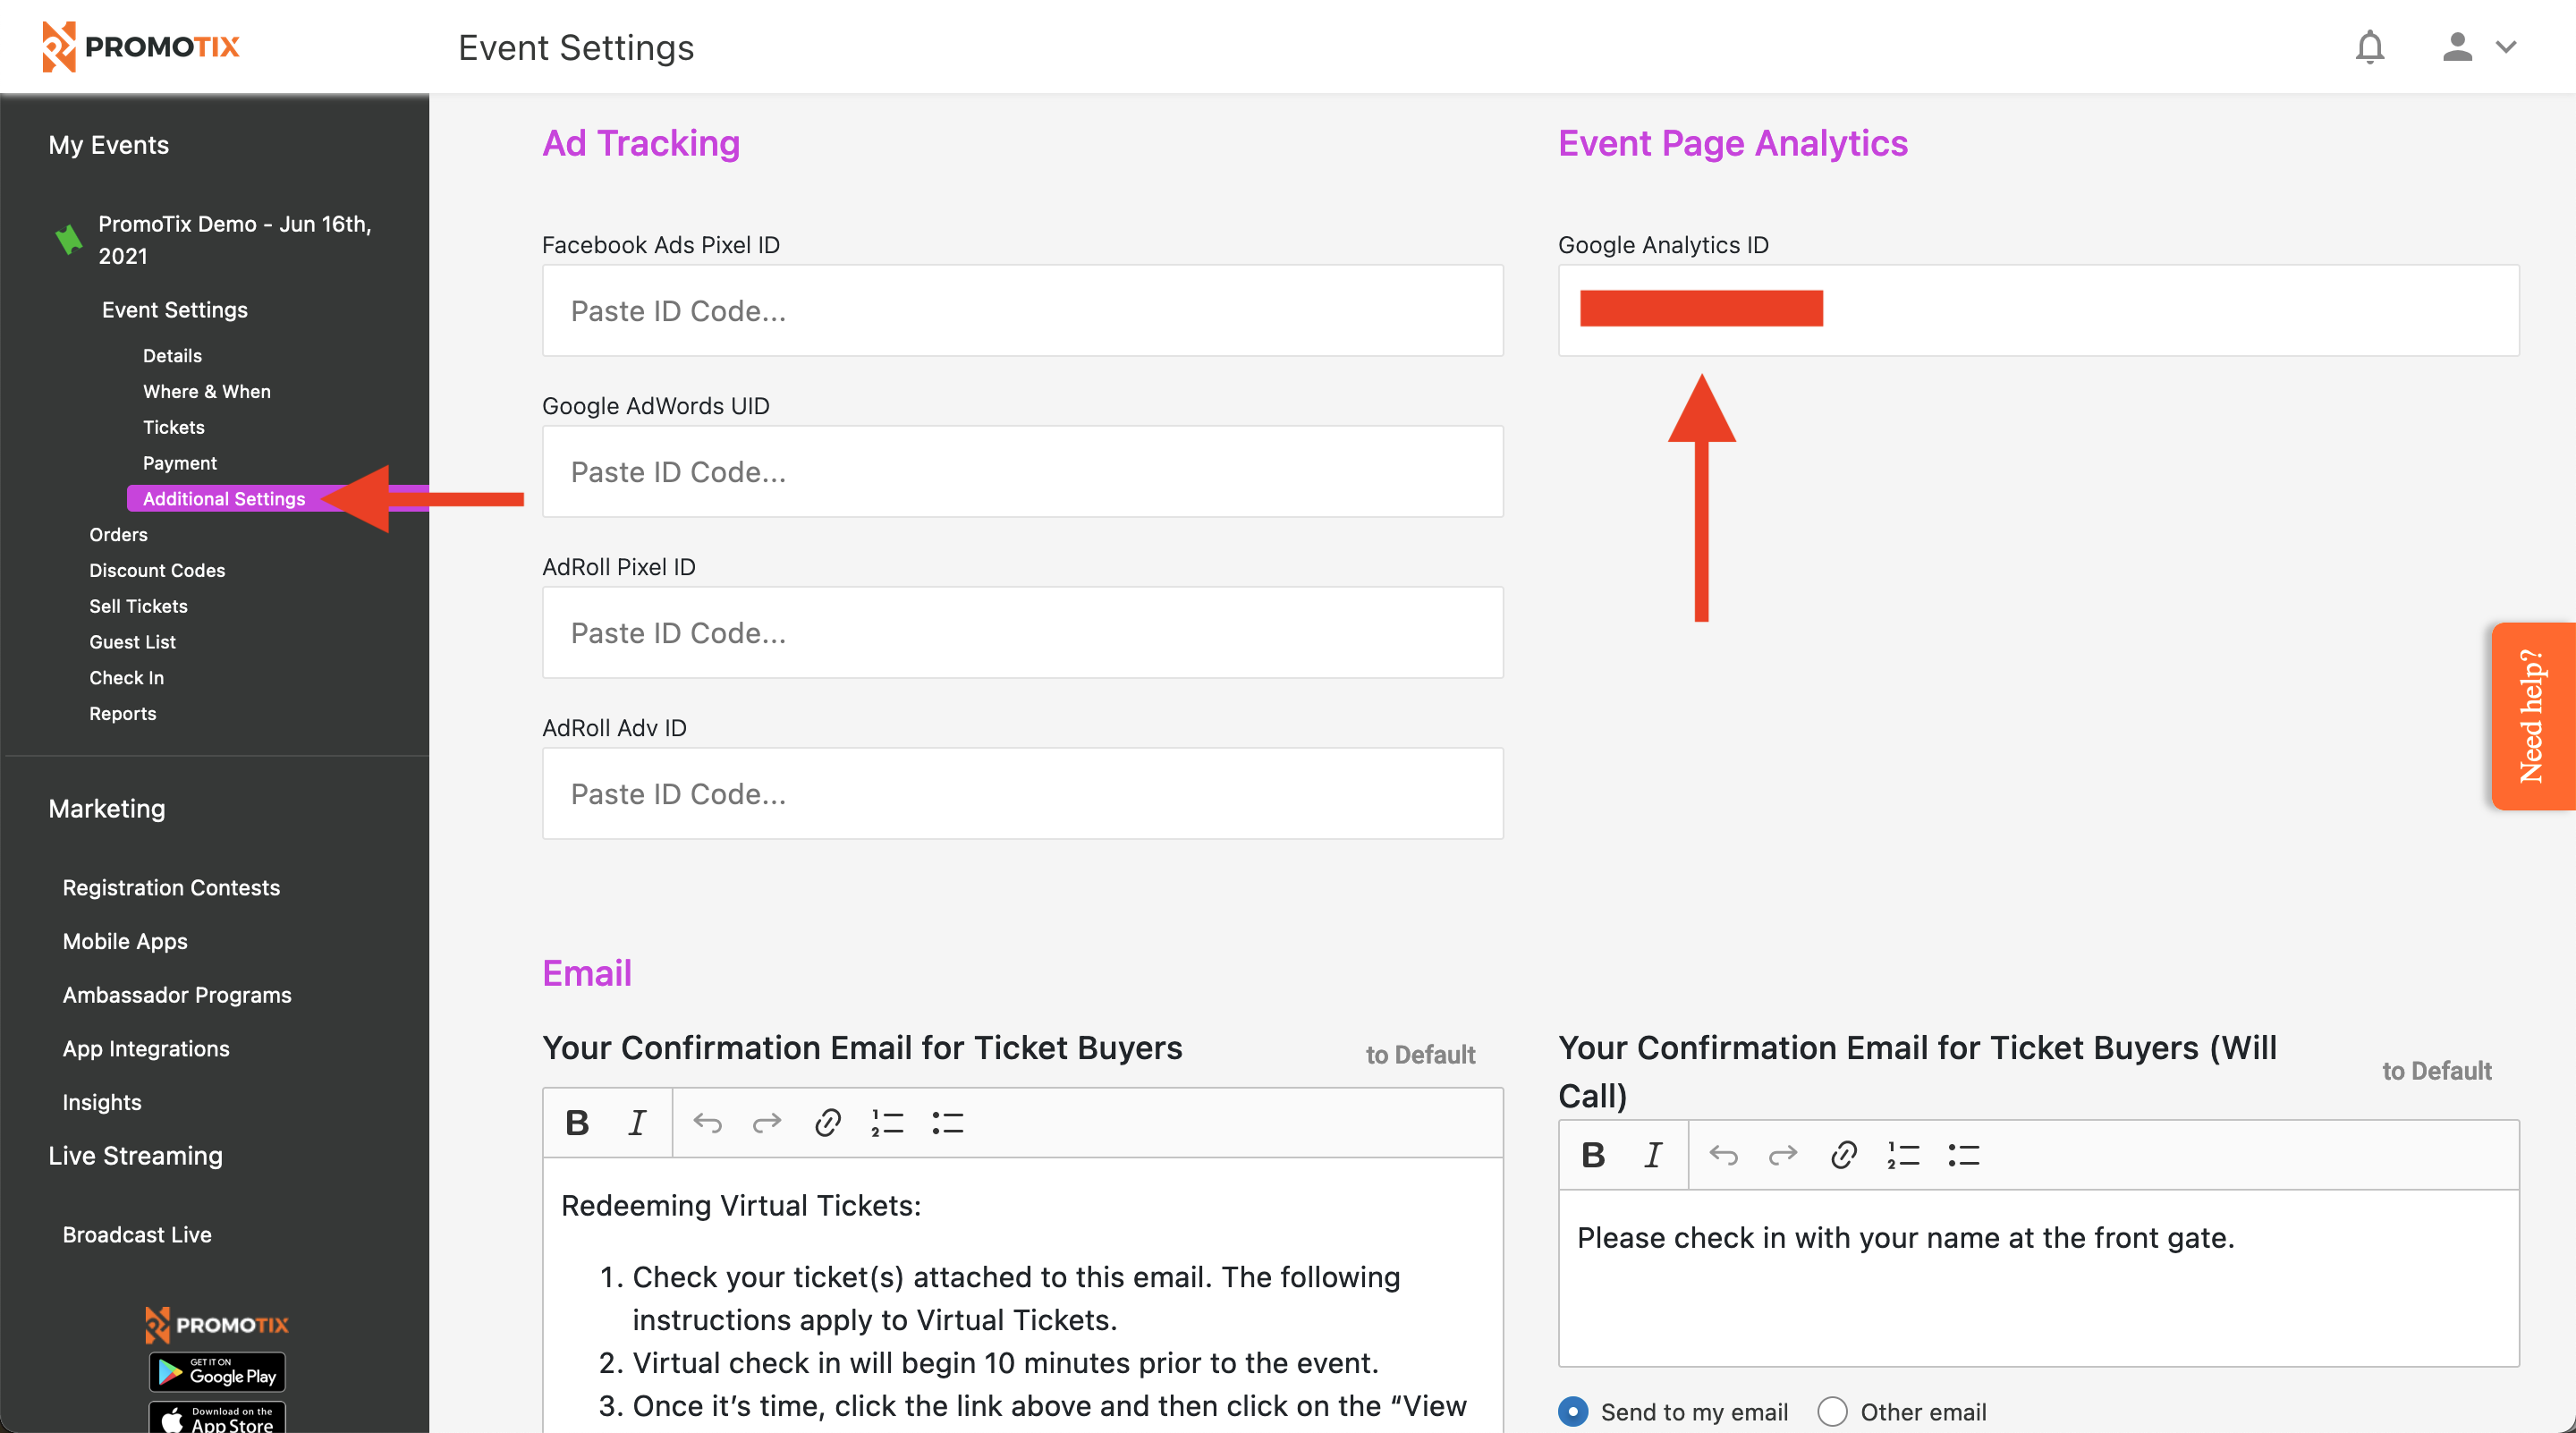
- On your PromoTix event page, click on the "Additional settings" tab, and then paste your Tracking ID from Google Analytics into the "Google Analytics ID" field. Don't forget to click "Save & Continue" at the top of the screen.
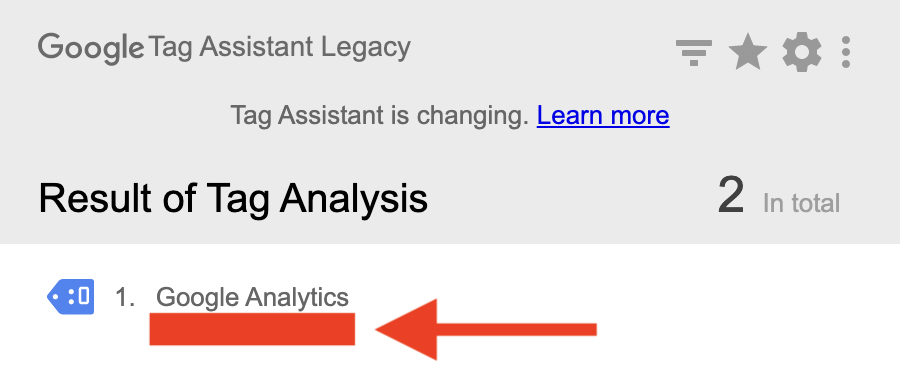
4. (Optional) Confirm that your pixel is firing
If you would like to confirm that your pixel is firing properly on your event page:
- Install the "Tag Assistant Legacy (by Google)" browser extension for Google Chrome.
- Visit your event page URL.
- Click the puzzle piece icon in the top right-hand corner of the screen to activate the extension. Click "Enable," "Record," and then refresh the screen. Your Tracking ID should be displayed.
5. Create a goal in Google Analytics
Creating goals in Google Analytics will allow you to track how many customers complete the buying process, and every other step in the buyer's journey. For more information about Google Analytics goals and the customer journey, click here.
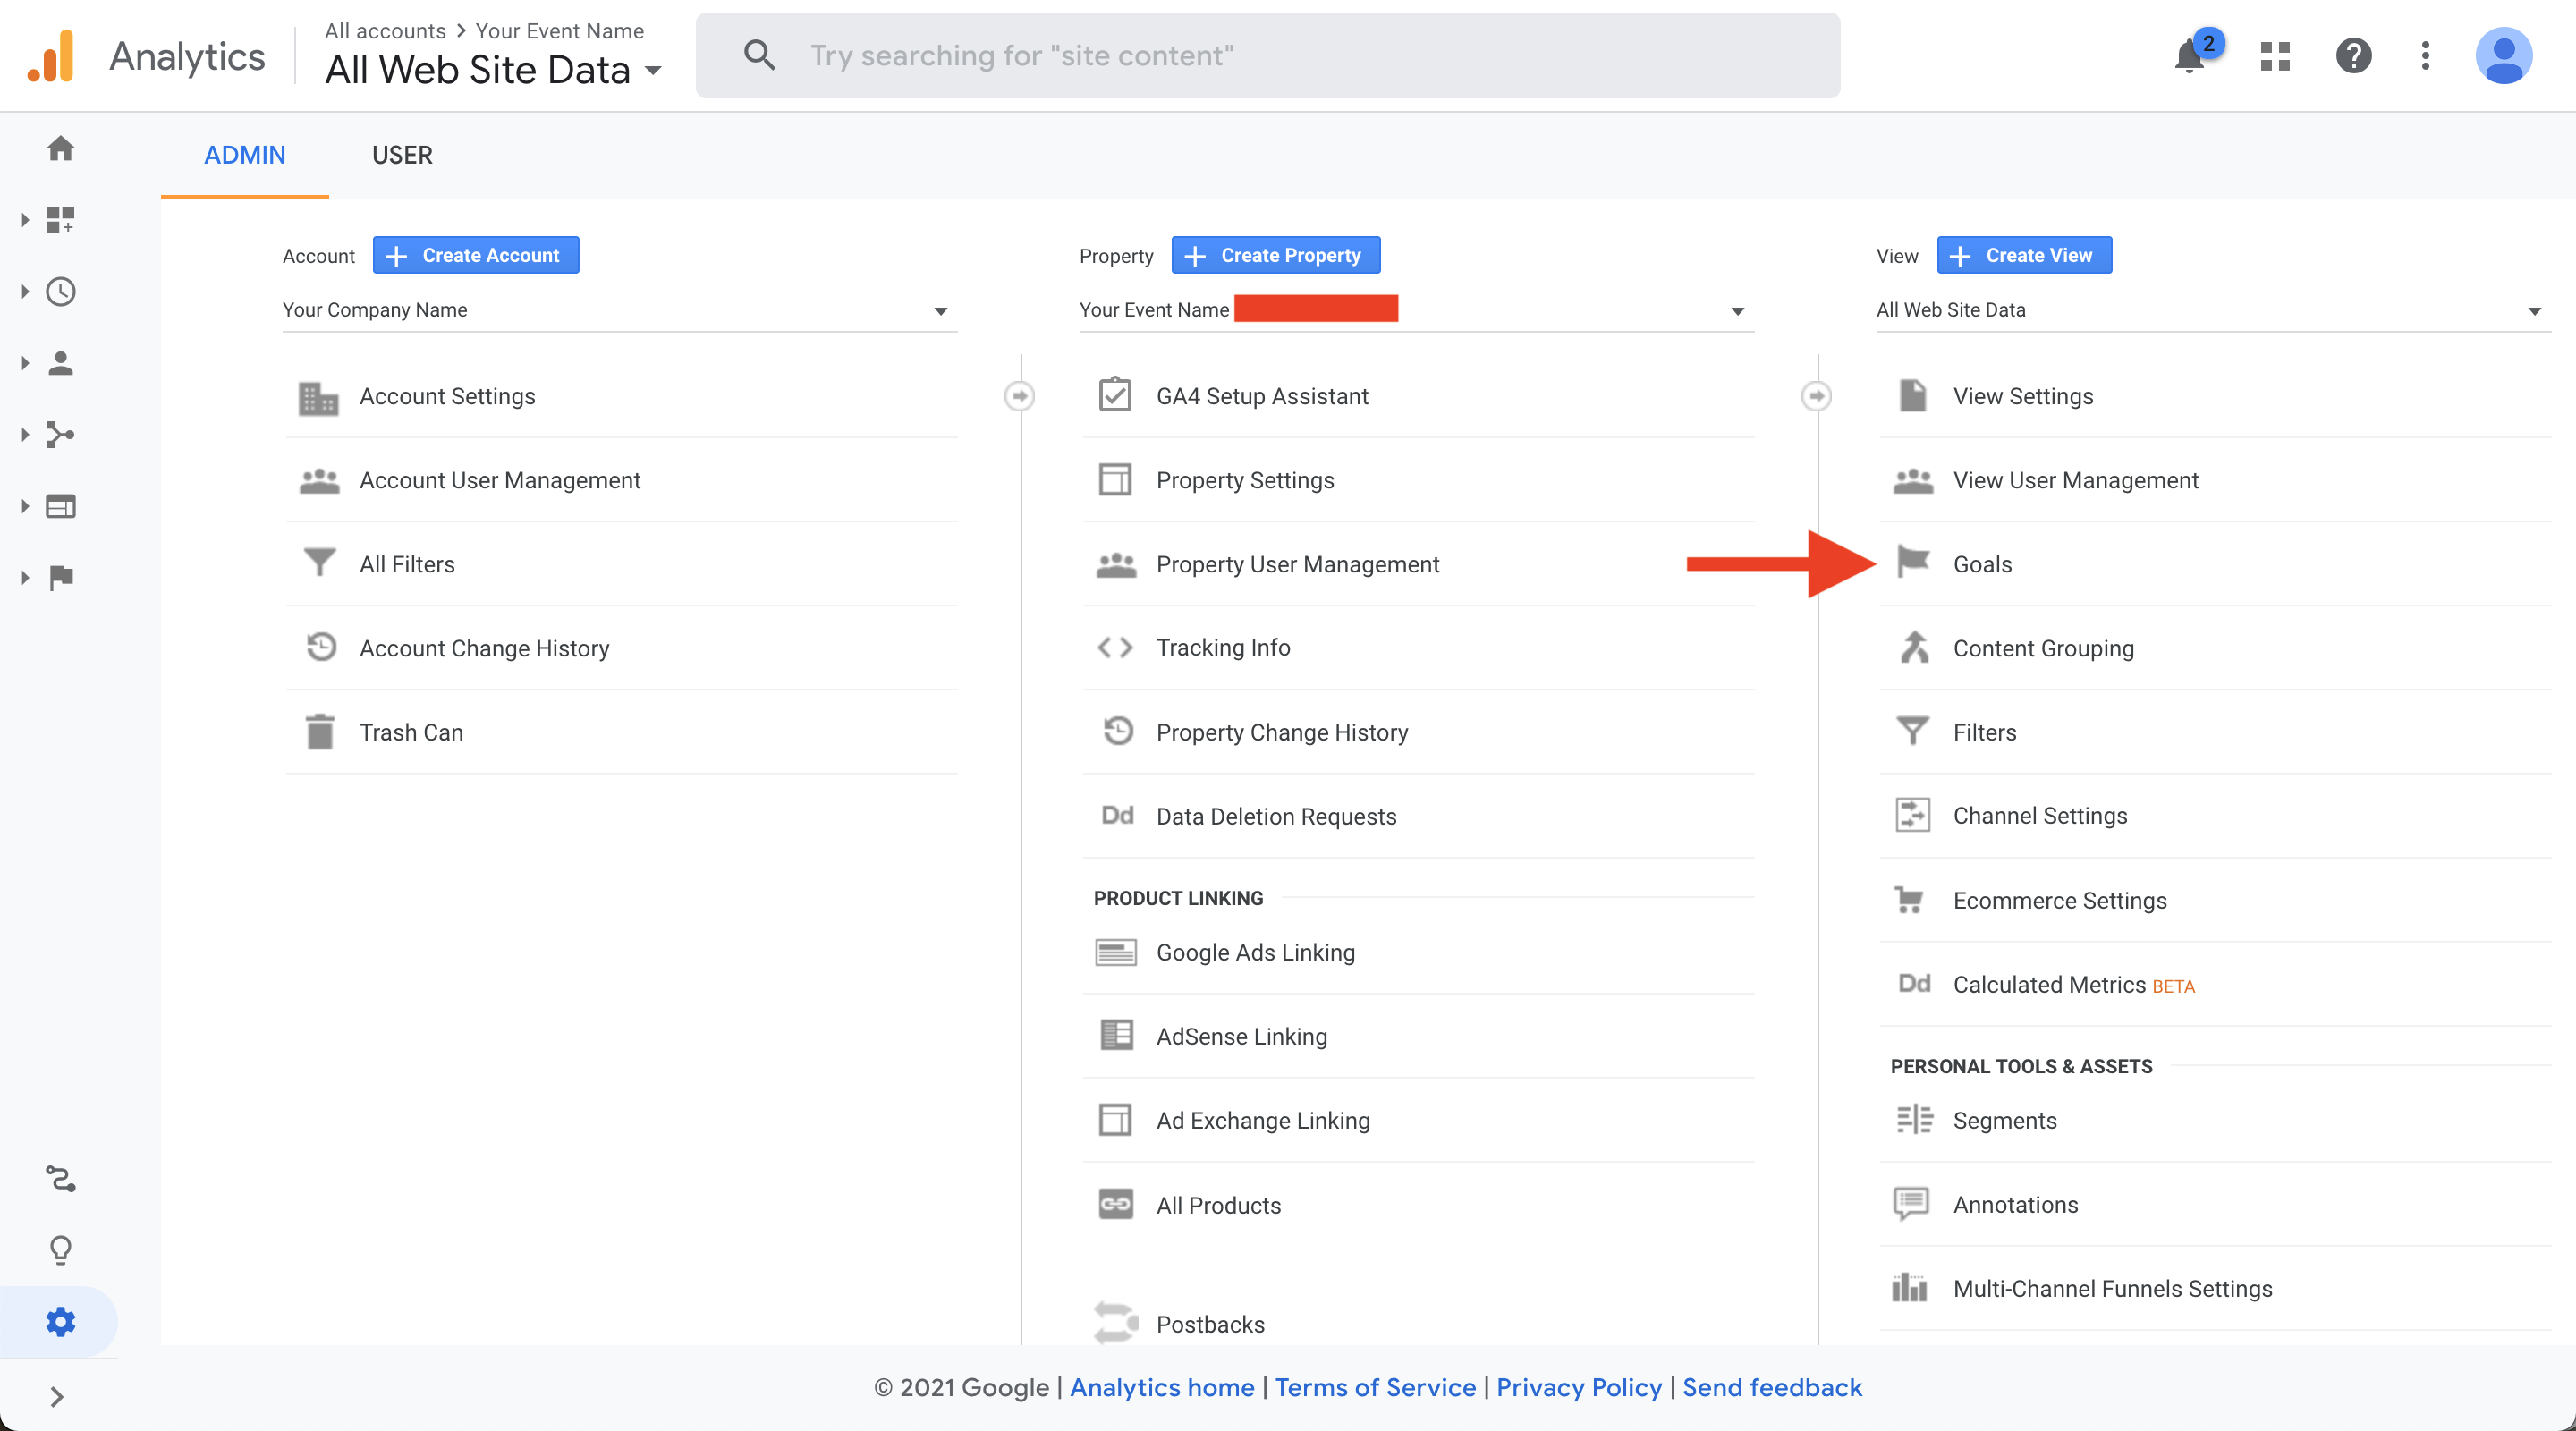
- In Google Analytics, click on the gear icon in the lower left-hand corner of the screen to access the ADMIN screen.
- Click on "Goals."
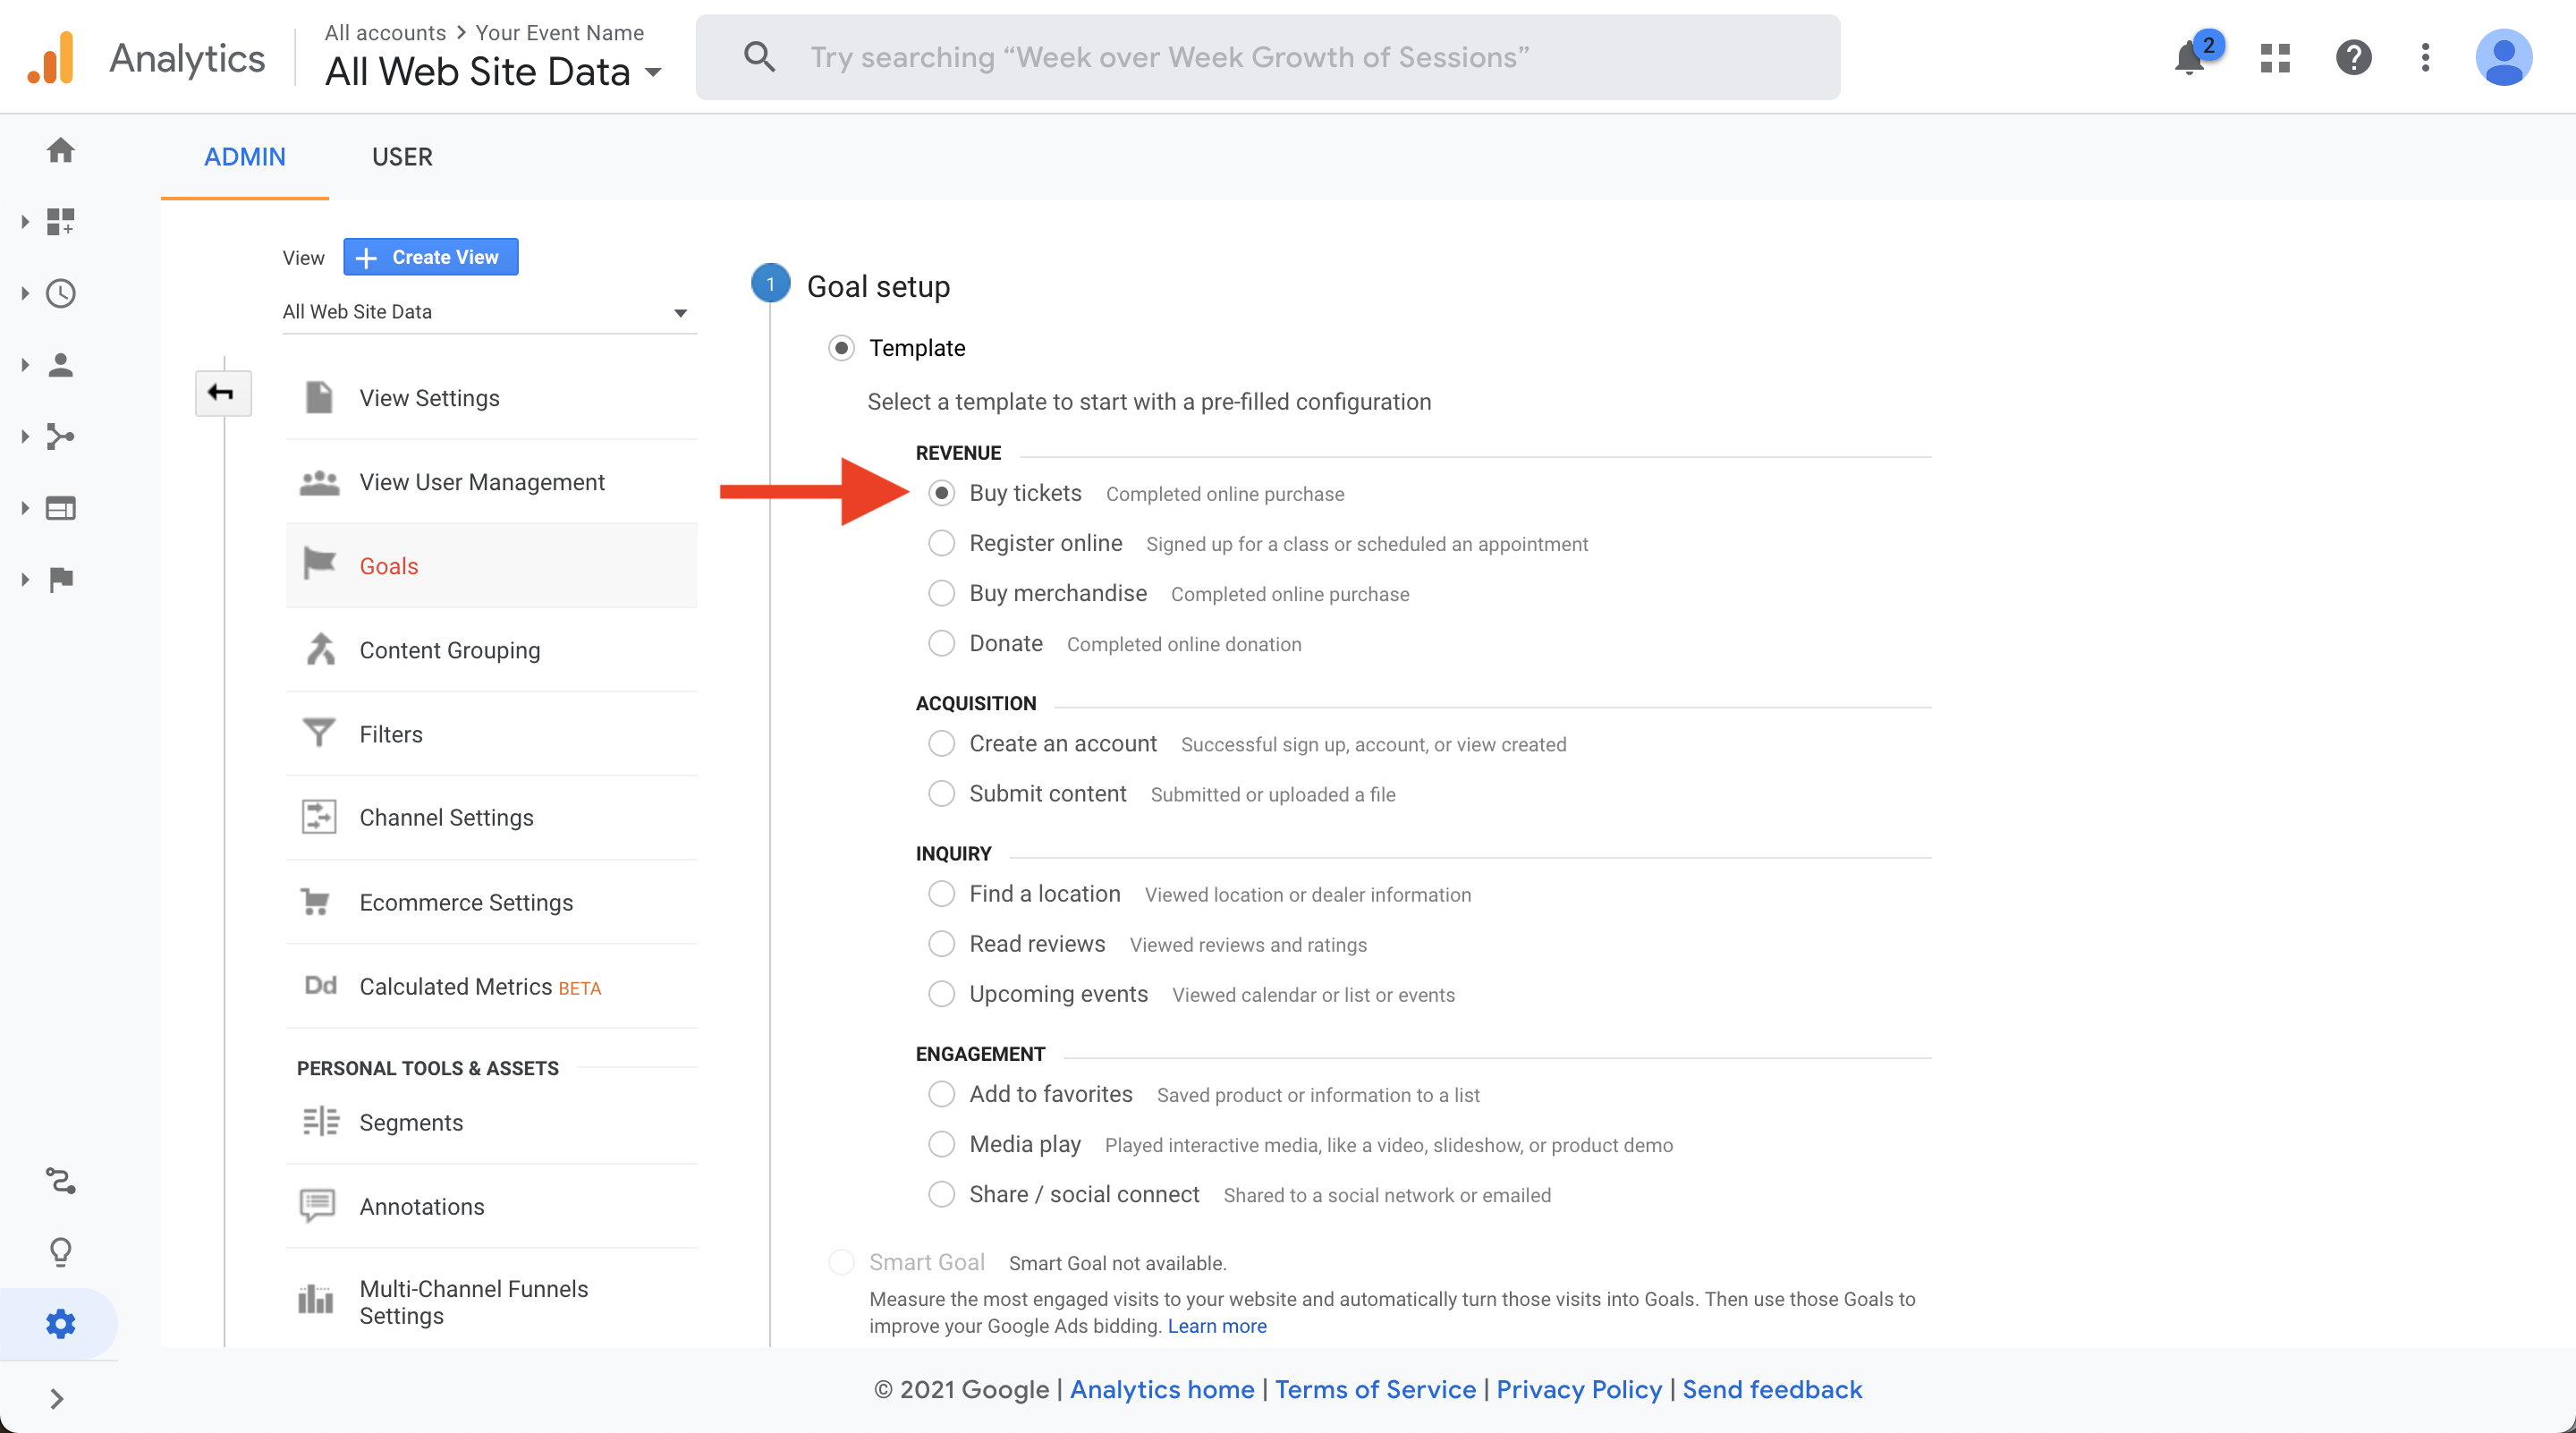
- Click on "+ New Goal."

- Select "Buy Tickets," and then click on "Continue" at the bottom of the screen.
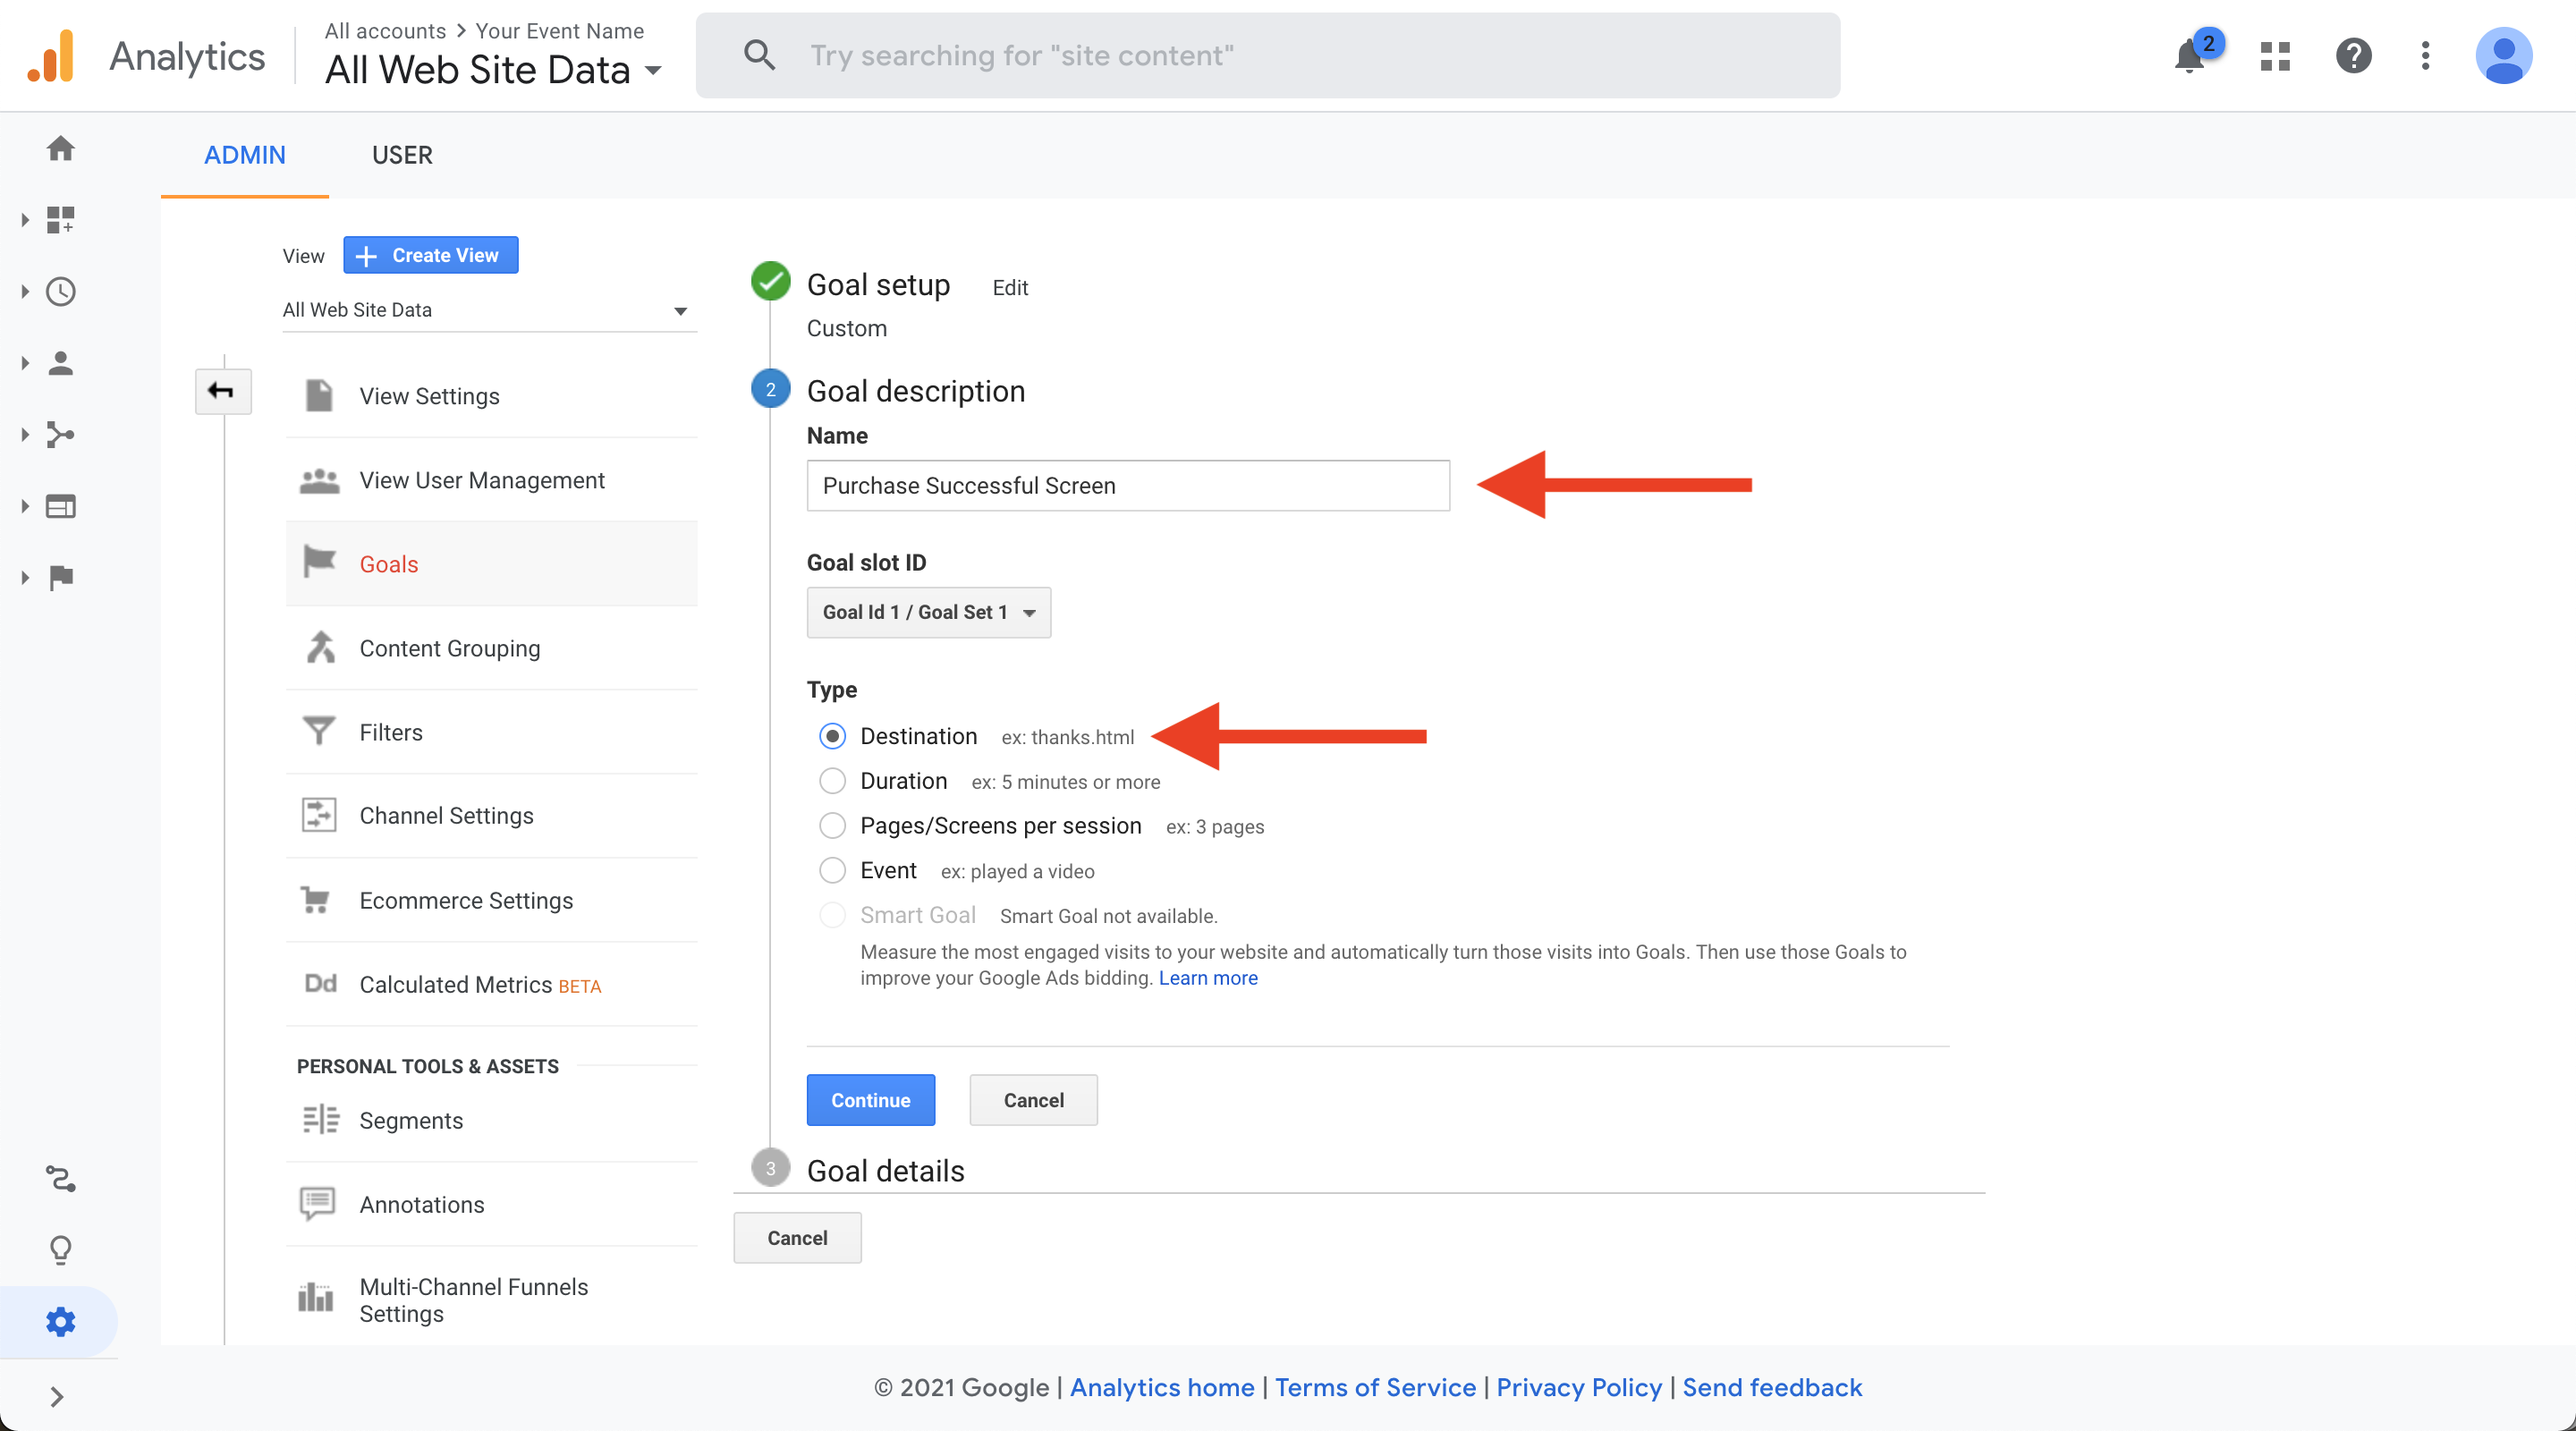
- Name your goal (ex. "Purchase Successful Screen" or "Complete Purchase"). Afterward, select the "Destination" option, and then click "Continue" at the bottom of the screen.
- Visit your event page and purchase a ticket (tip: create a free ticket type for testing purposes, and then set it to private once you're done). On the "Purchase Successful" screen, copy the URL from your web browser.
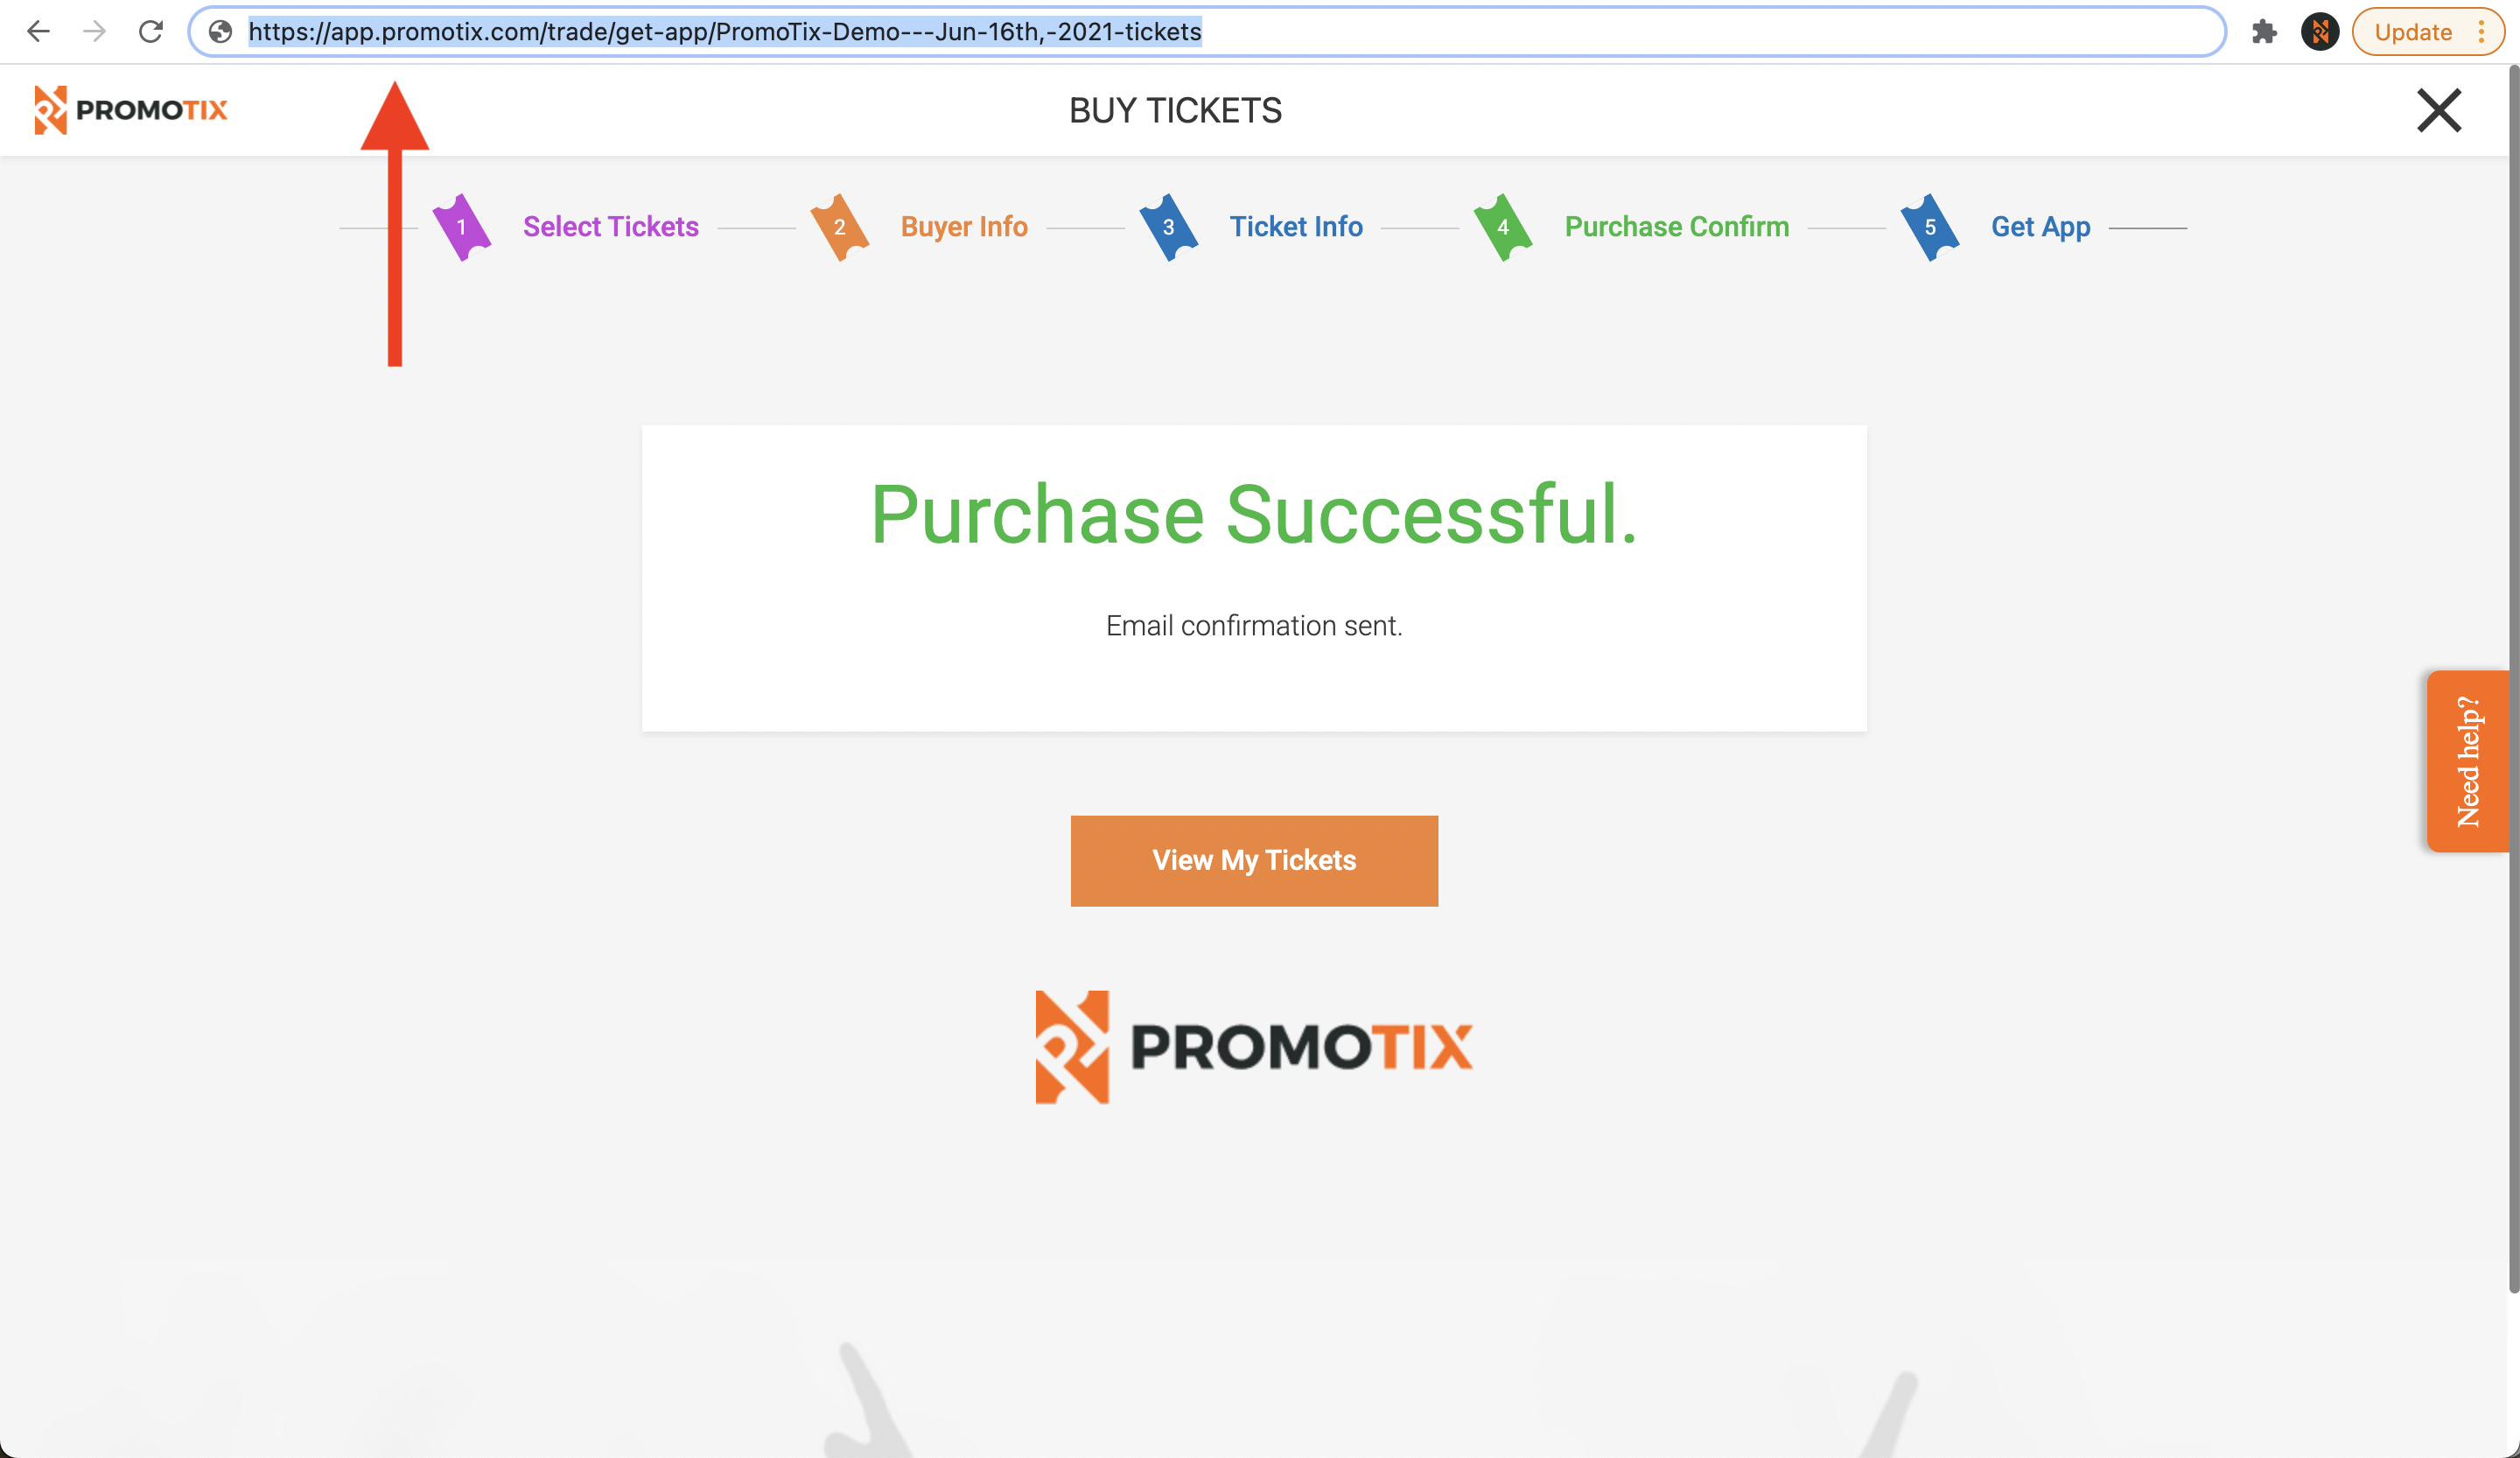
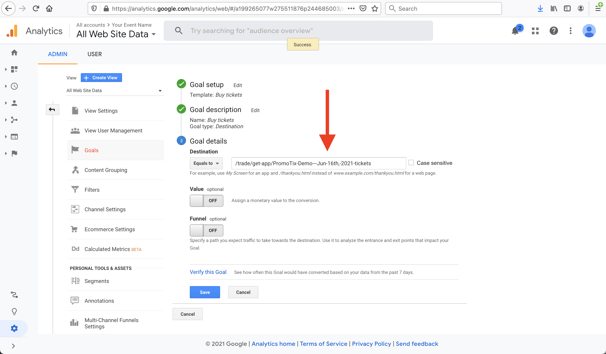
- Back in Google Analytics, paste the URL you copied previously into the "Destination" field, and delete the entire portion before the first "/" character, as shown below. Afterward, click the "Save" button at the bottom of the screen.
- You're done! Now you can track how many orders are placed on your event in your Google Analytics account. You can repeat the steps above to create goals for additional steps in the customer journey.
TIP: enable Ecommerce in your Google Analytics account to track order specifics.
NOTE: if you are creating goals for the "Buyer Info" and "Attendee Info" steps in the PromoTix checkout process, then there will be a string of numbers at the end of each URL that change each time the page is loaded. You will need to remove these numbers before pasting each URL into Google Analytics in order for the goal completions to work.
 6. (Optional) Create custom UTM links to track ad performance
 UTM links are custom links that you can create for each of your ads. By creating custom UTM links, you can track the performance of each of your ads in Google Analytics. To create your first UTM link:
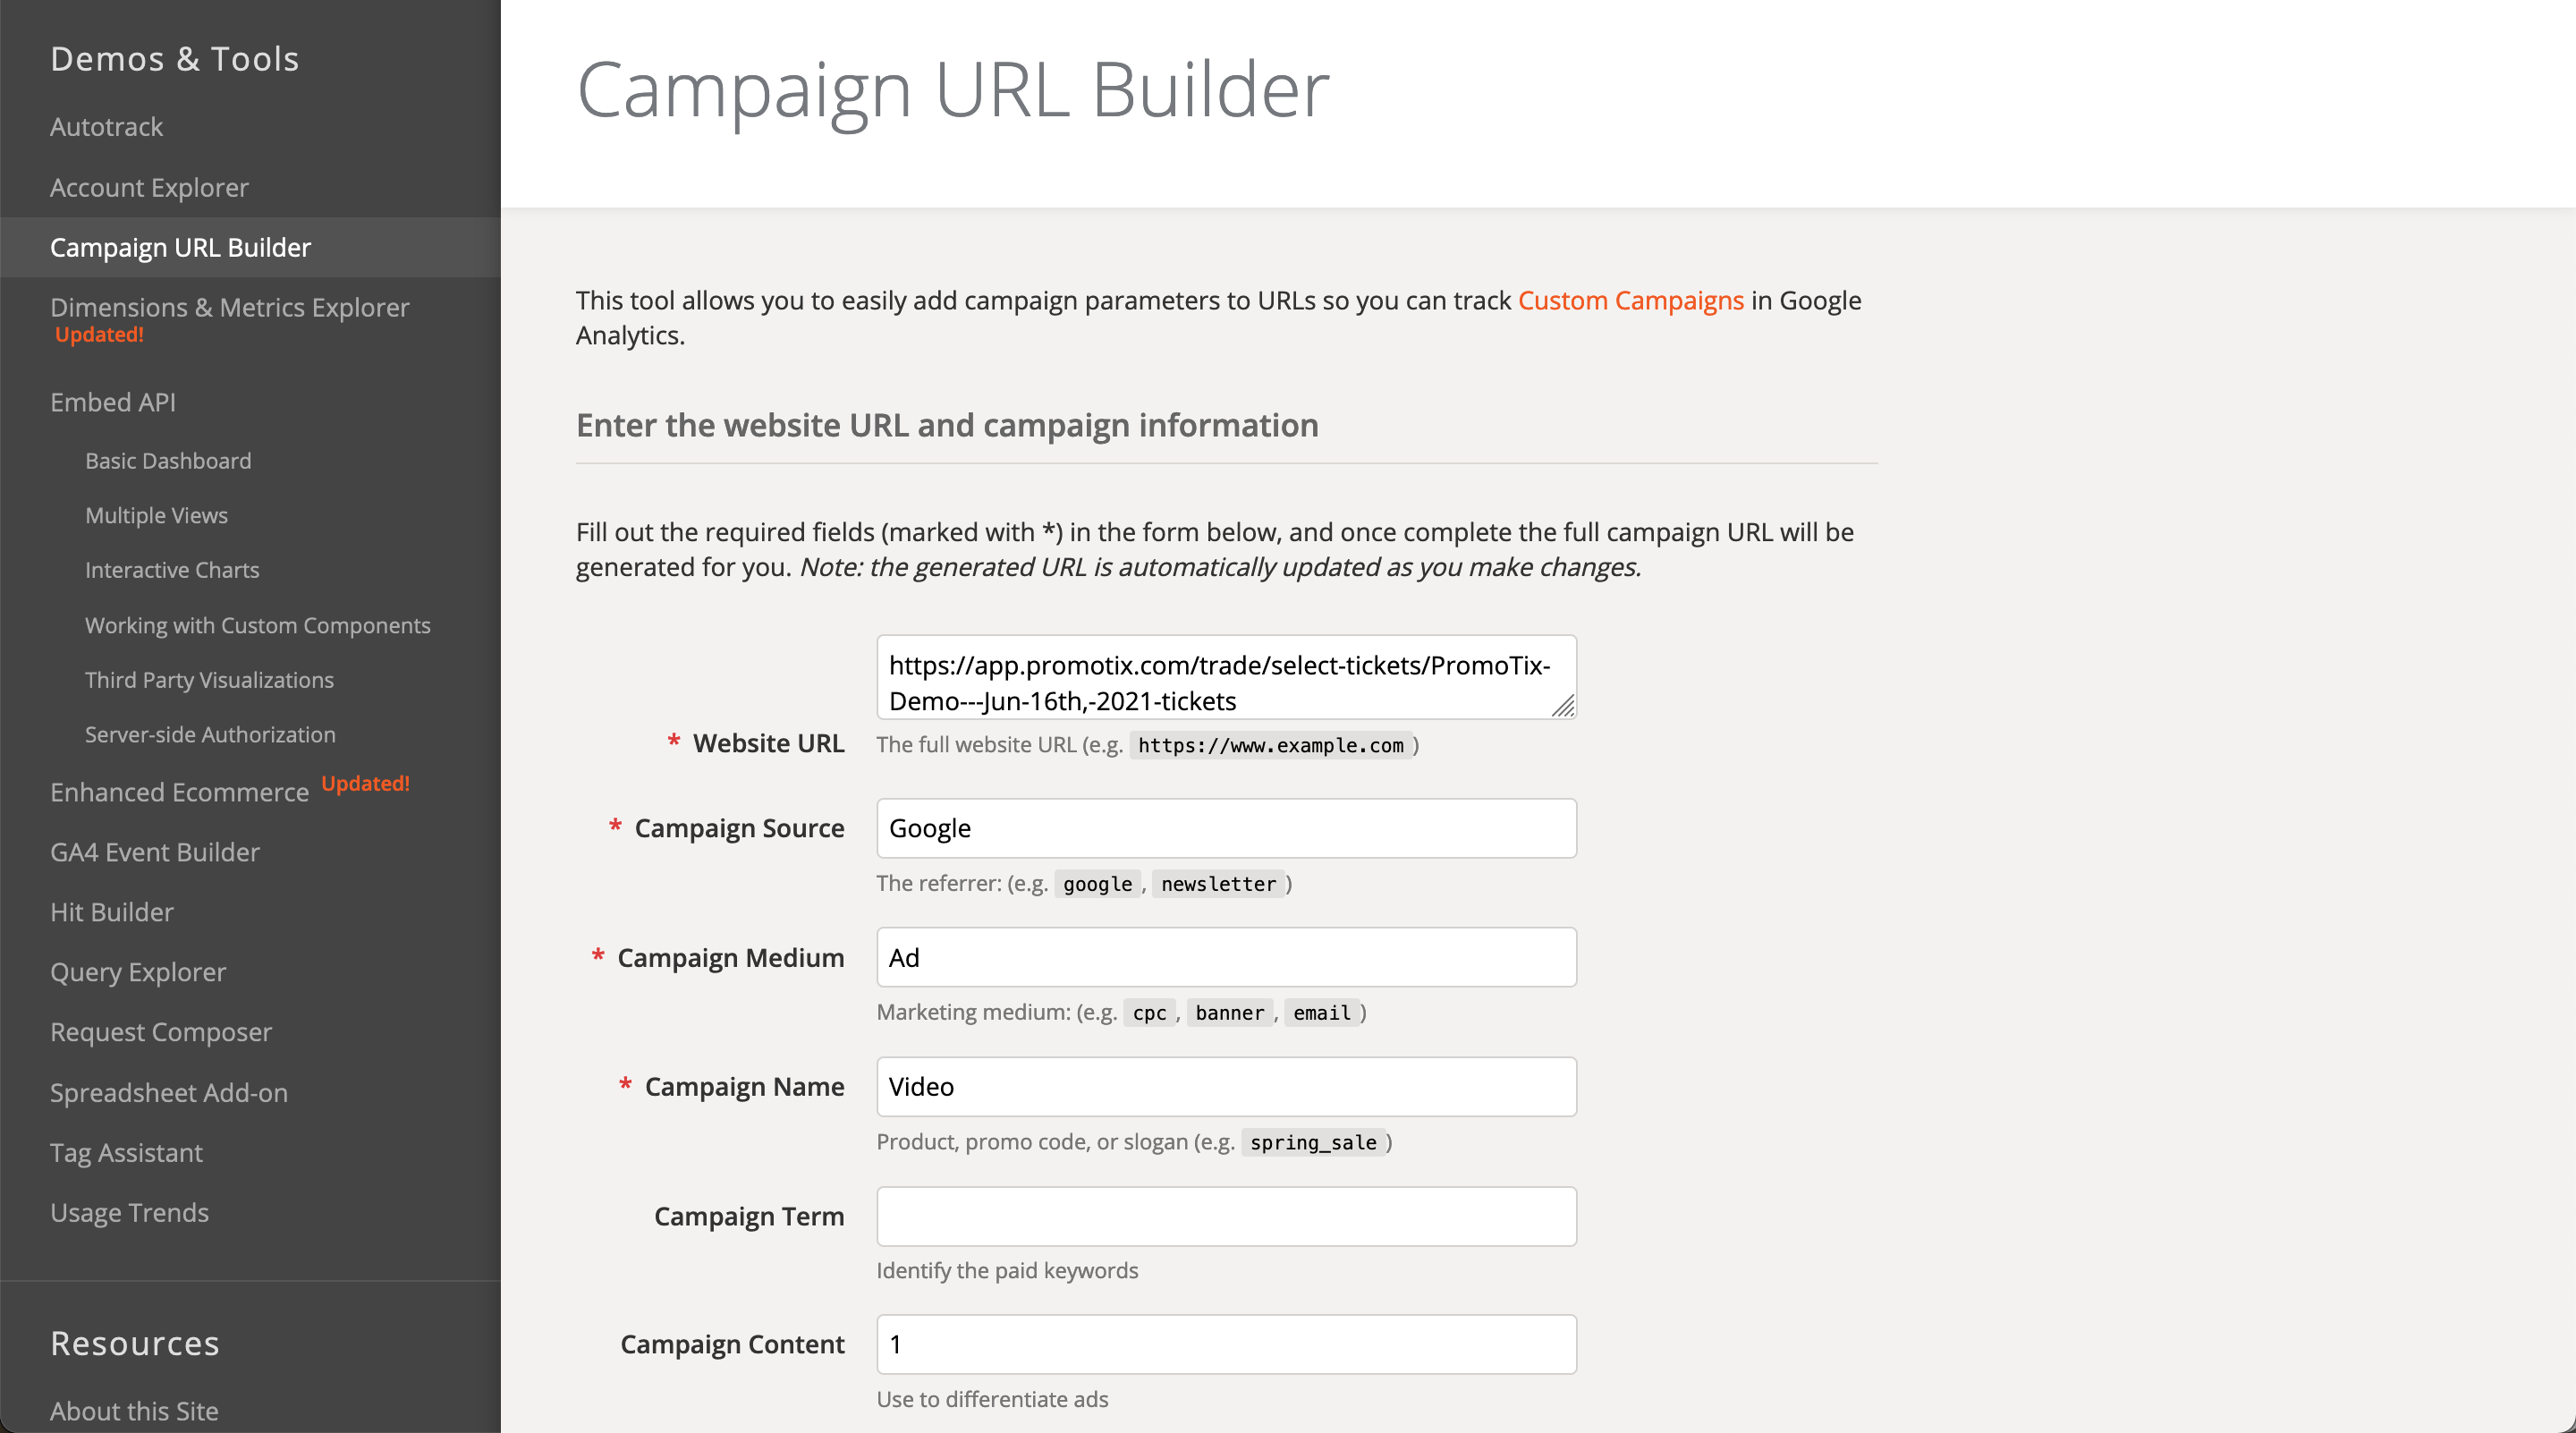
- Visit this URL.
- Website URL: this will be the "call-to-action" link in your ad. For example, the link to your event page, or the select tickets screen.
- Campaign Source: ex. Facebook, Google, Newsletter.
- Campaign Medium: ex. Ad, Email.
- Campaign Name: ex. On-Sale Video, Lineup Announcement.
TIP: if you have multiple variations of a single ad, use the "Campaign Content" field to differentiate between them (ex. "1," "2," "3," etc.)
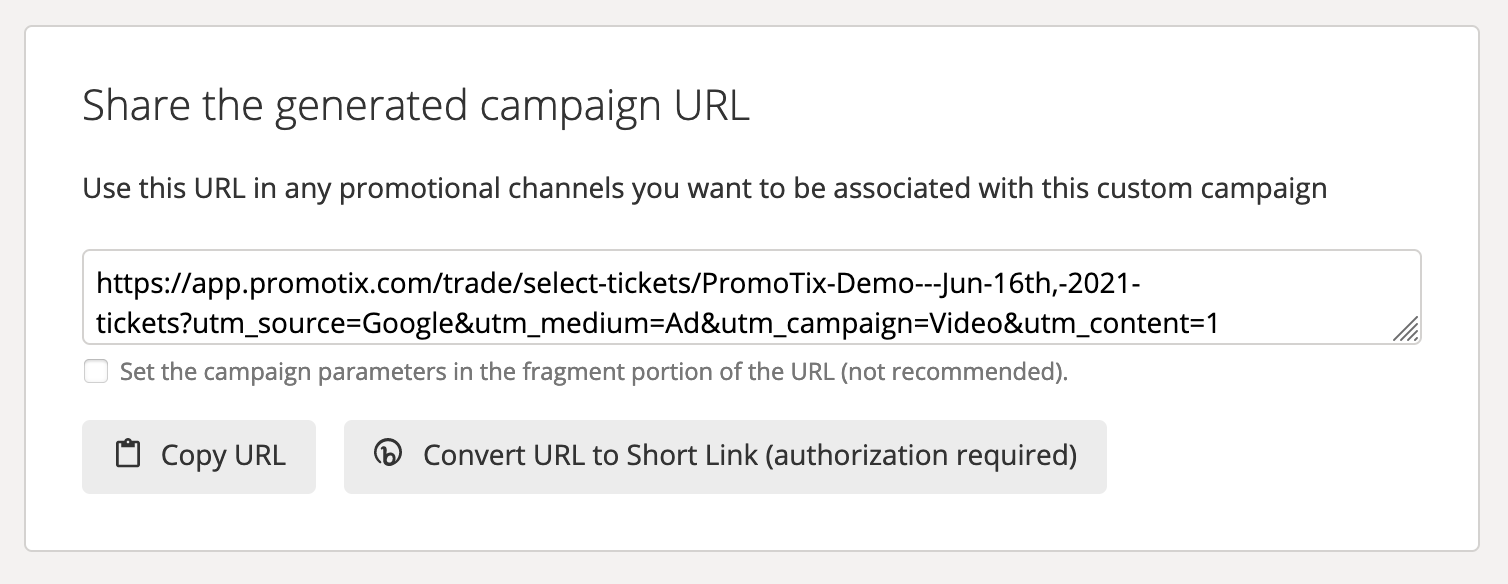
Once you're done, a custom UTM link will be generated automatically for you below. Copy this link and use it in your ad.
7. Monitor ad activity in your Google Analytics account
To view the data you've collected in your Google Analytics account:
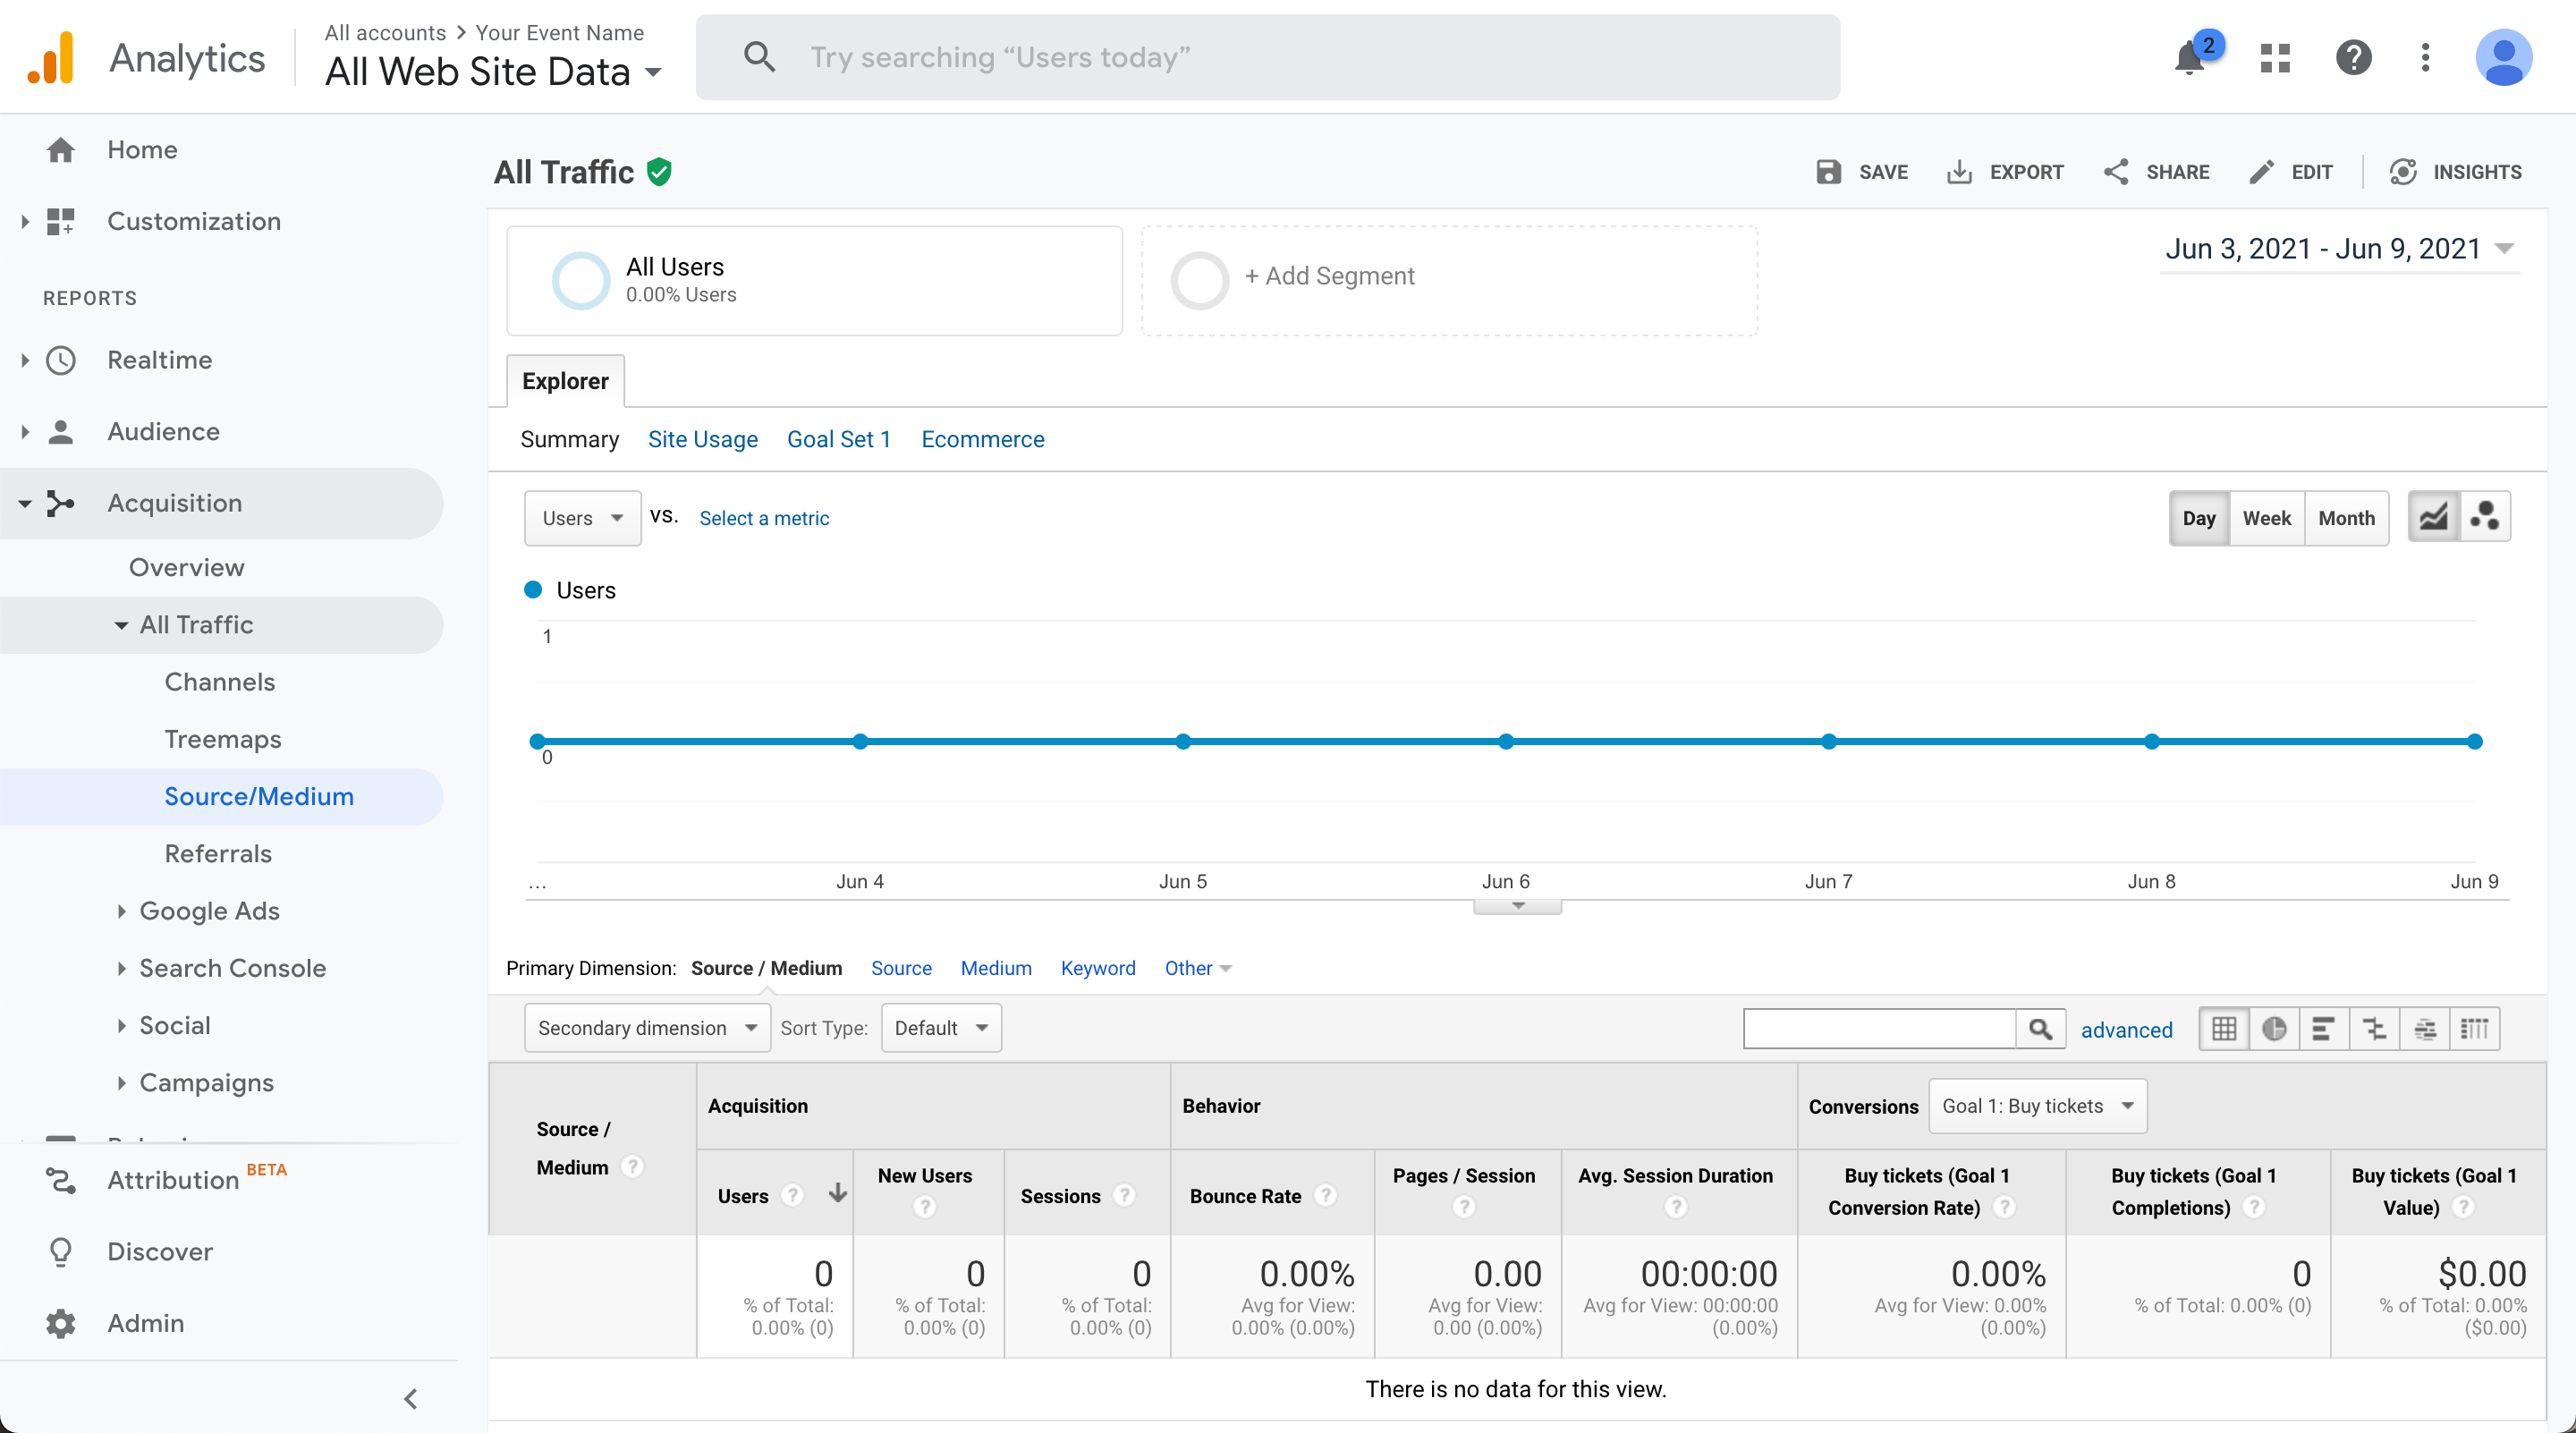
- Click on "Home" in the top left-hand corner of the screen, and then click "Acquisition" then "All Traffic" then "Source/Medium."
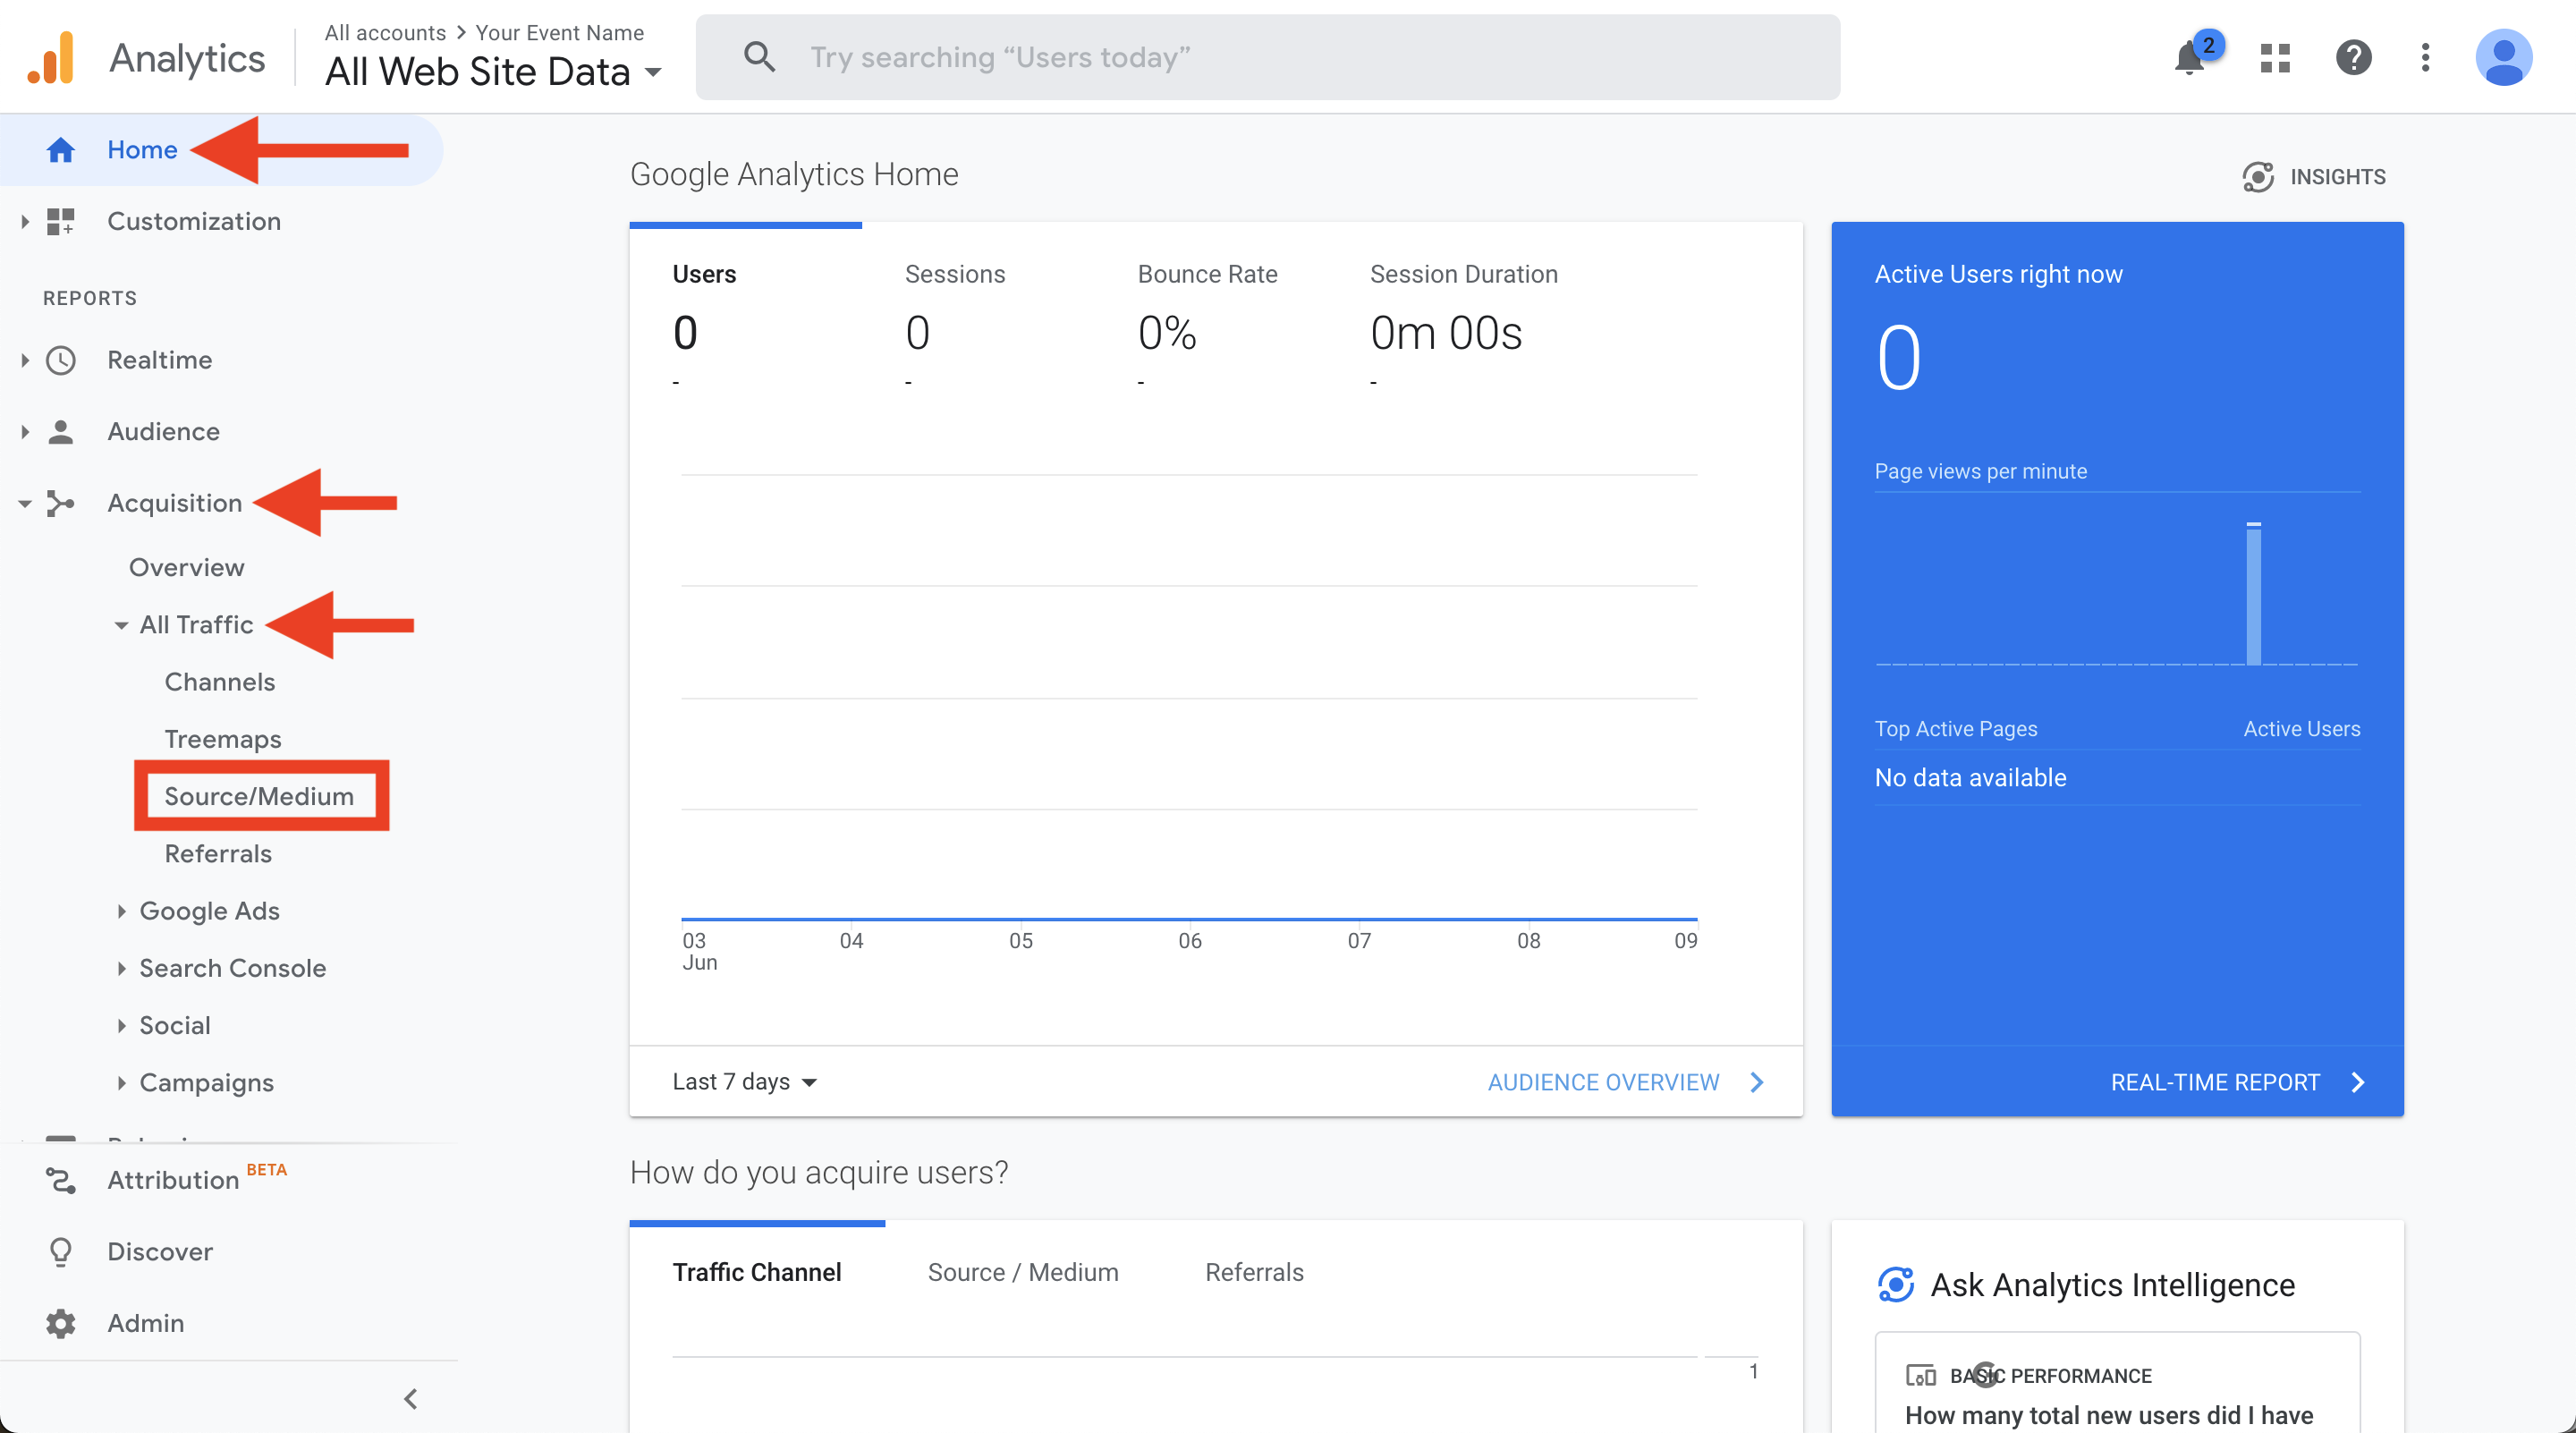
- After 24-48 hours, data will start to appear in your Google Analytics account. Here, you will be able to track Goal performance for each of your custom UTM links.
Additional resources:
- More information on custom UTM links
- How to set up custom campaigns in Google Analytics
- Google Analytics goals not working?

