(Last Updated 4/9/24)
Need to sell tickets on-site during or before your event? This guide will teach you how to use PromoTix's built-in point-of-sale system (POS).
PromoTix's POS is setup similarly to your public online checkout process, except for the following differences:
- Tickets and add-ons set to "Private" can be seen and sold through the POS
- You are able to accept cash orders using the POS
- Checkout fields such as name, email address, and phone number are all optional when using the POS
- A credit card terminal ("swiper") can be used to process orders through the POS
- Tickets and add-ons sold through the POS can be immediately "checked in" once sold
PromoTix's point-of-sale system is available on both the PromoTix web application, as well as inside of the PromoTix Organizer mobile app. Please see below for both sets of instructions.
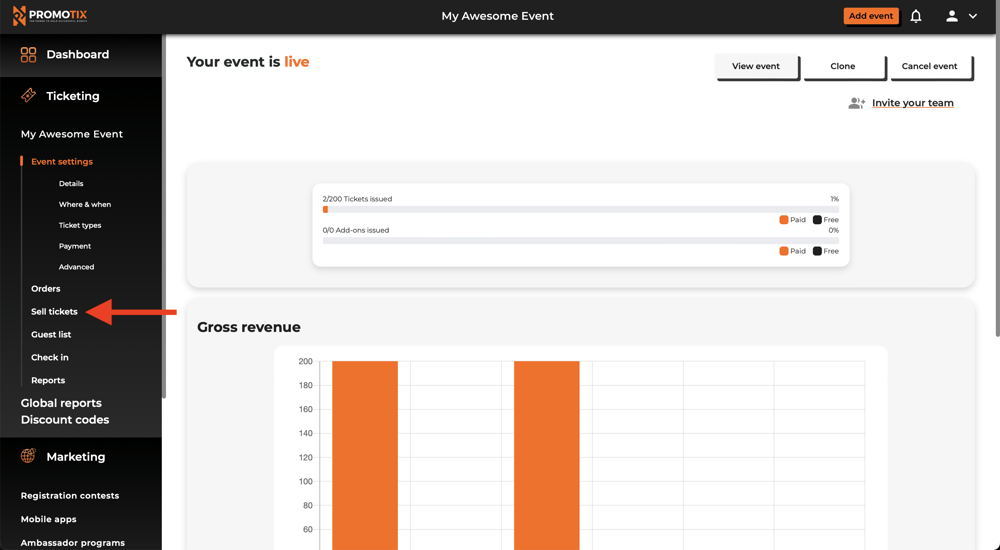
1. (WEB) From your event dashboard, click on the "Sell tickets" tab to access the point-of-sale system
2. (WEB) Select items to add to the cart
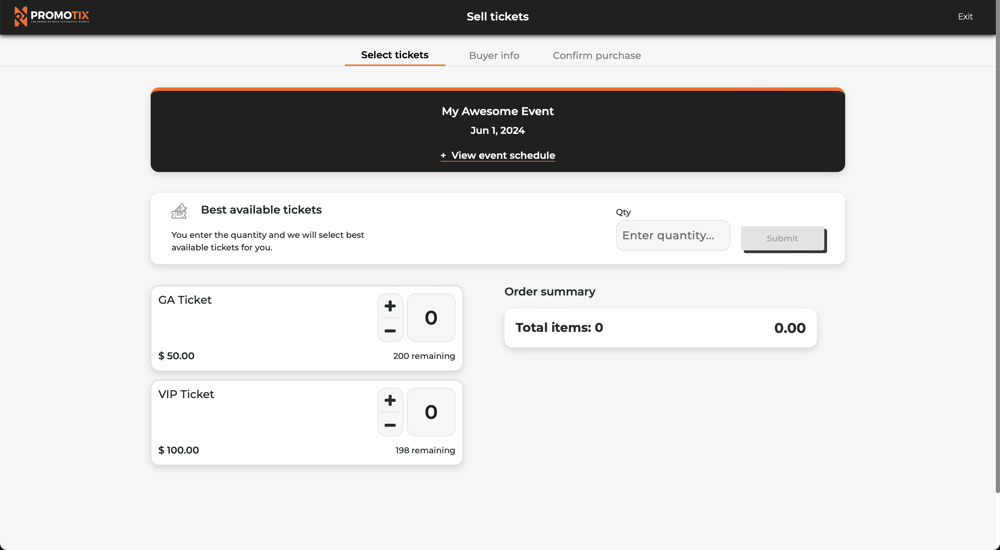
Click the + and - buttons to add or remove items from the cart.
Once you're done, click on the Proceed button.
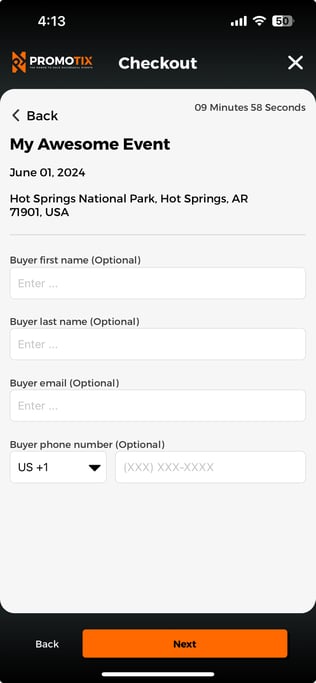
3. (WEB) Enter in the customer's information (Optional)
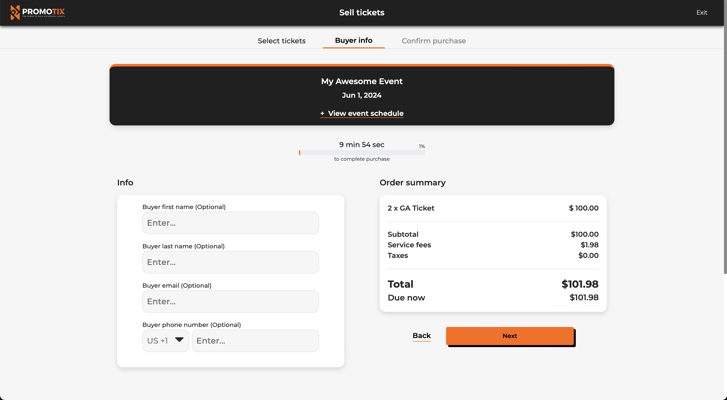
Fill in the customer's information for your own records, however please note that this step is completely optional.
Once you're done, click on the Next button.
IMPORTANT: if the customer would like a receipt via email, you will need to enter their email address in the "Buyer email" field.
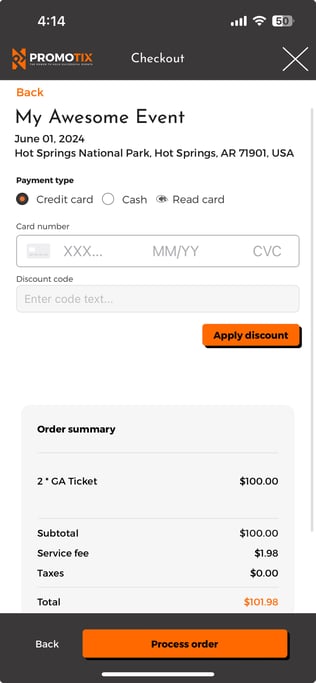
4. (WEB) Input payment details and process order
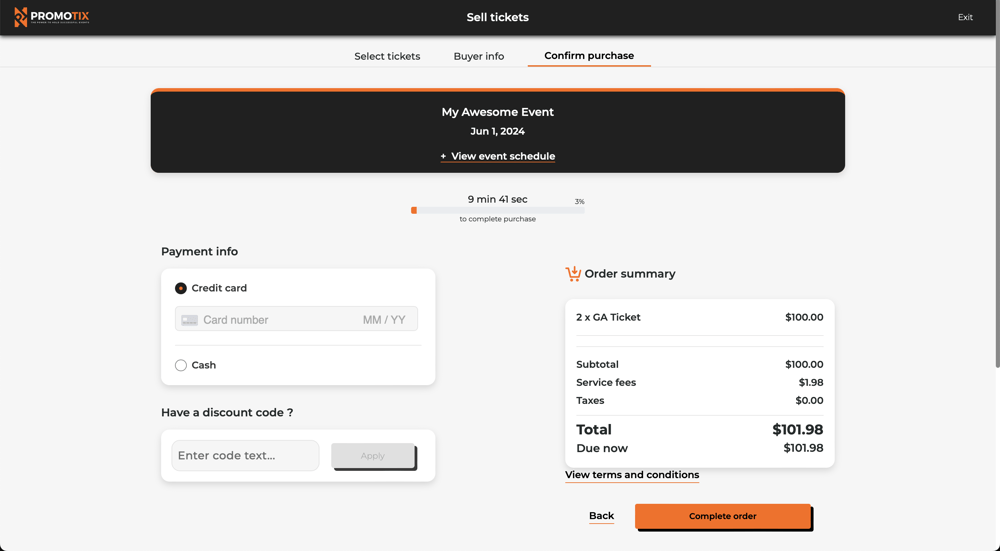
By default, the Credit card option is selected. Enter in the customer's debit or credit card information in order to charge a card. If you would like to accept cash instead, select the Cash option instead.
If you need to redeem one of your discount codes, enter the code into the text field and then click the Apply button to apply the discount code to the order.
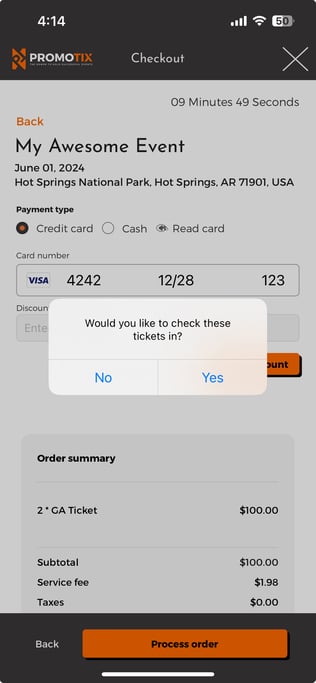
Once you are done, click the Process order button. A popup message will appear that says "Would you like to check these tickets in?"
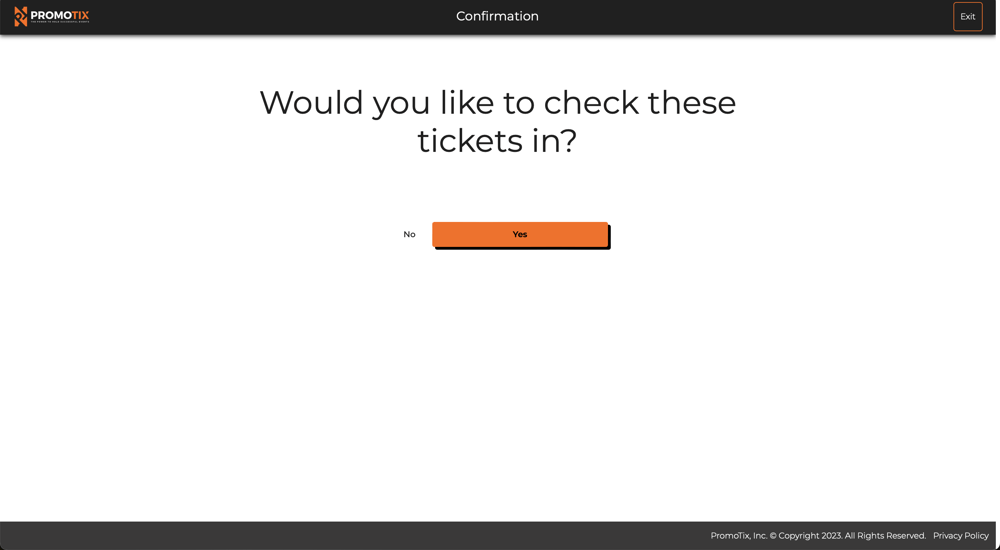
- If you are selling tickets during your event (and the customer will immediately be redeeming their tickets), then select Yes to mark all of the items sold as "checked in" automatically.
- If you are selling tickets before your event (and the customer will need to bring their tickets with them later to the event), then select No to keep all of the items sold "checked out" in the system.
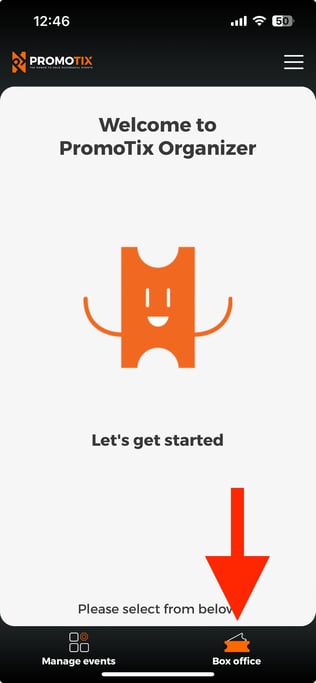
1. (MOBILE APP) Login to the PromoTix Organizer mobile app, then select the "Box office" option
The PromoTix Organizer mobile app is available for both iOS and Android devices:
- iOS download link: https://apps.apple.com/us/app/promotix-organizer/id1493907694
- Android download link: https://play.google.com/store/apps/details?id=com.ksolves.promosuite&hl=en_US&gl=US
Login to your PromoTix account, and then tap on the Box office option at the bottom of the screen.
2. (MOBILE APP) Select a Live event
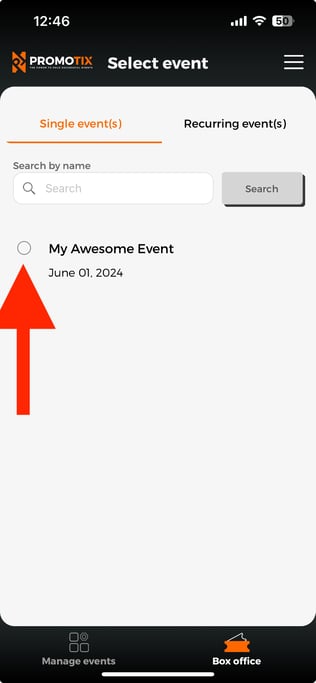
Tap on one your Live events to select it.
NOTE: To select one of your Live recurring events, tap on the "Recurring event(s)" tab at the top of the screen.
3. (MOBILE APP) Select items to add to the cart
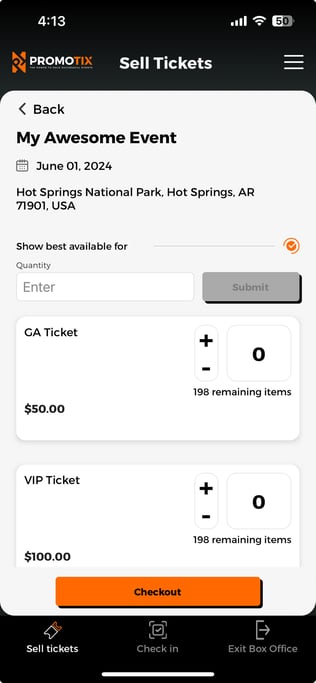
Click the + and - buttons to add or remove items from the cart.
Once you're done, click on the Checkout button.
4. (MOBILE APP) Enter in the customer's information (Optional)
Fill in the customer's information for your own records, however please note that this step is completely optional.
Once you're done, click on the Next button.
IMPORTANT: if the customer would like a receipt via email, you will need to enter their email address in the "Buyer email" field.
5. (MOBILE APP) Input payment details and process order
By default, the Credit card option is selected. Enter in the customer's debit or credit card information in order to charge a card. If you would like to accept cash instead, select the Cash option instead.
You can also tap on the "Read card" icon if you would like to user the Stripe Reader M2 credit card terminal. For complete instructions, click here.
If you need to redeem one of your discount codes, enter the code into the text field and then click the Apply button to apply the discount code to the order.
Once you are done, click the Process order button. A popup message will appear that says "Would you like to check these tickets in?"
- If you are selling tickets during your event (and the customer will immediately be redeeming their tickets), then select Yes to mark all of the items sold as "checked in" automatically.
- If you are selling tickets before your event (and the customer will need to bring their tickets with them later to the event), then select No to keep all of the items sold "checked out" in the system.